Holmes Group
Removing the old furnace chimney from your home following the installation of a high-efficiency furnace is an easy task.
Question: Several years ago, we had a tankless water heater and very high efficiency furnace installed and the installers tape-sealed off the old metal furnace chimney in the basement, as the new furnace and water heater vented out the side of the house. I don’t think any further sealing off of the chimney top above the roof was done. At the second floor level, the old chimney column goes through the interior of a closet. I would like to repurpose that area for shelving space. I would like to open it up, remove the metal chimney piping, then put in a base and ceiling. I would then install several shelves in the cavity, nicely finished, for clothes. Is there anything wrong with doing so?
—Joe Shaykewich
Answer: Removing an older metal furnace vent pipe is a very acceptable alternative to sealing and ignoring the redundant chimney. There should be no problem with your plan, as long as you properly insulate and air-seal the closet ceiling and properly patch the roof.
Many older homes had standard or mid-efficient furnaces in basements that vented out the flue gasses through a double-walled metal chimney, like yours. This B-vent piping is designed to have minimal clearance to combustibles, so could easily be installed inside a closet or small chase inside the home. A proper installation should have a metal or other non-combustible collar holding the pipe away from the ceiling framing in the floor of the attic. Also, many of these were installed with a similar collar, or drywall, surrounding the vent at the main floor joist level, to prevent warm air leakage due to the stack effect. To facilitate the vent removal, these will first have to be removed.
Further actions to remove the old chimney will simply be to disconnect individual sections of the B-vent. This can sometimes be done by simply twisting the sections, but often it’s much more difficult, due to corrosion or fusing over time. Prior to that step, care should be taken to remove insulation surrounding the vent in the attic, to prevent it all falling into your living area once the pipe is removed. Once that is complete, the most critical part of the renovation can be done. The closet ceiling, which is also the floor of the attic, must be properly covered, insulated, and air-sealed. This is critical to prevent warm air intrusion into the attic, which can lead to condensation, moisture, and mould related problems.
Sealing this important area may be done in several ways, but may be most easily accomplished by cutting a small piece of drywall the size of the opening and securing it to the ceiling joists or bottom of the trusses. Once in place, the top of the drywall can be insulated with a few pieces of extruded polystyrene, cut to fit between the ceiling joists where the ceiling patch is in place. This foam sheathing can then be sealed to the surrounding air/vapour barrier, and/or existing substrates, with caulking or a can of spray-on polyurethane foam. Once this is complete, additional conventional insulation can be put over top, to match the existing material in the rest of the attic.
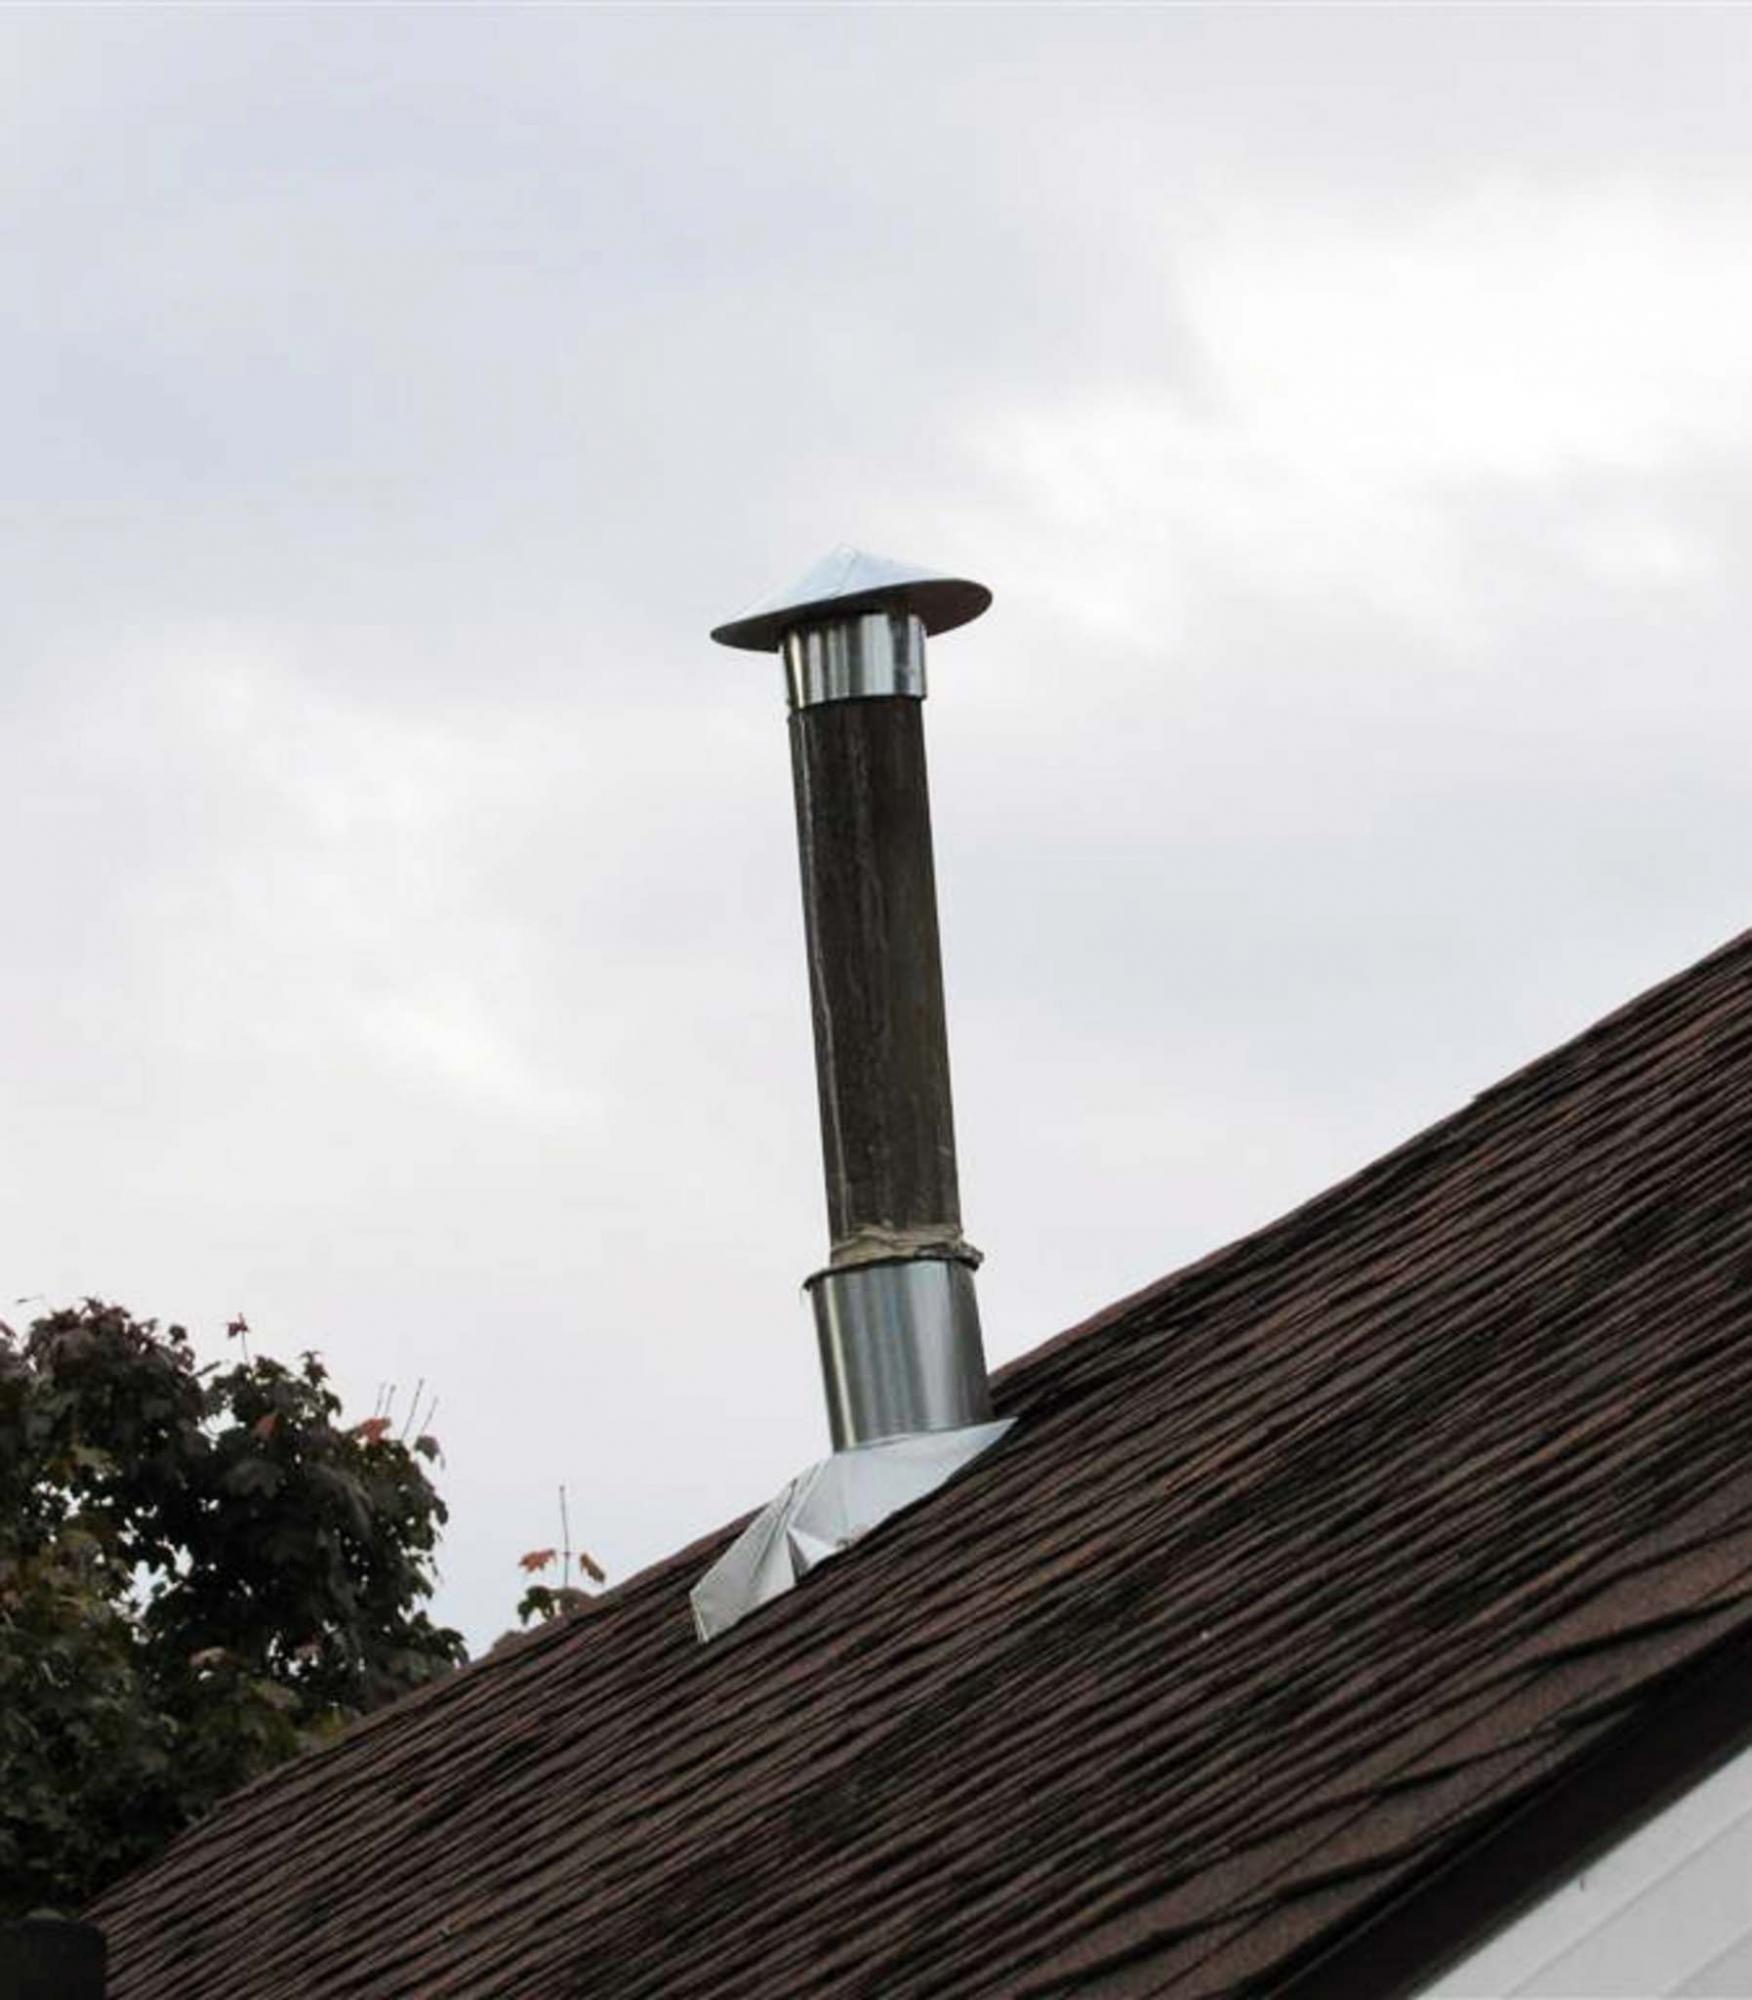
The next phase is to ensure the roof is properly prepared, if the entire vent pipe is to be eliminated. It is possible to partially leave the portion of the chimney travelling though the attic cavity in place, but a couple of additional precautions will be required, if that is your choice. First, the bottom of the remaining vent will have to be secured to the collar ties or trusses, to prevent movement. Previously, the bottom sections of the vent prevented this from moving laterally, but that support is now gone. Securing this can be done with a few pieces of additional wood framing, or by attaching plumbing straps to the vent and the existing roof structure. This new bottom of the pipe must be well secured, to prevent movement during high winds or ice and snow accumulation. The final concern is the prevention of moisture, birds, insects, and other pests entering the top of the abandoned chimney, and accessing the attic. This can easily be done by removing the rain cap and replacing it with a sealed, solid metal cap.
If you do want to remove the entire vent/chimney, then repairs to the existing roof will also have to be planned. If the roofing is quite old, it may be prudent to plan this final removal phase for the time of roofing upgrades.
To facilitate removal of the old vent above the roof, several shingles will have to be pulled up to allow removal of the pipe and the flashing surrounding it. Once exposed, the sheathing can be patched and new shingles interwoven with the existing ones to seal the roof. This can be a tricky job, especially if the shingles are fairly new and sealed together. Calling an experienced roofer for this portion of the renovation is a good idea.
Once all the preliminary steps are complete, there should be no reason that the existing materials of the old chimney chase cannot be removed. This should allow you to properly patch, tape, and paint the inside of the space to increase the size for your proposed closet. Installing shelving after this stage should be the icing on the cake and successfully complete your project.
Taking out an old, redundant metal B-vent furnace chimney from your home to facilitate installation of a functional closet is a good idea to provide more storage space. As long as you properly patch and seal the attic floor and roof areas to prevent moisture intrusion, there should be little concern with your plans.
Ari Marantz is the owner of Trained Eye Home Inspection Ltd. and the past president of the Canadian Association of Home & Property Inspectors — Manitoba (cahpi.mb.ca). Questions can be emailed to the address below. Ari can be reached at 204-291-5358 or check out his website at trainedeye.ca.
trainedeye@iname.com