Marc LaBossiere / Free Press
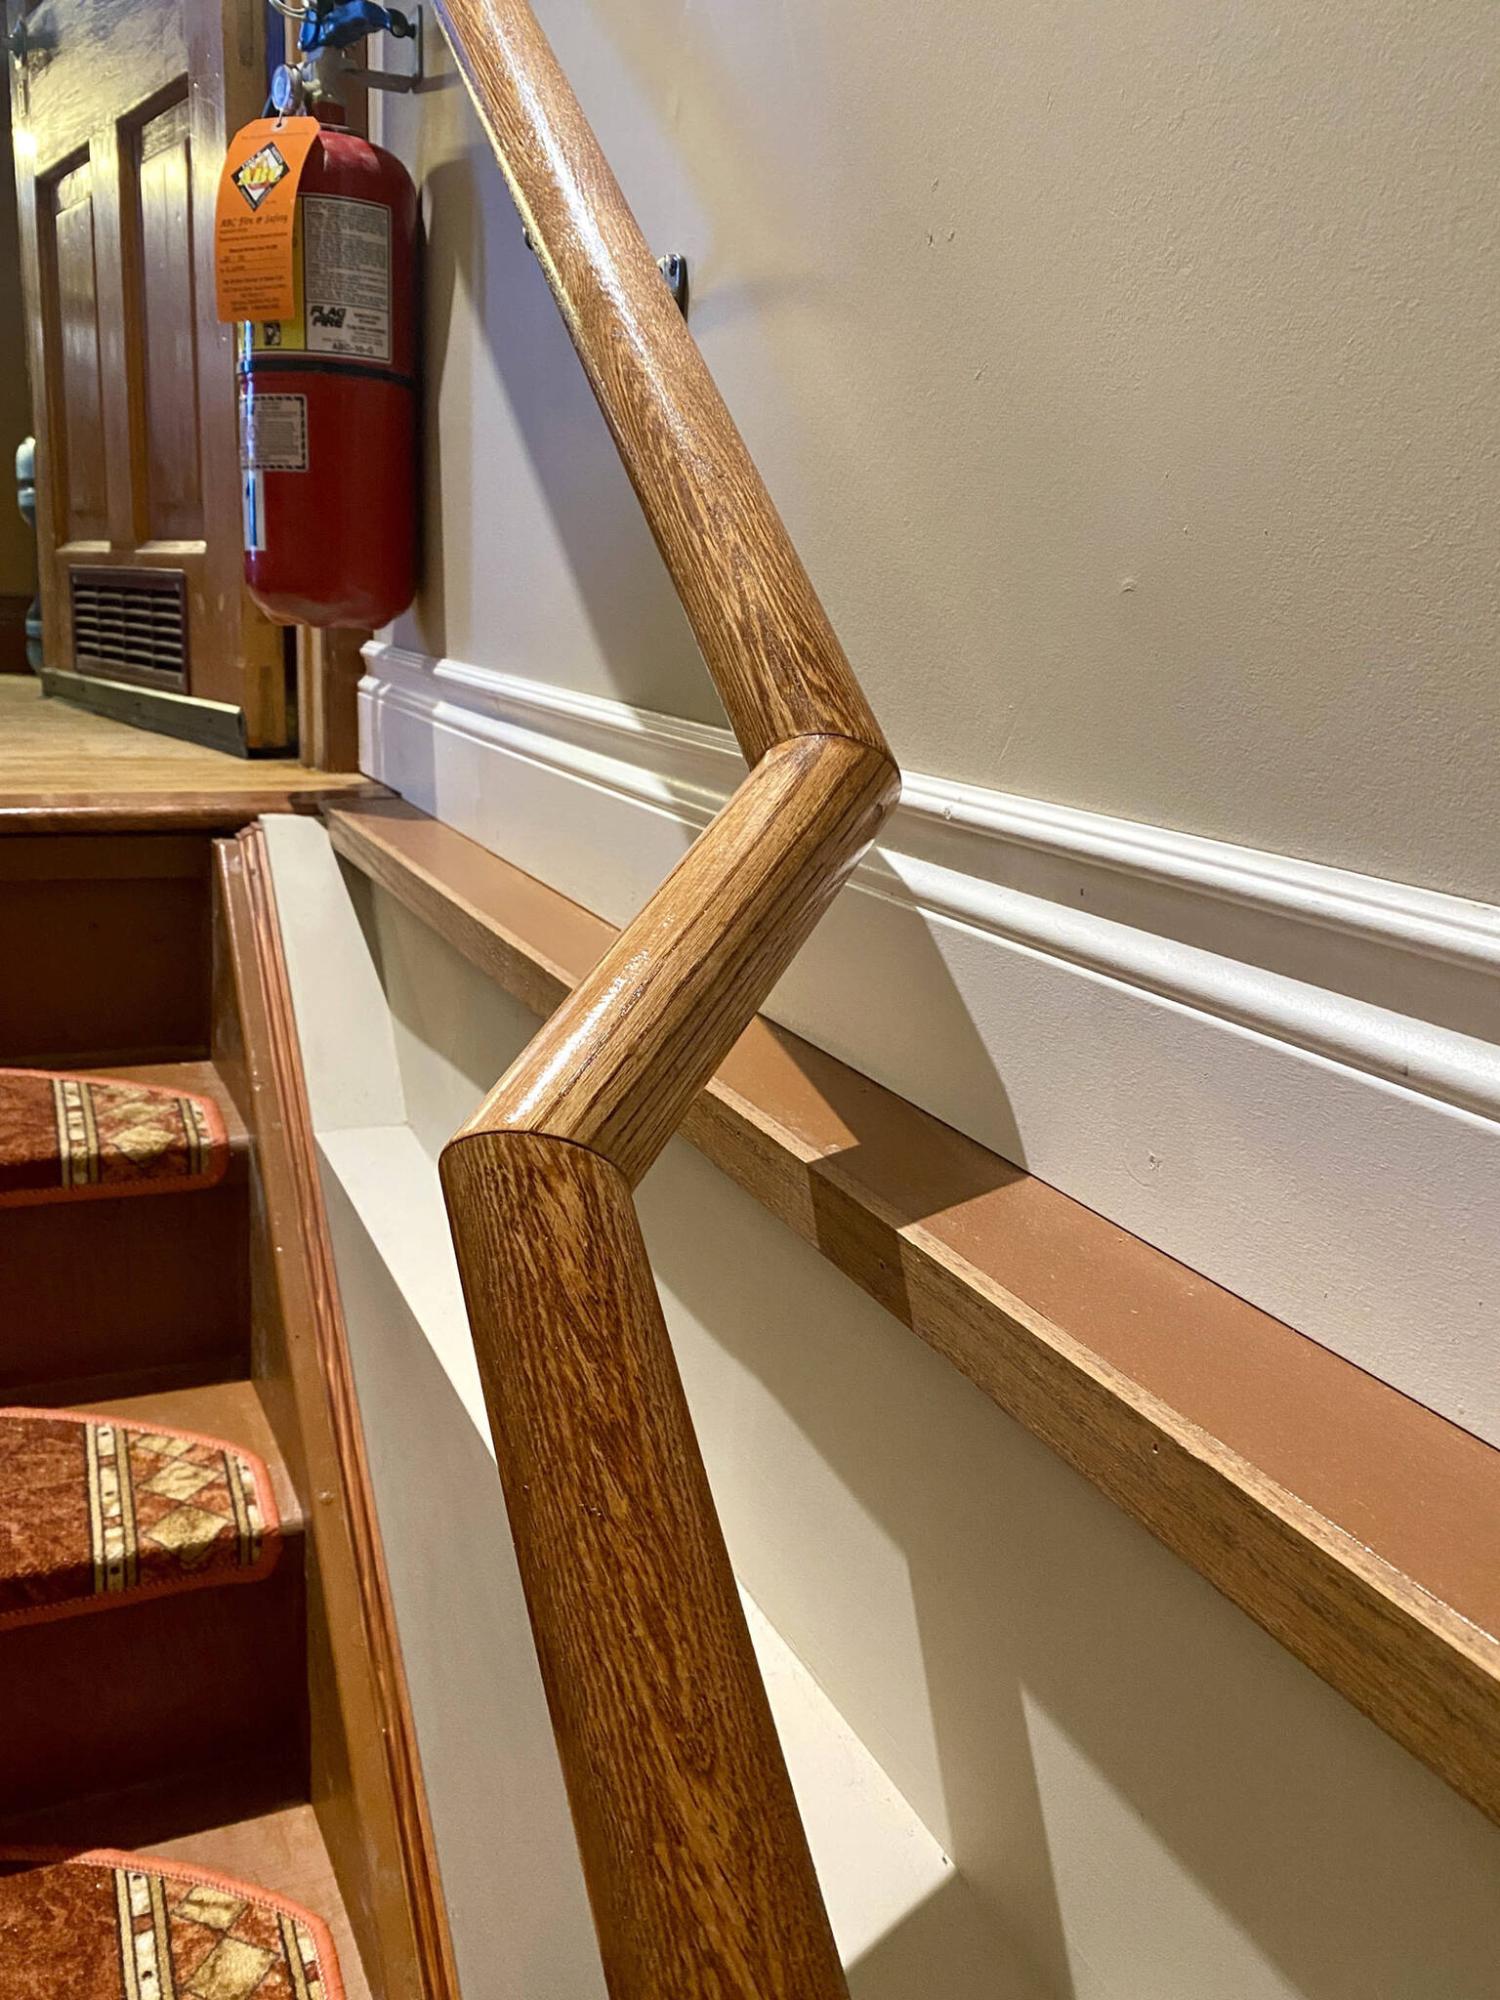
Staggered horizontal planes along the vertical wall necessitates a handrail deviation from straight.
Marc LaBossiere / Free Press
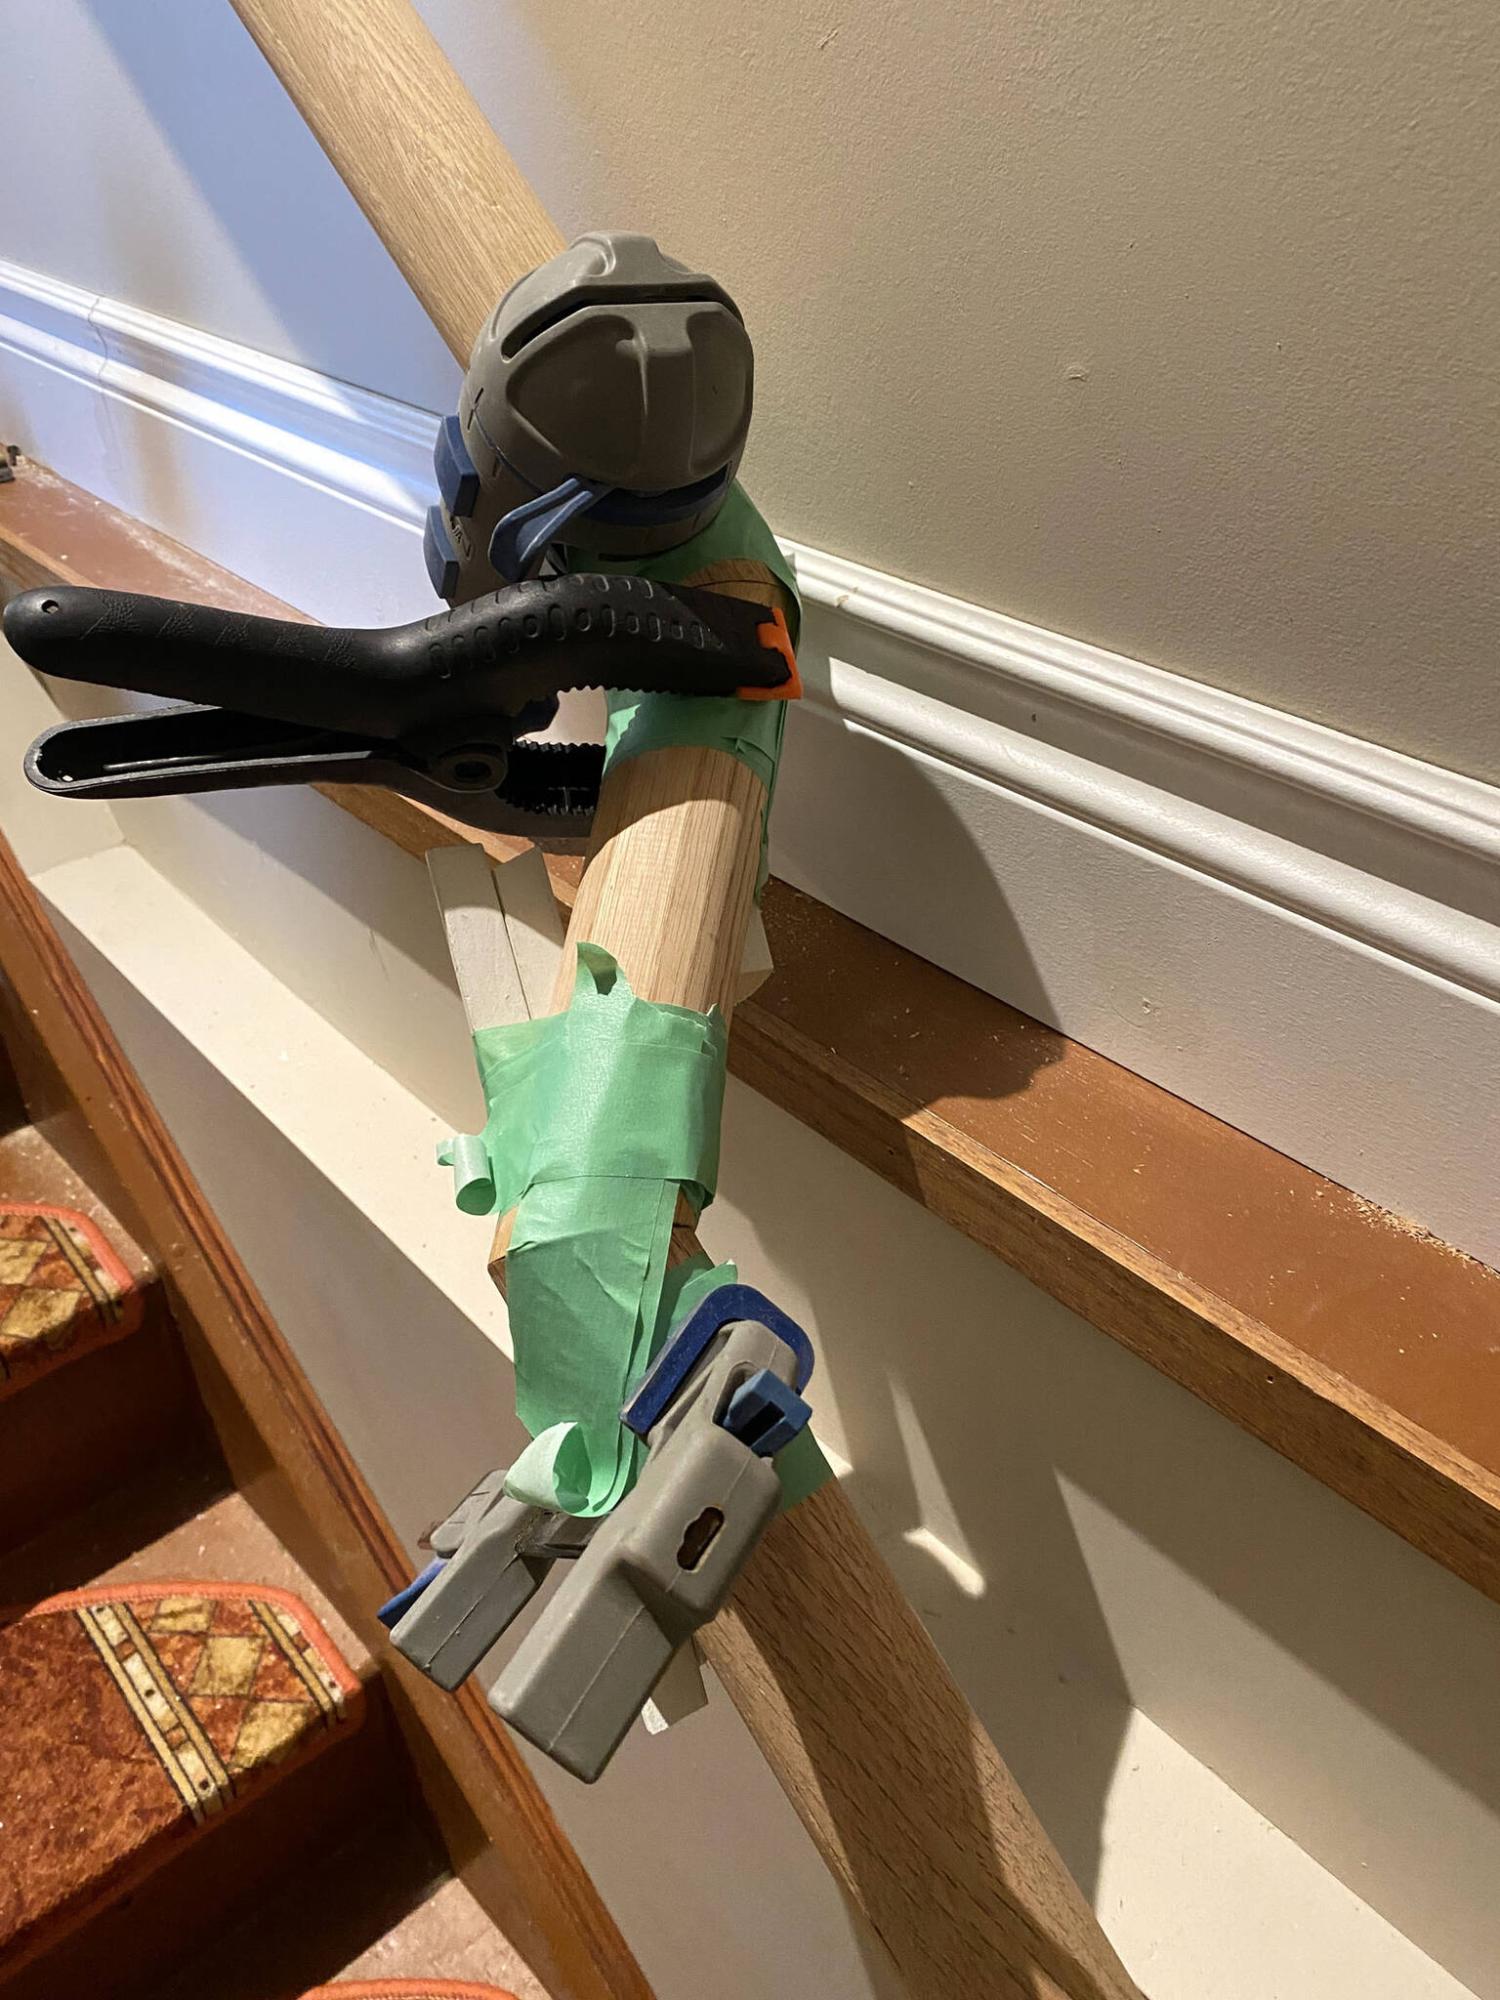
Initially securing the sections with clamps proved to be inadequate, and setscrews were added to ensure rigidity as the adhesive cured.
Marc LaBossiere / Free Press
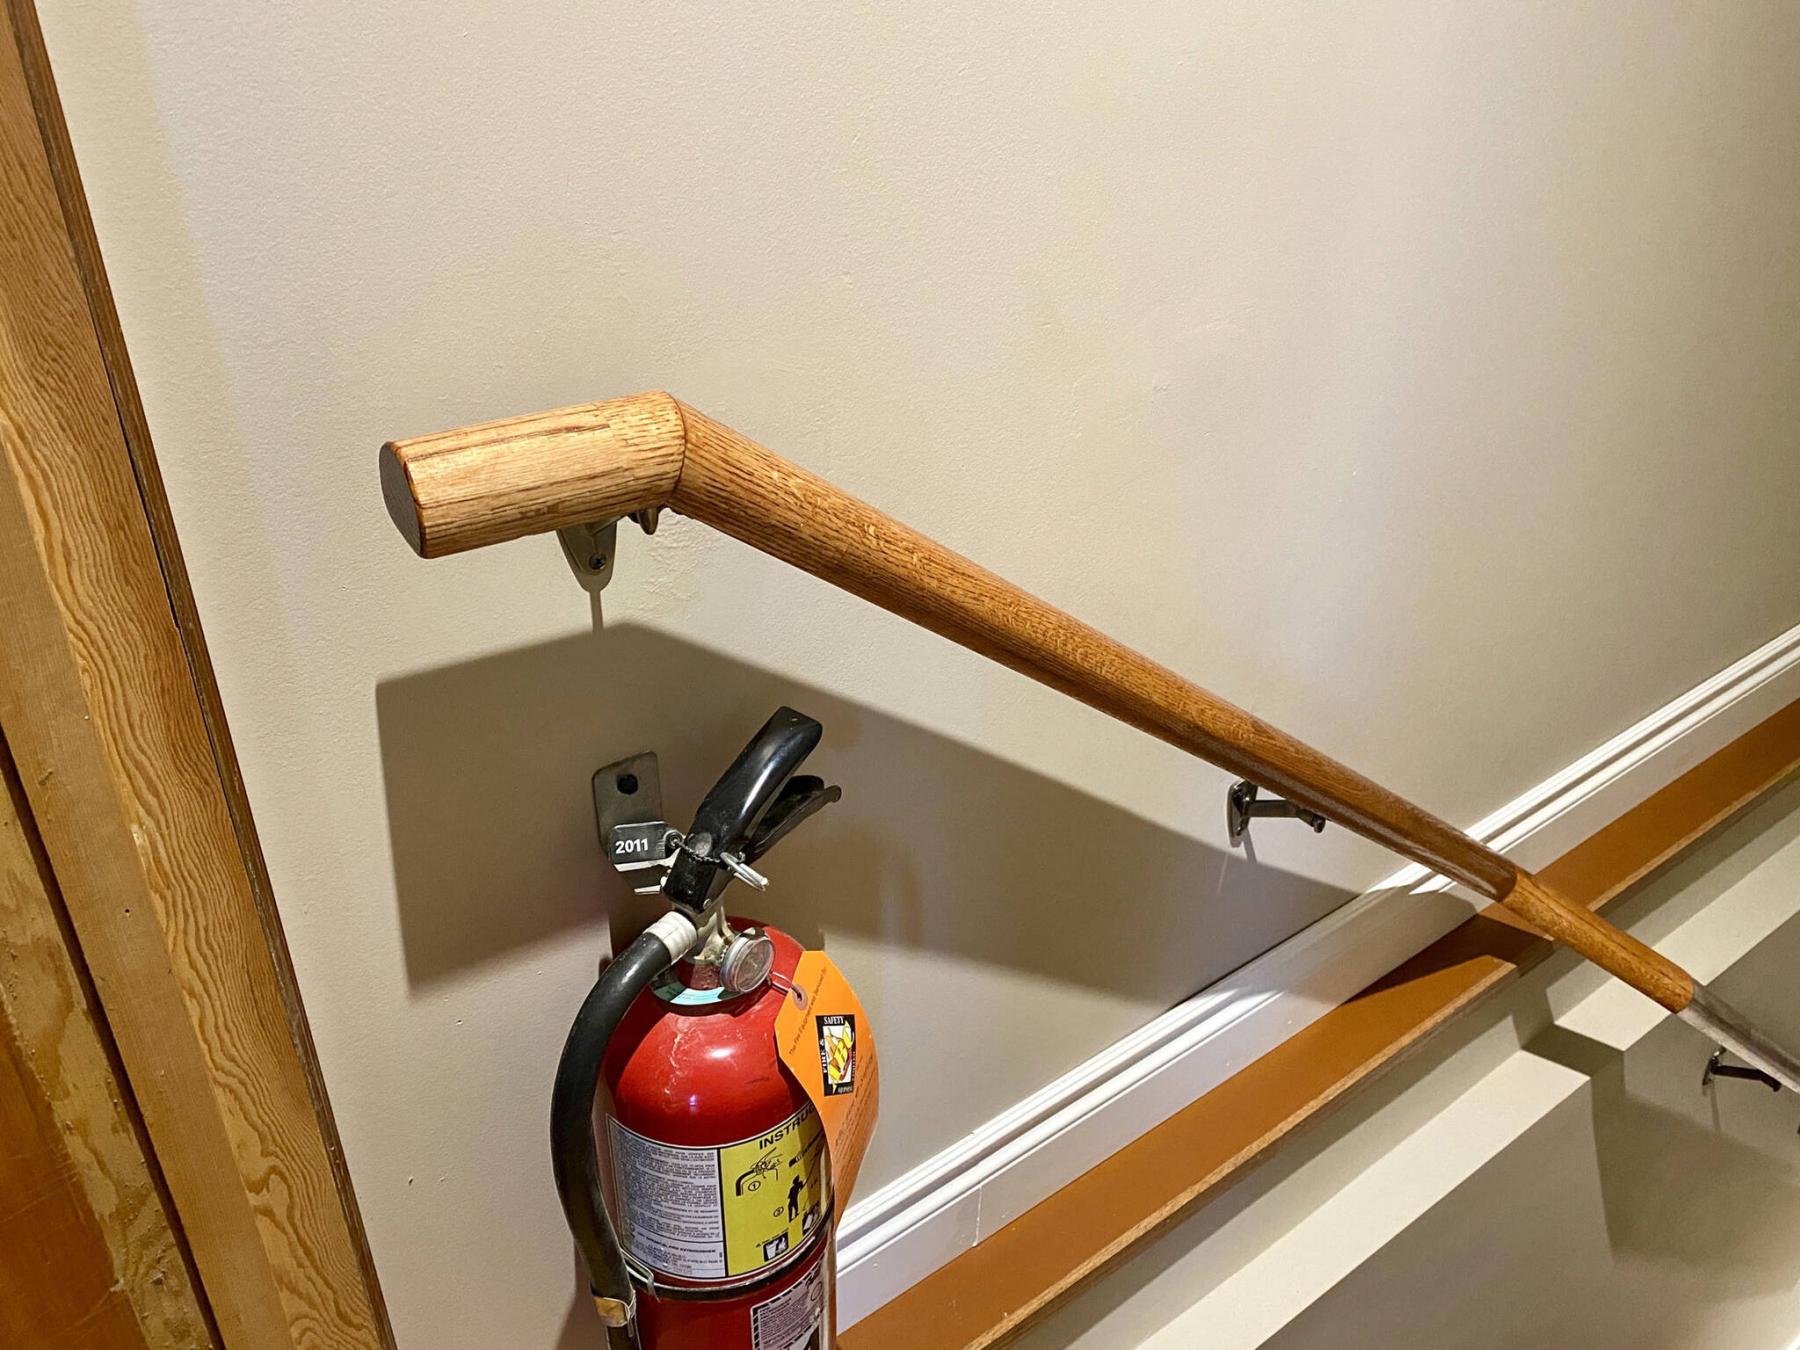
A short section is introduced allowing the top of the handrail to start horizontally.
Marc LaBossiere / Free Press
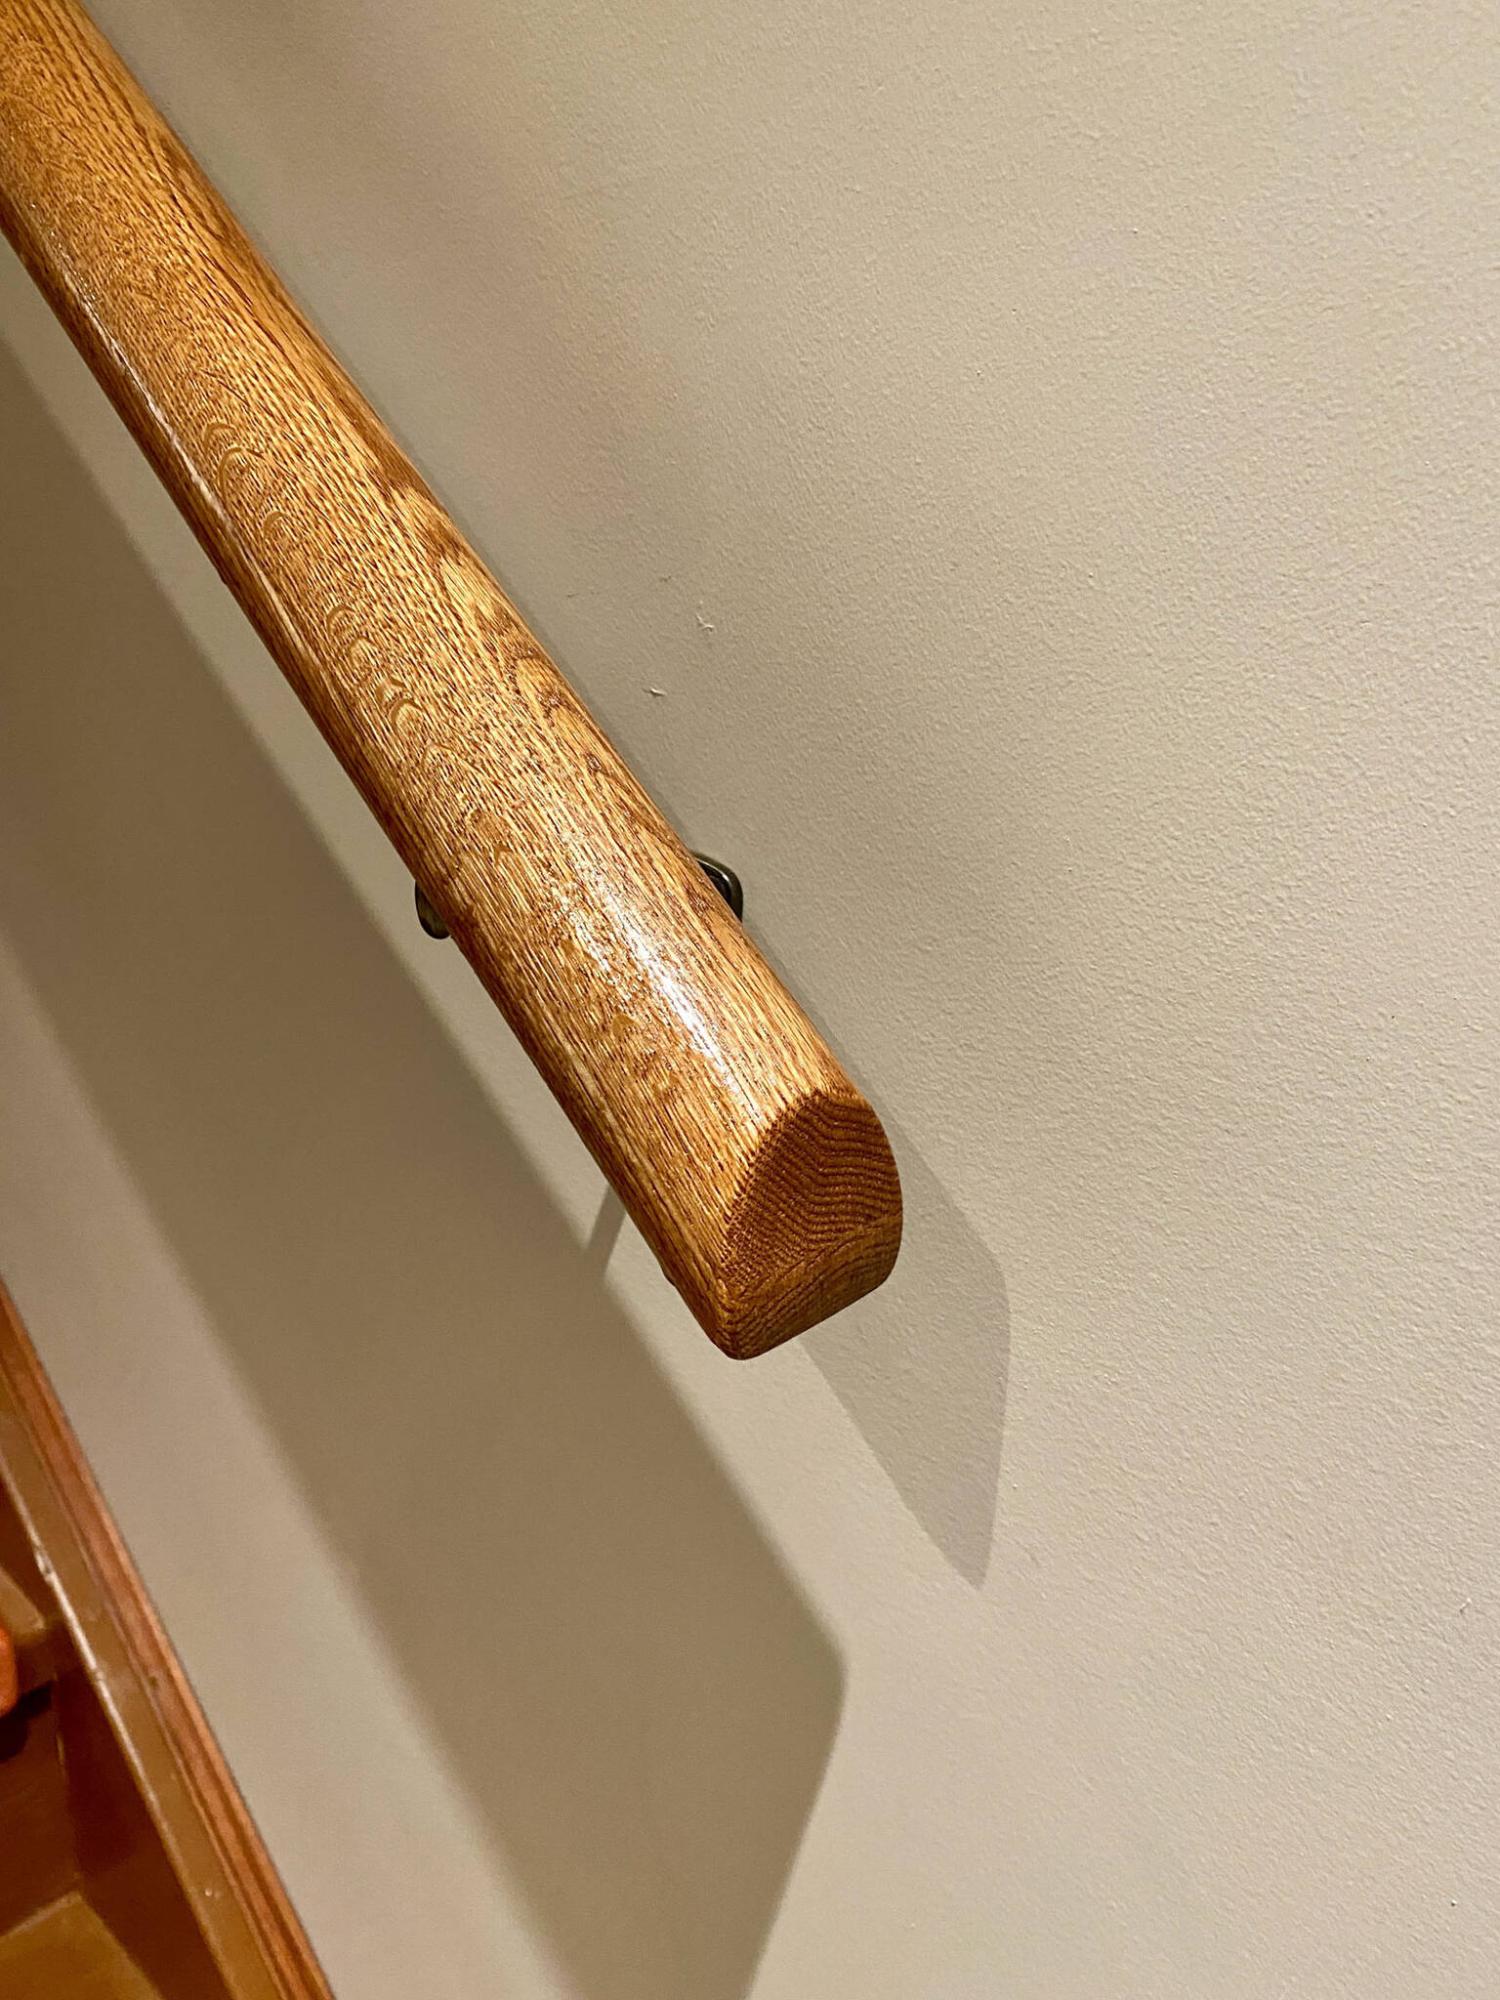
The lower end of the handrail is mitred and sanded to be vertically plumb.
After completing the final job of 2024, a well-deserved break began shortly before the holiday festivities kicked off. During that time, I elected to tackle one lingering task regarding the completion of the basement project at my house.
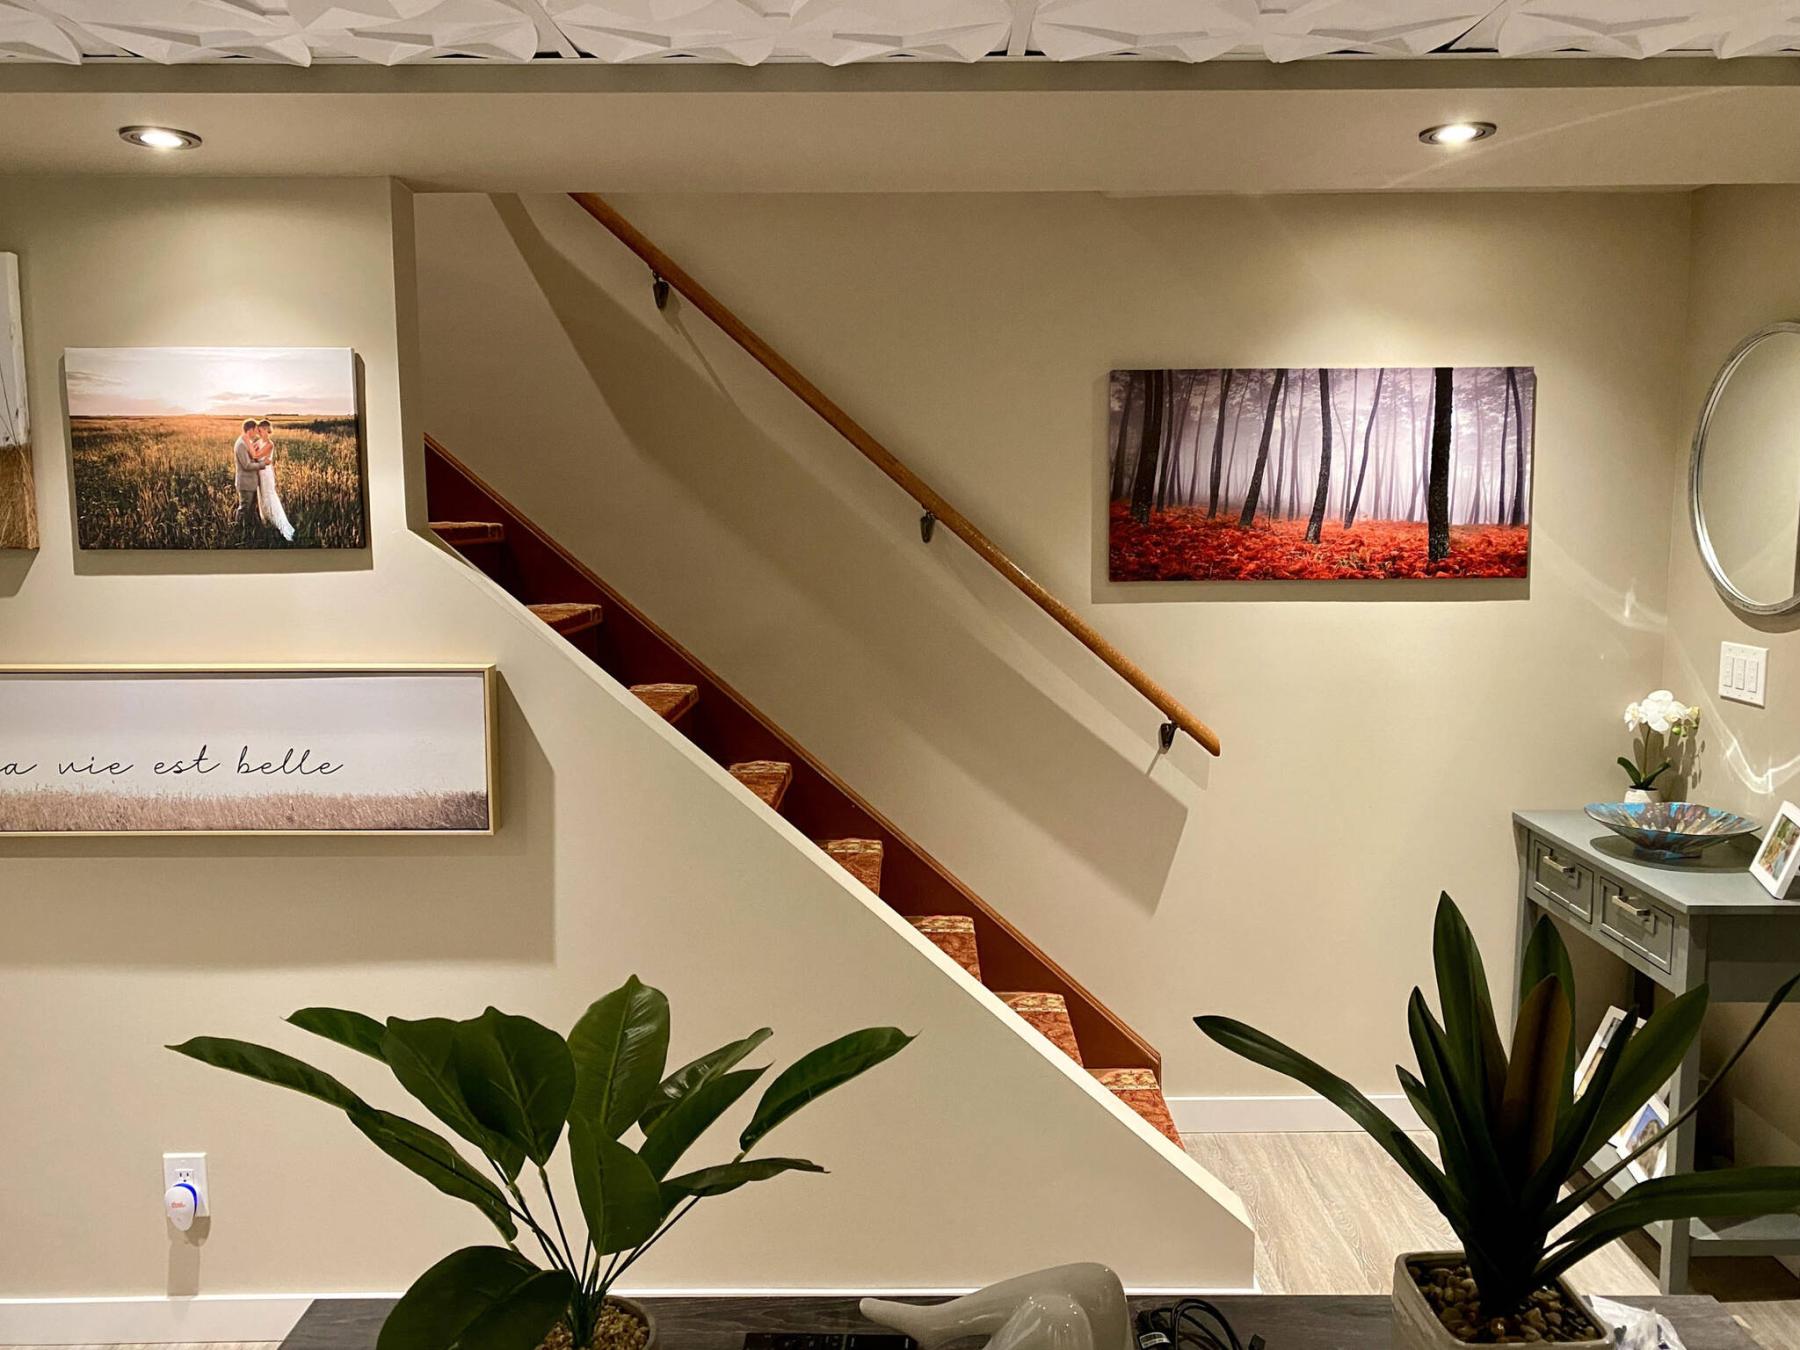
What I expected to unfold as a straightforward installation slowly evolved into a lengthy and frustrating one. No matter, a handrail to the basement is always essential for safe passage.
With a perfectly straight wall no deviation, I suppose a handrail would have been as easy to install as anticipated. A single length of rail would be prepped by cutting each end to the appropriate mitred angle, then sanded and finished prior to being mounted to the brackets fastened to studs along the wall.
At my place, the stairway to the basement would have provided only two possible handrail installations. Although the easier approach would have included two straight runs of handrail split onto the two opposing walls, this approach would have been awkward in practical application.
As such, a continuous handrail along the constant wall would provide better serviceability. However, the continuous wall includes two staggered planes, due to the way the stairway had been designed when the house was built long before my arrival. The rail design would require a strategically placed jog to be continuous — a challenging approach.
To start, two separate sections of unfinished oak handrail were obtained: one for the main section along the lower area of the stairs, and the other to create the shorter sections to accommodate the jog along the wall. Once the staircase angle was determined, the lower end of the main section was then mitred to the complementary angle, to appear plumb and vertical once installed.
At the upper end, a 22.5-degree mitre was created to allow a 45-degree elbow at the jog location of the wall planes. Three main brackets for the long lower section of handrail were then mounted to the available studs along that length, and the handrail was secured to them.
With this main section in position, the short section creating the 45-degree angle was cut to the appropriate length that allowed the upper handrail section to return parallel to the wall at the proper gap required by the brackets.
This short section was then mitred to 22.5-degrees on both ends, allowing the upper section with the reverse 22.5-degree angle to return the handrail to parallel with the wall. At the high end of the shorter handrail, a very short section of rail was fashioned to bring the handrail back to horizontal level at the top of the stairs.
To secure the sections of handrail above the main rail already fastened to the wall along the lower staircase, set screws were introduced at every mitre joint to ensure rigidity as the main adhesive at every joint was allowed to dry and cure. While the adhesive dried, the remaining two brackets were mounted below the determined angle of the upper handrail at the available stud locations, and the rail was secured to them.
After several hours of drying time, the mitred joints, as well as the ends of the handrail, were sanded using an electric palm sander with moderate-grit sandpaper. This ensured all seams and edges of the rail are perfectly smooth.
The final steps included staining the handrail to match the existing stairs and the red-oak trim. This process involved temporarily protecting the wall and stairs with plastic and cardboard where needed, until the finishing process was complete. With a small brush and roller, the stain was generously applied to the sanded oak, and wiped away to eliminate any streaks. This continued in a series of smaller areas, until the entire railing had been fully stained.
After a few more hours of drying, the entire railing was given two coats of clear-satin Varathane finish and sanded with 1,200-grit sandpaper after each coat to remove any application anomalies. Once the clear finish was dry to the touch, the protective plastic was removed, and the railing was allowed to fully cure for 24 hours.
I had greatly underestimated the volume of work involved in creating a custom handrail to accommodate a vertical deviation from plumb. What I initially anticipated to take a few hours ended up lingering on over several days with some extremely tricky hurdles to overcome. The greatest challenge was how to properly ensure the mitred sections of oak rail remained rigid as they set with adhesive.
Initially, only clamps were used, but this of course proved to be inadequate, which forced the introduction of setscrews. No matter though, as wood-filler applied into screw holes, once sanded and stained, blended well with the oak grain, adequately concealing the fasteners.
This project serves as a gentle reminder to me. Despite my years of experience, it is still sometimes easy to underestimate a seemingly “simple” task.
RenoBoss.Inc@outlook.com