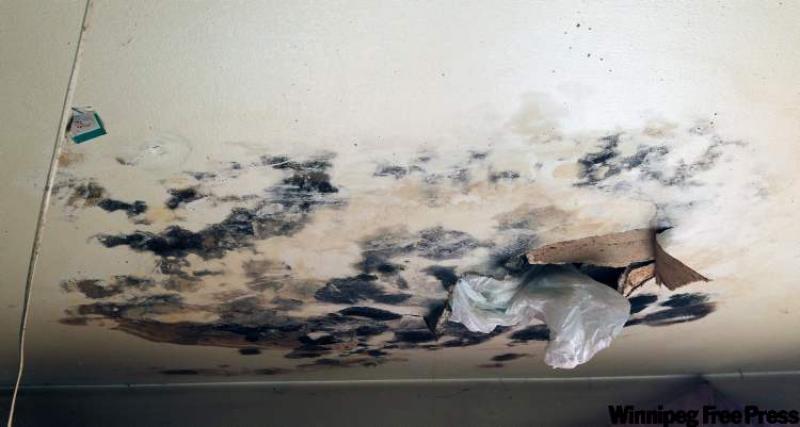
QUESTION: I have a 65-year-old house with an ongoing mildew problem on the bathroom plastered ceiling. In the past I have cleaned it with bleach and TSP and then painted it with latex bathroom paint. The mould spots keep coming back even though I have a fan with a timer. Would painting it with an oil-based paint help? I'm also thinking of trying to remove the plaster part of the ceiling and putting up drywall. That would be a lot more work and I don't want to do it unless it's needed. What would you suggest? -- Peter Thiessen
ANSWER: A small amount of mould on an older plaster bathroom ceiling is very common and normally not a health concern, but may become worse or more difficult to clean with age. You are right to take action to get rid of this problem before it gets out of hand and I will give you a couple of alternatives to consider.
Mould only grows where there is high humidity or moisture. While you have an existing ceiling fan and timer to prevent this, that is the first place to look for a solution to the ongoing problem. Many ceiling fans appear to be working fine when they are actually not properly venting moisture. This can be caused by simple dust and dirt inside the housing, on the cover, in the ducting or something more sinister.
Before going any further, remove the cover of the fan, clean it in the sink or bathtub with soap and water and let it dry. After removal of the cover, look at the condition of the fan housing, motor, and fan blades. If they are coated with a heavy layer of dust and dirt, as is typical, take your vacuum hose with a small brush attachment and clean this area thoroughly.
If the dirt is caked on or won't easily come off, removal of the motor is the next step. This is normally easily accomplished by unplugging the motor from the small outlet inside the fan housing and removing the nut from the centre bolt holding the motor in place. Once out of the housing, the motor and fan can be thoroughly cleaned with a combination of a small brush and damp cloth, with care not to immerse it in water or get it too wet.
Once the motor is removed and the area behind it cleaned, the damper and exhaust port should be inspected to ensure it's in working condition. This small flap should push up easily by hand and be free of debris. If this is stuck in place or the opening blocked in any way, this may be the cause of the excess moisture and mould on the ceiling. If it is in good working order, reinstall the clean, dry fan and cover and turn on the fan.
Testing for proper draw is the next step. While standing on a stool or stable chair, hold two joined pieces of regular toilet paper to the underside of the cover. If the fan is drawing air properly, both pieces of paper will be easily sucked up and held in place against the cover. If this doesn't occur, move the paper slightly on the cover or remove one piece and try again. If the fan still fails to hold up the paper, it is damaged or the exhaust ducting is blocked. If the test is passed on the initial attempt, then the cleaning may be all you need to prevent a recurrence of the mould growth.
If the fan appears to be working well, is venting to the exterior of the house and the problem persists, then the mould on the ceiling has likely reoccurred for years and spores may be embedded within the paint or plaster. In that case, further remediation is needed.
If the fungus has penetrated only the bottom layer of paint, and is mainly visible on the surface, cleaning and painting may fix the problem. Cleaning the mould with regular household cleaner and a scrub brush should remove the visible surface material. Be sure to wear a good mask while doing this to avoid breathing in any mould.
Once dry, this area can be painted with an oil or shellac-based primer containing a fungicide. More than one coat may be needed to seal the surface before covering it with a finish coat of paint.
If you succeed in keeping the relative humidity at a reasonable level in your bathroom with a properly functioning exhaust fan, the mould may not return. But if the problem returns after sealing the area with a proper primer, further evaluation and repairs are necessary.
Before installing any new drywall on the ceiling, look up in the attic. This inspection should include carefully crawling into the area directly above the bathroom and looking for problems. Damp or discoloured insulation, excessive stains on the underside of the roof or rafters or visible light entering the attic through the bathroom ceiling are indications of a problem. Pull away the insulation from around the fan housing and the area where you see the mould and check for damaged or wet plaster. If any of these warning signs are seen, further work is needed.
If visible gaps in the ceiling or around the fan housing are discovered, then this area must be air sealed before proceeding. This may include installing a proper air/vapour barrier over the fan housing and any other ceiling protrusions, to prevent air leakage.
Removal and discarding of wet or mouldy insulation may be required to allow the existing ceiling to dry before re-insulating. If this area is not badly damaged or wet and things are relatively well sealed and insulated, then the next step can be taken.
Rather than trying to remove any part of the ceiling, which may create even more issues, covering the entire ceiling with drywall is a better solution. This will often take less time and effort than cutting out one area of the old plaster and trying to match the thickness and finish. There may be more drywall taping and painting with this method, but it will be easily accomplished over a perfectly smooth, new drywall surface.
To prevent continued mould growth in the old plaster, another thorough cleaning and priming should be done before installing water-resistant drywall over the entire ceiling surface.
Ari Marantz is the owner of Trained Eye Home Inspection Ltd. and the President of the Canadian Association of Home & Property Inspectors -- Manitoba (www.cahpi.mb.ca). Questions can be e-mailed to the address below. Ari can be reached at (204) 291-5358 or check out his website at www.trainedeye.ca.
trainedeye@iname.com