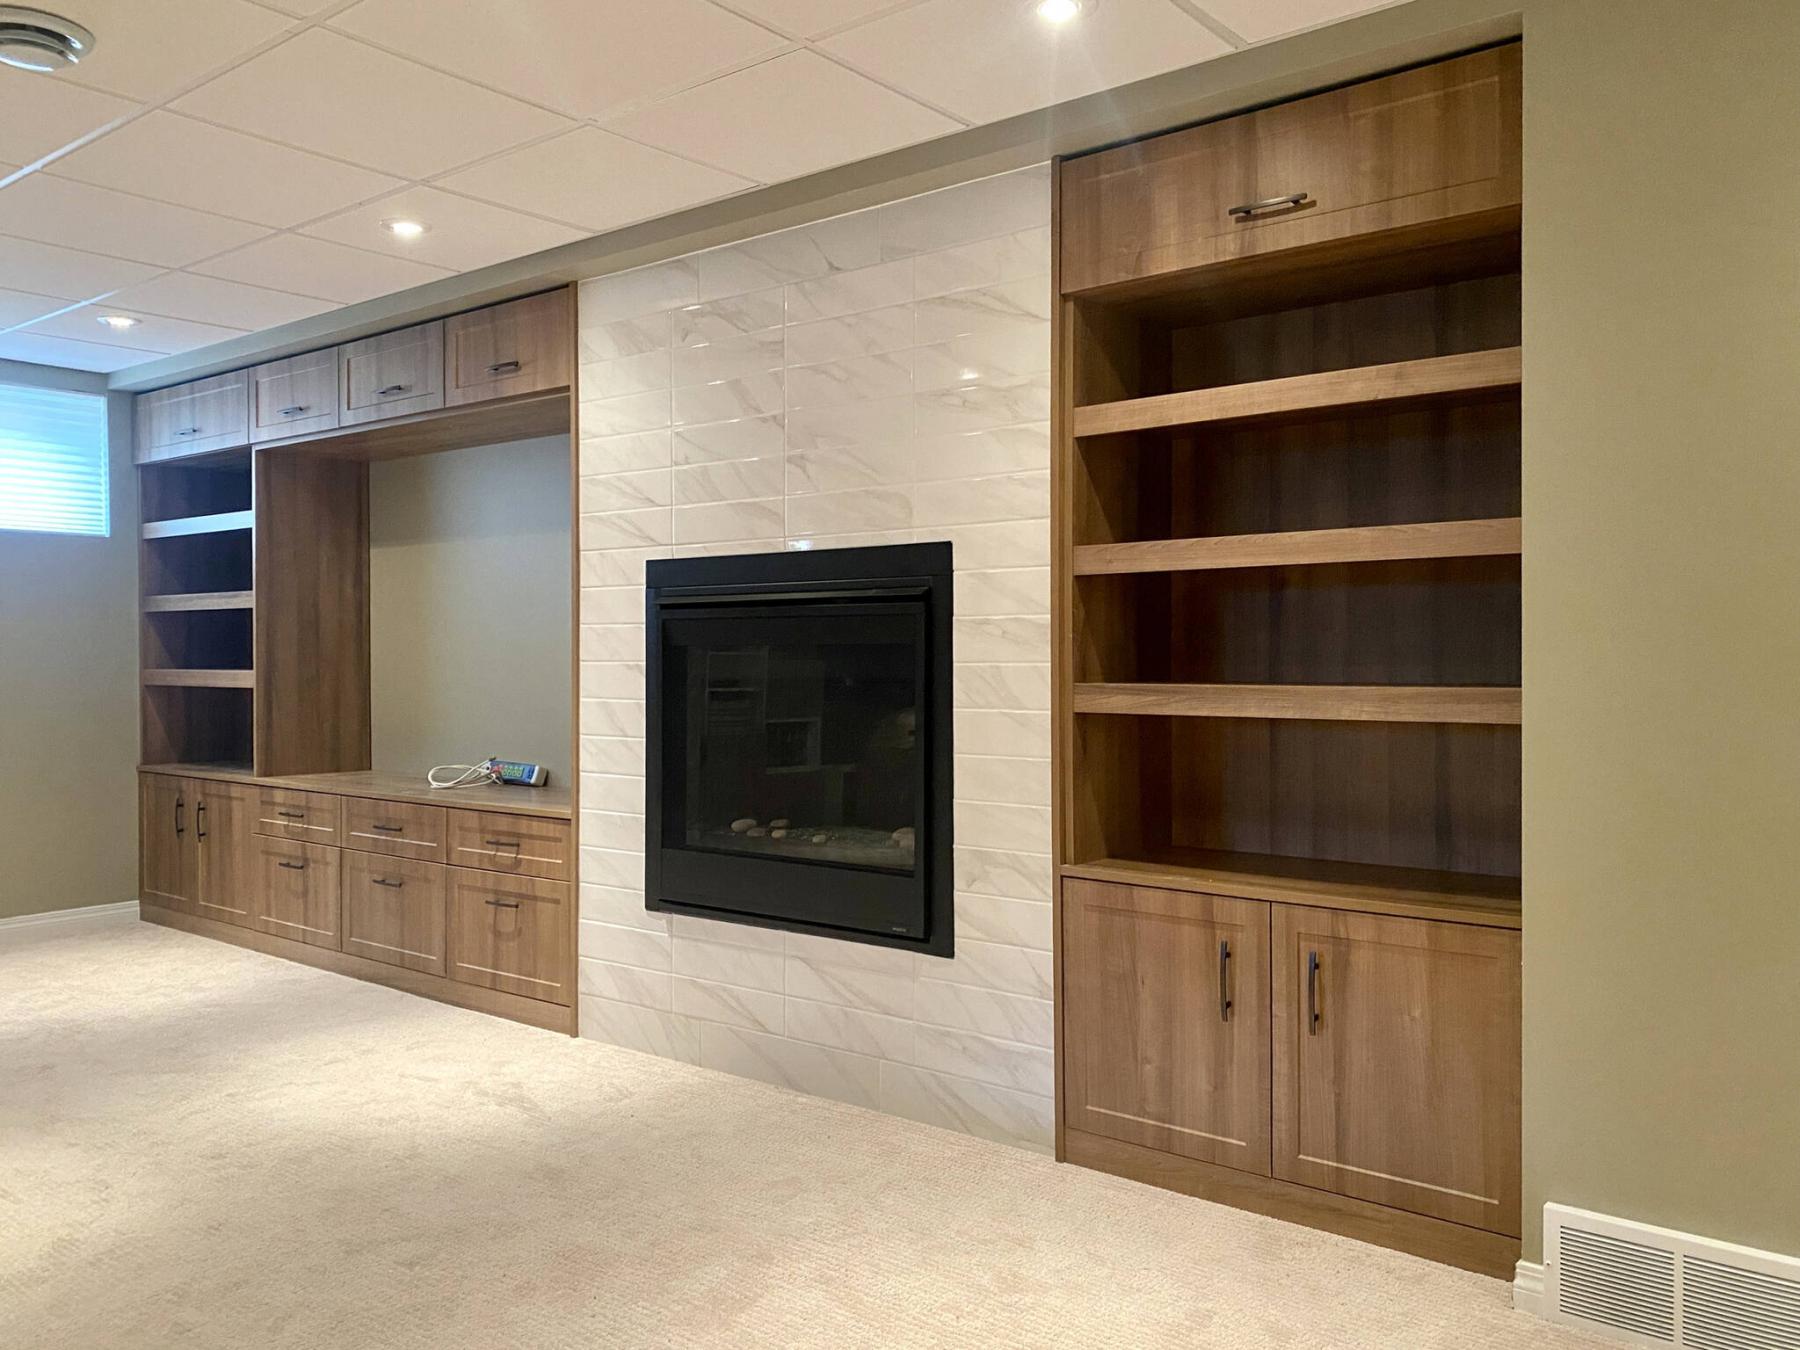

The various elements of cabinets and shelving are systematically mounted, and fit like a puzzle based on the design layout.
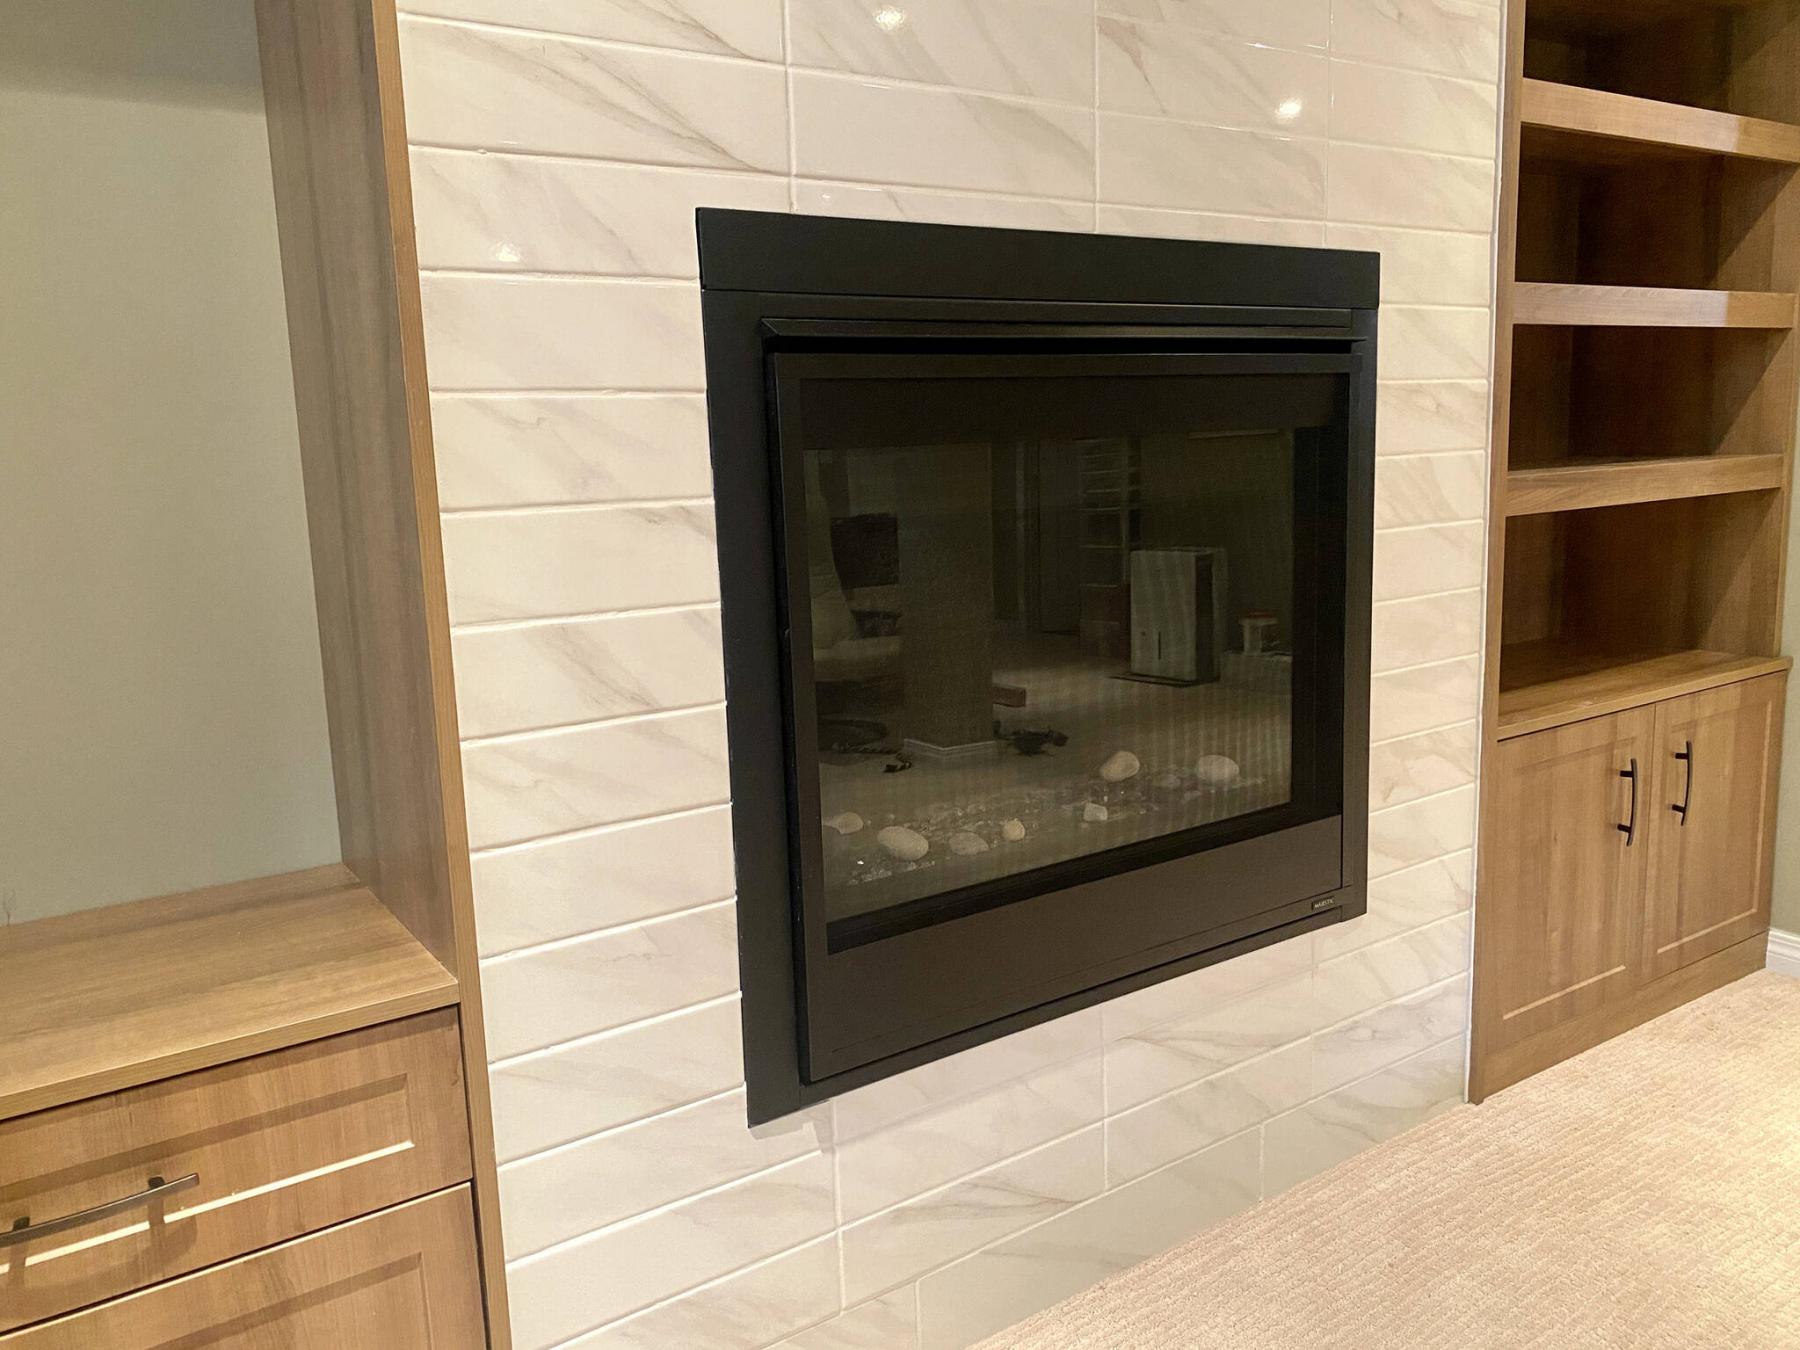
The pre-installed gas fireplace was framed-in and subsequently sheathed with fireguard drywall before the decorative tiling was applied.
Another planned ‘squeeze-in’ job wound up kicking off my run of interior projects this fall. Much like a recent kitchen facelift, the cupboard elements were ordered well in advance, allowing a delivery date a few weeks before a possible installation date. With everything on site and ready for my arrival, the multiple tasks were easily achieved on schedule, and without many hiccups.
The project entails filling in a 17.5-foot inset the homeowners’ basement wall with an assortment of cupboards and shelving that encases a tiled decorative feature that surrounds a pre-installed gas fireplace. The design includes several drawers and shelving, as well as a 72 by 48-inch void where the new TV can be mounted.
Once the design layout was confirmed, based on an acceptable width to create a decorative area around the face of the fireplace, the homeowners visited with Richard Rochon at Cabinet Corner to choose the appropriate color and style of cupboard sheathing that best suit. With the choices made, the cabinetry was ordered with an ETA that fell well within the projected installation date range. The marble-esk tile for the fireplace area set within the cabinets on either side chosen compliments the wood tones along the subtle veins of the tiles. With the decorative choice made, an installation date was set.
On the first day, the cabinets were fully installed. The process began with the lower cabinets along the left side of the fireplace, a 37-inch-wide lower cupboard at the far end with three, 24-inch dual-drawers arranged side-by-side. Once the tops were mounted, the 37-inch-wide shelving unit was set atop the outer lower cupboard. The row of upper cupboards with doors that open upward were then systematically affixed to the wall, ensuring plumb and level at every step. The lower cupboards, shelving and upper cupboards were then mounted and affixed on the right side of the fireplace. Floor to ceiling plant-on boards were then added at each end of the cupboards facing the fireplace gap, as well as the underside of the upper cupboards above the void for the impending flatscreen TV. Matching toe-kick plates were installed along the bottom of the lower cabs, and several holes were created along the inner backside of the lower cabinet frames to allow for power and audio-visual cables.
The second day entailed framing the area between the cupboards, where the gas fireplace had been installed. A 2×4 structure was created at a depth that would allow, once the fireguard drywall and tiling were completed, no more than a half-inch inset from the cabinetry adjacent the fireplace wall. Careful measurements were taken and confirmed, and the structure was erected. Shortly after, the fireguard drywall was affixed to the framework and the face of the gas fireplace was subsequently fastened to the framework. The area was ready for tiling.
Day three involved much pre-prep. A substantial area of the carpet in front of the fireplace was protected with plastic drop-sheets, temporarily taped in place. The wet-saw was then set-up conveniently to the side of the face to be tiled, to avoid travelling across the carpet once tiling began. Cutting tile with the wet-saw can be quite a wet and messy endeavour, best to limit movement when possible. Starting along the bottom to set the level-line, the first row of tiles was custom cut to simulate a baseboard effect. The main 16-inch by four-inch tiles placed in horizontal rows, centered in four vertical columns slowly crept upwards, surrounding the fireplace to meet again above the unit’s face, finally reaching the ceiling whereby another row of custom-cut tiles creates a top moulding effect. The tiles were then allowed to set overnight. Having completed the tiling in short order, the handles were duly installed on every door and drawer-front that same day.
As such, the fourth day would, as it turned out, only be a partial day. The entire tiled surface was grouted with a white, resin-based product. And along every seam adjacent the cupboards or the ceiling bulkhead drywall, matching caulk was used to fill the 90-degree corners along the entire perimeter. Had the homeowners already purchased their new flatscreen TV and wall-mount, there would have been plenty of time to mount it all that day. No matter, this newly implemented basement feature wall is ready for a new TV, when the time eventually comes.
The lesson on expediency remains the same, the moment a cupboard design has been established, it’s best to order the required cabinets well in advance to offset any delays that may arise, to ensure the project can start (and finish) on time. A big thanks goes to Richard Rochon and his manufacturing crew at Cabinet Corner once again, the various elements of cabinetry fit together beautifully, like a puzzle, and that always make my life easier during installation. The cupboards and shelving, coupled with the tiled fireplace wall create a warm and welcoming area in the homeowners’ basement, a space that will no doubt become the family favourite — time to go TV shopping!
RenoBoss.Inc@outlook.com