Photos by Marc LaBossiere / Free Press
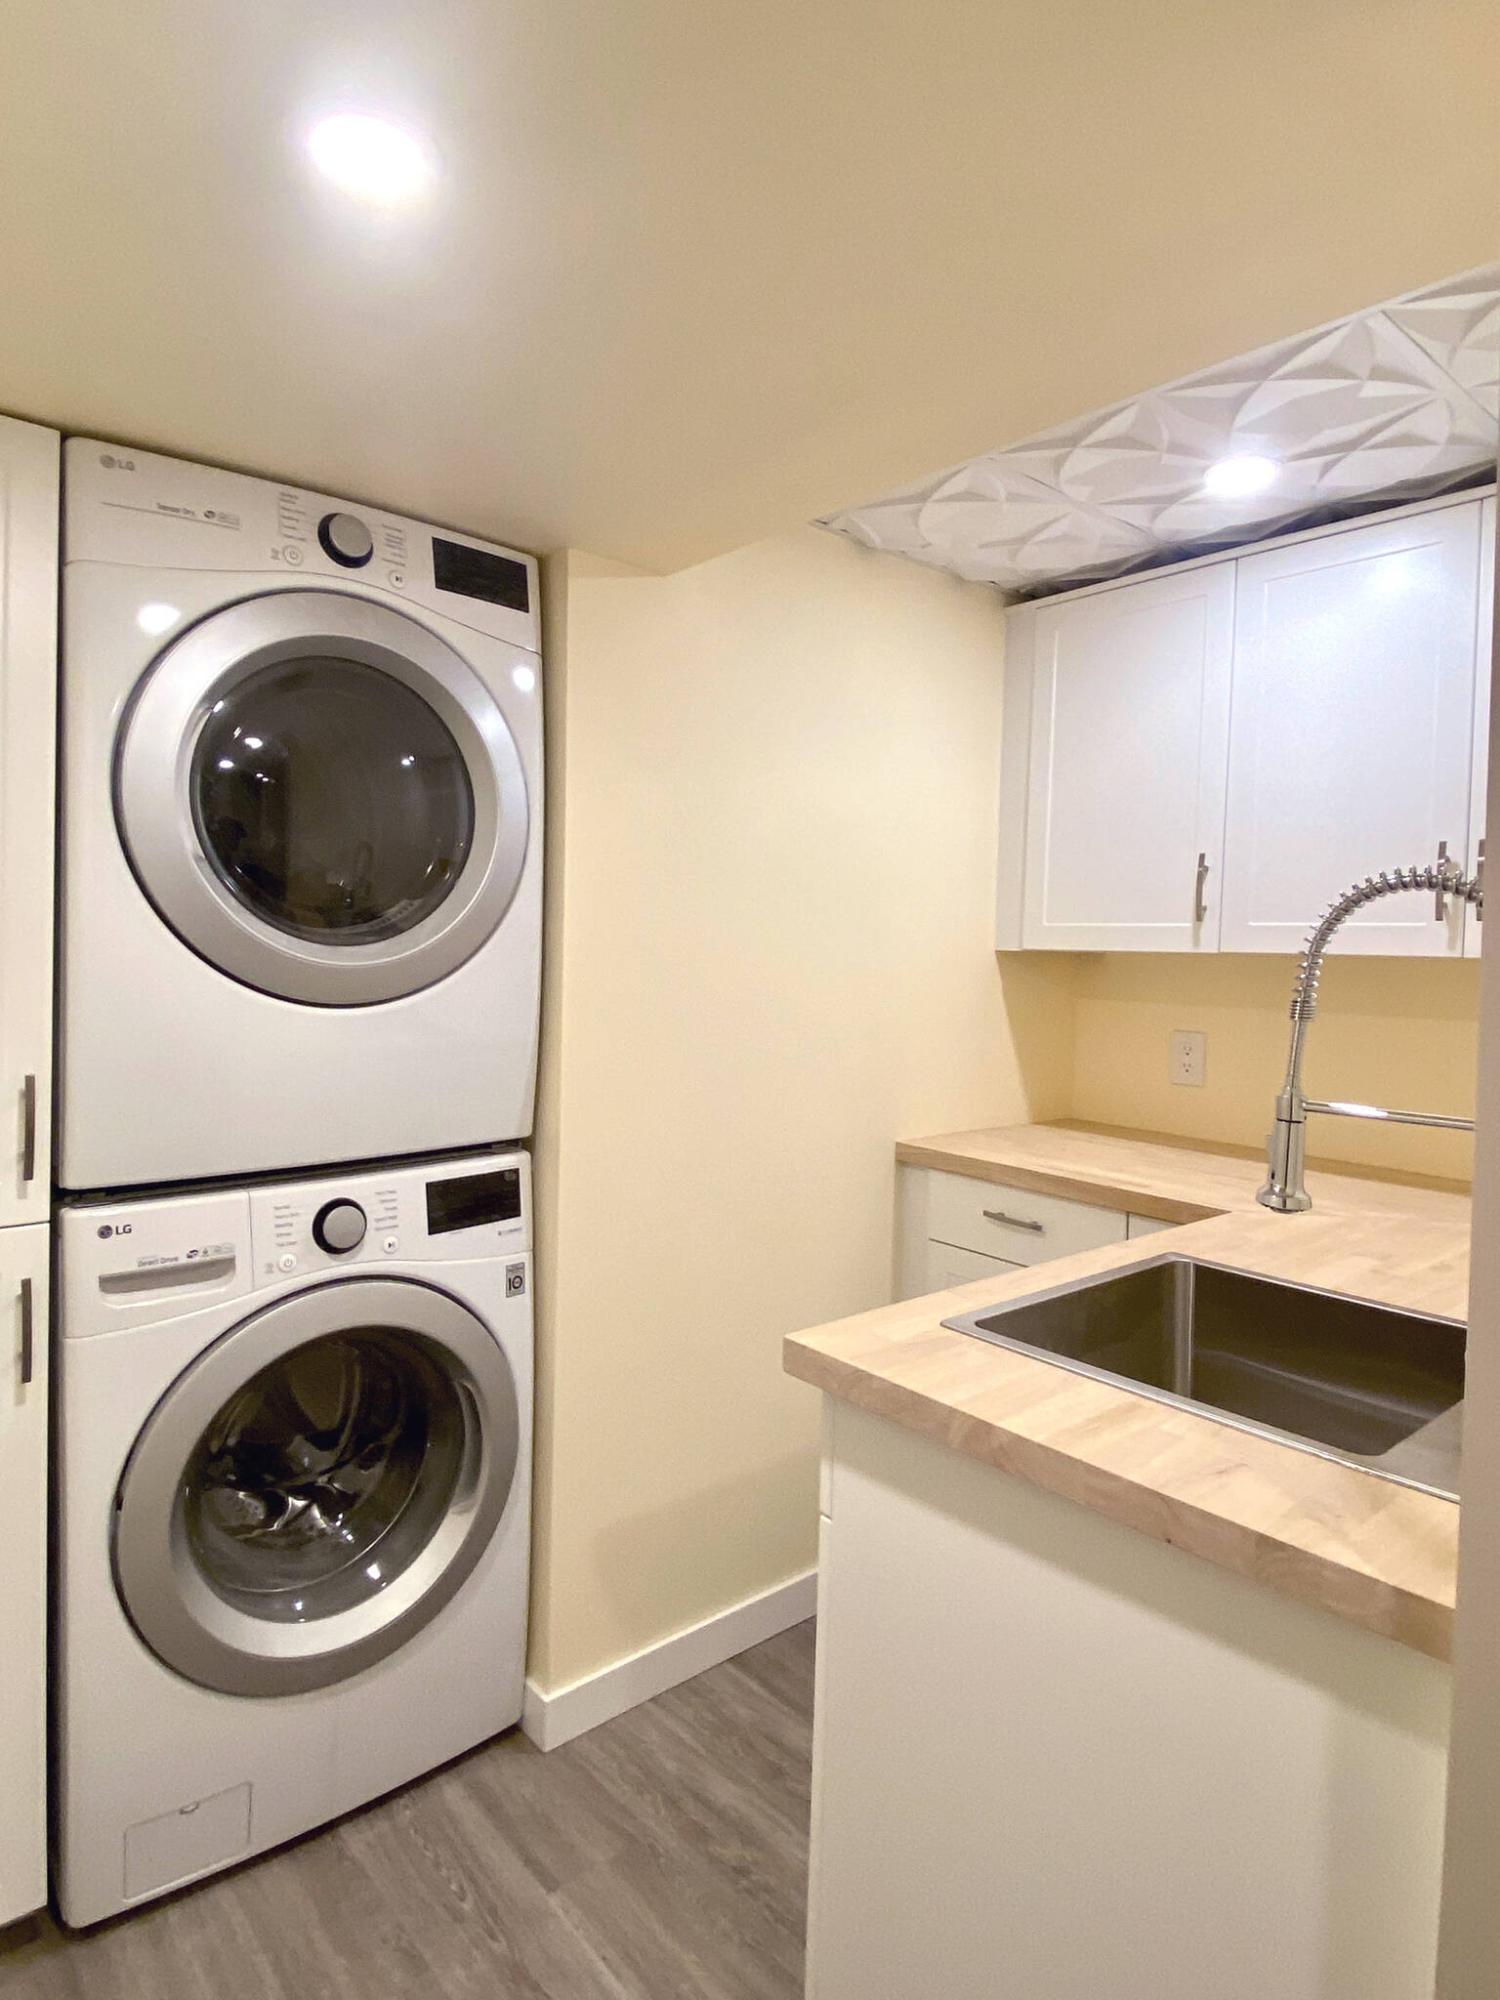
Everything needed was precisely laid out in this small laundry room.
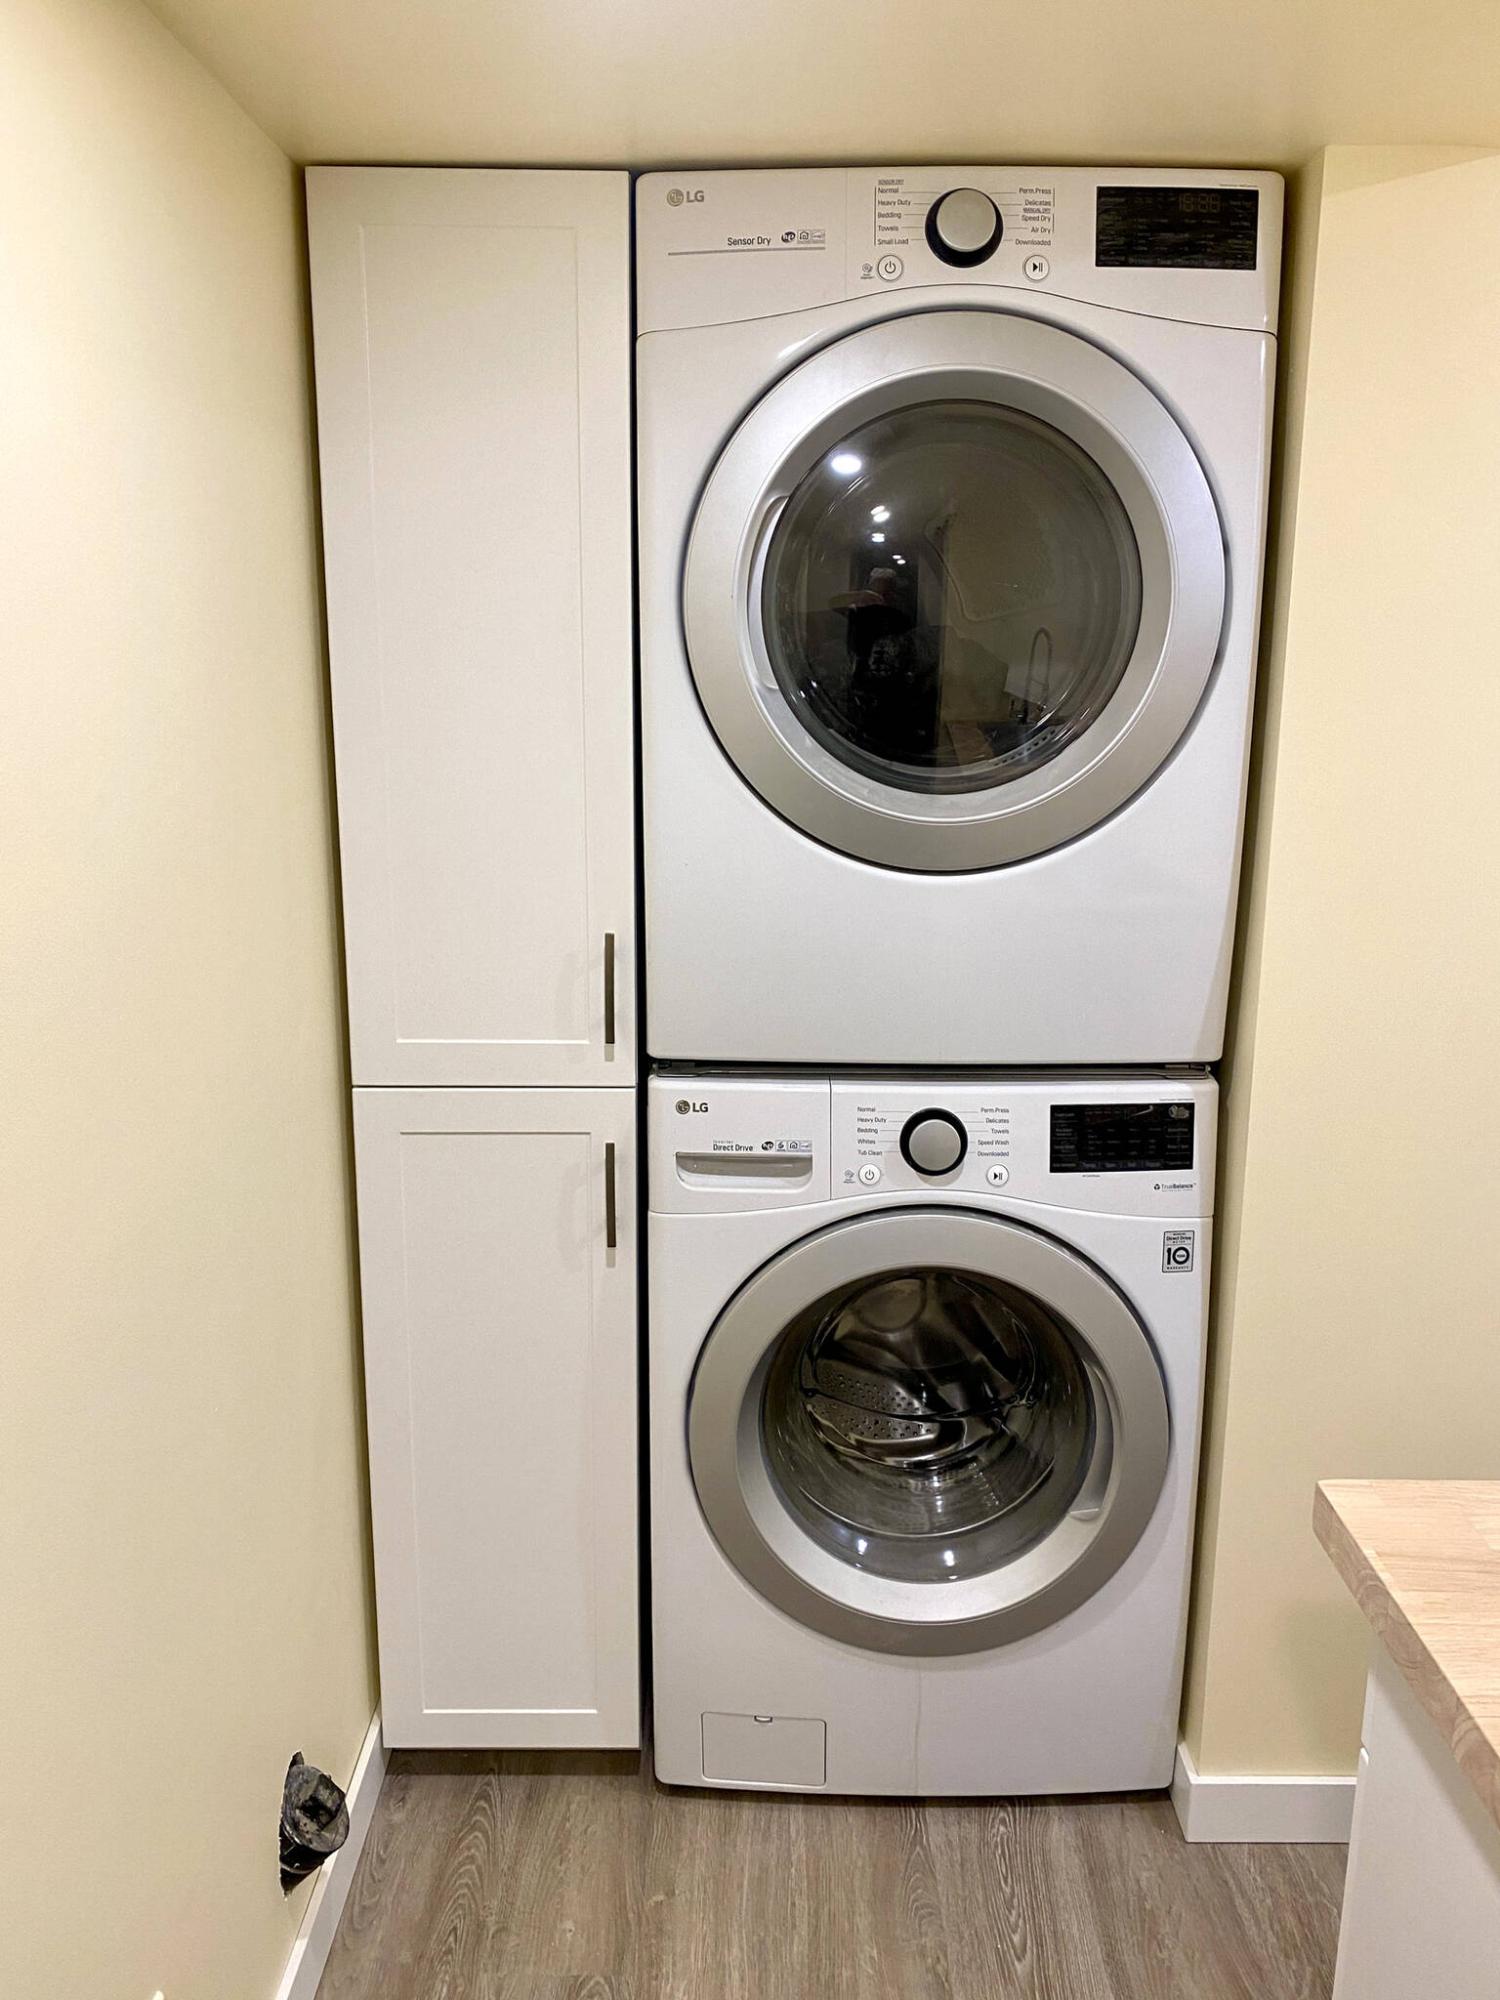
Vertical cabinets fill the void next to the washer and dryer.
The spatial layout challenges when designing a small laundry room require careful attention and strategic planning from the onset. In the early stages of my basement renovation, a portion of the intended space was reassigned to provide a walk-in shower stall in the adjacent bathroom. As such, the limited space was reduced even more.
Once the shell was completed to the painted walls, suspended ceiling, and vinyl flooring stage, it was time to populate the area with the expected amenities. A cavity facing into the laundry room had been created (next to the shower stall of the bathroom) during the framing stage to house the stackable washer-dryer with roughly 15 inches of width to spare. In the main space, the back wall measures 54 inches, with a wall depth of 68 inches – not much space with which to work. But really, how much room do you really need in a laundry? In the spirit maximizing potential, most of the available space would feature cabinets and storage, including a vertical cupboard that fills the void next to the washer-dryer.
Along the 54-inch back wall, a bank of three upper cupboards were installed roughly two inches lower than the suspended ceiling tiles. An L-shaped configuration of lower cupboards was then positioned along the back wall below the uppers, with the L-wing back towards the entry on the opposite wall of the washer-dryer cavity. The lowers were secured to each other, leveled and subsequently fastened to the walls. The two vertical cupboards were then stacked and secured together, before being placed into the cavity void next to the washer-dryer. This upright cupboard will remain movable for access to service the washer and/or dryer.
With the cabinetry in place, matching trim pieces were fashioned to fill any gaps between the end cupboards and the walls. A simple upper valance was added along the top of the upper cabinets, and toe-kicks were installed at the base of all lower cabinets. Due to elevation idiosyncrasies between the vinyl flooring and the bulkhead at the washer-dryer, the lower vertical was ordered without a standard toe-kick, so that a custom base could be created on site, to the exact elevation requirement which ensured the perfect “fit”. With all the finishing trim completed, the cupboard door and drawer pulls were then installed using a pre-prepped drilling template.
In lieu of an arbrite or quartz countertop, I elected to select two slabs of rubberwood, which provides a natural light wood-grain look. The back leg of the counter was first cut to length, to fit snuggly from wall to wall within the 54-inch width. The protruding leg was then cut an inch longer than the L-wing of the lower cabinets. Both tops were then set into place, to mark the angular intersection to ensure the proper miter cut – assuming walls are at exact 90-degrees can often create unexpected issues. In this instance, the walls were indeed out by a degree or so. With the tops marked, the tops were removed, and the miter cuts were then achieved using a circular saw and a guide. The two countertops were then placed into their respective positions, summarily fastened to the lower cabinets using particle board screws from below. For good measure, the mitered seam was glued, and a hint of sawdust was sprinkled along the seam. The entire countertop surface was then sanded, and sealed using a satin clear-coat.
Finally, the sink-hole was introduced at the midway point of the outer lower cabinet using a jigsaw, once the template provided by the sink manufacturer was scribed along the counter surface. The faucet hole was then created using an appropriately sized auger bit. The top-mount stainless steel sink was then mounted and fastened to the rubberwood from below, and the single spring-coil faucet was also installed. Although the space seems confined at first glance, this laundry room offers a ton of additional storage space, a large wash basin as well as the high capacity, stackable washer-dryer combo.
Up until these past few weeks, the thought of doing multiple loads of laundry was daunting – for two decades, the bare concrete floors and partially-framed walls were never at all that inviting. Although completing the shell of the space a few months ago was a vast improvement, having the cabinets, countertops and sink installed makes all the difference. Doing the laundry has never been so fun! The laundry room has come into its own, and showcases how a small area can truly have a huge impact.
RenoBoss.Inc@outlook.com