
The 10-foot 4 x 4 posts were placed into re-drilled holes, set with quarter down limestone and cut to a height of six feet before the framing began.
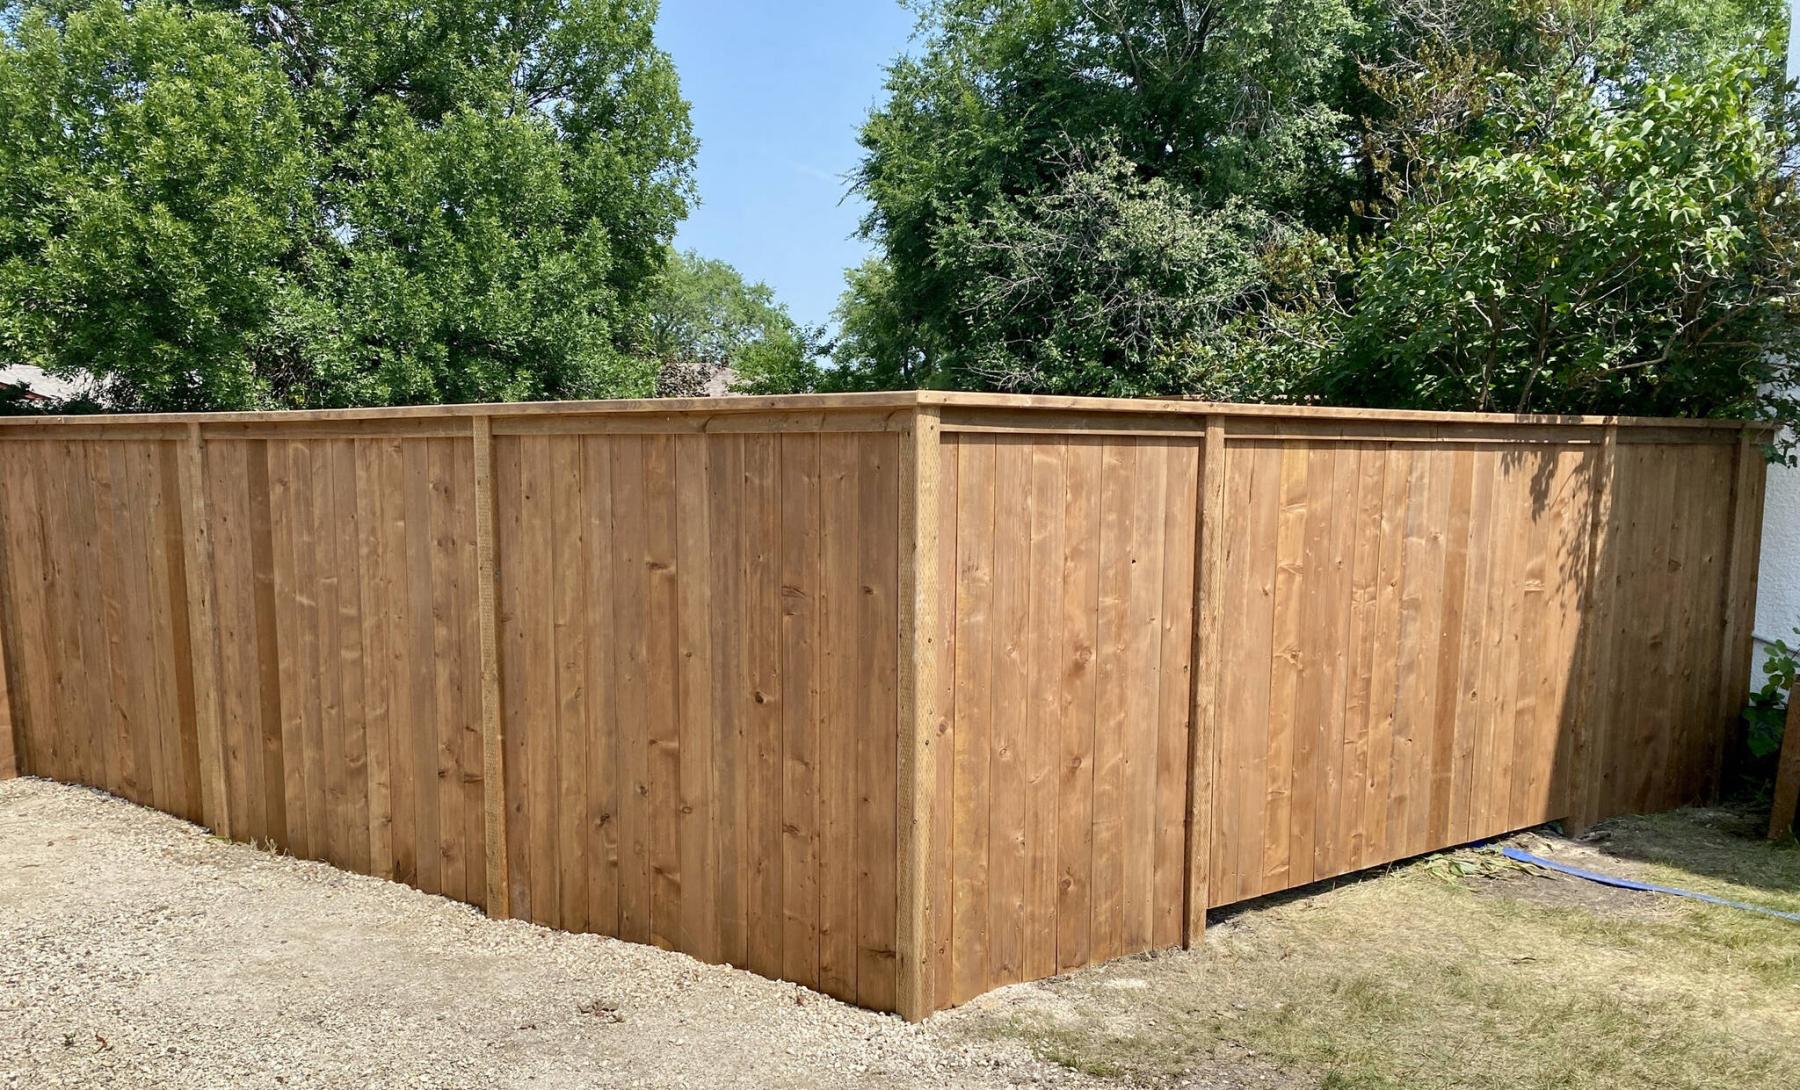
The replacement L-shaped fence is built of treated lumber with posts set in quarter down limestone.
An inside view of the fence reveals three 2 x 4 horizontal supports upon which 1 x 6 fence boards are mounted, capped with 2 x 6s.
Anyone with a fenced property knows that the area most susceptible to failure is the gate. No matter how well it’s mounted on posts, the sheer repetitive action of opening and closing the gate creates stress and can cause posts to shift. Over time, the posts become loose and the gate begins to droop, creating an unstable fence section that requires attention.
During a recent fence-replacement project, the gate issue was twice as bad — a double French-door style gate had caused the posts on either side to teeter so much that the gates would barely open unless they were forced upward, relieving the downward pressure caused by the weight of the gates on the posts that had failed. The L-leg of the adjacent fence section was also wobbly and required replacement.
The old fencing was cut out between the posts and the posts were then heaved from the ground to make way for a new set. To mimic a neighbour’s fencing along the back of the yard, the new fence frame consisted of three rows of horizontal 2 x 4 boards set equidistant between 4 x 4 posts, with a 2 x 6 cap atop the 1 x 6 vertical fence boards that enclose the framing. Before the framework was installed, the existing fence post holes were re-drilled using a hand-held auger with an eight-inch bit. Each hole was dug to roughly three-and-a-half feet. The treated 4 x 4 posts were then placed into each hole along a string line and set using quarter down limestone to ensure the posts remain level and plumb along both sections.
With the posts in place, the tops of the 4 x 4s were then cut down to six feet, again using a string line to ensure they were level. The two sections of the L-fence were then fully framed using the aforementioned 2 x 4s and 2 x 6s. Unlike with a traditional gate-mounting process, however, the upper 2 x 6 cap continued overtop the double gates to provide extra rigidity while the gates are in use.
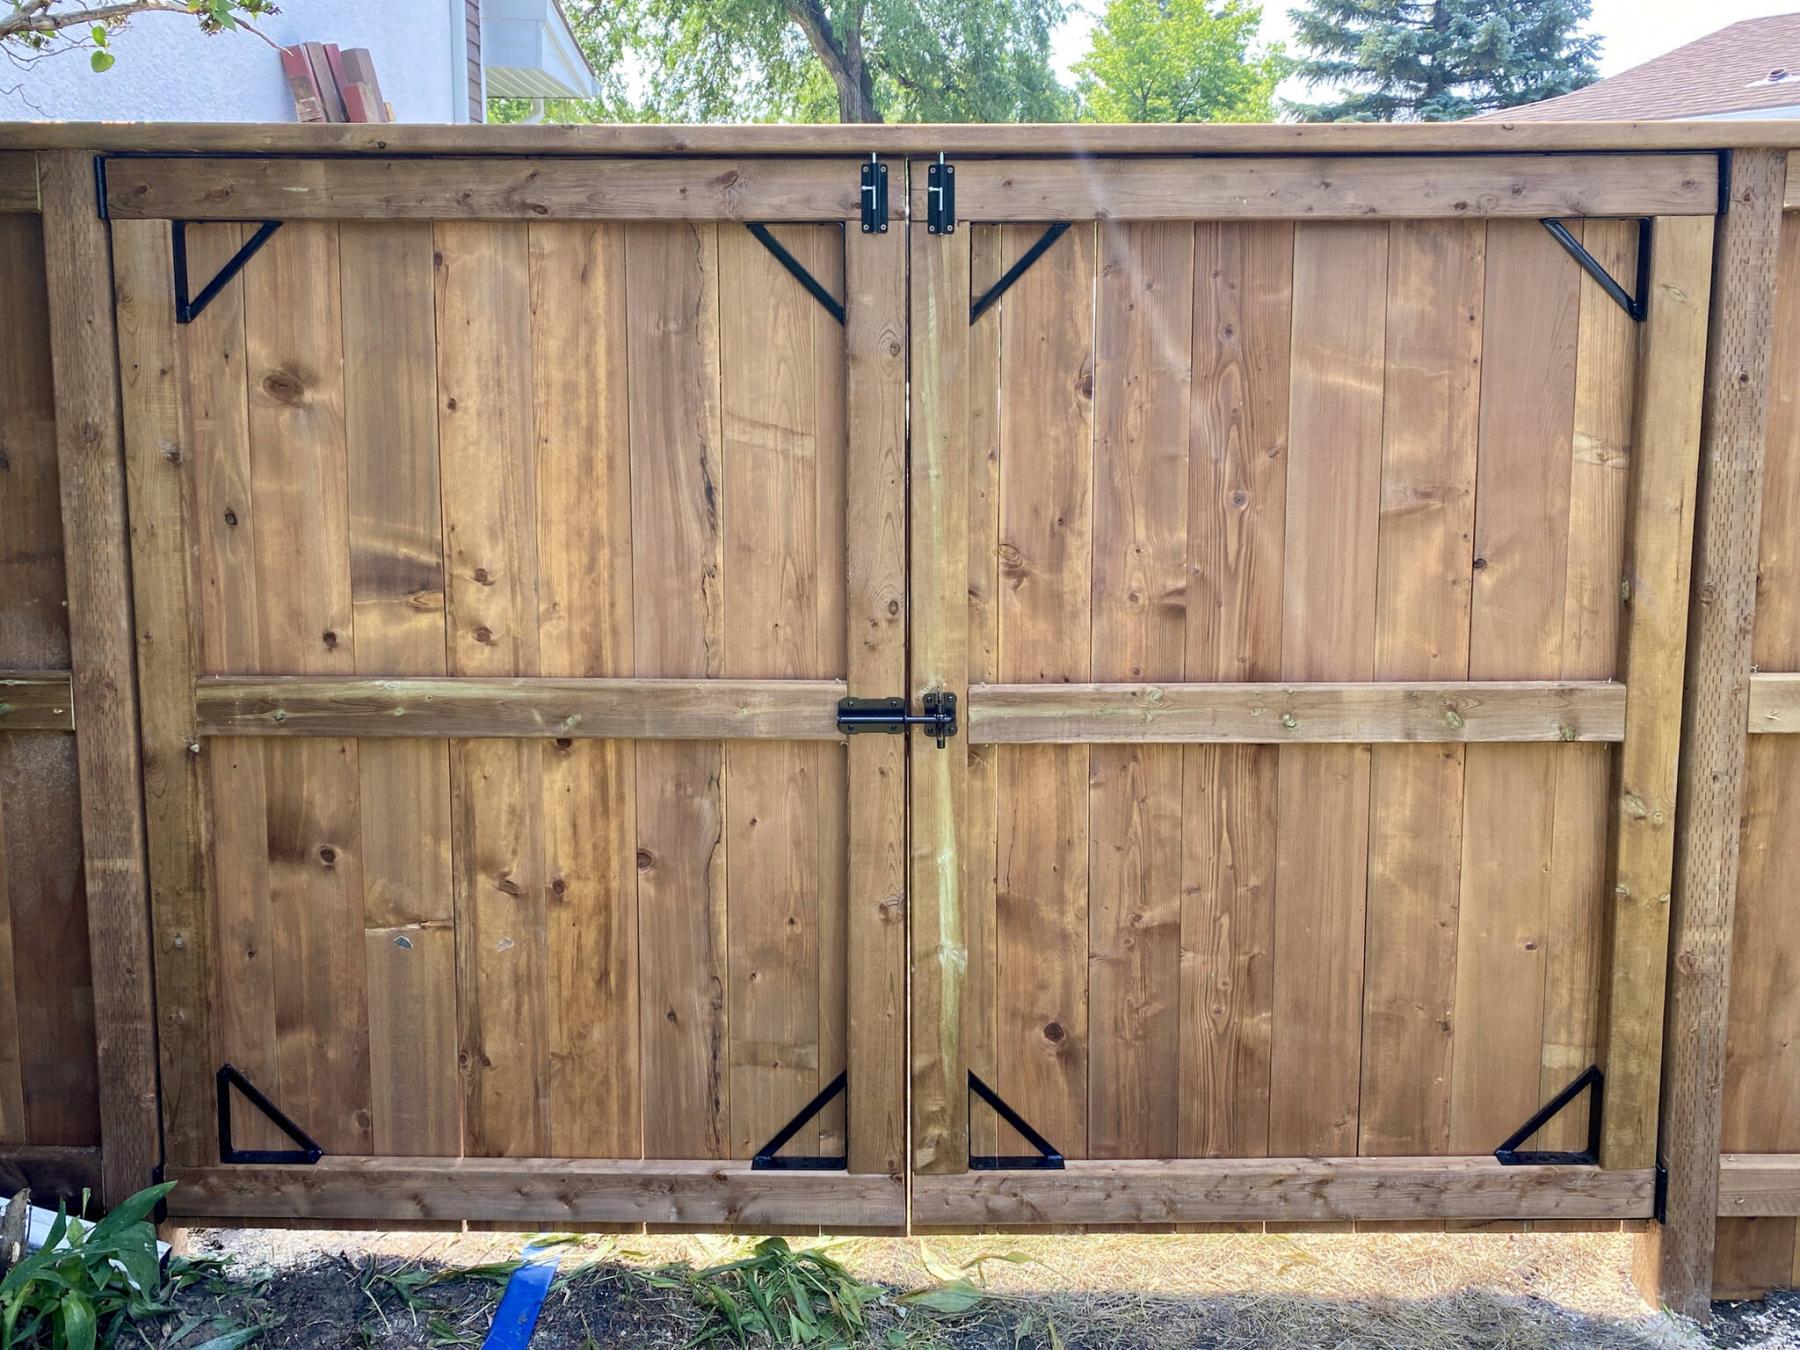
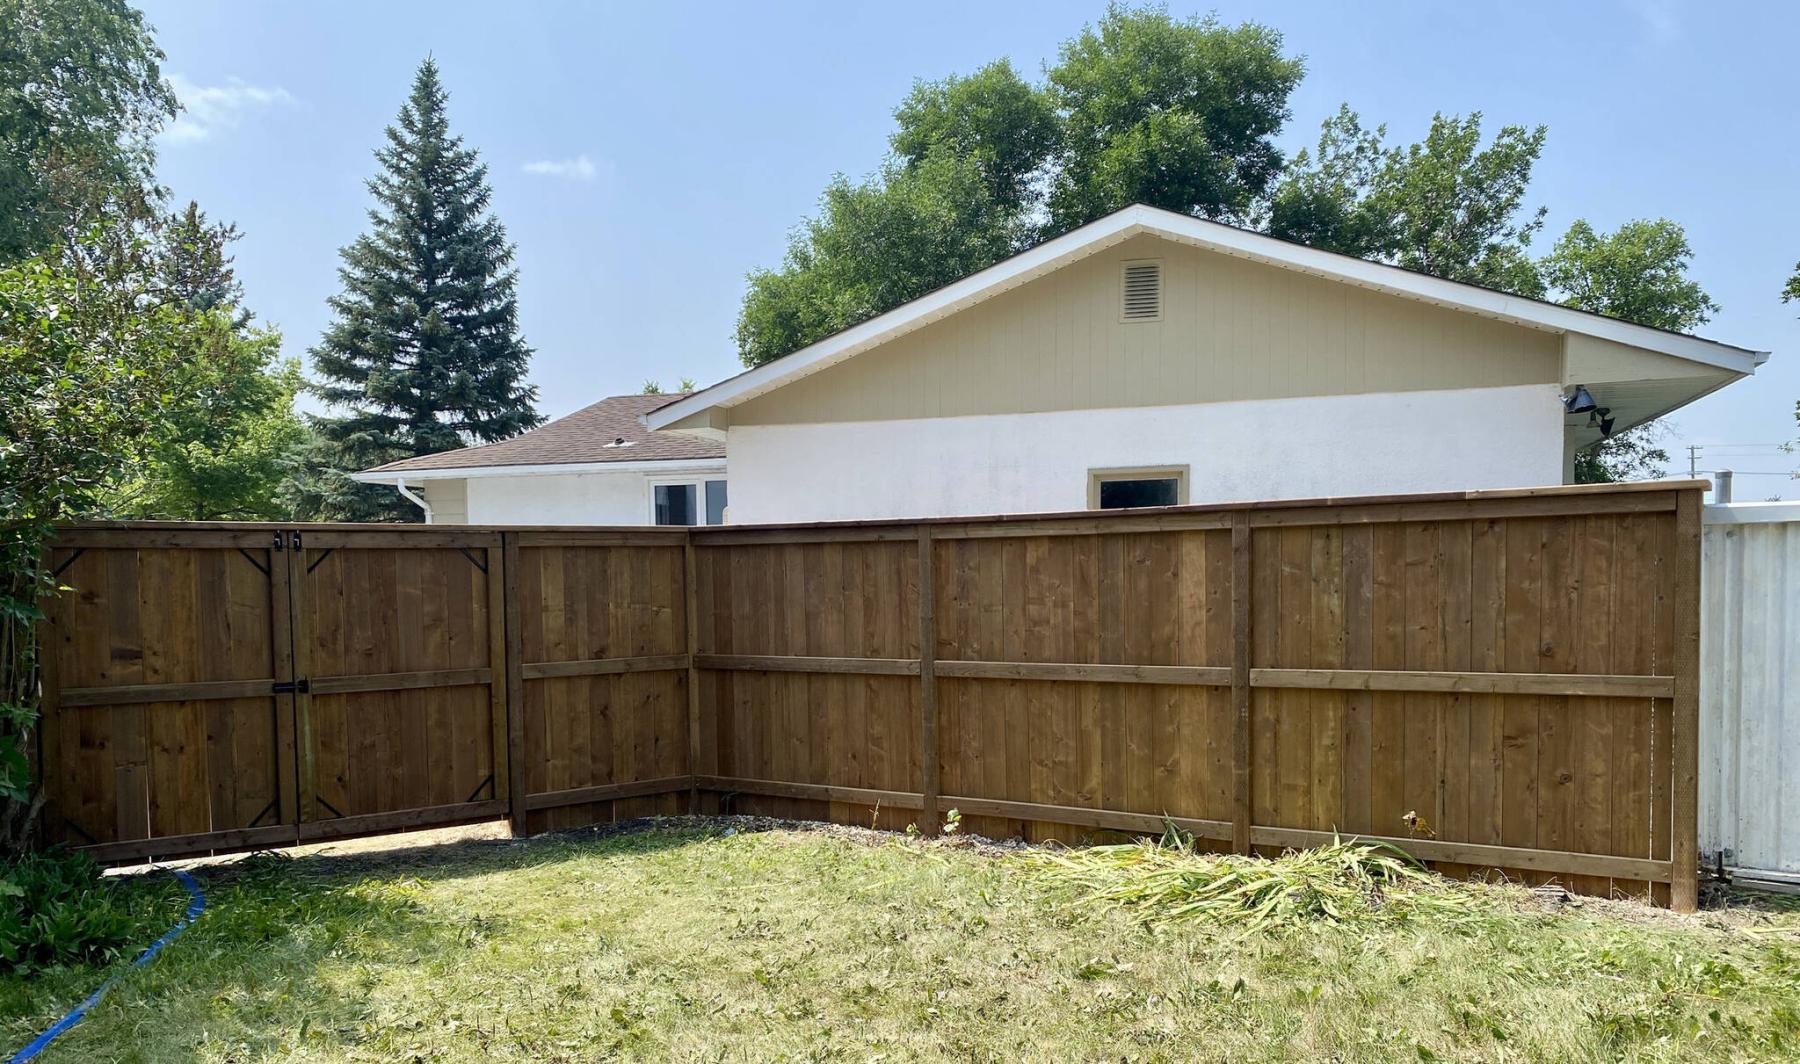
Once the gates were fabricated to size on site to meet the gap between the gate posts, they were mounted to their respective posts with an inward swing. Gate kits that included inner steel corners were used to improve the gates’ performance — lessening the odds of sagging while keeping the gates square. The continuous 2 x 6 cap between the gate posts also greatly decreases any movement of the posts when the gates are in use, thus reducing the potential for drooping or sagging.
Once the framework and gates were completed, the 1 x 6 fence boards were mounted on the outer side of the fence. At the gates, the fence boards were cut to a slightly shorter length to ensure that the gates clear the ground. At a glance, the double gate is virtually undetectable from the front yard. A hefty gate latch was installed on the inside face of the double gate, with two smaller latches at the top of each gate securing them to the rigid 2 x 6 cap. Although this double gate probably won’t be used often, it’s nice to know it functions well and is unlikely to cause fence integrity issues due to sagging, which you’d expect from traditionally mounted gates over time.
The roughly 40 feet of fencing along with the double gate was completed in just two days, including the demolition of the old fence. The key to fence replacement is properly setting the new posts, which usually requires re- drilling the old fence holes for best results.
The L-shaped fence replacement turned out so well, a similar section of old fencing on the other side of the property will probably receive the same upgrade this fall. And with only one gate to contend with at the next go ’round, that replacement project should take even less time to complete.