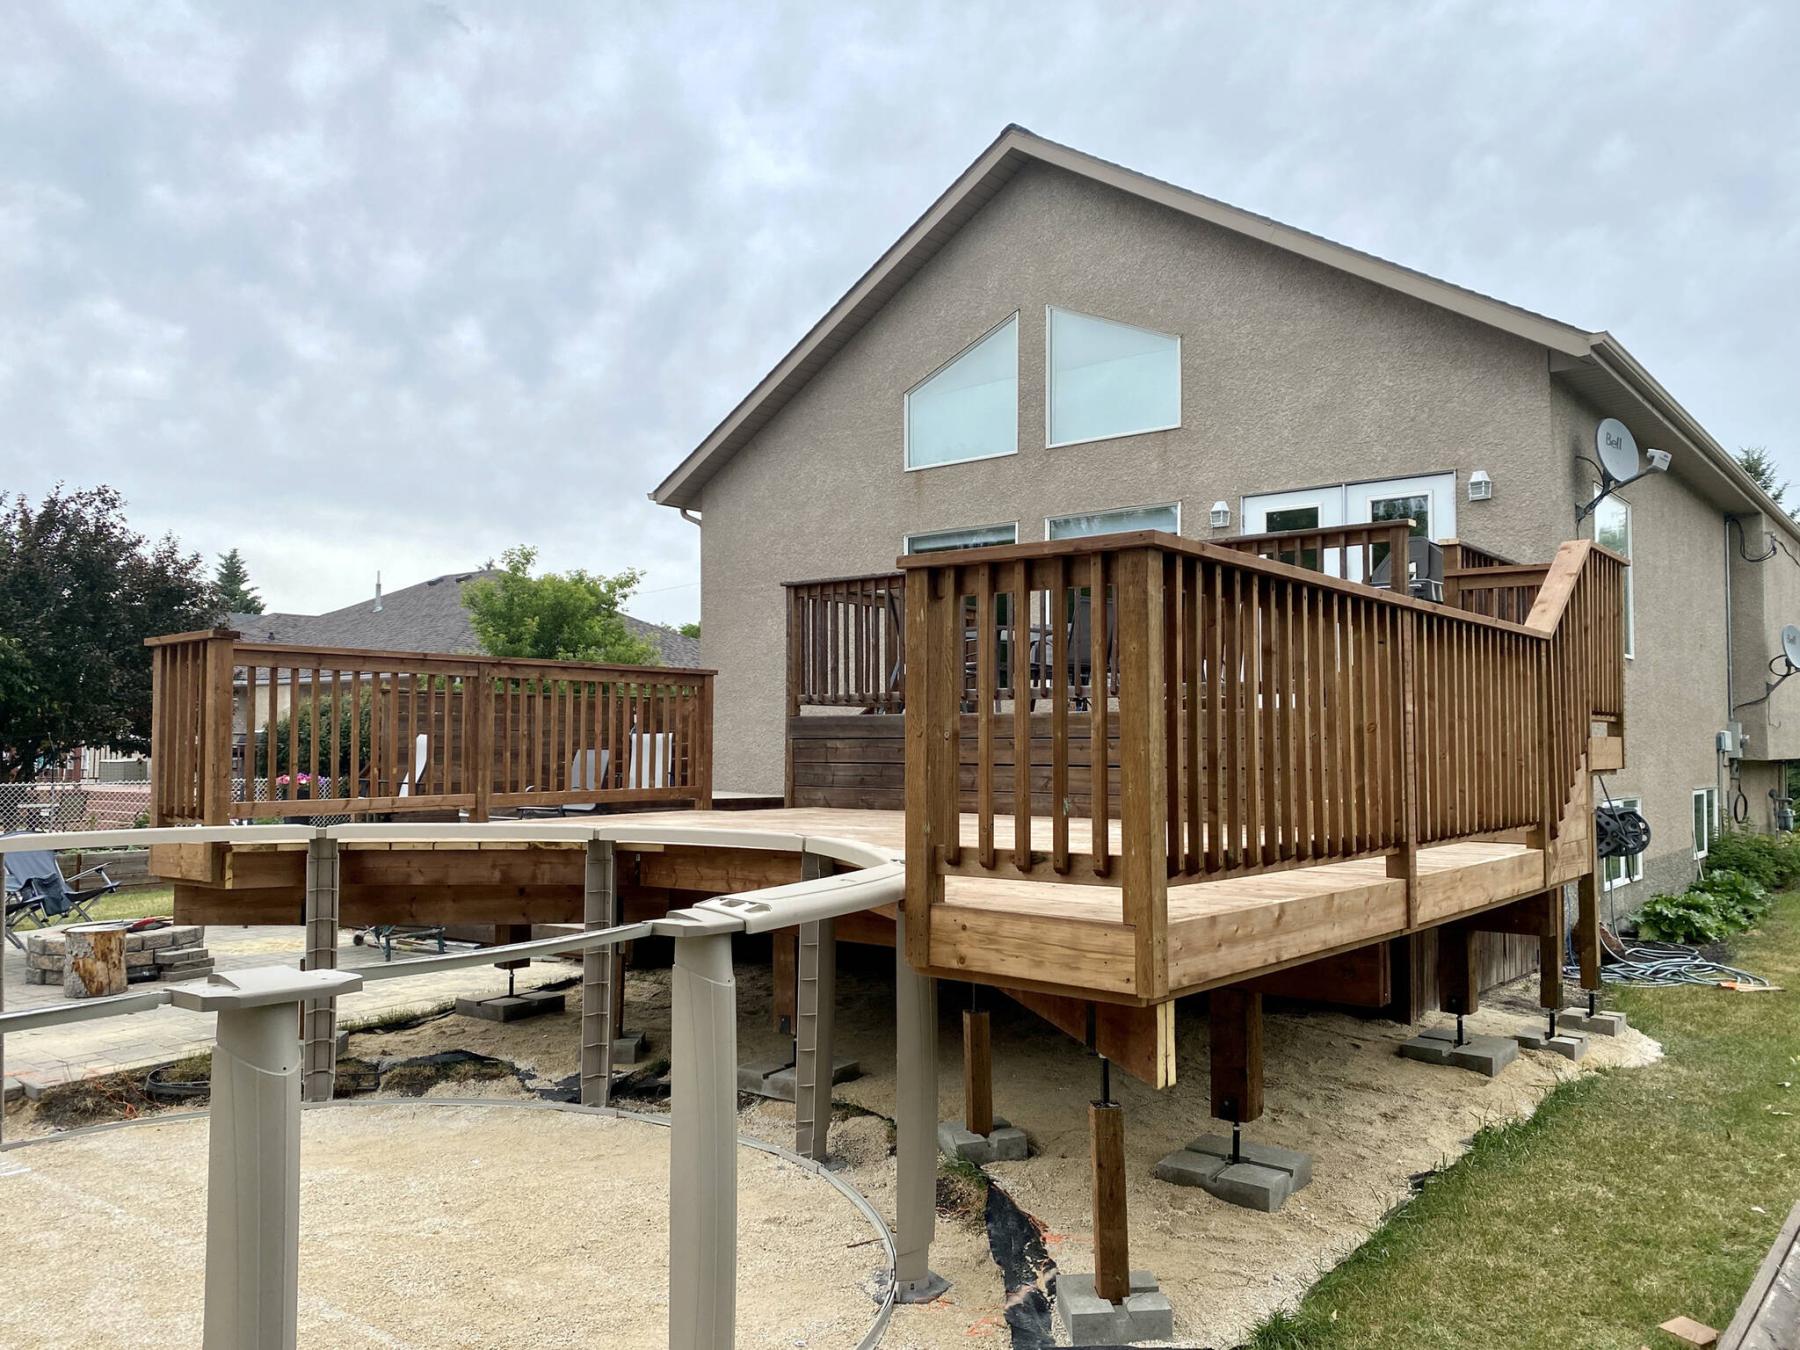
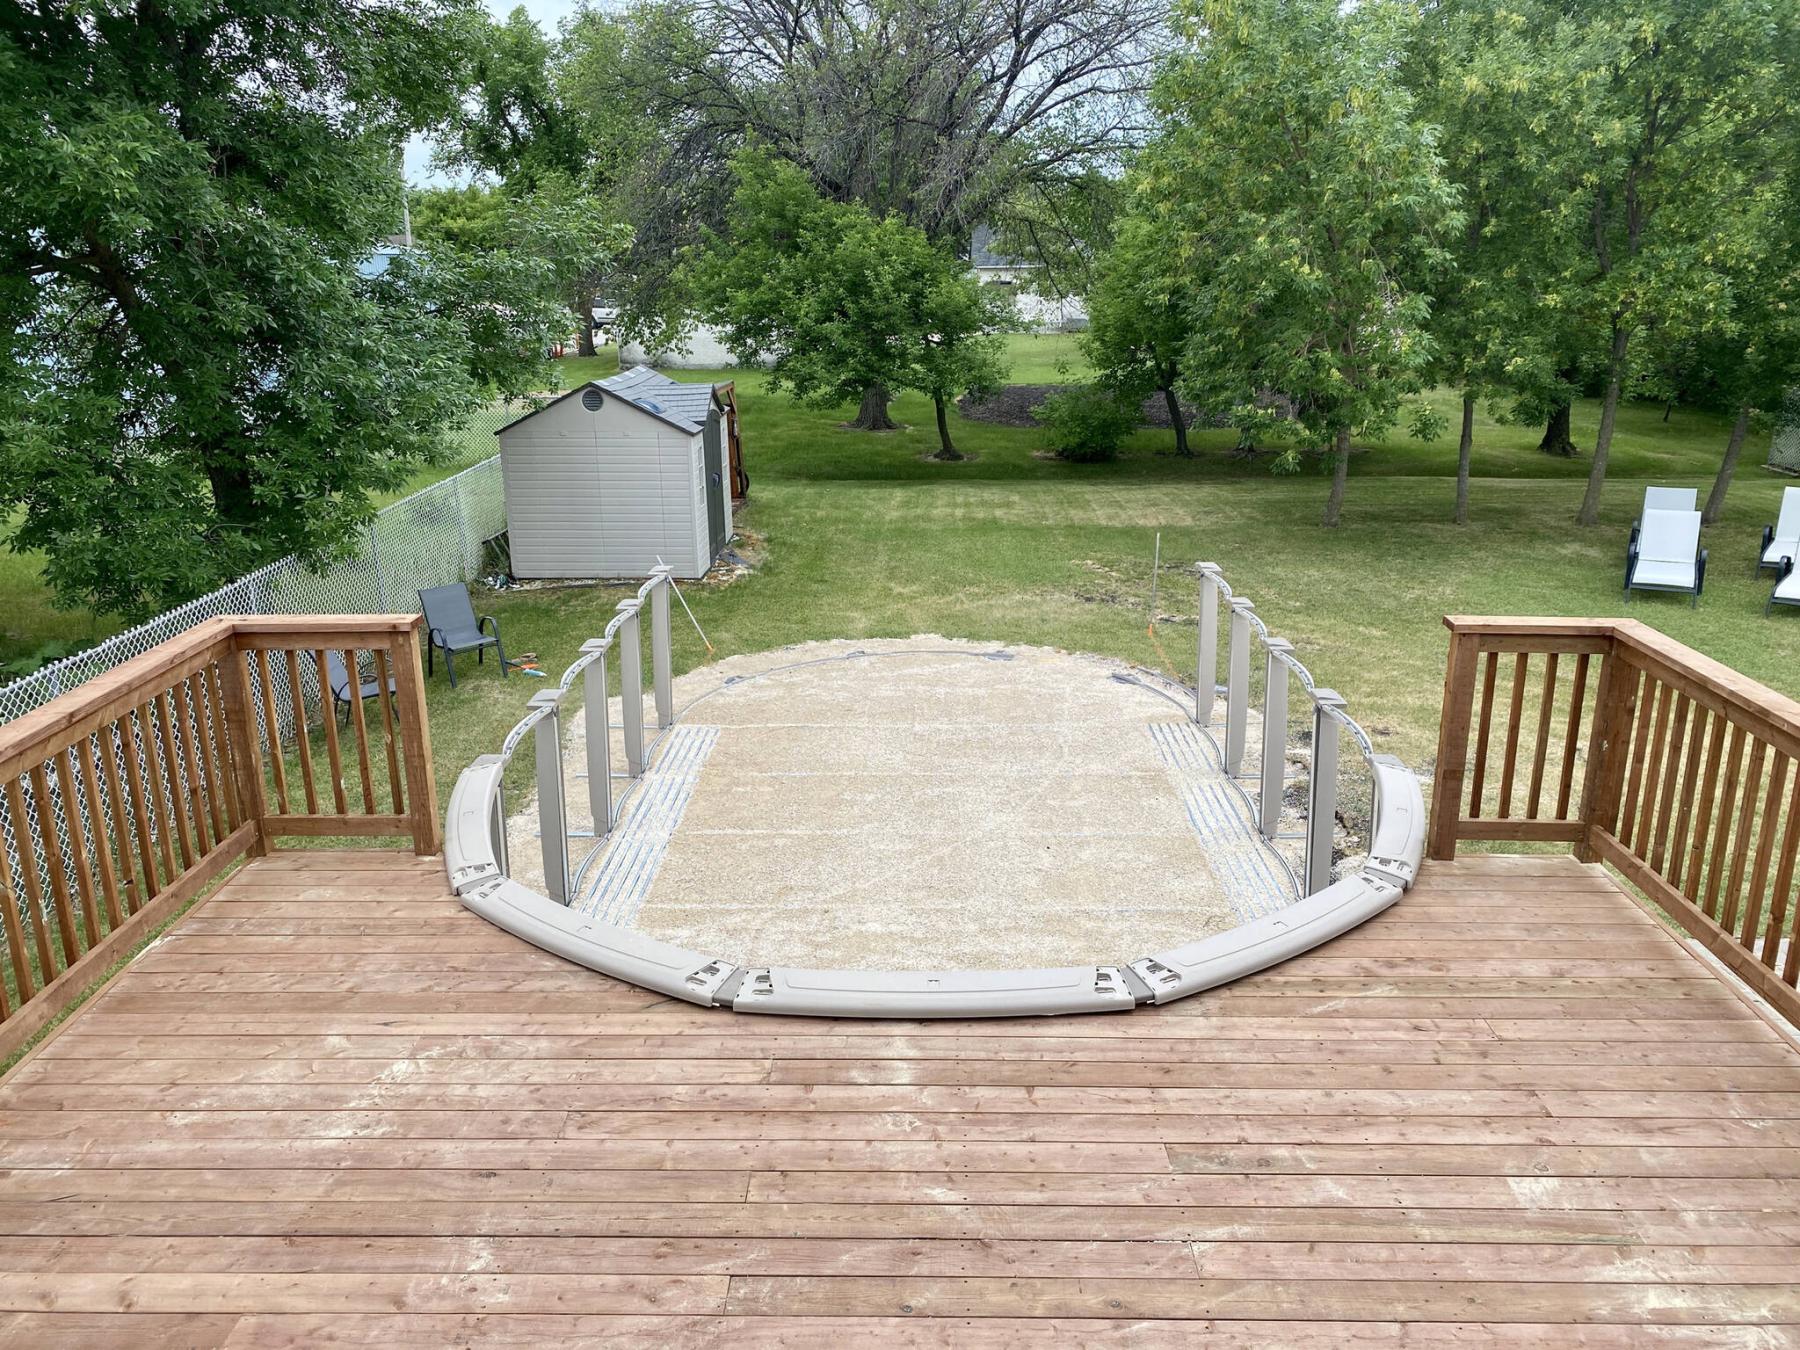
The deck was built guided by a portion of the pool structure temporarily positioned along the close end.
The pool deck was built three feet wider than the upper tier to allow proper support for the staircase and landing.
Projects run smoothest when tasks are achieved in the proper order. This holds true for both interior and exterior projects. If the desire is to build a deck on a virgin plot of land behind a newly constructed house, it is best to forego landscaping until the deck is built. The reason for this is simple — it’s much easier not to mention more pleasant to the eye to adjust the grade of the yard to meet the lowest level-line of the deck, than it is to build the deck to follow the contours of the backyard. Conversely, building a deck around an above-ground pool must await the installation of the pool — or, so it seemed.
A homeowner and high-school chum for whom a two-tiered deck had been built several years ago contacted me this past spring. There had been a recent desire to introduce a middle tier surrounding an above-ground pool, which would be adapted to the existing high tier with access to the back patio doors, and lower hot-tub tier that also provides access to the backyard patio and firepit. The design underwent a few modifications until it was refined to provide a partial wrap along the front edge of the 30 by 15-foot oval, above-ground pool.
Having obtained the pool package from Krevco Pools & Spa, the homeowner was inspired to perform the majority of the above-ground pool installation on his own, with some help from me. The first step was to map the pool footprint on the existing grassy surface, using the bio-degradable and stakes. These are crucial prior to having the ground prepped with the appropriate gravel to serve as the base for the pool, as well as the foundation for the pool deck-tier support structure. Once the ground had been properly excavated, and gravel leveled, the initial steps of the pool installation were underway.
Installing an above-ground pool is a laborious experience, and not for the faint of heart. Having achieved the installation of my own above-ground pool, this personal experience is what led my school chum to seek my assistance. After a few days of toiling with the placement of the buttress-free supports along both ‘long’ sides of the oval pool, it became clear that the process would take much longer than the homeowner had anticipated. As such, a decision needed to be made regarding the start date of the deck-build portion of the overall tasks, in that my calendar was full and any delays would likely result in the postponement of the deck build until the pool was fully erect. After all, the pool must be in place before building the deck around it – until I thought of a work-around to stay on schedule.
Rather than waiting until the pool was fully installed (posts, wall, liner, and partially filled to prevent the walls from shifting due to the wind), I suggested we simply place the posts along the nearest edge of the pool, adjacent the impeding location of the pool deck-tier, whereby the “ark” of the posts (without the wall) would indicate how to build the support system for the new tier, as well as the elevation required to tuck the top decking below the caps of the pool between each post. Without delay, the required posts were placed along the near side, temporarily installed without the wall. It seemed as though this process provided enough information to allow the deck-build to begin.
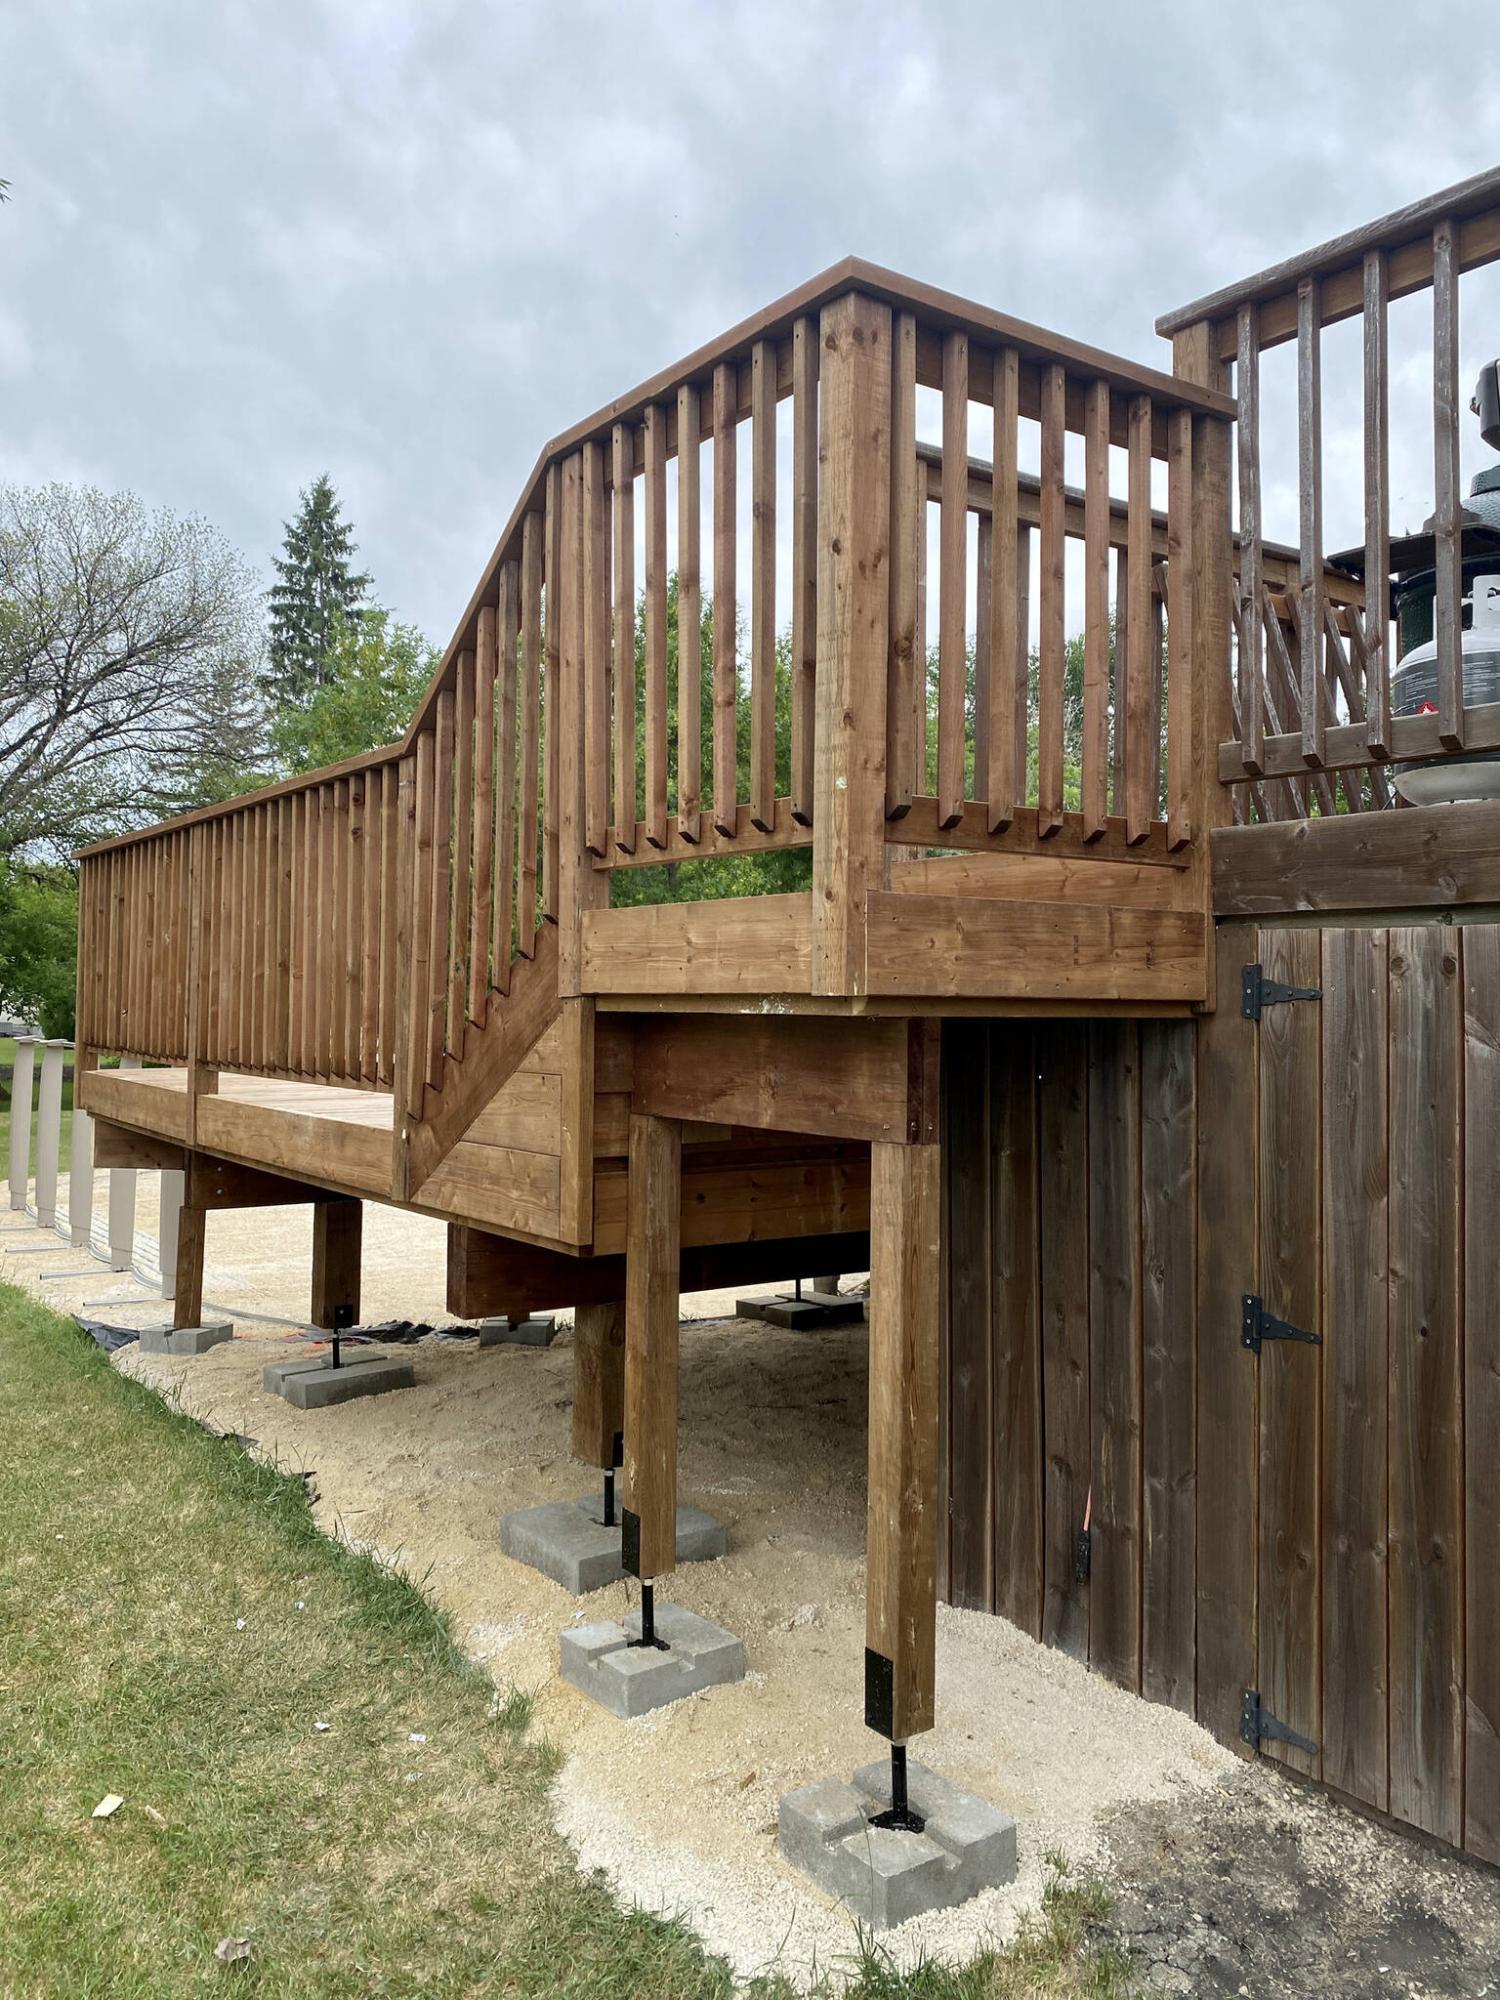
The 2×8 joists and triple-laminated 2×10 beams were systematically positioned atop 6×6 posts and adjustable deck jacks. Working perpendicularly from the existing high tier, the framework is set at an elevation that both allowed the impending top decking to tuck below the pool caps, and worked with the existing 2×8 horizontal fascia of the existing two-tiered deck. Once the framework was rigid, a single inset step was introduced along the low tier side of the newly built structure to provide access to and from the hot tub tier. On the opposite side the deck was purposely constructed three feet wider than the upper tier to allow the introduction of a three-step staircase plus landing that allows convenient pool access from the upper tier, and to the back patio doors. With the hand-cut stair stringers fastened to the deck frame, the entire structure was topped with 2×6 treated lumber, that easily tucked below the pool caps along the ark nearest the house.
The railing consists of 4×4 posts, notched along the bottom for side-mount installation. Once the required posts were mounted throughout the pool deck-tier layout, the existing railing along the upper tier adjacent the new staircase landing was carefully modified to provide an opening to the landing. The newly fastened posts were then capped with a 2×6, and the 2×4 supports allow an upper and lower surface upon which the wooden balusters can be affixed. As a final step, 2×8 decorative fascia was secured between every post, and along the rise of every stair. The deck was completed on schedule, allowing the continuation of the above-ground pool installation without any further delays.
Although unconventional, temporarily erecting just enough of pool to guide the deck build was the only way to remain on schedule. Moreover, the homeowners were able to enjoy their newly built pool deck-tier while awaiting the completion of their above-ground pool installation. After my on-site involvement had concluded, it was only a couple of weeks later that the pool did indeed get fully installed, and it looks fabulous. This timely deck build and subsequent pool installation will no doubt allow the homeowners to thoroughly enjoy their re-invented backyard oasis for most of the summer — I’m so glad we didn’t wait to build that deck until the pool was up! Because who knows when I could have returned, based on my hectic summer schedule.
RenoBoss.Inc@outlook.com