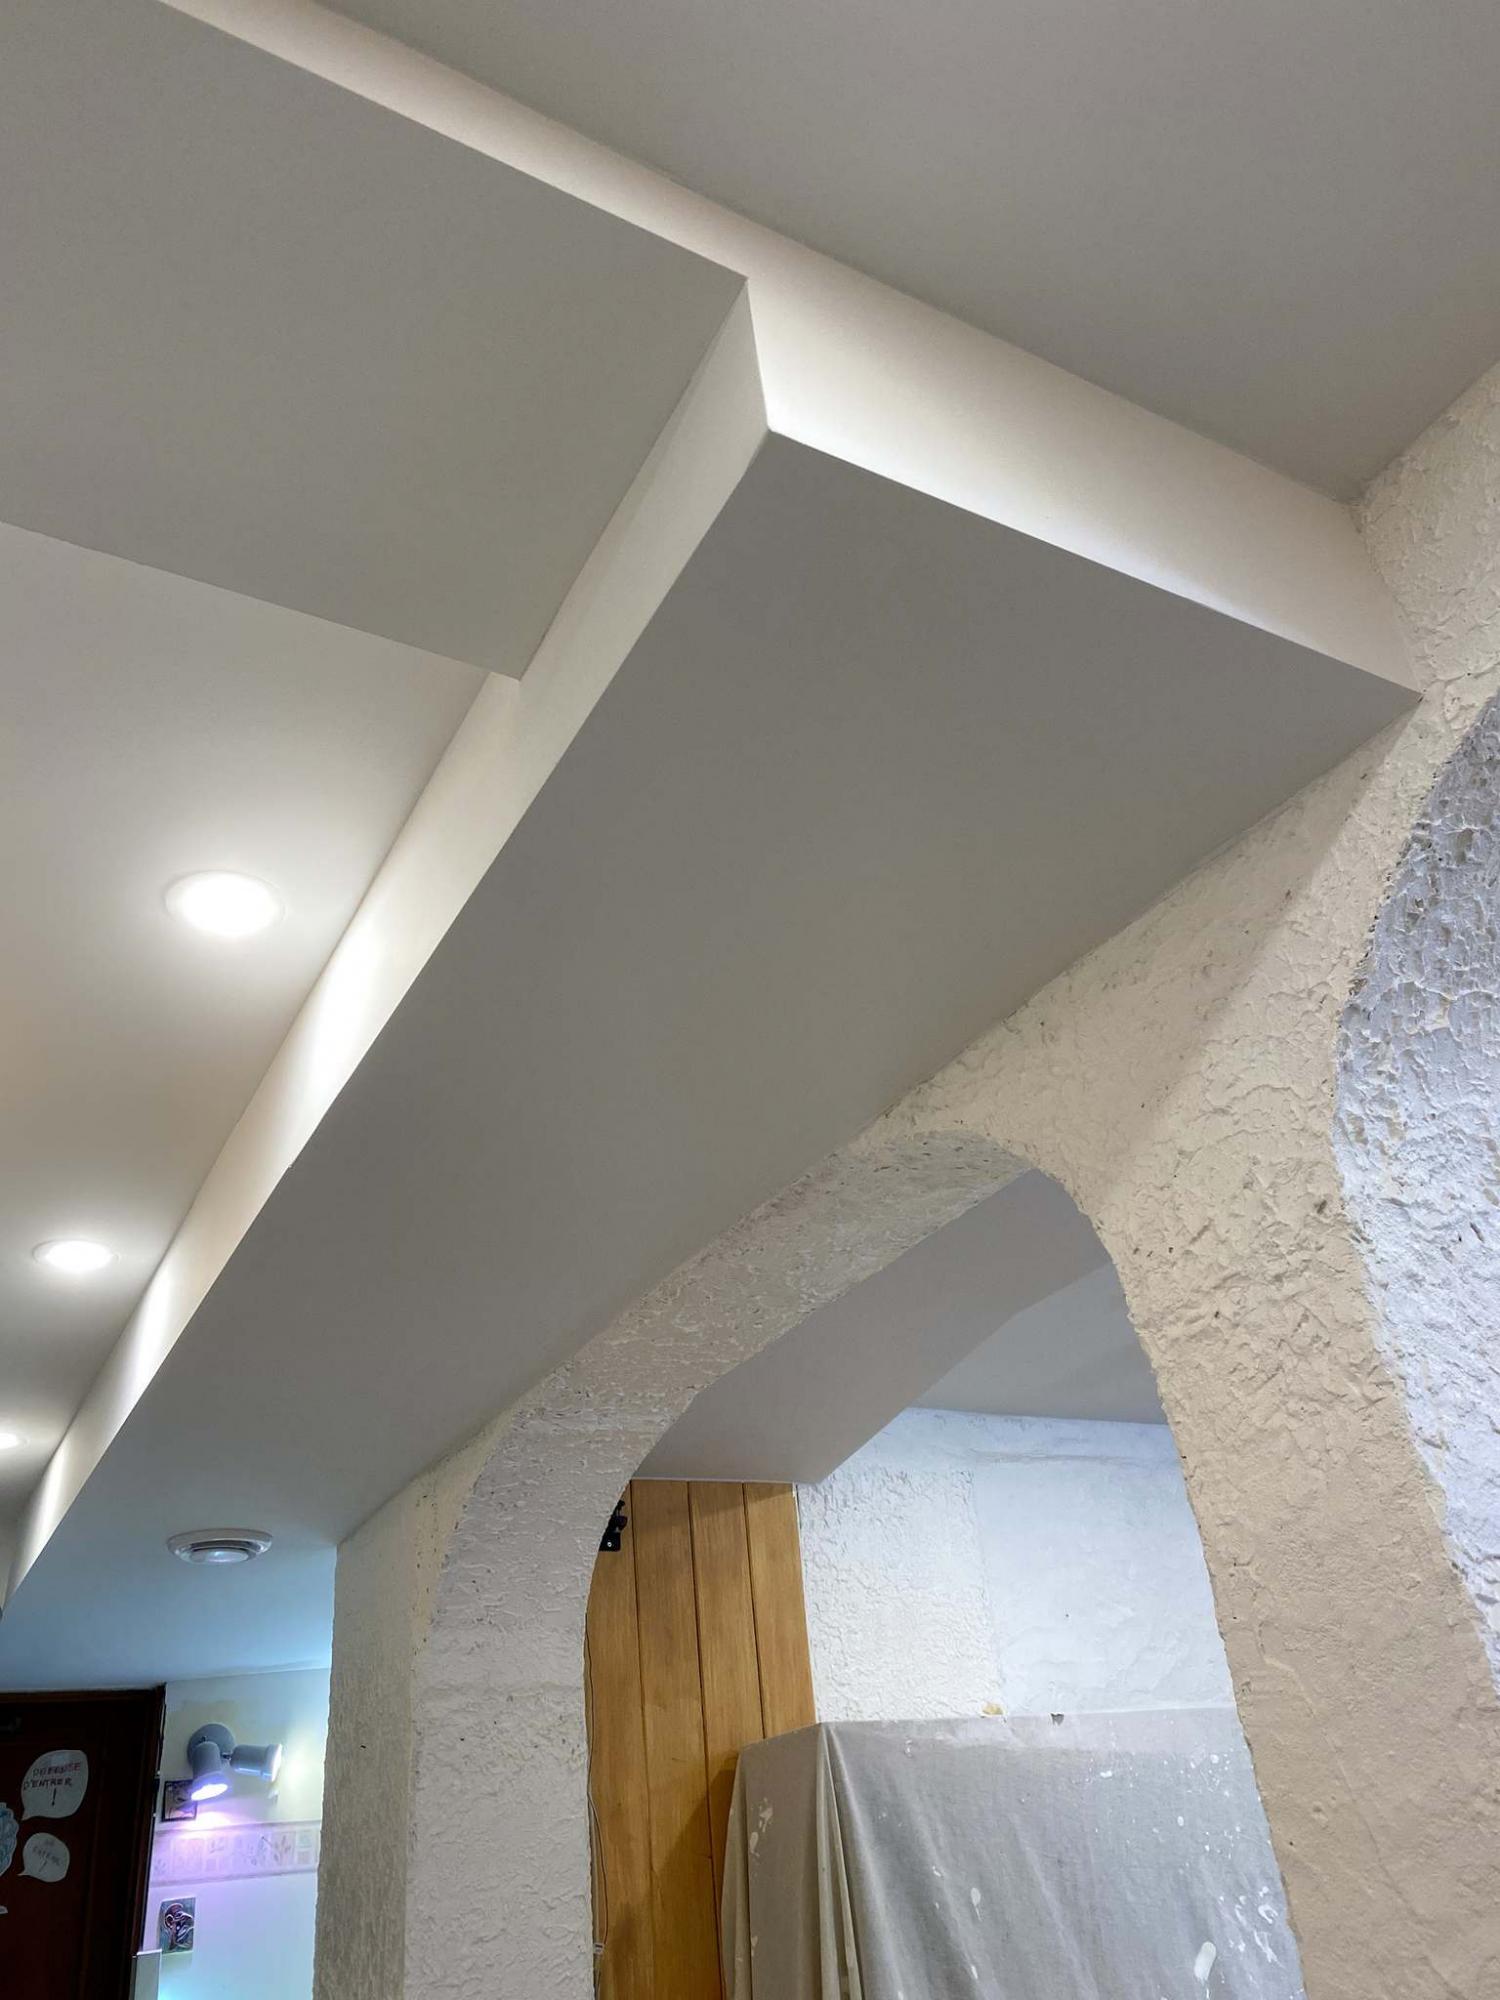
The box frame was created as high and as straight as possible to contain all ducting without looking too bulky.
Although the rule of thumb with basement ceilings is to introduce a suspended ceiling (also known as a drop ceiling) to allow access to services and utility lines, some homeowners do opt to install drywall. When existing ventilation ducts hang lower than the ceiling joists, however, things can get tricky.
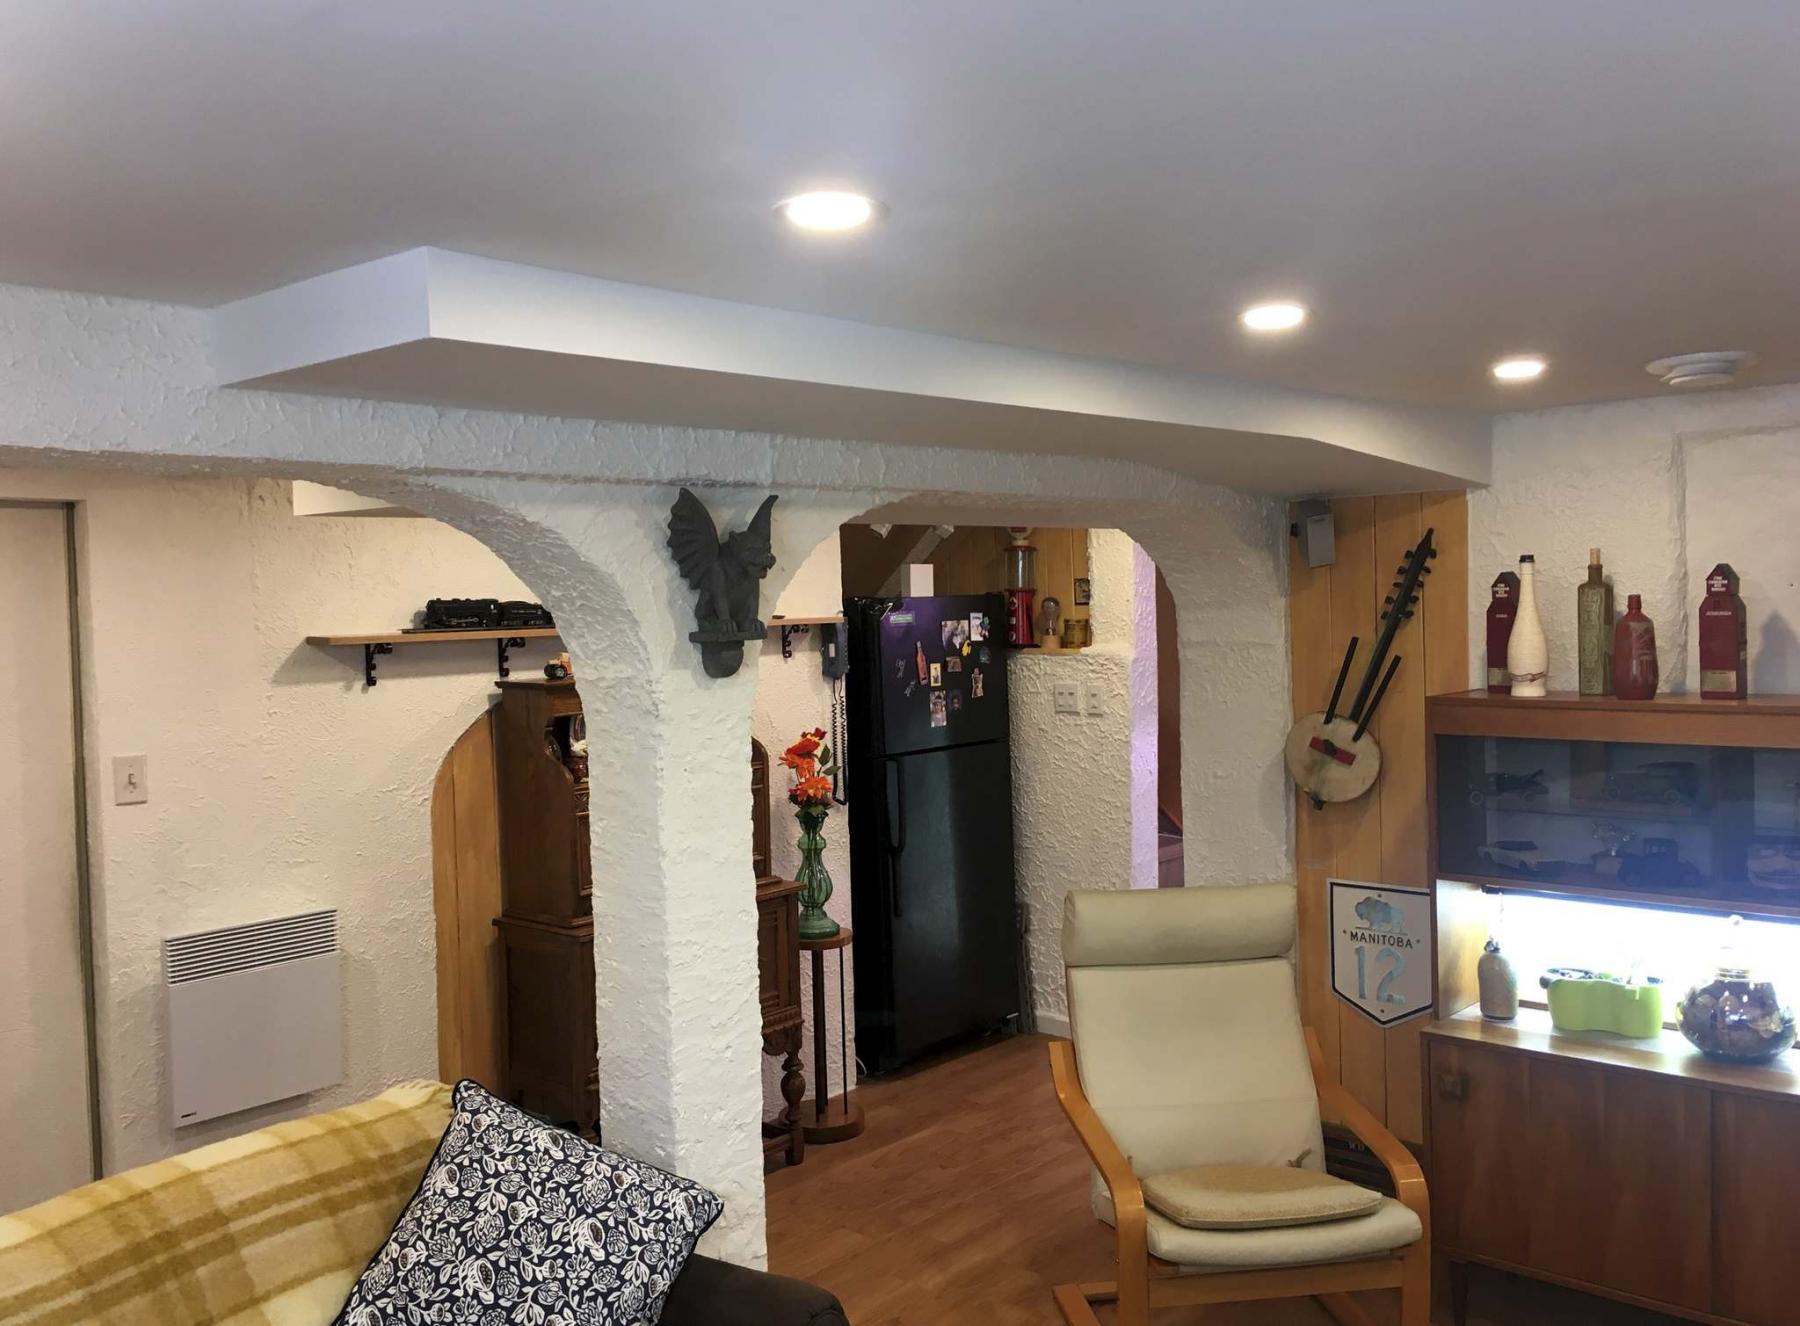
The old dingy, nailed-on ceiling tiles in this basement had become a deterrent and these homeowners wanted to update their basement ceiling to create a more inviting space. Although we discussed a suspended ceiling as an option, they ultimately chose drywall for a clean and sleek look. There were very few services that required access, and panels in those locations would suffice. Along with the drywall, ceiling lighting would be introduced on two separate circuits; one for the main hallway at the base of the stairs leading into the far end of the basement, and another for the big part of the rec room, each separated by the load-bearing beam that ran through the centre of the lower level.
The existing walls, beam, and boxed-in support posts had been previously decorated with a stucco-esque style of textured mud, painted glossy white. As such, any ceiling drywall adjacent to a textured wall could not be taped along the corner seam. Alternatively, I suggested we simply mount the drywall as close to the walls as possible, and first fill the gap with mud, then seal with caulk once the sanding stage was achieved. With the process established, work could begin.
The homeowner did a great job stripping the old tiles away and exposed the fir joists. However, it was soon determined that strapping would still be required because the old joists were not on equal 16-inch centres, and strapping would lower the new ceiling just enough to cover any wall edges that did not meet the current ceiling height. As such, 2x3 lumber on the flat was strapped perpendicularly to the joists at exact 16-inch centres along the length of the rooms. Boxes were then created around any ducts that protrude down past the ceiling elevation, in as lineal a manner as possible. Furthermore, the boxing was achieved as to meet the lowest edge of the ducting in any area, so the drywall can be mounted as high as possible without wasting height potential. And as a final framing step, base of the stairs was engineered to follow the slope of the stairwell ceiling until the very edge of the exposed ducting, which would all be hidden once the drywall was installed.
The old duct vents were abandoned, and new, round vents were strategically introduced on both side of the main beam, adorned with circular adjustable vent covers. The wiring for the new lighting was pre-run within the joists and strapping to the five locations along the hallway, and eight locations for the rec room. The dimmer switches for each circuit were adapted to the existing switch box, and tested with temporary lighting to ensure the circuits were fully functional before closing everything in with drywall.
A drywall lift was used for most areas that required full and larger sheets of drywall. It was much easier to manhandle the smaller pieces used to close in the box frames around the lower ducts. Once the entire ceiling was sheathed, a four-inch auger bit was used to create the holes necessary for the self-mounting four-inch round, slim LEDs that will illuminate the hallway and rec room respectively. All joining seams were taped, and outer corners fashioned with 90-degree cornerbead. Allowed to dry over the weekend, the following coats would be achieved systematically over the course of a few more days. Between coats, the LED light boxes were tied in to each respective lighting circuit and again tested for congruency. The LED were left to dangle until the painting stage was done.
With the final coat of mud dry, every visible mudded area was carefully sanded until flush with any adjacent visible drywall surfaces. Masking was applied on the walls along the entire perimeter, and caulk filled any remaining gaps between the new ceiling and textured walls. The entire ceiling was then primed, and given two coats of tinted ceiling paint in a ‘chalk’ color. Soon after the final coat had dried, the 13 LEDs pot lights were fitted into their predrilled four-inch holes, the two access panels were installed and the round adjustable, tension-held vent covers in the new ducting outlets would control the ventilation distribution at the turn of a knob. Basement ceiling success.
Although it was only the ceiling that received an update all that glistening white really gave this basement rec-room a new lease on life.
BossEnterprise@outlook.com