Photos by Marc LaBossiere / Winnipeg Free Press
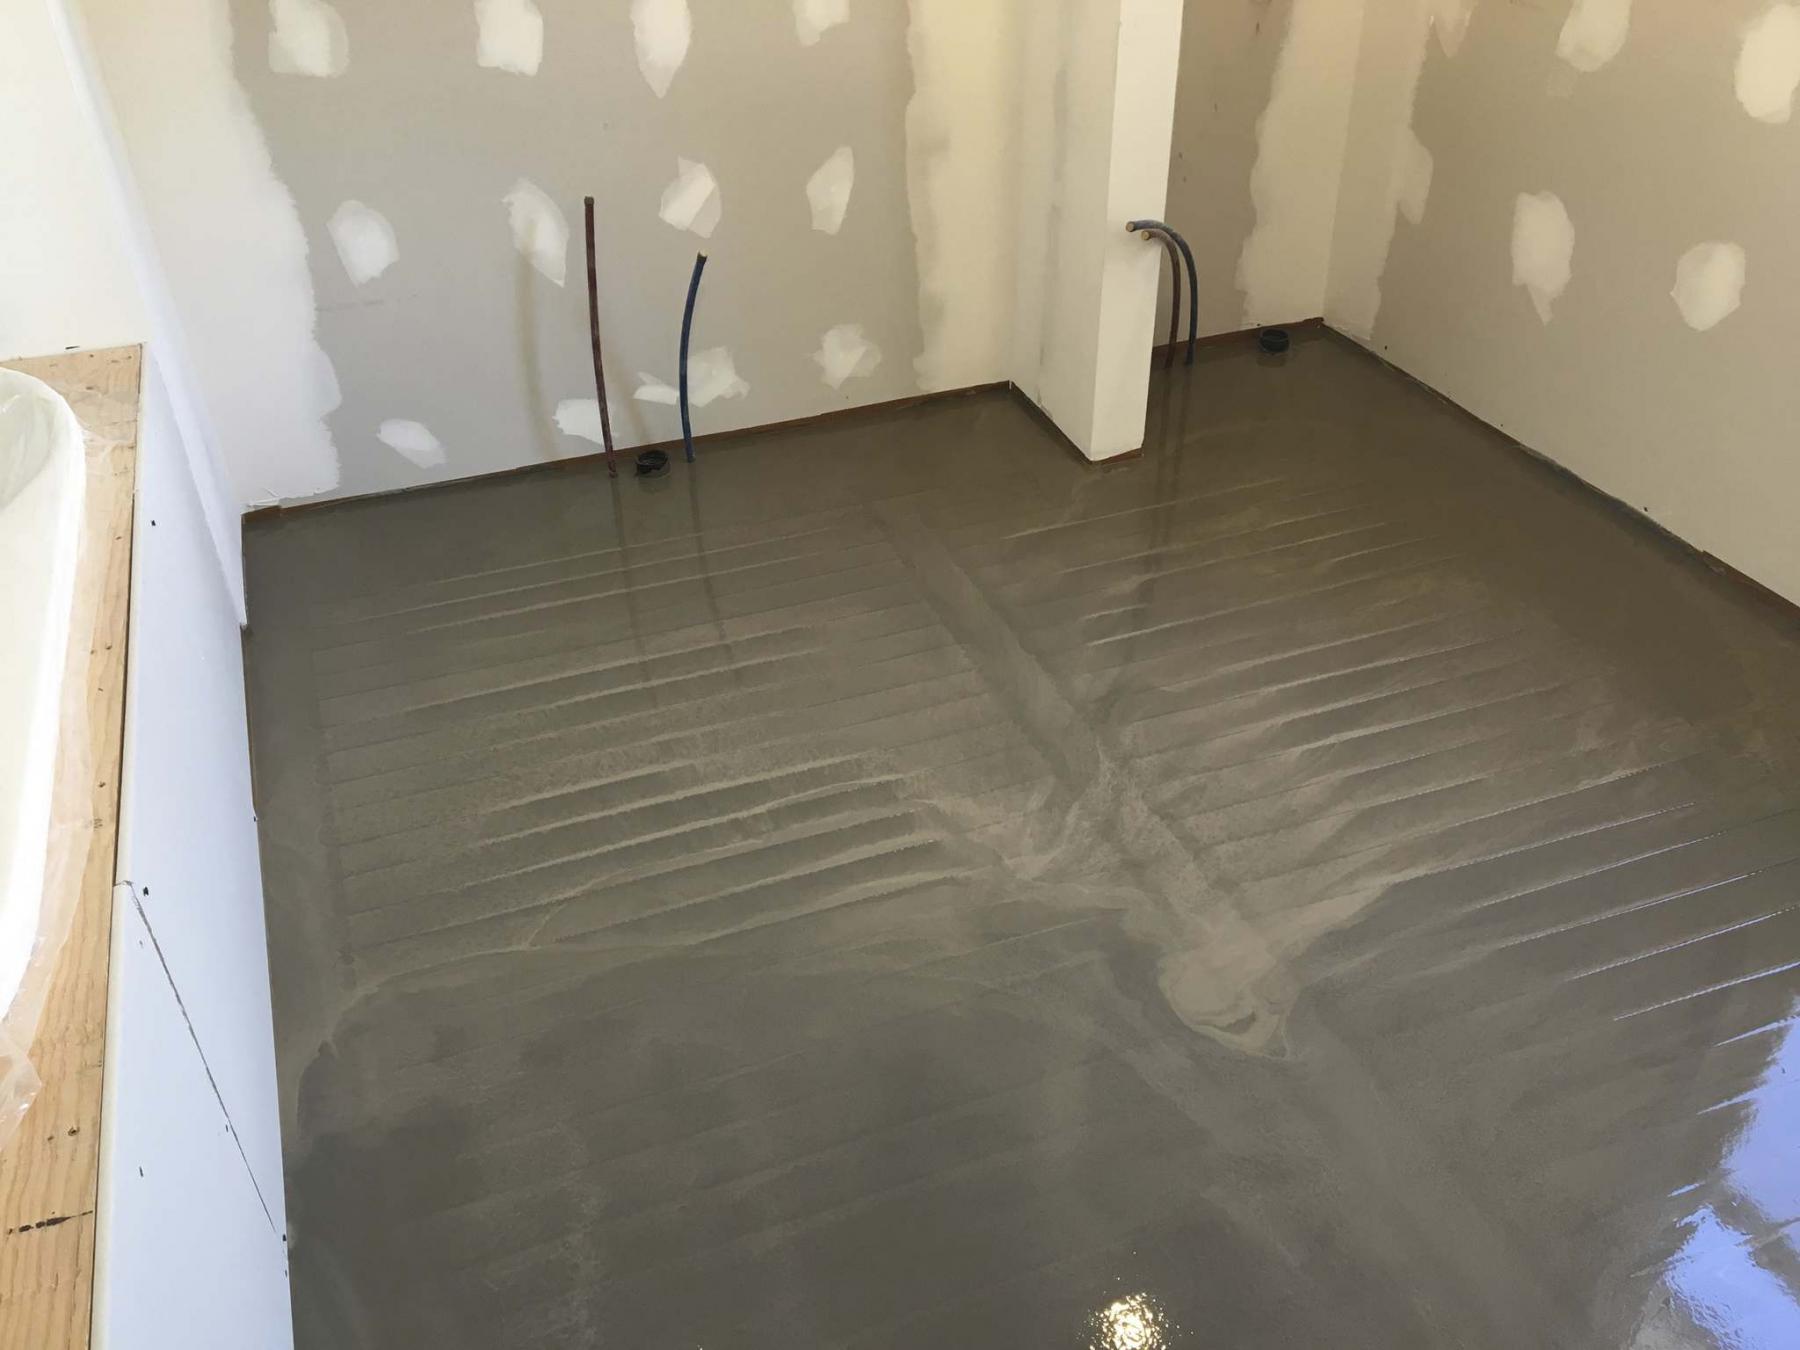
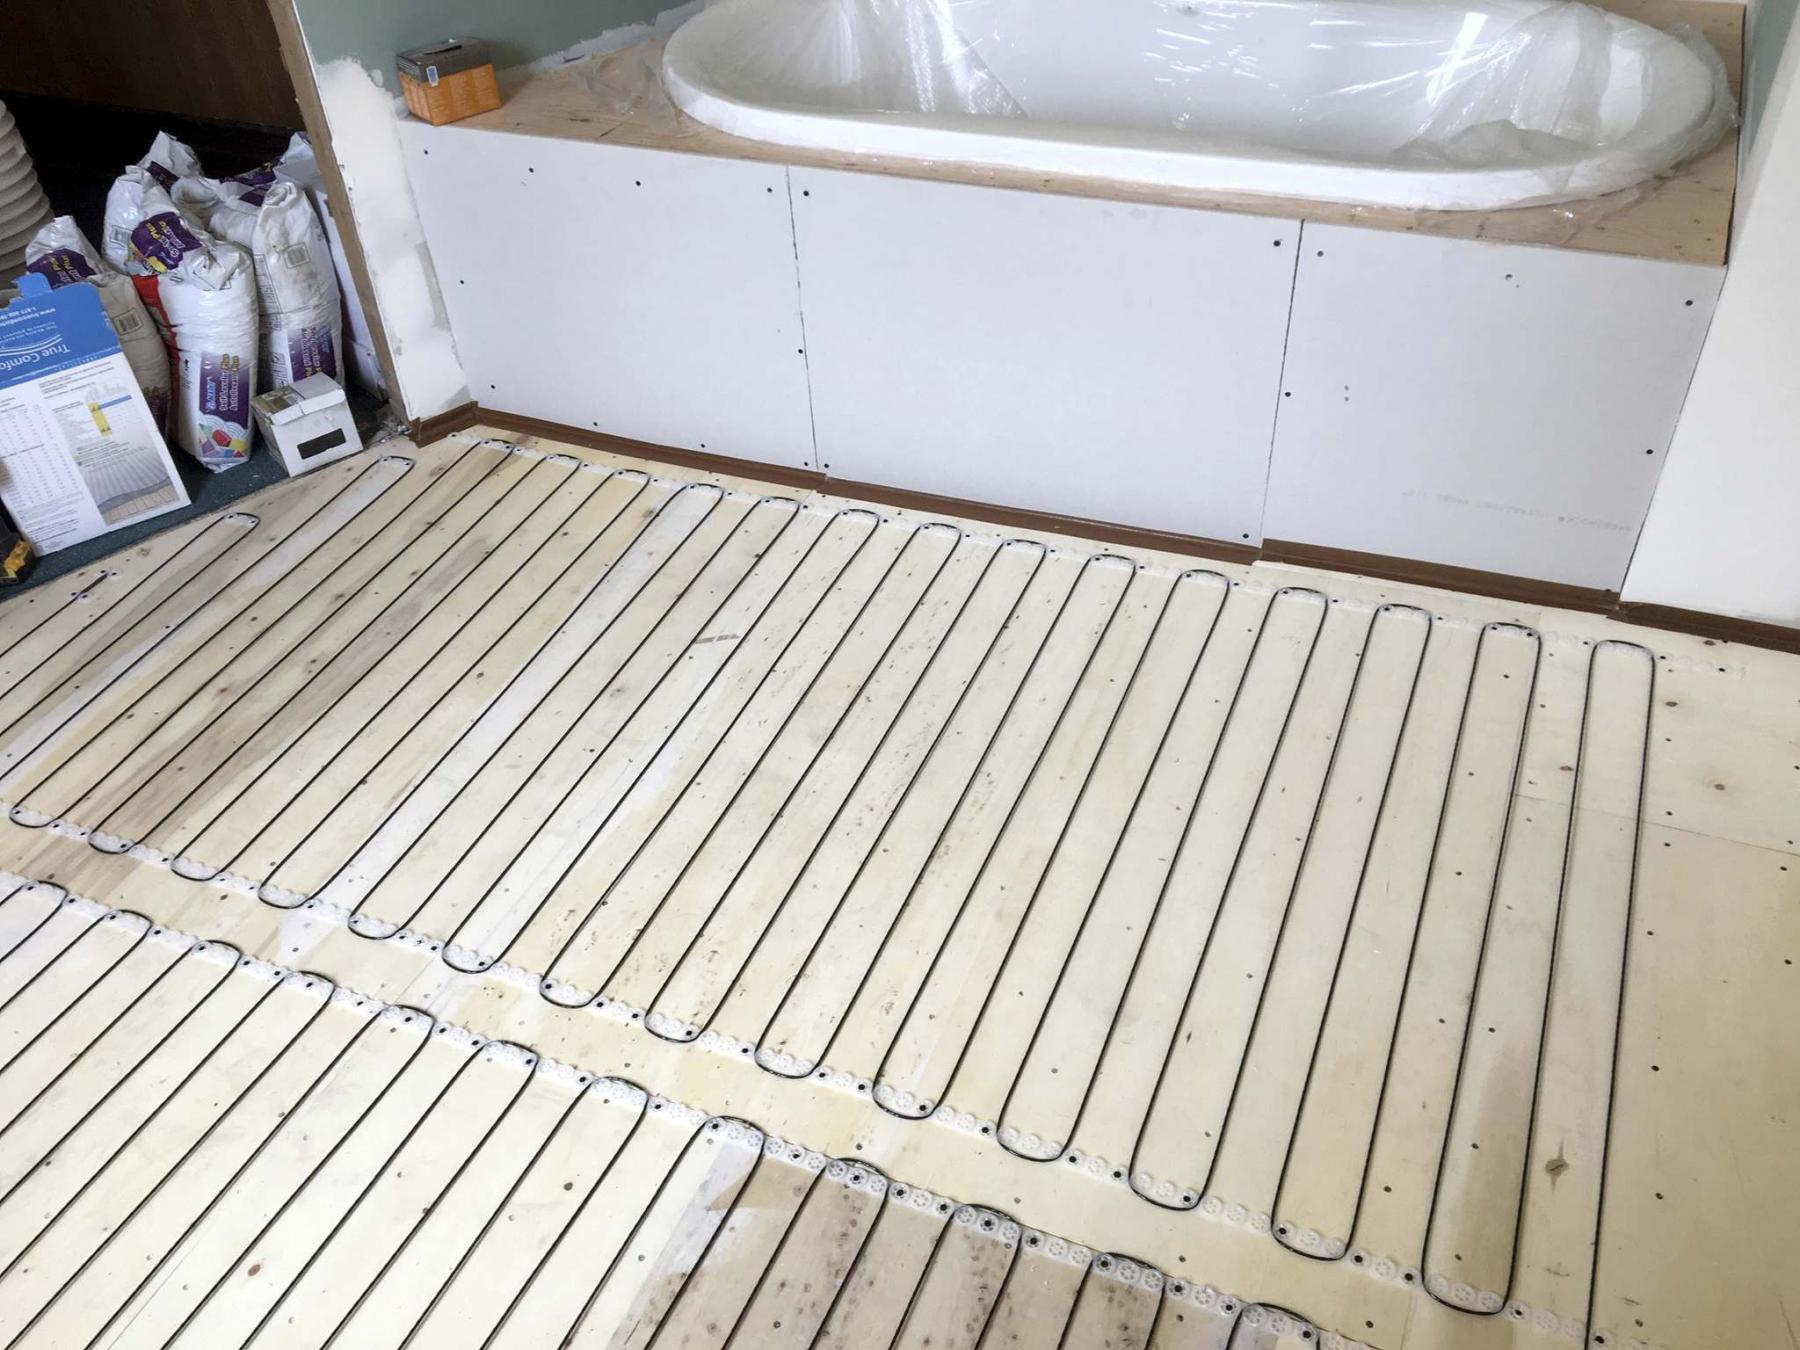
Once plumbing and electrical elements were run beneath the subfloor, a thin sheet of plywood was laid atop the existing subfloor on which the heating coils could be installed.
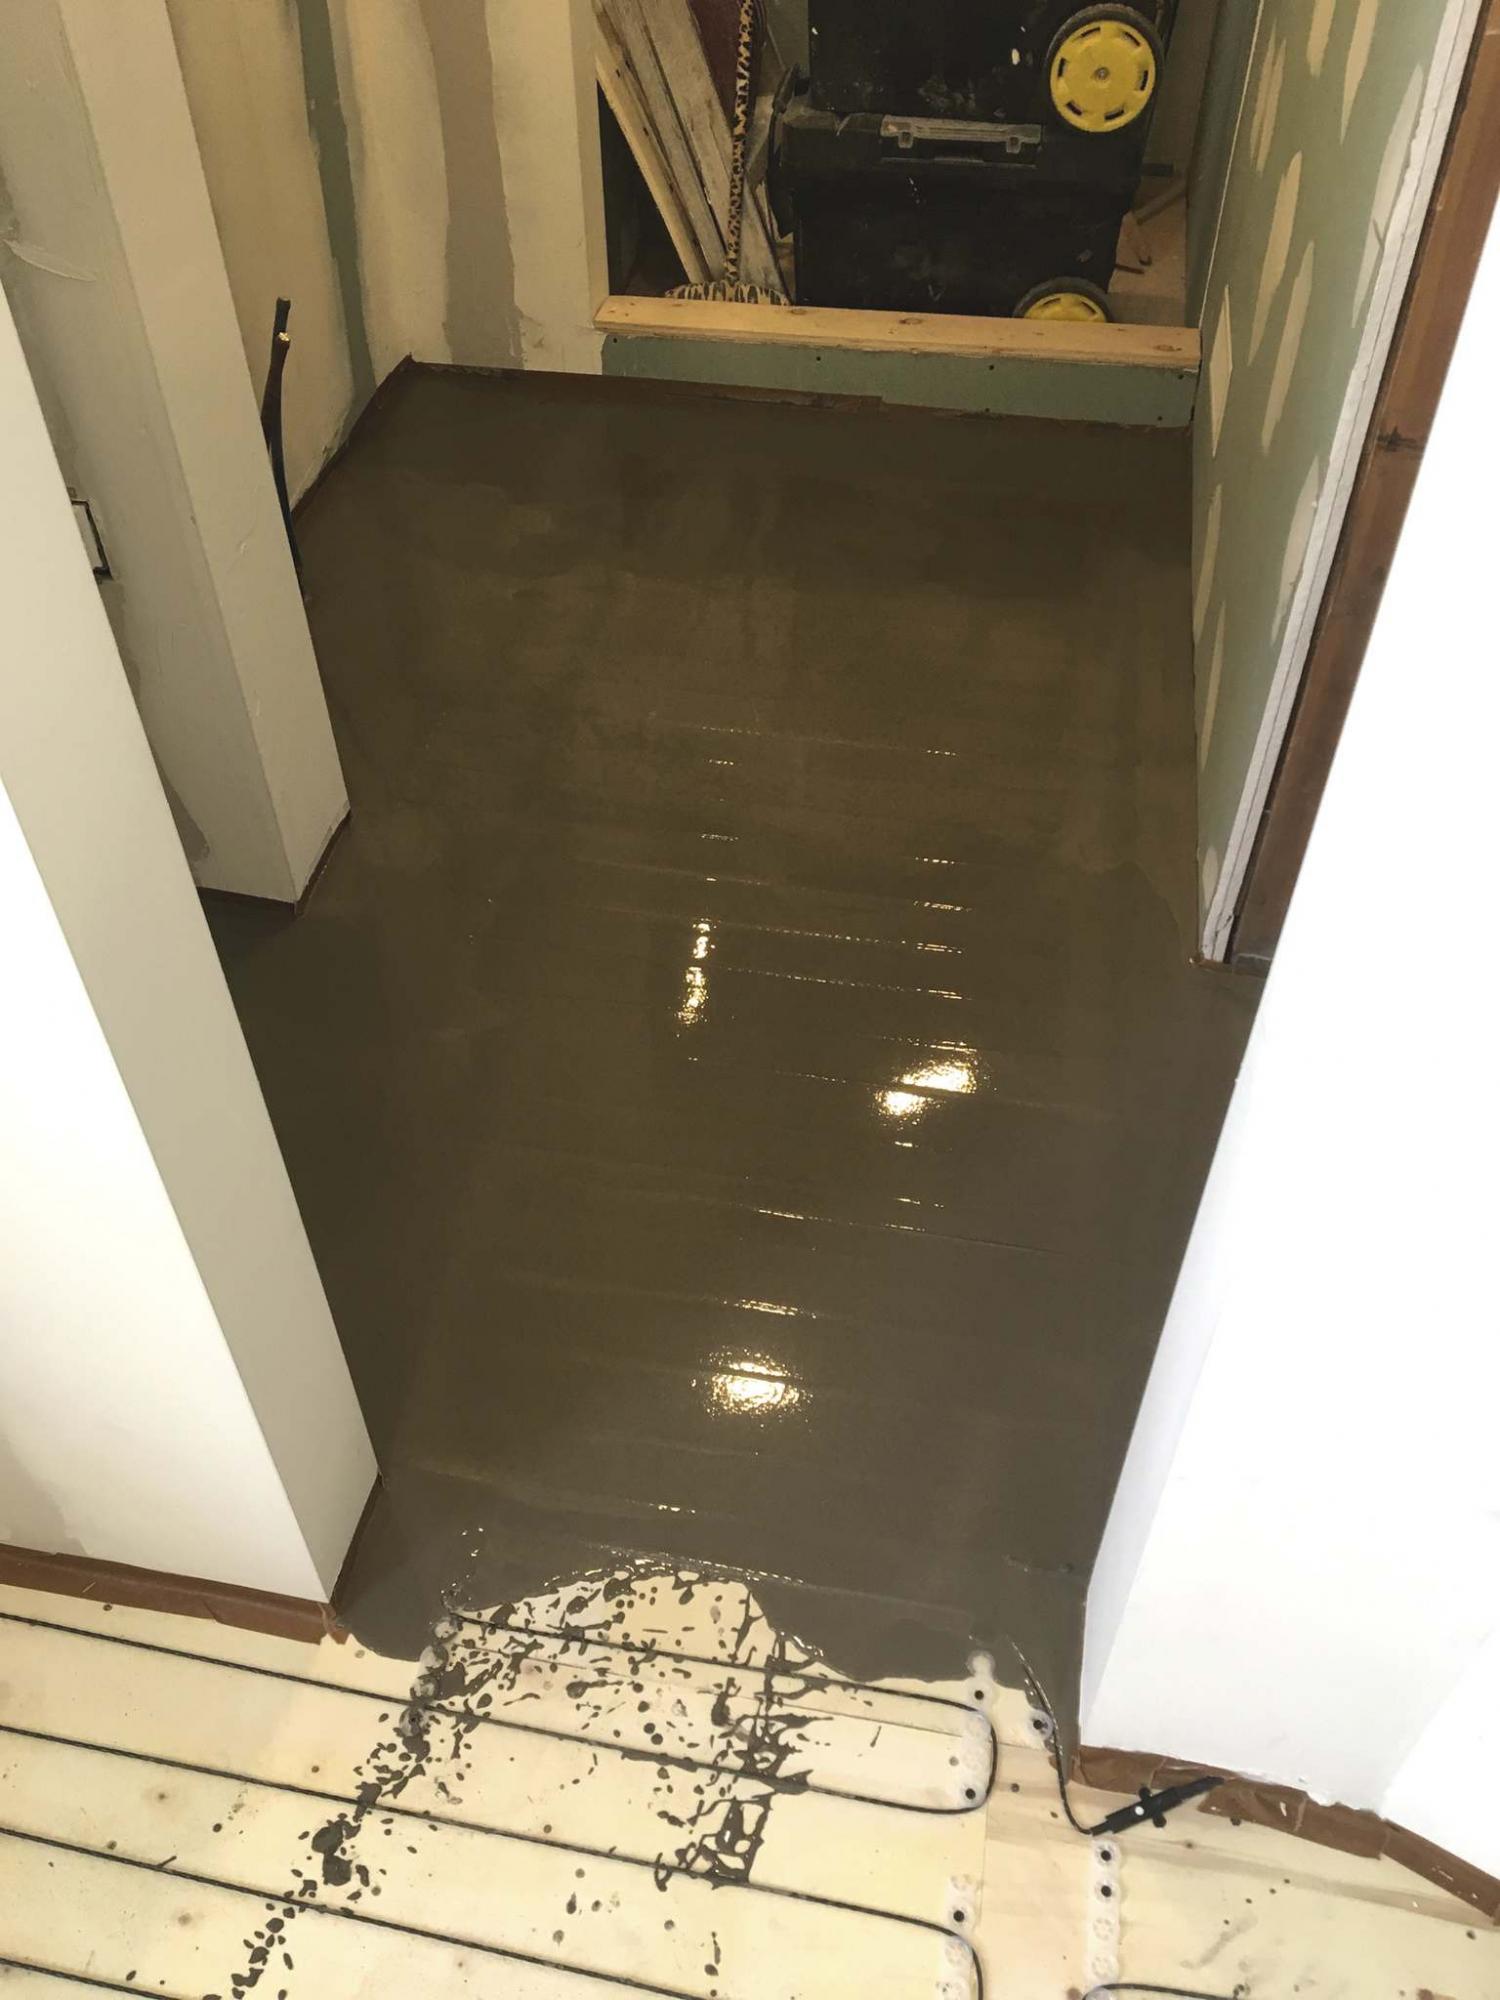
A thick mix was created with less water for easier manipulation of the self-levelling concrete, in order to cover the coils but not lose all the leveller to the lowest point of the floor.
Using self-levelling concrete is an economical way to achieve a level floor — in most situations. It is important to remember, however, that the existing subfloor and perimeter must first be properly sealed. Otherwise, some of the levelling compound may escape.
And when the grade or slant of the existing subfloor is somewhat heavy, the leveller may pool beside the floor of an adjacent entryway, causing an unwanted discrepancy in floor height.
If that happens to be the case, should you then abandon the idea of using floor leveller altogether?
During a recent six-piece bathroom renovation-expansion on the second floor of a house built in 1906, the subfloor of the space was in visibly rough shape. The introduction of all plumbing and electrical elements was achieved by creating access areas through the subfloor, in the various locations required. Once patched, a thin quarter-inch plywood was applied throughout the 150-square-foot space. This step provided a smooth surface on which the heated floor coil could be installed. An isolated circuit, directly from the electrical panel, had been run into the wall cavity separating the two main areas of the bathroom, terminating in an electrical box which would house the programmable thermostat. With the electrical floor coil in place, and the thermostat’s floor sensor secured between two parallel lines of coil, it was time to pour the self-levelling concrete to conceal the coil before the tiling process could begin. It was clear from the onset that this would not be a standard pour, due to the slant of the floor.
Over the decades, the weight of each of the three floors of the house had taken its toll on the floor joists throughout the house — as you move away from the exterior walls, the floors slope towards the middle of the house. The six-piece bathroom reno is situated along an exterior wall, and the discrepancy in floor elevation from the exterior wall to the far side of the room is seven-eighths of an inch. Theoretically, pouring self-leveller until the floor was completely level was doable, but would result in a jump of nearly an inch of floor height when entering the bathroom from the hallway, and that’s before incorporating the three-eighths of an inch of tiling. This was unacceptable.
A non-traditional approach was required.
Normally, self-levelling concrete is prepared by mixing water until a very fluid consistency is achieved — this allows for the best levelling results. In this instance, however, I elected to mix each batch with less water than usual. By doing so, the leveller remained thick and much easier to manipulate. It was pushed into the far corners and poured in such a way as to adequately submerge the heated floor coil, all while controlling the amount of leveller travel.
In other words, although the leveller attempted to flow towards the lower points of the floor, the thicker consistency allowed it to set much faster where it was needed, as each batch was trowelled accordingly to cover the floor coil. After several batches mixed until the entire floor was covered, the results were quite satisfactory.
Although the floor slant could not be eliminated, the two primary goals were achieved nonetheless. The electrical coil for the heated floor was completely covered, and the cured leveller provided a smooth surface on which tiles could be set, despite not being able to rid the floor of the heavy slant that exists from exterior walls towards the centre of the house. It isn’t an ideal situation, and an unconventional approach was required.
Luckily, a hex mosaic tile was chosen for the floor — unbeknownst to the client, this was the perfect choice for this flooring scenario because it easily conceals any minor contours and discrepancies of the subfloor below the tile.
I suppose it was all just meant to work out in the end, and it did.
bossenterprise@outlook.com