Today we are witnessing a resurgence of this tiny-tile style in our own homes and gardens. Mosaic tile detailing has now become a staple in bathrooms, on floors and walk-in shower compartments. Nautical and water motifs -- jumping fish, sea shells, sailboats and anchors can be drawn with tiles to become the focal point amid simple, larger tiles. The kitchen backsplash is another focal area to cover with a striking background of mosaics -- a solid strip of metallic bronze or silver looks strikingly rich and contemporary. Mosaic tiles make an excellent border detail for floors in a hallway.
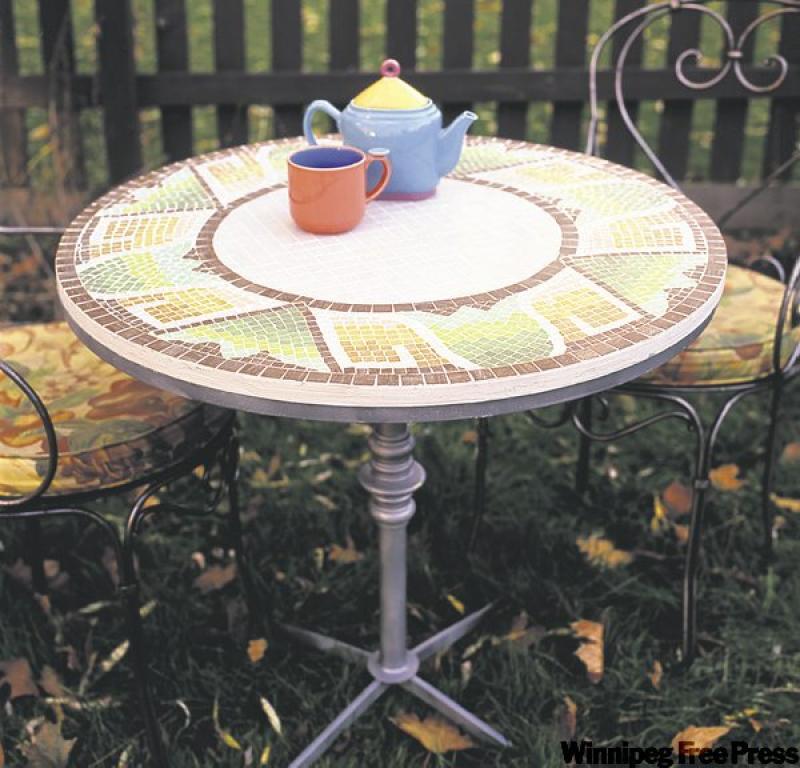
Applying mosaic tile to a large area, wall, floor or ceiling is a huge undertaking that is expensive. But mosaic tiles can be employed to decorate furniture and accessories. This is an art or craft form that takes as much patience as it does skill. Here's a perfect summertime project for you (and the kids). A mosaic garden table is just the right size to start, and chances are good when the table is finished, that you will have a family heirloom filled with memories that you have woven into the design.
Mosaic patterns can be produced with a vast assortment of materials, including glass, ceramic and metal tiles, pebbles, shells, even semi-precious stones. For a tabletop, you will want tiles with a smooth, flat finish so that your top will be even. Save uneven and textured tiles for walls and accessories. You can buy bags or kits of coloured glass tiles at art and craft stores. For covering larger surfaces, mosaic tiles are sold in blocks for faster installation. These are sold at flooring, tile or building stores.
For me, the most fun bit is making up the design. You can incorporate ancient patterns and modern motifs, your favourite colours, abstract shapes and familiar designs to create your own work of art. The Internet is a great place to explore design options. You'll find illustrations of ancient patterns for the Greek key and the guilloche pattern (twisted rope) along with designs for cats, fish, people... most anything you can draw. Two helpful websites are mosaic-tile-design.com and thejoyofshards.co.uk.
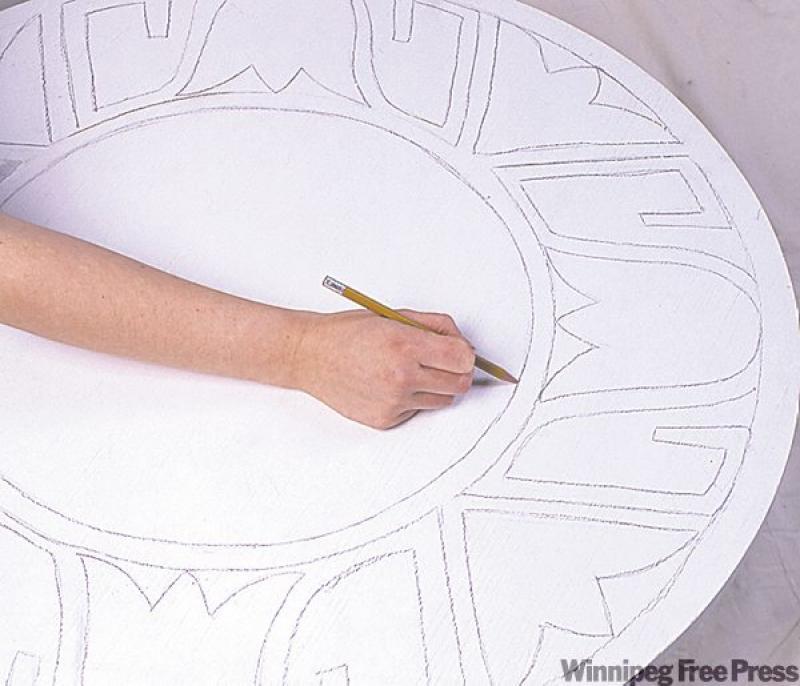
To make the garden table shown here, I started with a piece of one-inch plywood cut to fit over an existing table, and primed the wood. If you are working on an old tabletop, sand smooth first and then apply high-adhesion primer. Do some sketches on paper of the overall design until you are satisfied with the result. Use coloured pencils to mark where you want each colour block of tile. Then draw the design outline onto the primed surface with a pencil and ruler, using your paper design as a reference.
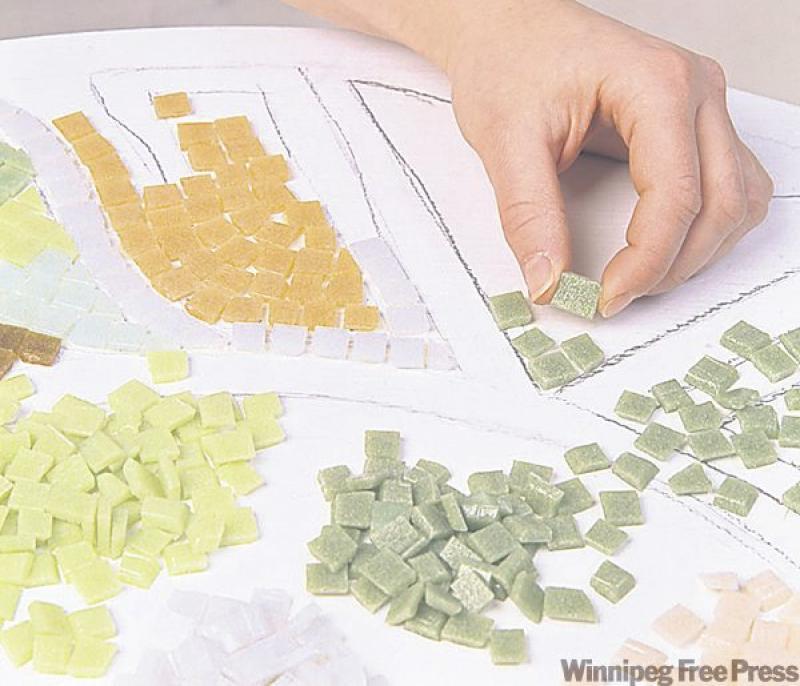
Assemble the tiles in place on your design, cutting tiles to fit where necessary. Tiles can be set at random angles, mixing colours and shapes. Leave a small space between each tile for the grout.
Working in small sections, as the adhesive dries quickly, remove the tiles you have set into position, spread a 1/8-inch layer of tile adhesive on the tabletop and a dab on the back of the tile and press into position. When the tiles are all on, let dry for several hours. Spread exterior grout over the whole surface, pressing it into the cracks between the tiles. Let dry for about an hour, then use a wet sponge to wipe the grout off the face of the tiles.
Debbie Travis' House to Home column is produced by Debbie Travis and Barbara Dingle. Please e-mail your questions to house2home@debbietravis.com.