Photos by Marc LaBossiere / Winnipeg Free Press
The new exterior door installed at the cottage includes an inset windowpane with mini-blinds.
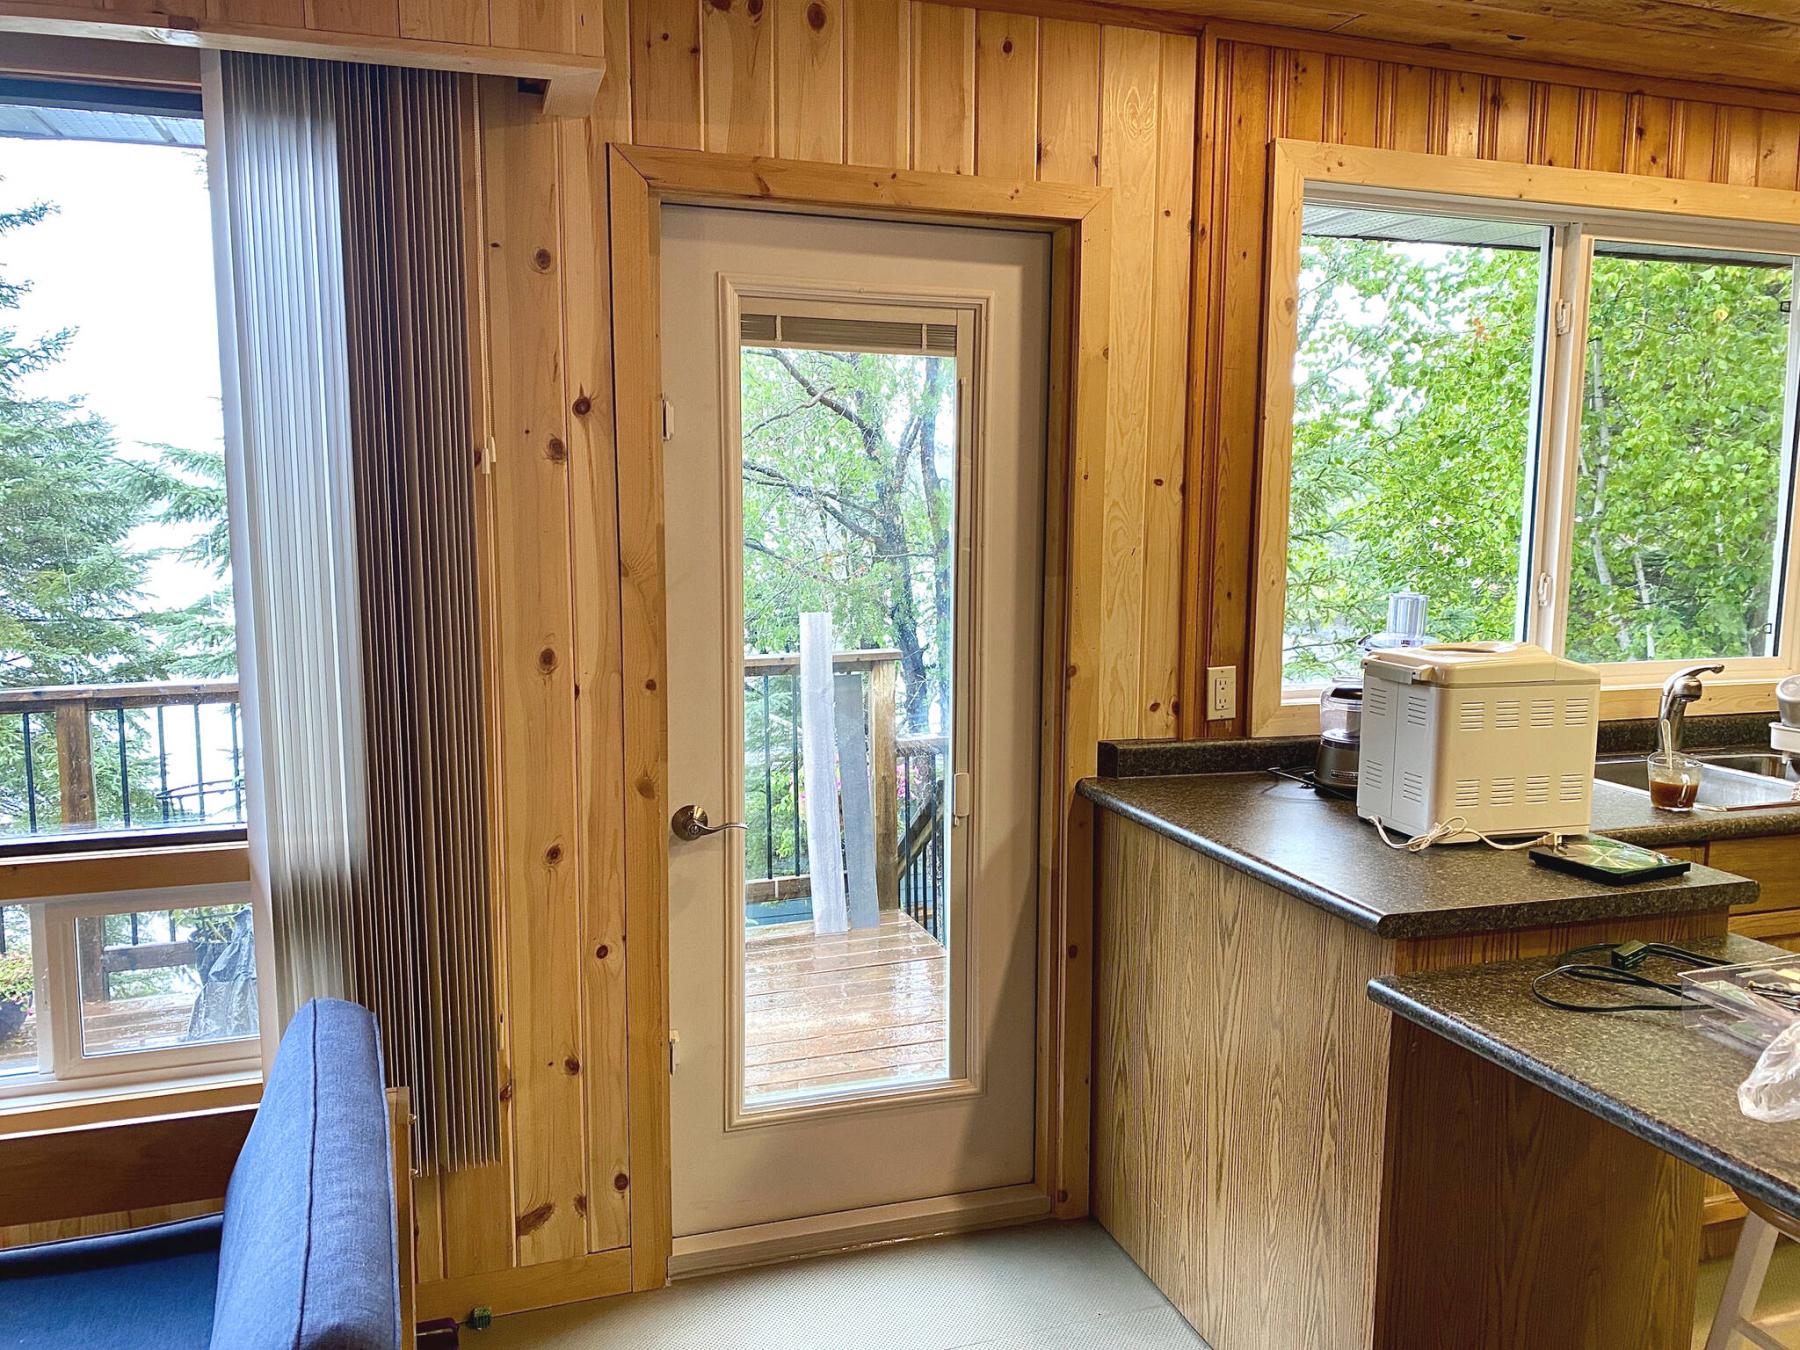
The new door and jamb slid easily into the existing rough opening.

Marc never get tired of the scenery when on site for cottage upgrades.
Working at a boat-access only cottage always presents a few challenges — the logistics of ensuring delivery of the required materials usually tops the list of hurdles. At a recent cottage upgrade, the cottage owners wished to update both their main entryway door, as well as the storm door located at the back porch. The respective doors were chosen, and promptly ordered. Upon delivery of the doors to their residence in Winnipeg, transporting the doors to the cottage would occur in a few separate stages.
The existing main entry of the cottage consisted of an old and tattered storm door with screen, along with the main door that swung inward towards the kitchen. To get any light or air movement within the cabin from this area, the exterior door would remain open, partially obstructing the view of the living room, and newly completed stone-clad custom fireplace. This door truly did truncate the space in a very obtrusive manner. My clients wanted to replace the existing main exterior door — a glass panel door with mini-blinds set within the pane was ultimately chosen. Furthermore, this new exterior door and jamb would provide an outswing, thereby no longer blocking the interior space as the existing door had for decades.
The other door replacement simply involved swapping out an old storm door at the back porch, with a new one that has a glass panel that slides down, releasing a screen from a roller dispenser mounted along the top of the door frame. Although it was a rather straight-forward swap, the new door was assembled on site. The tricky part was drilling the 12 holes, varying in sizes from 3/8” to 3/4” to mount the handle and locking mechanisms (not pre-mounted, because the door comes reversible). Fortunately, the tools that had been pre-packed for the trip from the boat launch to the cottage were sufficient to achieve that end and the new storm door was successfully mounted later that day. The door sweep was added along the bottom and the piston was tested and adjusted to ensure it closed the door after each use. The cottage owner had gotten the storm door to the cottage location on his own, several weeks prior — I didn’t know what was contained in the box until it was opened that day.
As for the exterior door, it would have been too heavy and bulky for his vehicle. As such, I stopped by his house early the morning of the intended installation date to load the new door into the box of my pick-up. Due to the sheer girth and weight of this pre-hung door and jamb, it was a two-man job hoisting it into my truck, and subsequently loading it into the boat for the ride out to the cottage location.
Once at the cottage, preparations for the front entryway upgrade began by ensuring the measurements of the rough opening would accommodate new door and jamb — there is nothing worse than removing and old door prematurely, and then finding out the new door isn’t going to fit properly. No matter, the rough opening was as expected, and the new door would simply slide into place following a few slight modifications. The old front storm door was first dismounted from the exterior brickmold. Then, both interior and exterior trim were removed. The old exterior door was released from the hinges and the jamb cut out completely using a reciprocating saw. Once the measurements were reconfirmed, the new pre-hung door and jamb were set into place, leveled to ensure plumb, subsequently secured to the rough opening using three-and-a-half inch screws. The exterior trim was then re-installed with only a few minor modifications required.
With the casings still lying in wait, the gaps along the outside of the jamb and rough opening were reenforced with additional shims, and the cavities filled with insulation. The interior casings were then mounted using a Brad nailer, in virtually the same position they had been along the perimeter of the old door. As such, it was not necessary to customize any trim, which would have complicated the process on this boat-access only jobsite. The final step was to caulk the interior threshold along the floor. The ability to open and close the mini blinds within the new door’s pane of glass provides superior function. And although the door no longer offers a screen, the adjacent windows installed last season all provide sliders with screens. Most importantly, the new front door, when opened or closed, no longer blocks the area between the kitchen and the living room. When standing back and looking towards the newly installed door, the cottage owners marveled at the upgrade and voiced how they wished they had tackled this sooner. It’s like a brand-new space, and makes the cabin seem bigger in some way. In the very least, definitely more functional and aesthetically pleasing.
Working out at the cottage is always a pleasant experience, despite the stress induced when sorting out the logistics to ensure what’s needed on site, is on site when it’s needed. And although it was a rainy day from dawn until dusk, the doors installation process provided just enough shelter to keep me relatively dry. I can’t forget to mention the hospitality offered by the cottage owners throughout the day, including a wonderful meal, and storytelling. Mostly, I’ll remember the look of satisfaction on my clients’ faces as I left the cottage, as though things were finally right with the world — all because the new doors spruce up the cottage so well.
RenoBoss.Inc@outlook.com