Marc LaBossiere / Winnipeg Free Press
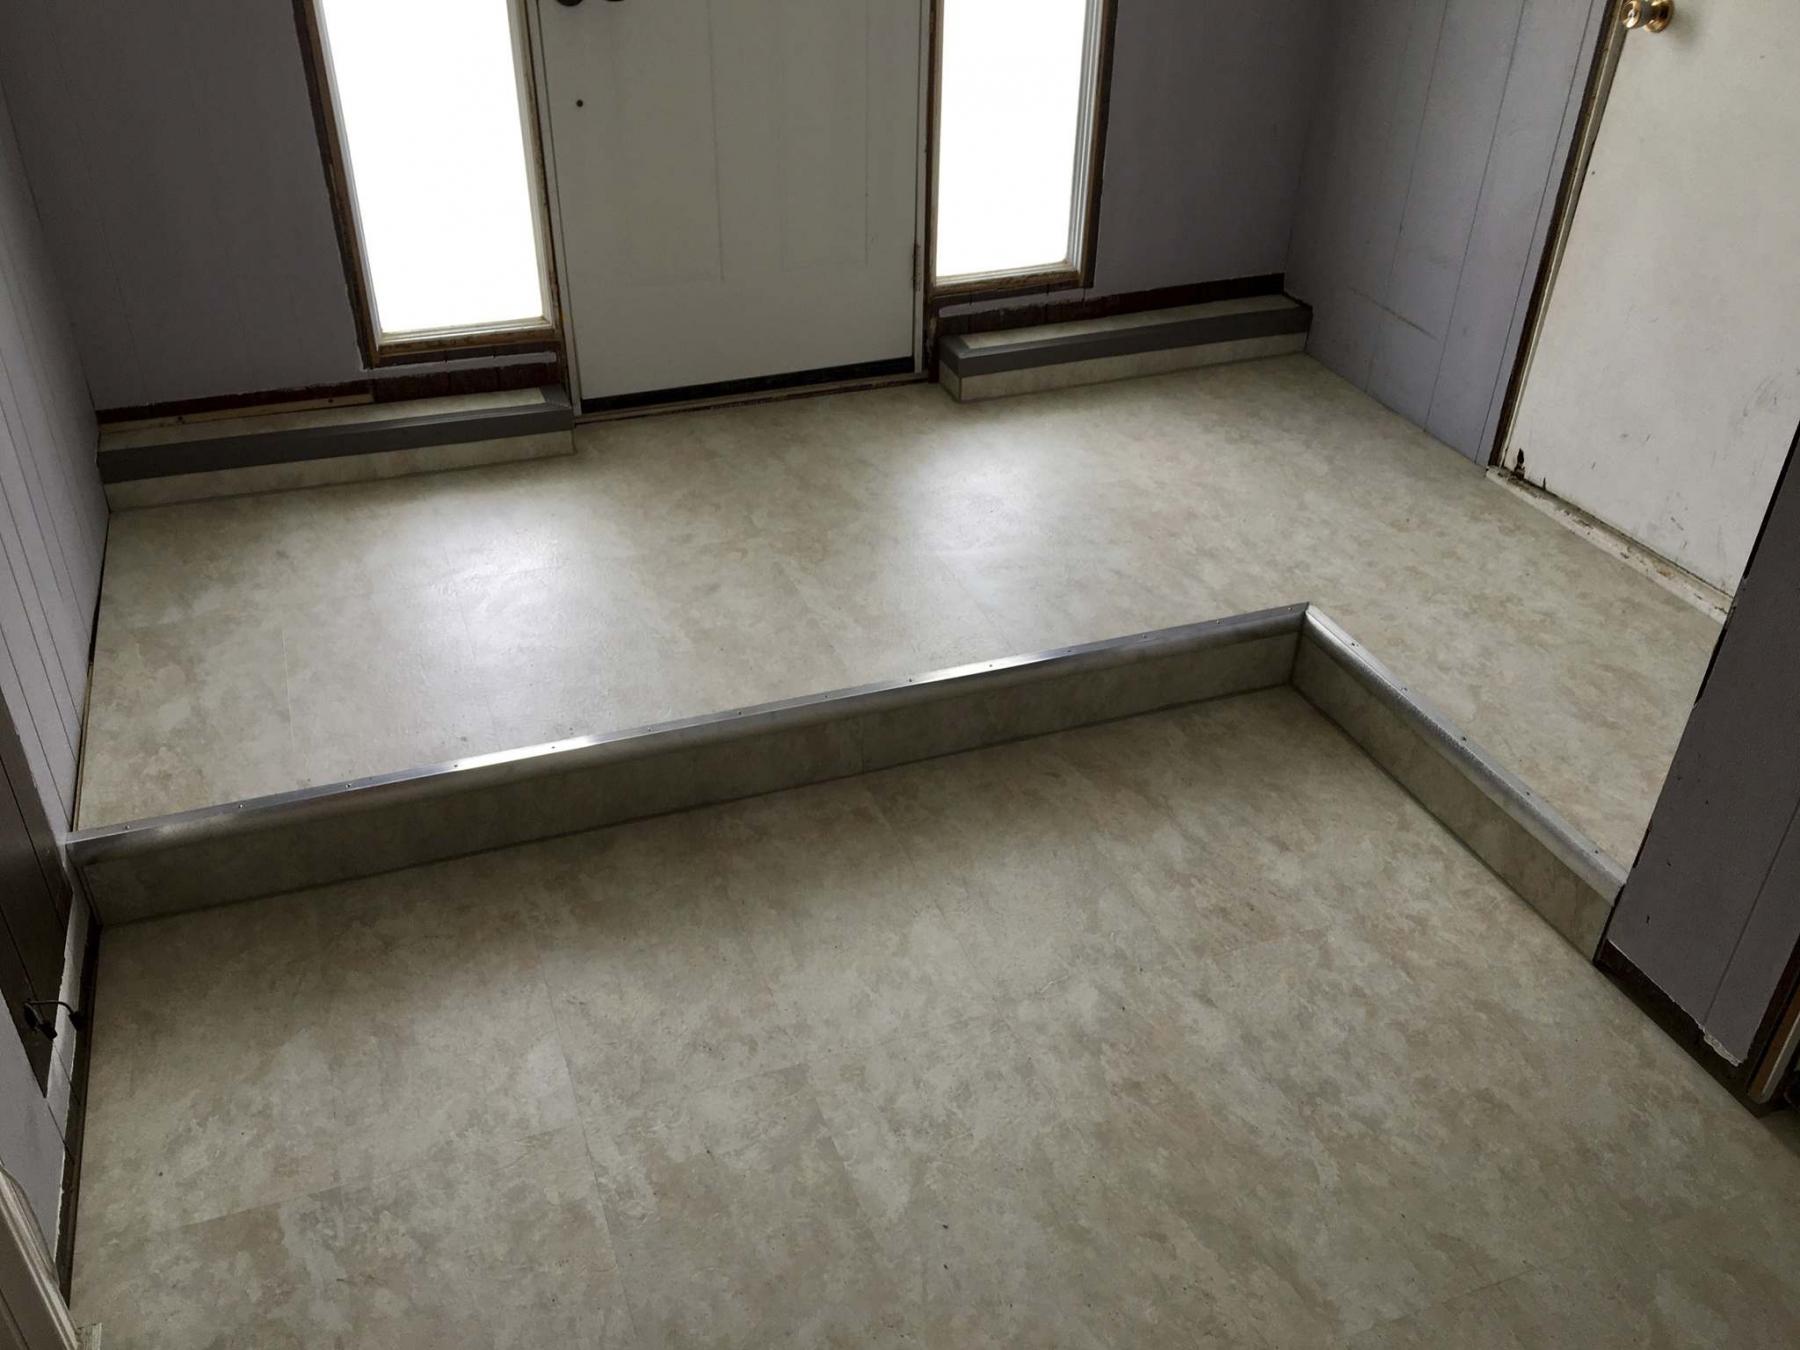
New laminate flooring and aluminum nosing finish the L-shaped upper step of the foyer.
Marc LaBossiere / Winnipeg Free Press
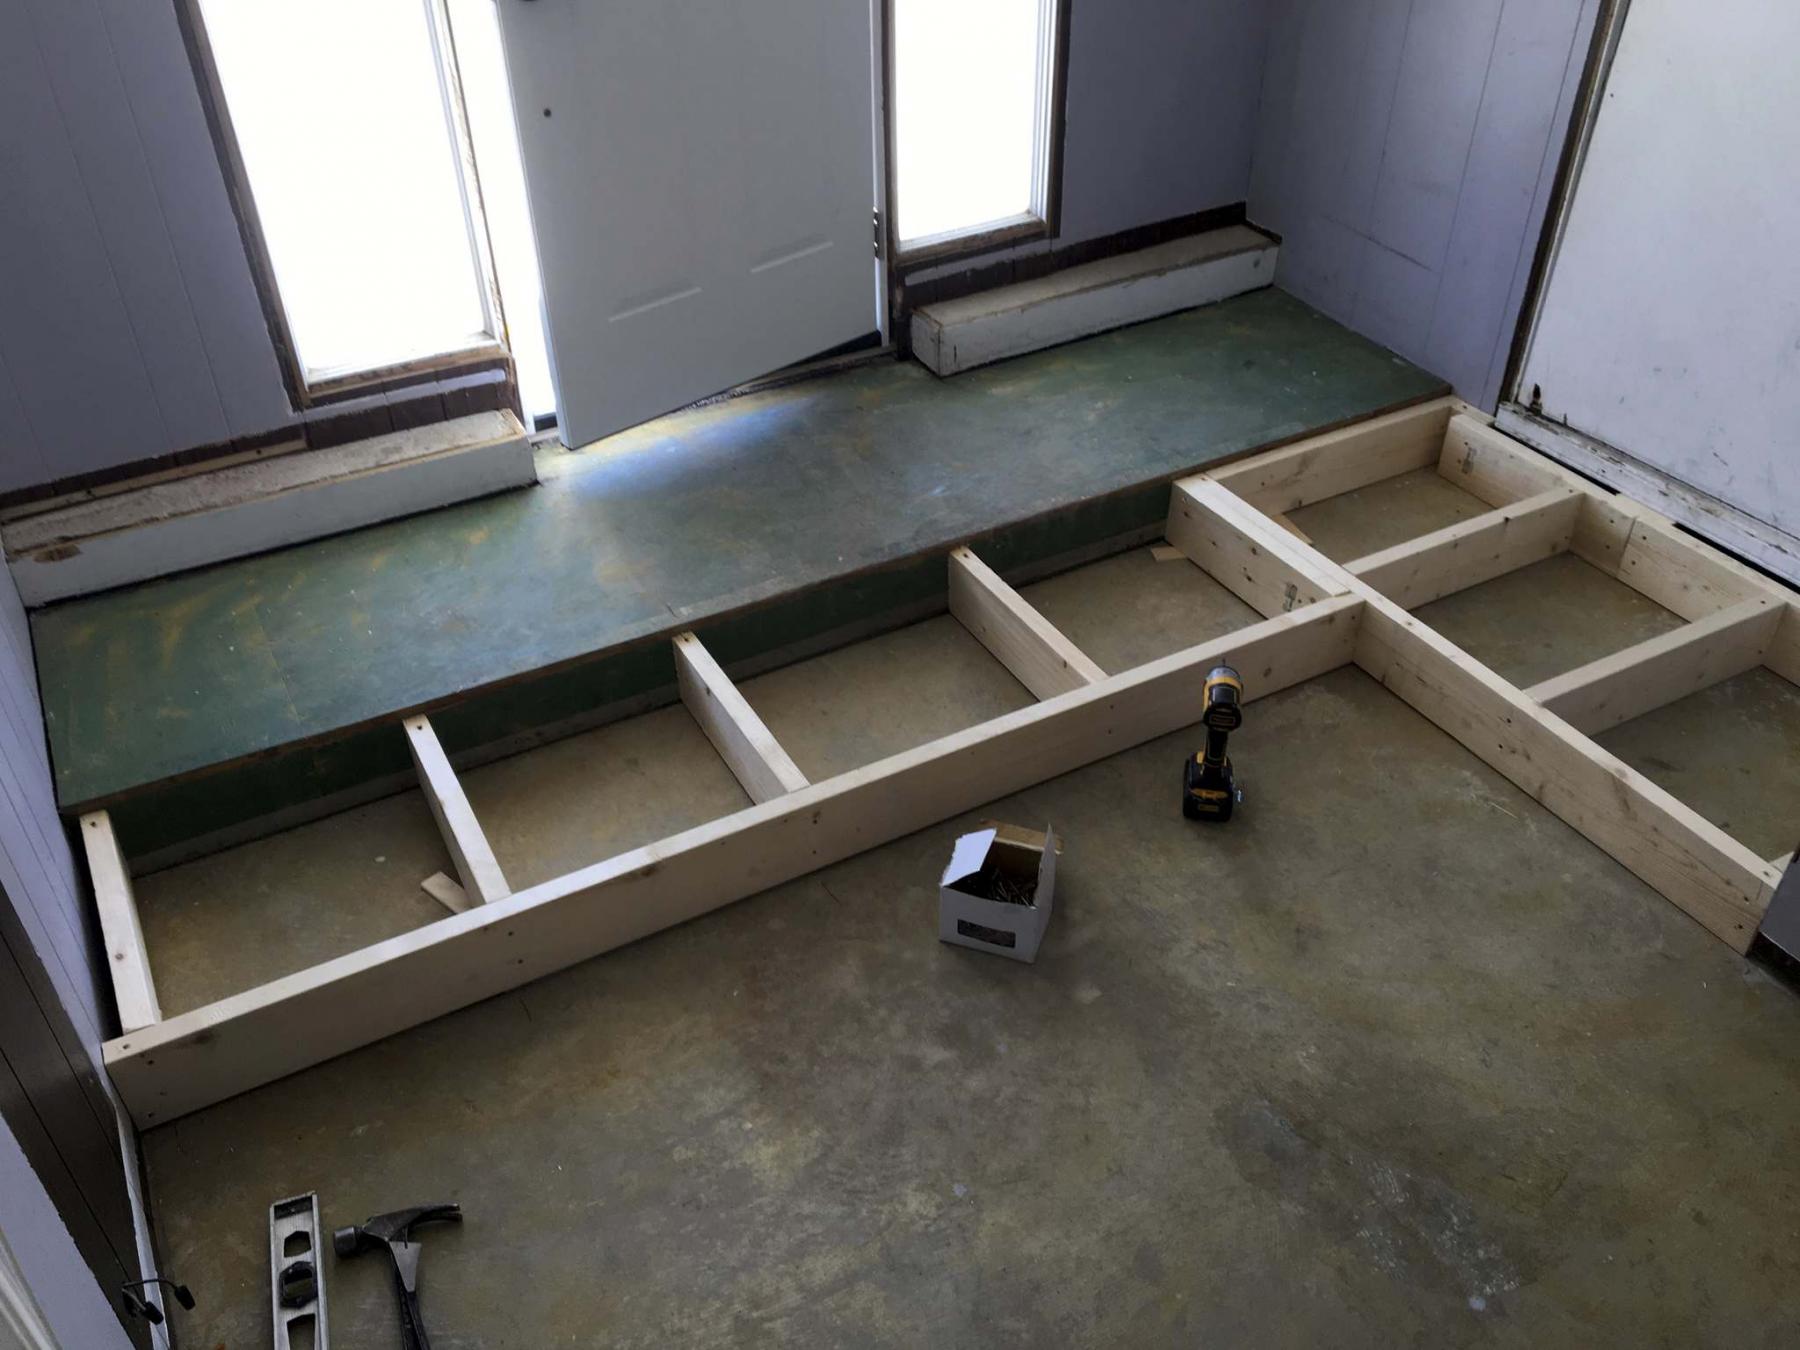
To follow the lower floor’s grade and contour and meet the upper step’s elevation, boards were ripped and shimmed as needed.

Marc LaBossiere / Winnipeg Free Press
The new door was secured within a carefully prepped rough opening.
When the main entry door to the house begins to malfunction, the obvious solution is to completely replace the exterior door and jamb. To complete the upgrade improvements to the foyer floor may as well be tackled at the same time. At a job site this past July, the door replacement was anything but typical.
The landing expansion of the foyer didn’t concern me much. The exterior front door, on the other hand, was a different story. Normally, replacing a self-standing door would entail removing the trim inside and out, and subsequently disposing of the entire door and jamb unit. Once the rough opening was prepped for the new door unit, the jamb would be secured to the existing framing after being levelled, and the inner and outer trim could then be re-affixed respectively.
The front-door unit had been custom built within exterior brick, including side-light windows on either side of the door. The existing door jamb also doubled as the inner supports of both windows. To replace just the door required some serious lumber surgery. The trim was carefully removed to be reused, and the old door was taken off its hinges to reveal the entire jamb structure. In order to not disturb the windows on either side, the custom jamb was slowly ripped along the vertical edge of the inside lip to a depth that was required for the new door and jamb unit to fit flush along the inner framing once set into place. With the new rough cavity prepped, the door was leveled using shims, and secured into position using 3½-inch screws at three locations on each side of the jamb.
Due to a height discrepancy introduced by replacing the door, additional framing was added below the aluminum door threshold, contoured slightly along the bottom edge to mimic the slight grade of the concrete walkway. The interior casing was re-attached along the inner perimeter of the door, and the exterior vertical trim was then secured along the left and right sides of the door jamb, adjacent to each of the windows respectively. Every joint was caulked, and the area was finished to paint-ready.
With the new door in place and awaiting a new doorknob and deadbolt, it was time to tackle the foyer inner landing. The existing full-width and barely two-foot-deep step upon entering the foyer had proven to be impractical — another door adjacent leading to the attached garage was framed at the same elevation as the front exterior door. Yet, the step did not continue to this location. It was high time to remedy this matter with a better landing/step layout. After a brief consultation with my client, my suggestion to create an L-shaped step that included the door to the garage was eagerly adopted, and I promptly got to work.
To meet the elevation of the existing step, two-by-six boards were ripped slightly in accordance to the slope of the lower-level floor, and shimmed where necessary to ensure rigidity. The new portion of the landing was framed three-quarter inches lower than the top of the existing step. With the new plywood affixed to the top of the new landing framework, both old step and new merged to a flush elevation. The vinyl laminate chosen for the area was first installed along the upper tier, and continued along the lower tier and into the closet. Once the fascia of the upper step was finished with laminate, the 90-degree edge was fitted with an aluminum nosing. Other custom elements below each window were also finished with laminate and nosing. All inner seams were then caulked to prevent any water breach during the wet seasons. This now-functional area was ready for new paint and baseboards.
A functional entryway only requires a couple of essentials: a working exterior door, and a proper interior layout that maximizes usable space. Prior to this modest upgrade, my clients’ foyer had neither. The not-so-simple front-door replacement was achieved without having to replace the entire custom door plus side-light windows unit, which would have been extremely costly. And by adding to the existing step to create an L that ties in the door to the garage, the improved floor space is better suited for a foyer and mudroom.
A functional and cost-effective upgrade — music to my clients’ ears.
BossEnterprise@outlook.com