MARC LABOSSIERE / FREE PRESS
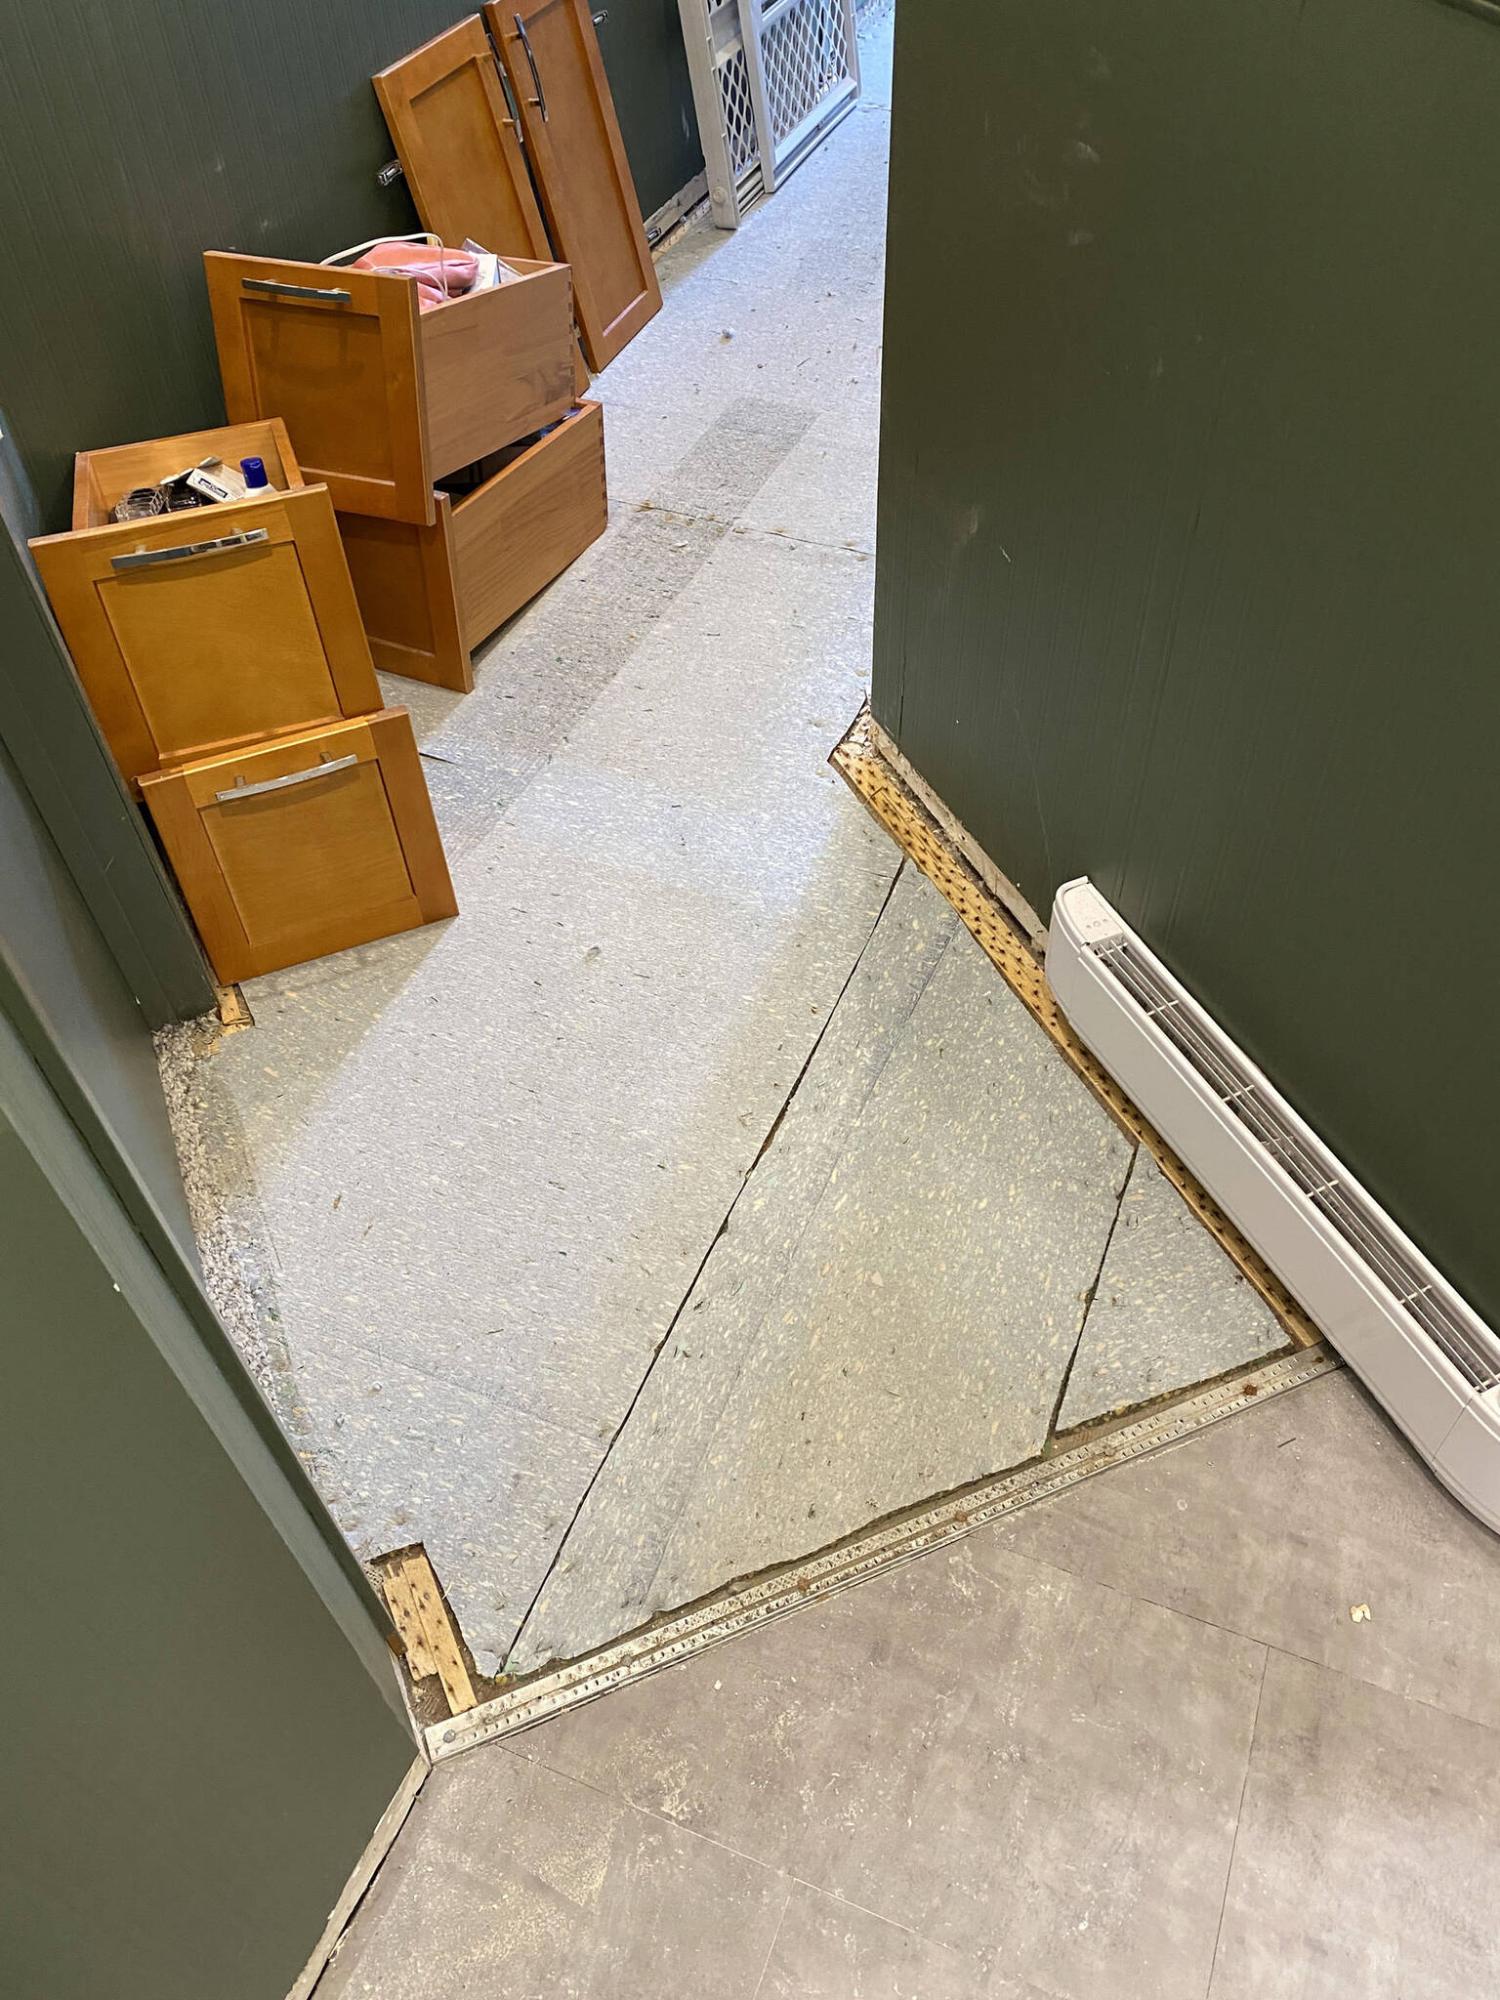
Linoleum on secondary sub-flooring which met the carpet elevation, were removed prior to vinyl-plank installation.
MARC LABOSSIERE / FREE PRESS
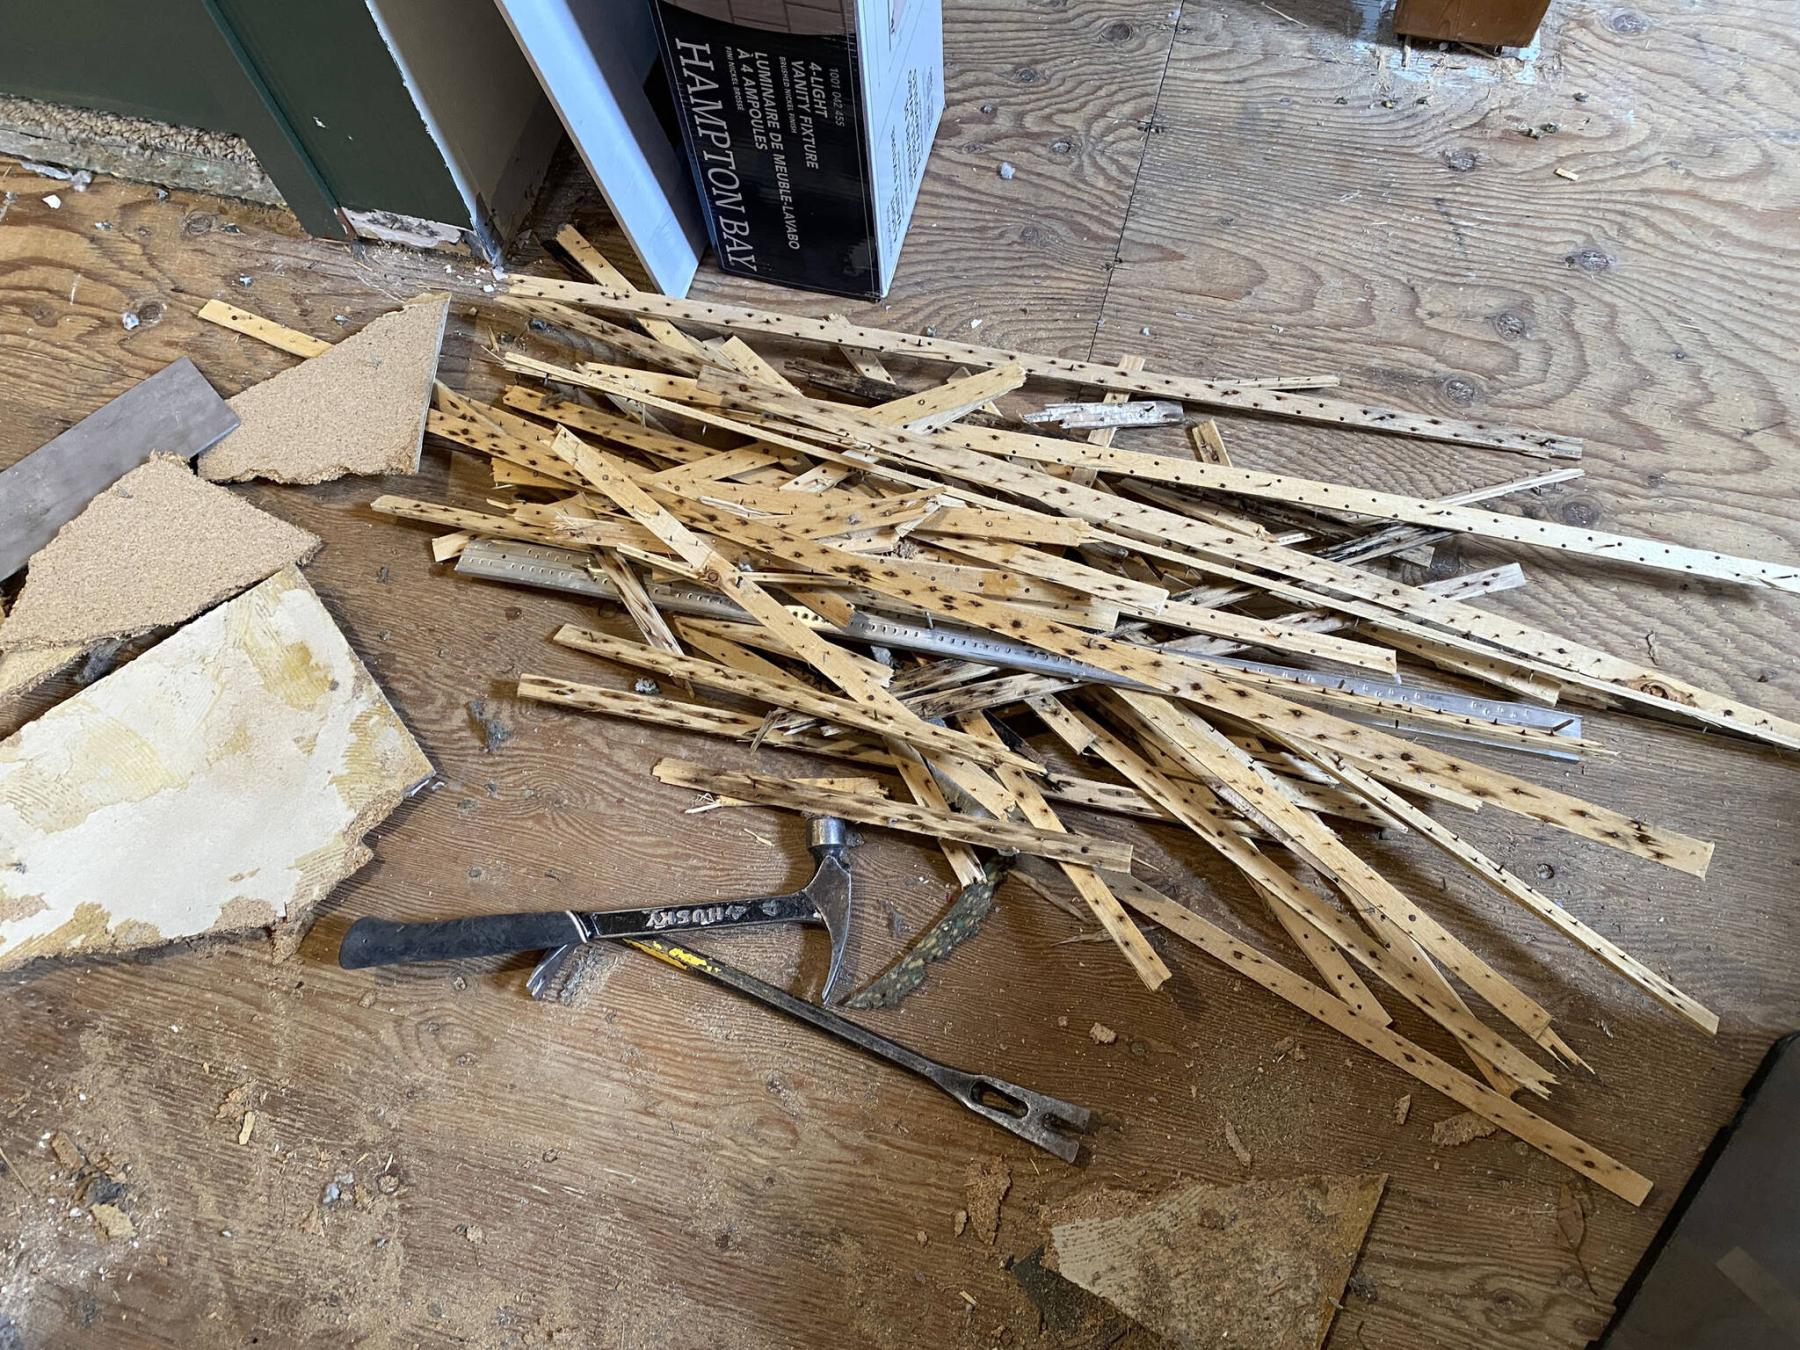
Carpet tack strips along all walls were removed, and carefully discarded.
MARC LABOSSIERE / FREE PRESS
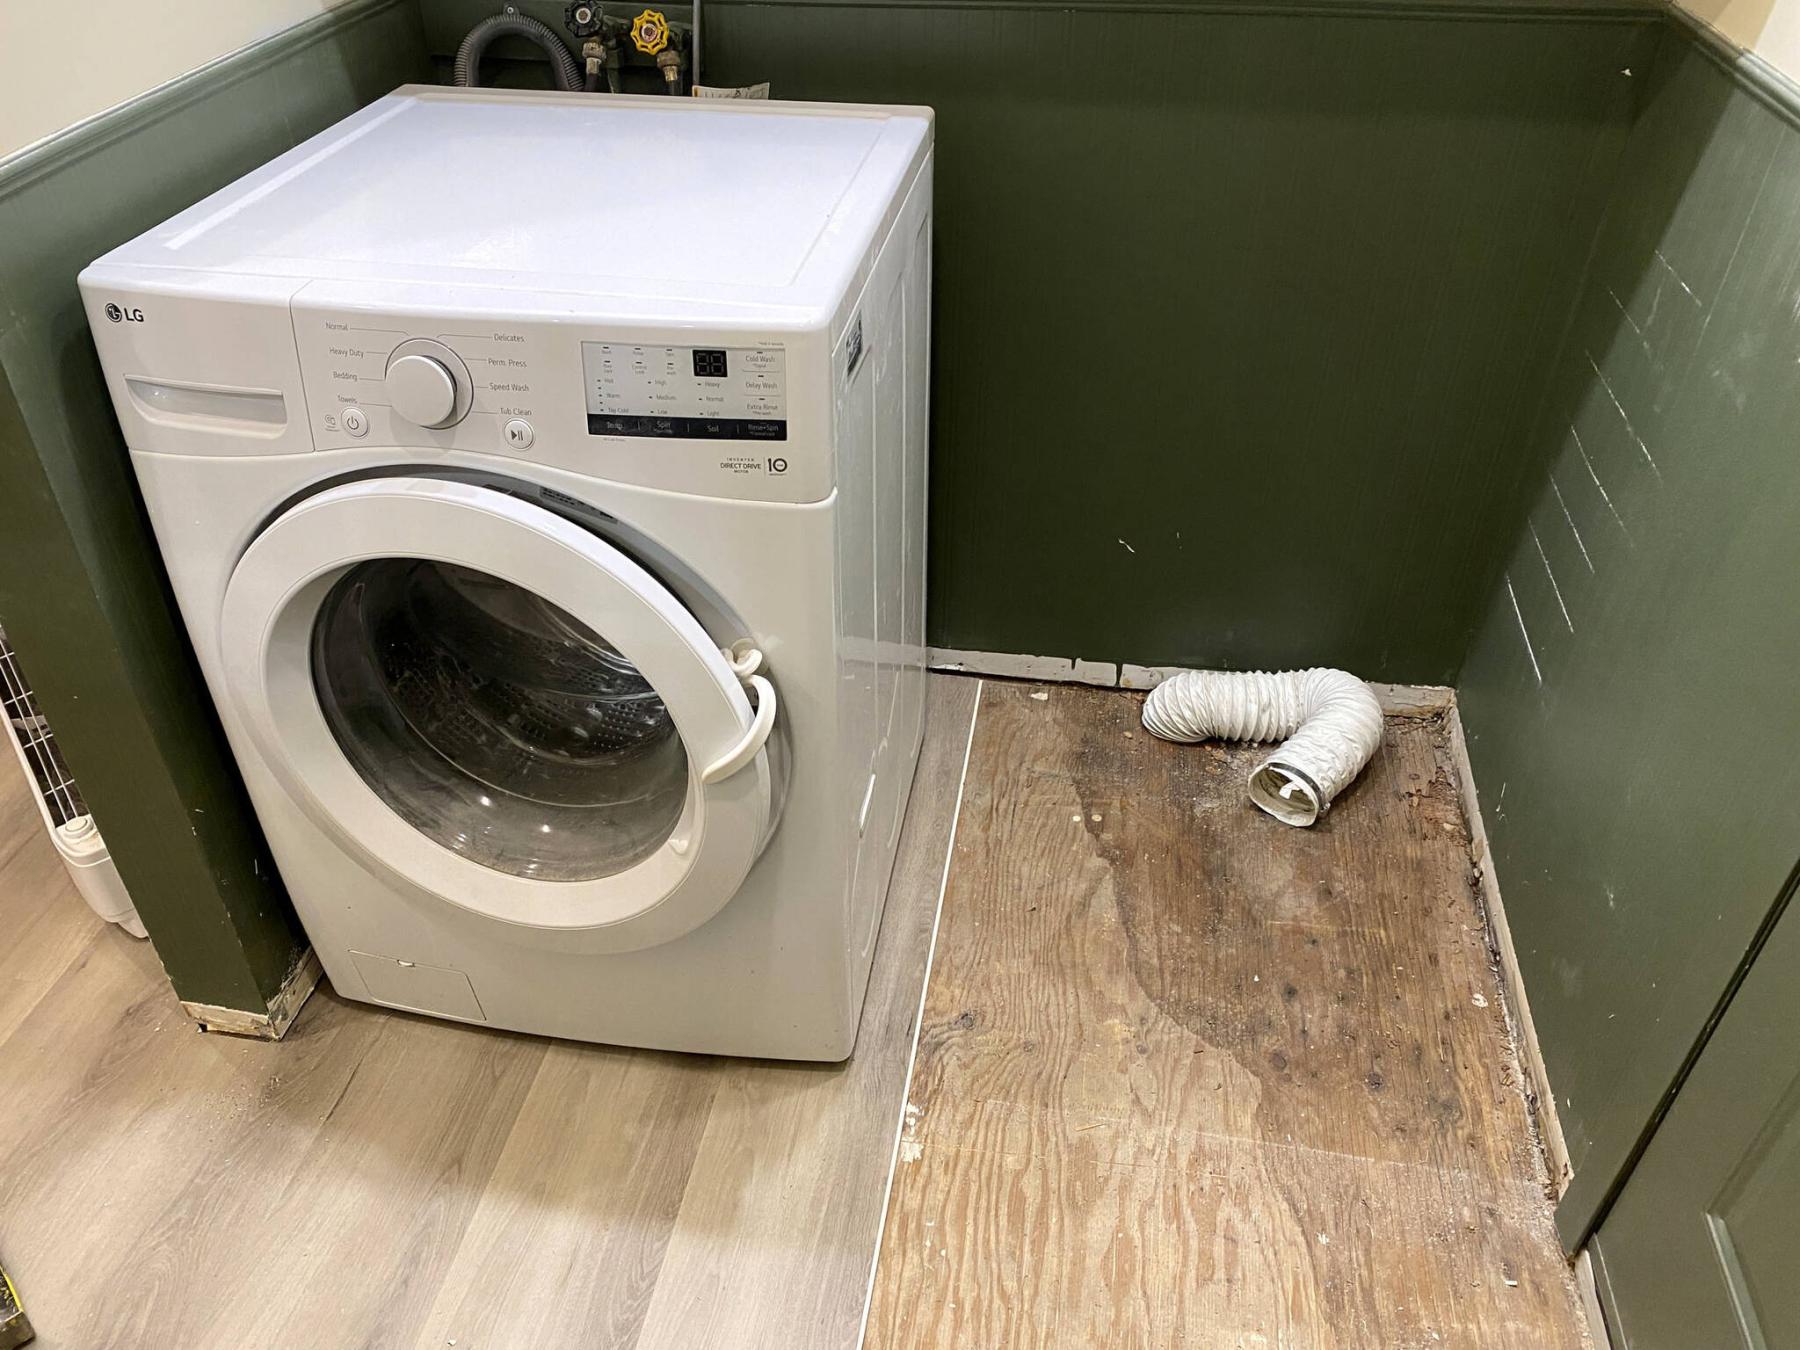
The washer was moved several times to allow for prep work and installation.
MARC LABOSSIERE / FREE PRESS
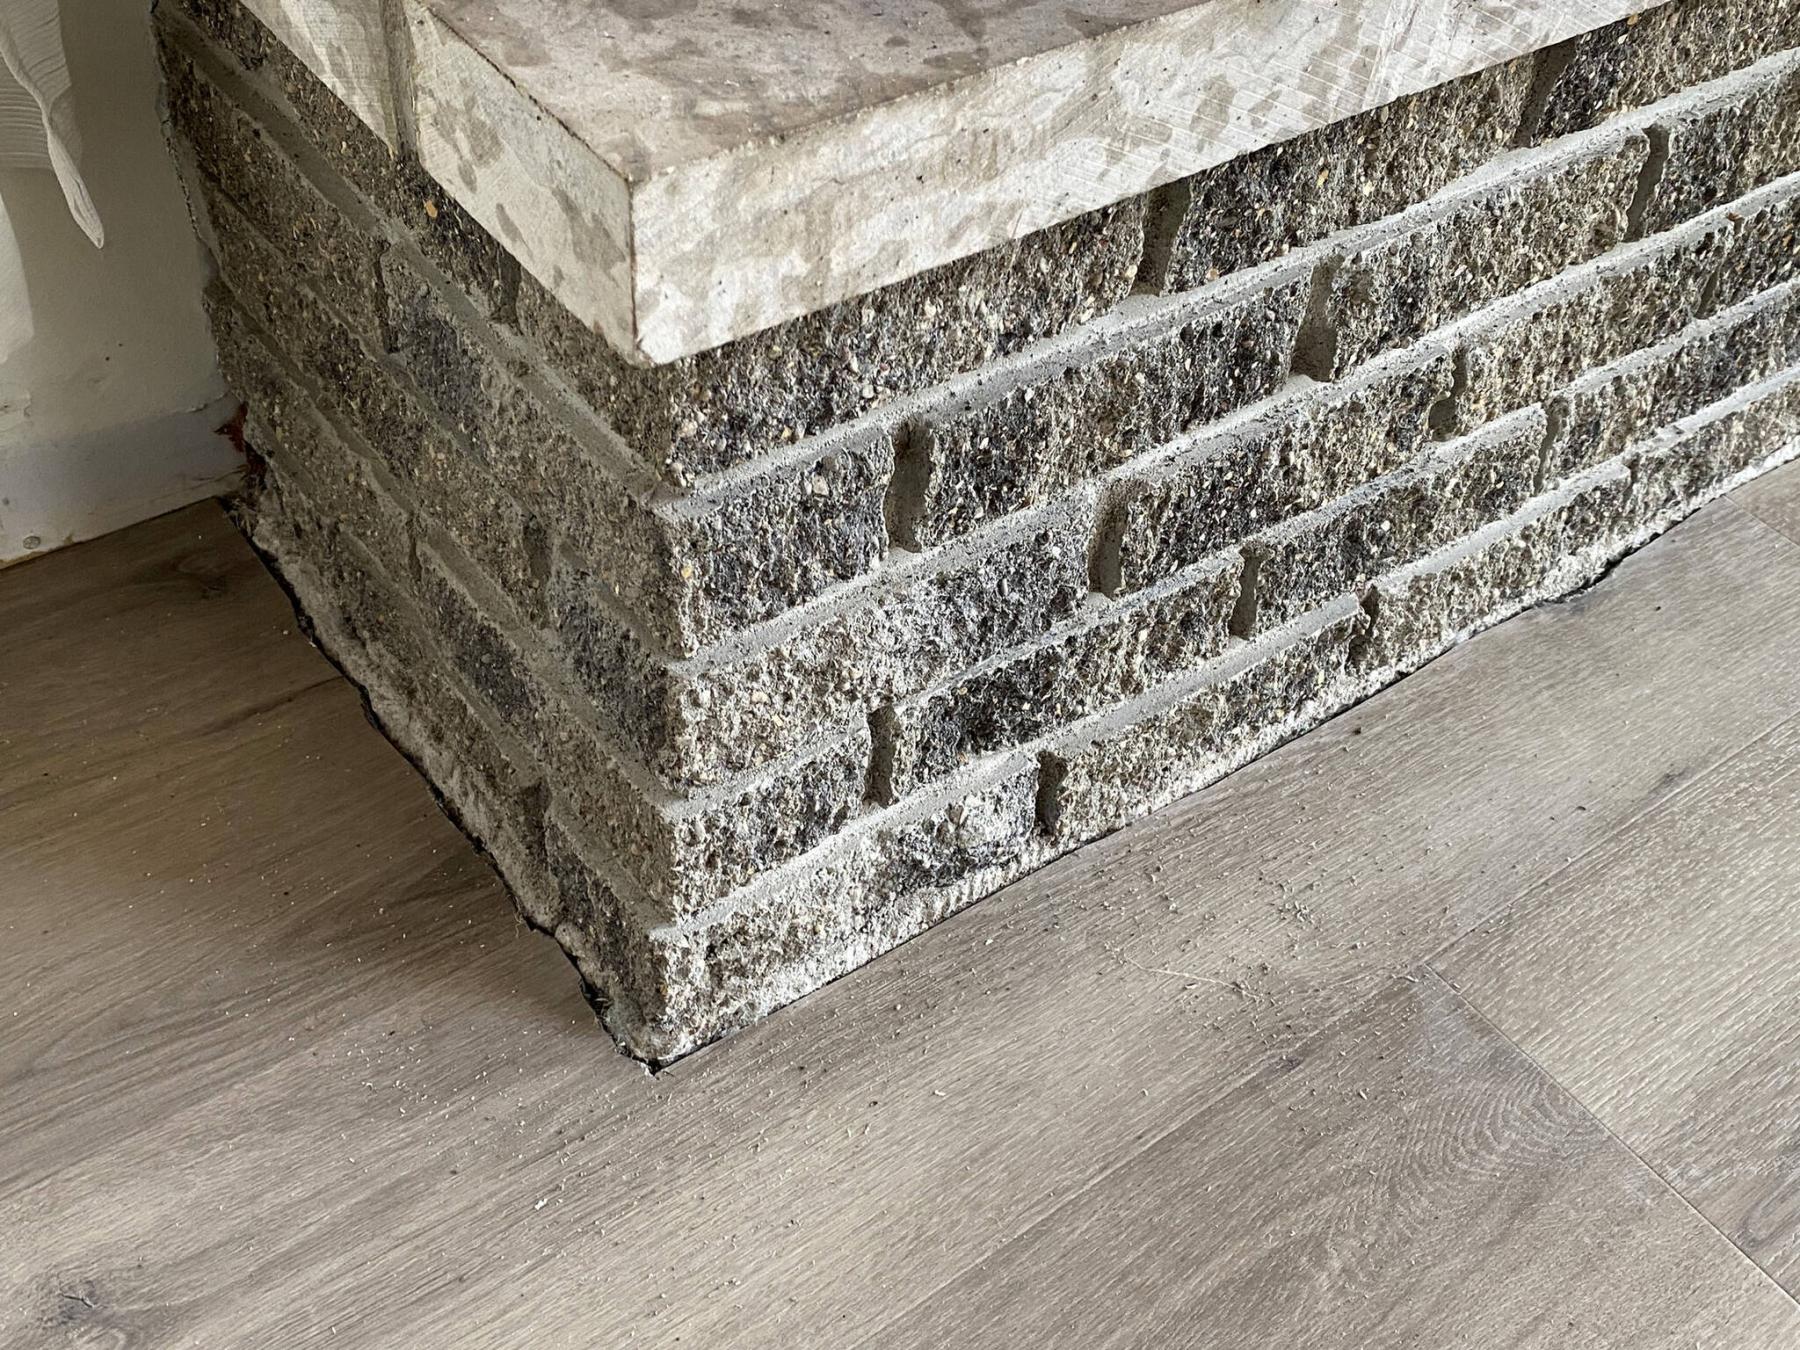
The vinyl plank is scribed to meet the idiosyncrasies of adjacent fireplace brick.
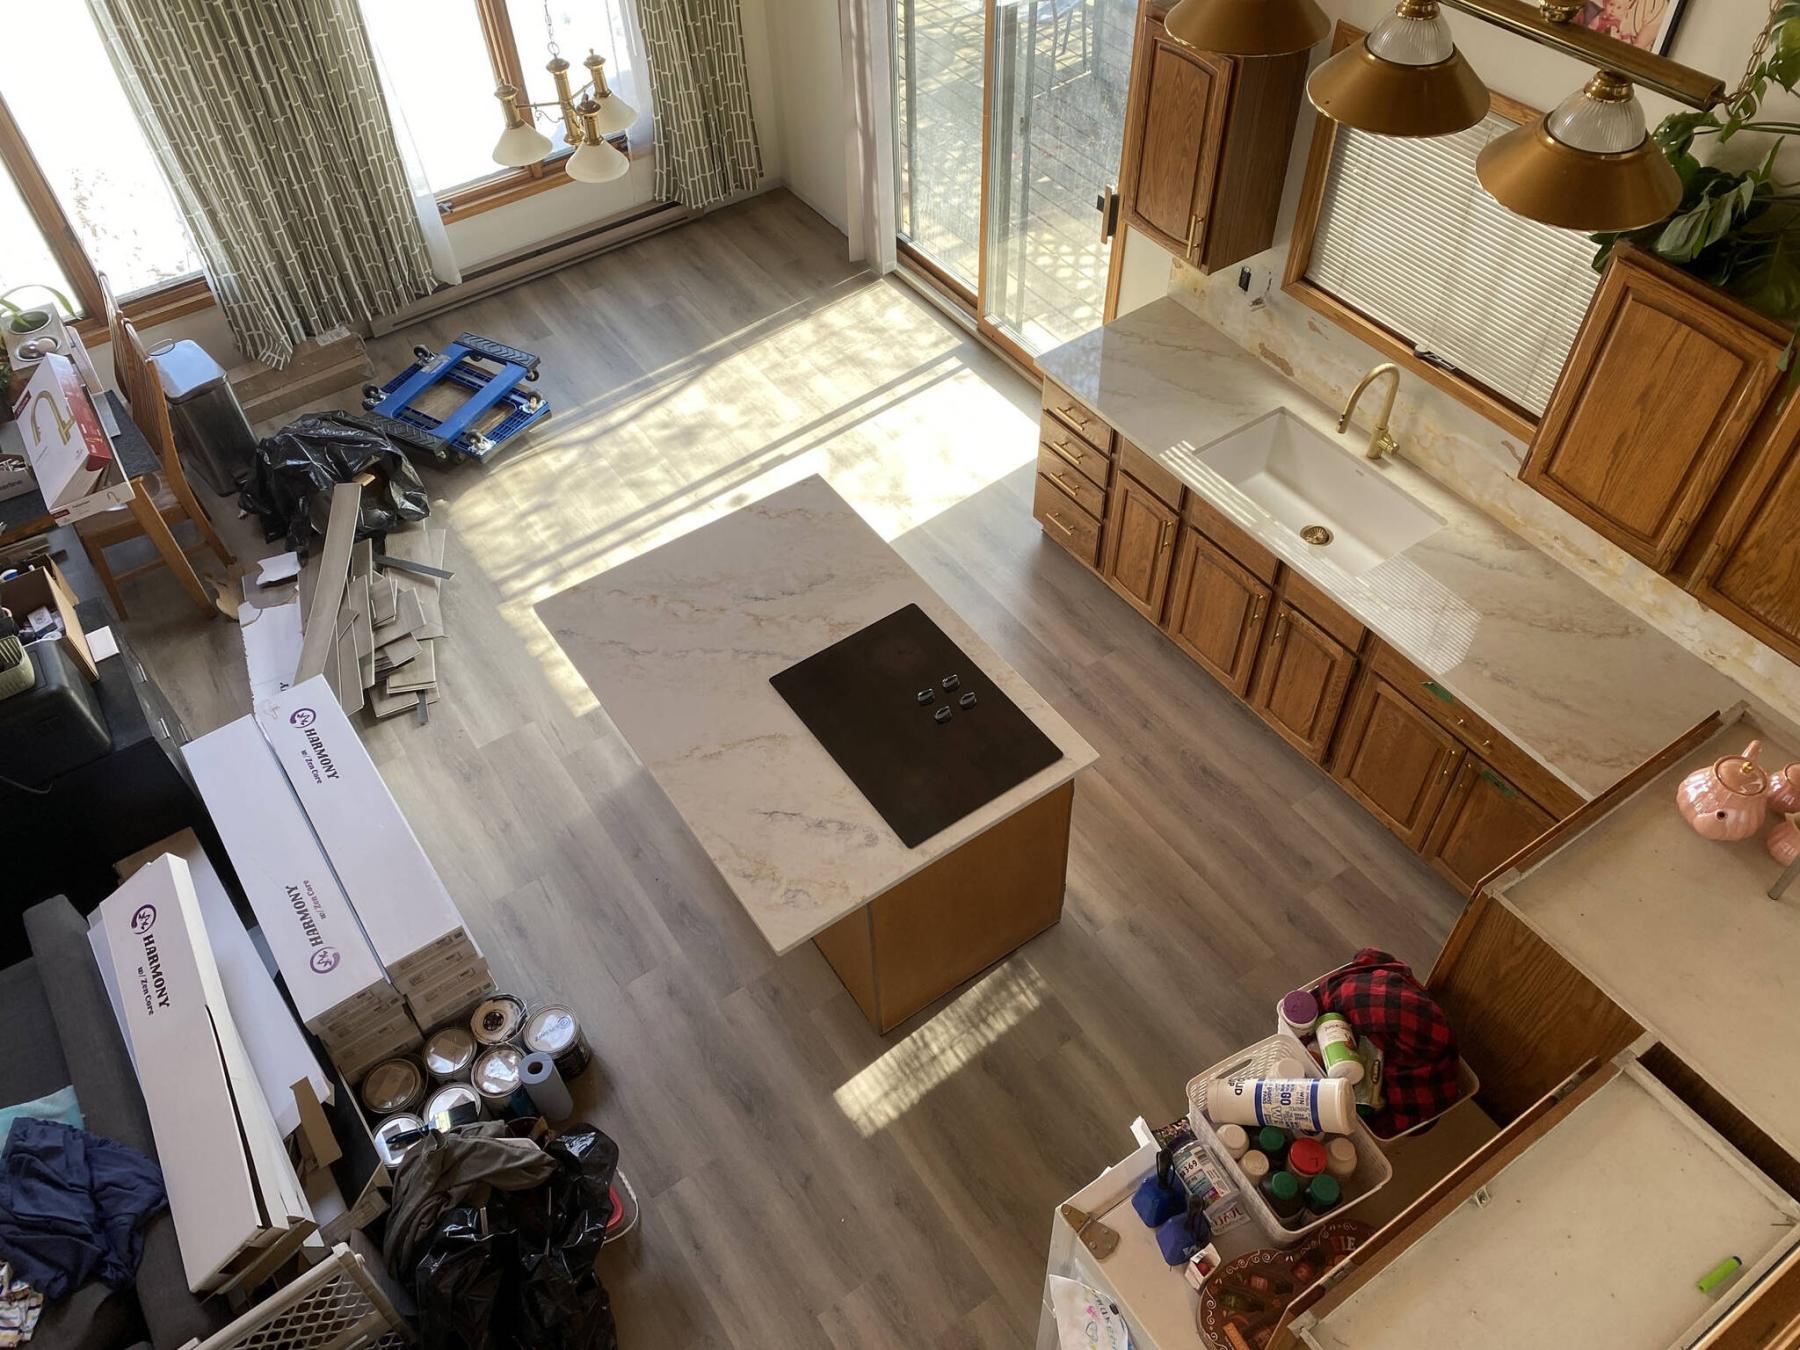
When planning a vinyl-plank flooring installation in a freshly built space, the task can usually be achieved relatively quickly due to the absence of obstacles and snags.
In a current living space, however, existing furniture and appliances can present a rather large challenge. Moreover, the removal of existing flooring can easily double the time needed for the entire process. That is why proper prep and careful planning is vital to a successful vinyl-plank installation in an occupied living space.
The homeowners had decided a while back that the existing carpeting throughout the majority of the two floors of the house had to be replaced. Although they originally opted to keep the carpet in two bedrooms, they eventually elected to forego any existing carpet in the house.
Although 80 per cent of the overall square-footage was carpeted, there were several areas with linoleum: on a secondary sub-floor that equalled the elevation of the carpet atop underlayment; the kitchen area; the front entry; and the back space that includes a bathroom, laundry area and a small linen closet.
The vinyl project would entail removing all existing carpet and underlayment, as well as the areas of linoleum and secondary sub-floor below it. After ascertaining the prep tasks, and subsequent vinyl-plank flooring installation start point, it was crucial to then plan in advance the manner in which furniture would be moved and stacked to facilitate both prep work and vinyl-plank installation.
Because carpet (and underlayment) could not be pulled up in large sections during the demo process, all furniture and other objects were strategically stacked in an area away from the demo start location. In addition, accessible carpet was cut into manageable four-foot-wide sections.
Once the carpet in a specific area was fully removed, the carpet tack strips along the walls were also lifted and discarded. A straight spade was then used to scrape the sub-floor to remove all staples that held the underlayment in place. With that area prepped, furniture was then placed there, which freed up the next space. This continued until all areas of carpet were addressed.
As for the existing linoleum, a similar process was followed to free up the top surface. However, this process was slightly more involved. Because the linoleum could not easily be removed from the secondary sub-floor build-up, a circular saw was used to create narrow strips of flooring that could be removed more easily by prying up the strips using a flat crowbar. Any flooring staples that remained were pulled out using pliers.
Minimizing the number of furniture and appliance moves took a bit of forethought. The initial prep start locations were derived by playing out where I wanted to start the installation, and working backwards. This careful planning allowed a very strategic approach to demo-prep and subsequent installation.
Without such forethought, it’s likely the furniture would have been moved more times than necessary. Basically, the furniture was stacked first where I wanted to start the vinyl-plank installation, knowing that once the carpet removal process had begun on the other side, the furniture would have then been moved onto the opposing area, freeing up my desired start point.
Along the way, there are always a few unavoidable hurdles. For example, in the laundry area, the dryer was displaced temporarily, and the washer was moved into its place to allow the successive installation of vinyl-plank boards. Once the washer area was completed, the washer was moved back and the dryer area was planked.
Once the vinyl was completed in the laundry area, the dryer was then repositioned and reconnected. The same situation occurred in the bathroom. The sink vanity was dislodged and moved out of the way until the vinyl was laid in that area. And the toilet was completely removed to install the new planking. Once the vinyl flooring was completed in the bathroom, a new toilet was mounted and secured to the flange.
Vinyl-plank flooring installation is a fairly straightforward process. Once you get in the groove, things can move rather quickly and the day’s progress is quite noticeable. It’s the little things that can hinder a clean installation, especially when there are so many objects in the way. That’s why an effective strategy is of utmost importance.
Beyond ensuring the vinyl plank is laid in a perfectly straight line, parallel to the adjacent walls (which can be hard to do with so many things in the way), the process of where to start and how to proceed is sometimes more important than the actual installation process itself. Proper prep and careful planning is always time well-spent to ensure a successful project outcome.
RenoBoss.Inc@outlook.com