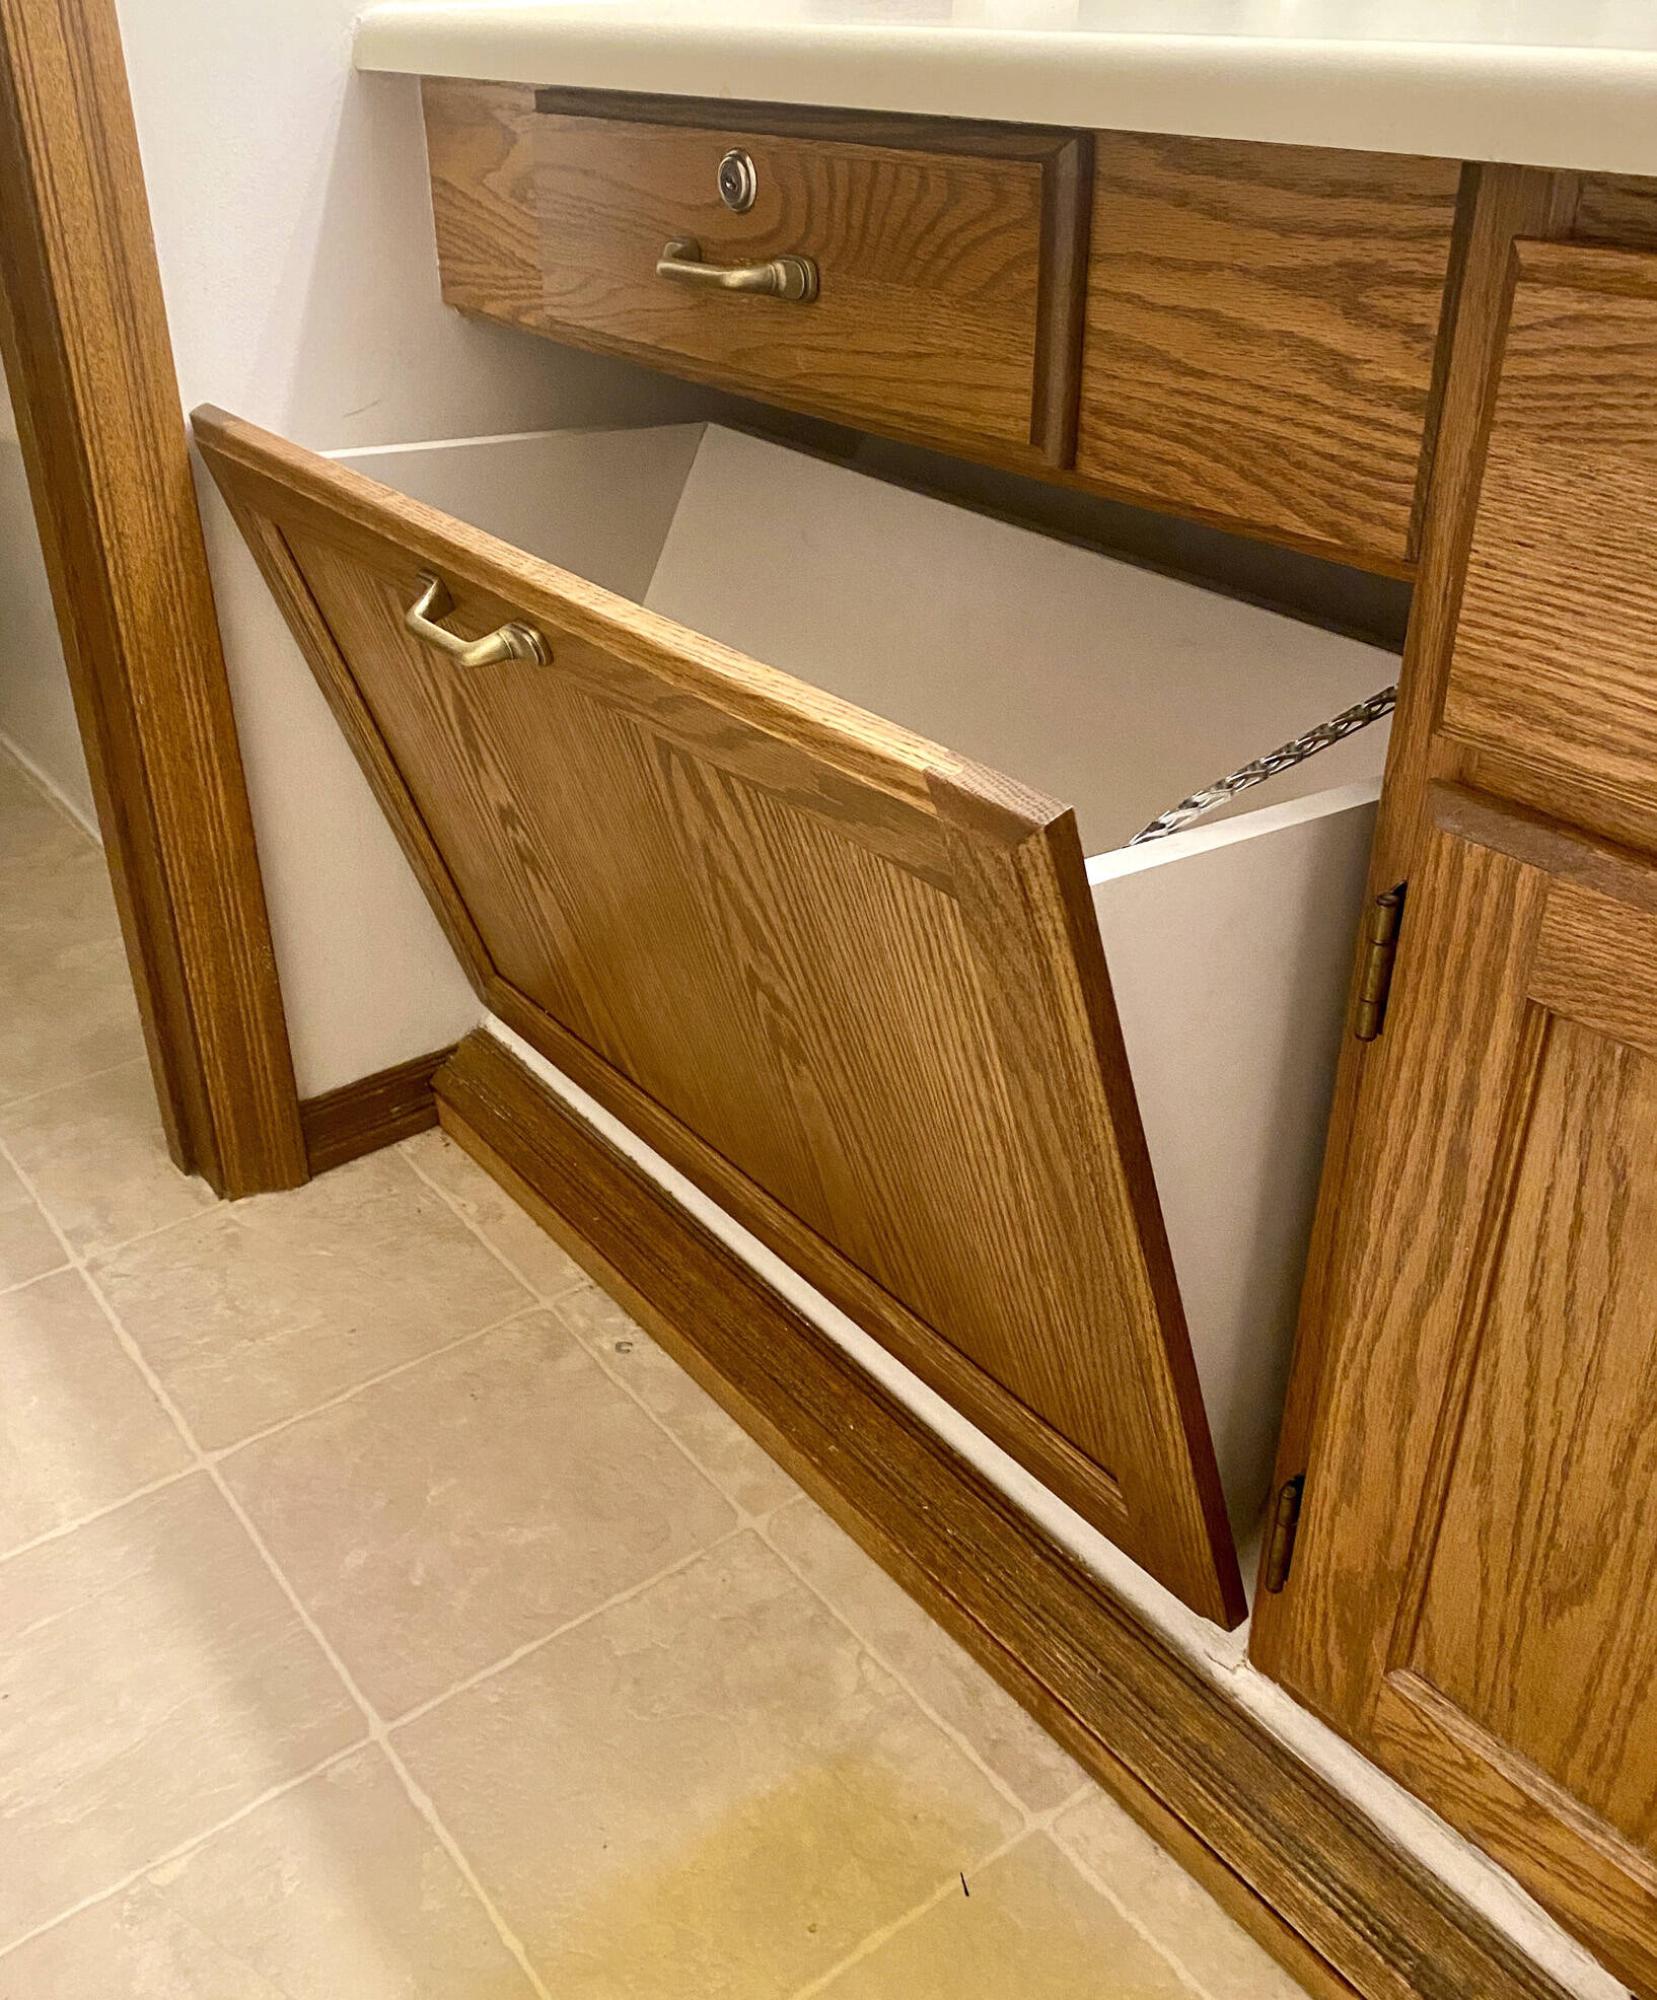
The custom box has triangular sides that meet the slant of the staircase ceiling, mounted on a piano hinge along the bottom.
photos by Marc LaBossiere / Free Press
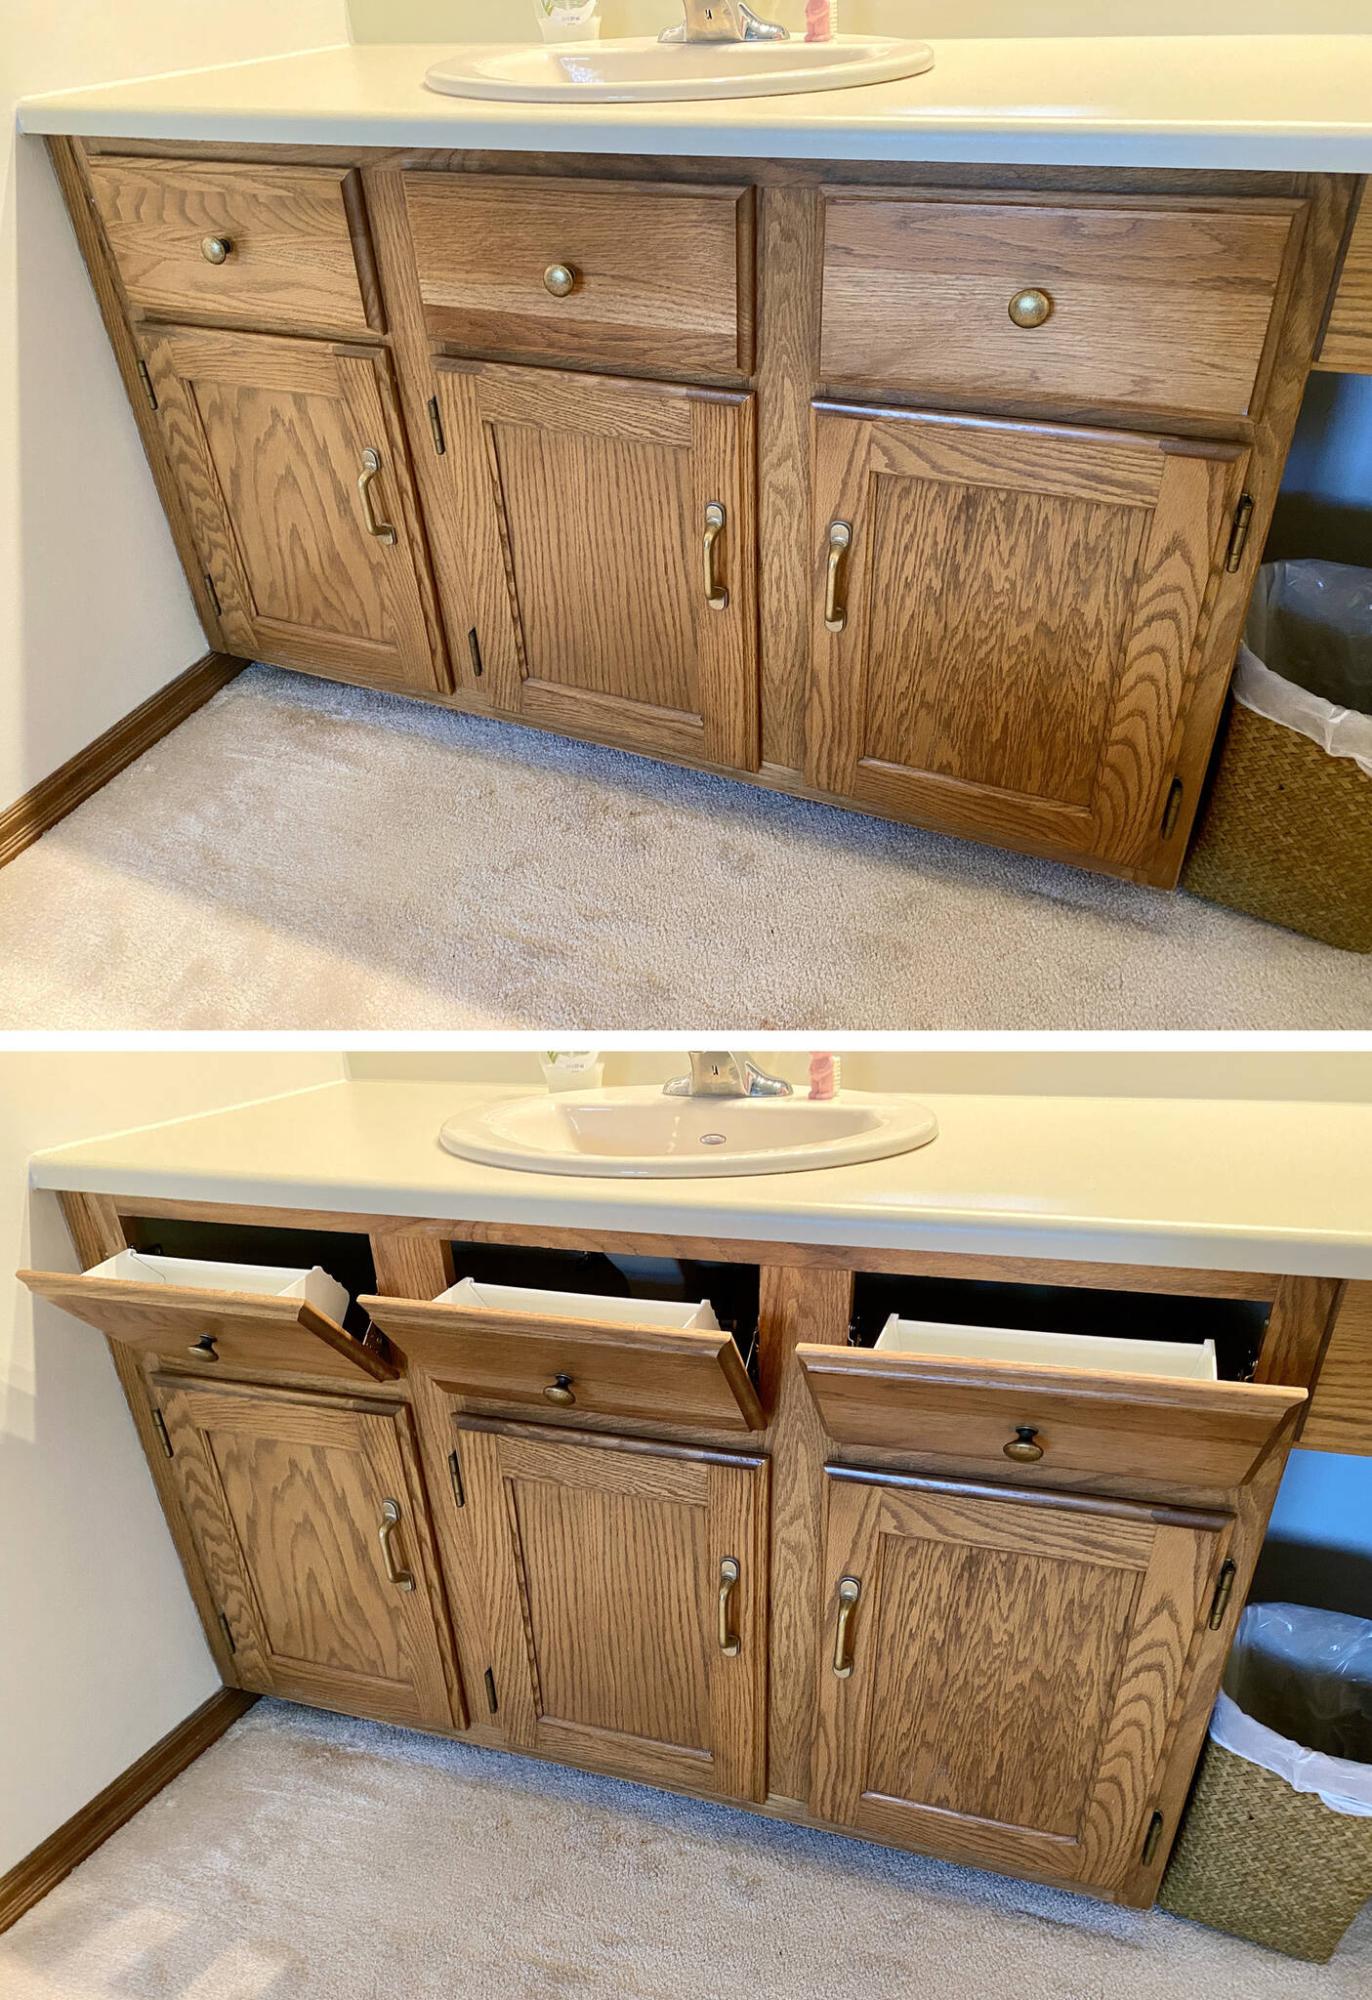
Existing plant-ons below the countertop have been converted to tilt drawers for additional bathroom storage.
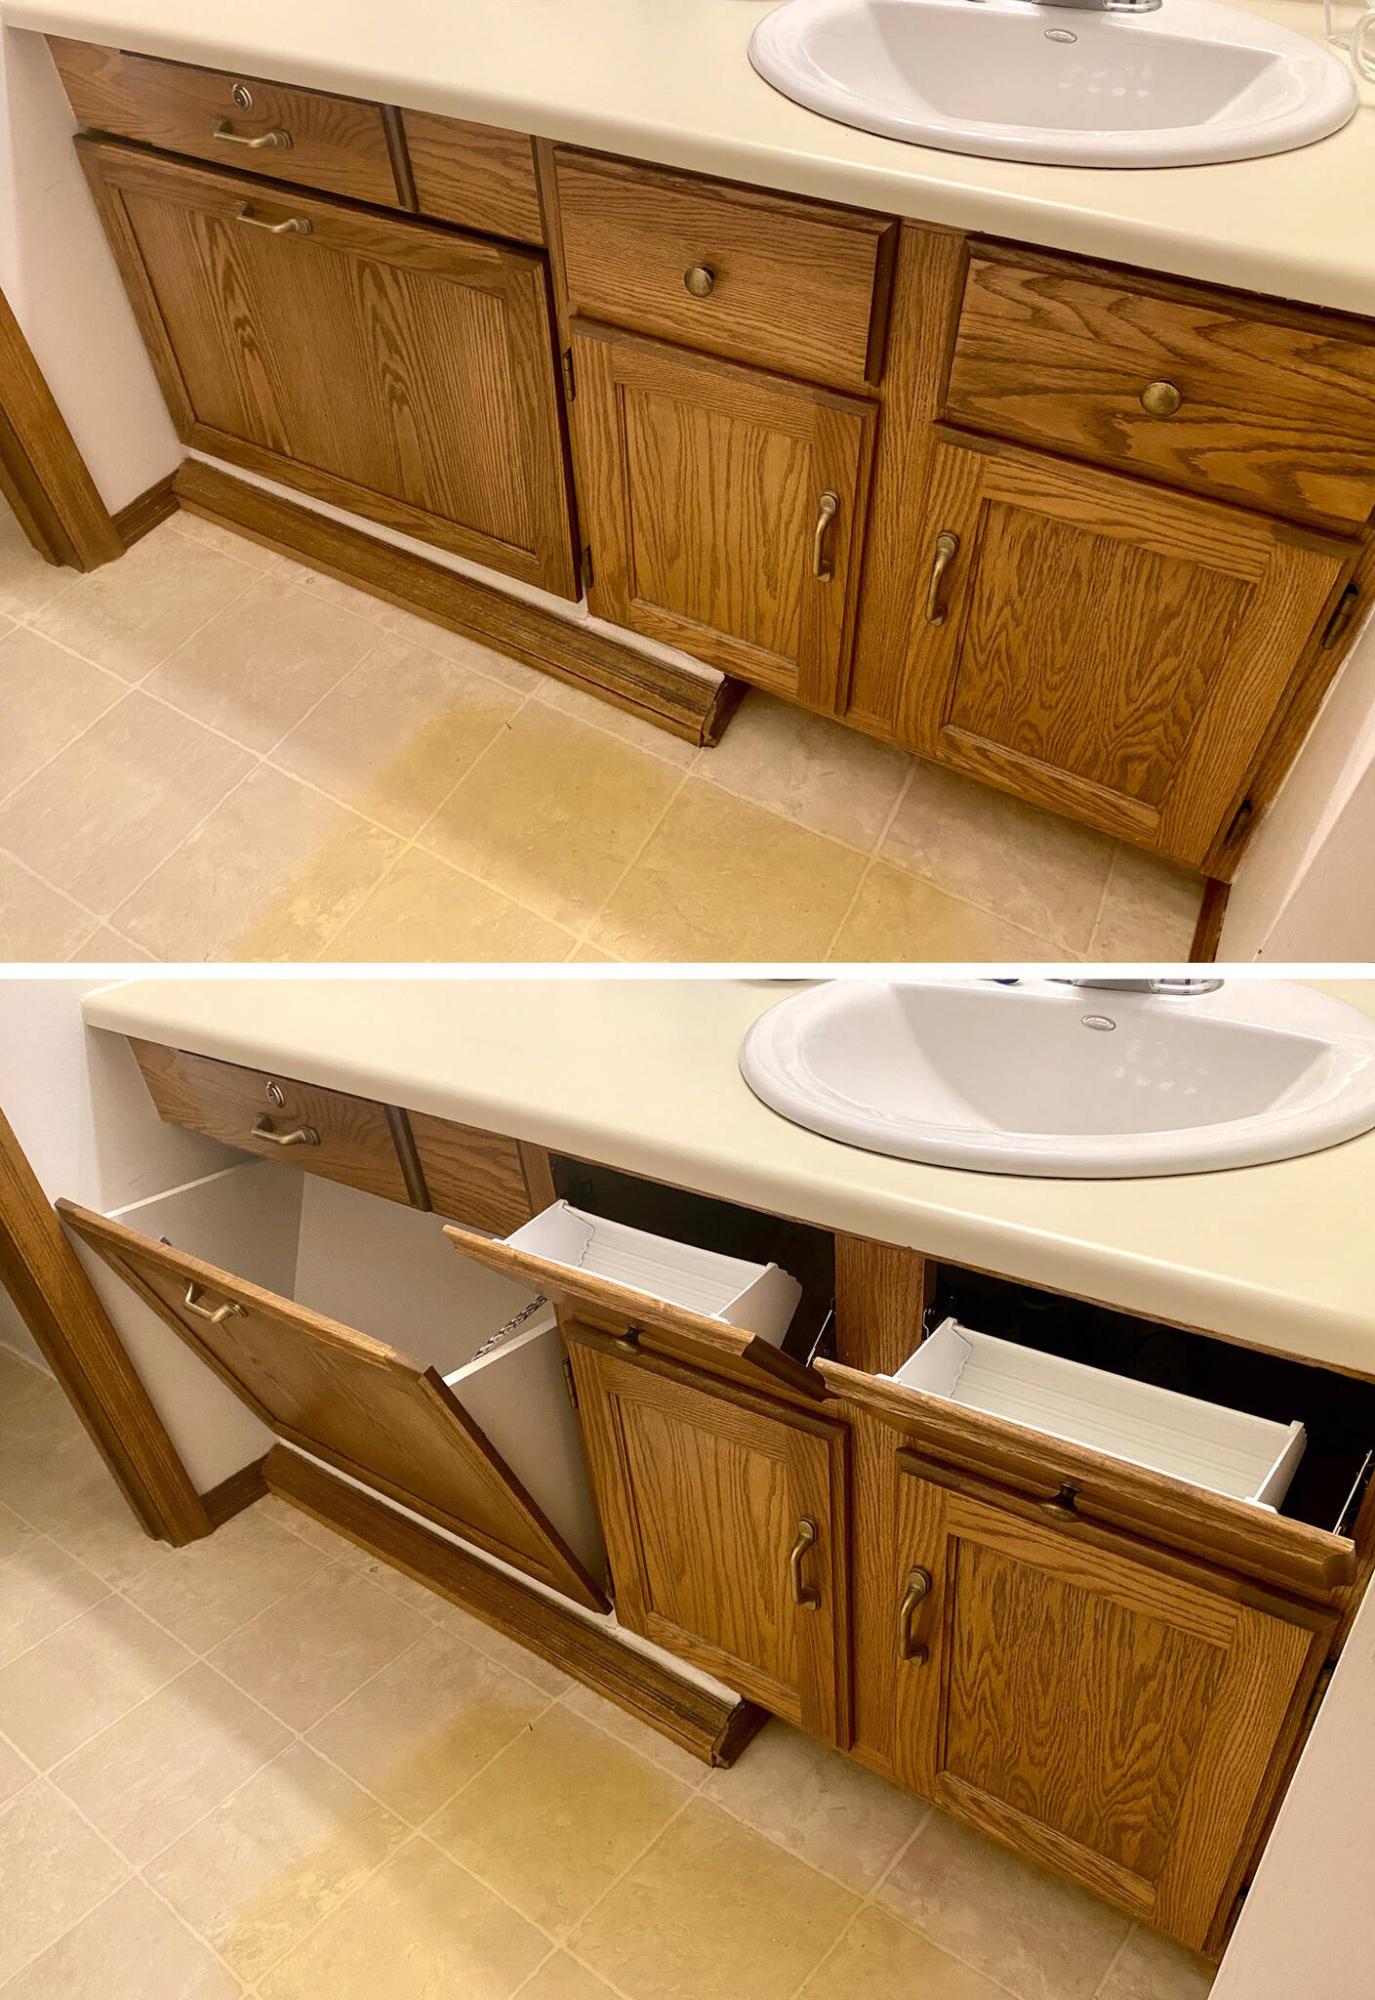
Beside two tilt drawers, a custom box was introduced to increase storage while concealing the top of a slanted staircase ceiling.
The most satisfying renovations often involve adapting a home’s existing features in order to improve functionality, based on the homeowners’ longtime wishes.
This requires a bit of creativity. One recent jobsite called for some innovative updates that are not only functional, but greatly enhance the overall look of a particular space.
Most homeowners have cupboards in with one or more sinks. No matter the size and width, the layout is usually the same: a main cabinet upon which the sink and counter are mounted and — depending on the placement of the sink — a combination of drawers and doors filling the void below. Typically, there is an area of unusable space directly in front of the sink.
In this column, I’ll explain how to transform those unused spaces into small storage drawers using tilt hinges.
To hide the sink below the countertop, a decorative front is often mounted to the cabinet framework. This piece, referred to as a “plant-on” — essentially a fake drawer — can be hard mounted using screws, but is often held by clips on either side that allow the front to be popped off if needed.
This particular jobsite boasted three bathrooms, each with vanities wide enough to require several plant-ons below countertop level. Both the main-floor and ensuite bathroom had three, while the upper-floor bathroom had two. That there were so many was surprising, since it’s usually only the space just below the sink that takes a plant-on, with drawers on either side. In this case, all the fronts above the cabinet doors were plant-ons, which meant the space directly under the countertop was not being used.
By converting the useless plant-ons into tilt drawers, I could give the homeowners a few extra areas for storage.
To begin, the existing plant-on clips were removed from the backside of the decorative front and the cabinet framework. The front was then prepared by pre-drilling centred holes for matching pull knobs. In place of the old clip mounted to the cabinet, left and right tilt hinges were pre-mounted along the vertical sides of the cabinet opening. Careful measurements were taken to ensure the proper placement of the fronts once they were fastened to the hinges, since they needed to remain level and parallel with the features of the cabinet.
Mounting holes were then pre-drilled onto the back of each front, and half-inch-long screws were used to secure each one to the tilt hinges (without breaching the face of the front). Once they were fastened, two additional screws were added along the inside top of the front, upon which a plastic insert was hung and tightened. This process was repeated to convert all eight of the plant-ons to tilt drawers.
Another custom upgrade added extra storage and greatly improved the look of the second-floor bathroom. In this case, the left underside of the sink vanity revealed the top of the staircase leading to the second floor. Although this is a common construction approach in smaller homes, it can be unsightly. I suggested we create a larger drawer in this area to cover up the angled void below. Following the same tilt-down principal we used in the upper areas, this larger drawer would also pivot outwards.
Measurements were taken and a sketch created for my good friends at Cabinet Corner. The requirements included an angled custom box with triangular sides that would fit above the slope created by the ceiling of the staircase, and a front that matched the existing oak cabinetry. Once the custom elements were ready, installation began by securing a piano hinge along the bottom of the box, which was then fastened along the bottom edge of the slanted area of the void, near the floor. The box was tested by tilting it forward and ensuring that its closed position aligned with the cabinet framework. The custom front was then mounted to the box using four L brackets and screws, ensuring that the position of the new front was aligned with the existing cabinetry. A matching pull was added at the centre-top, and a short chain was installed on one side to prevent the drawer from opening beyond the desired point.
This creative approach to modifying what had previously been unused space in three bathroom vanities has provided several new, easily accessible storage areas. Although the cabinets look the same for the most part (apart from the new pulls on the eight plant-ons), the slanted ceiling of the staircase is now concealed by a new door front that so closely matches the existing woodwork, it feels as though it has always been there.