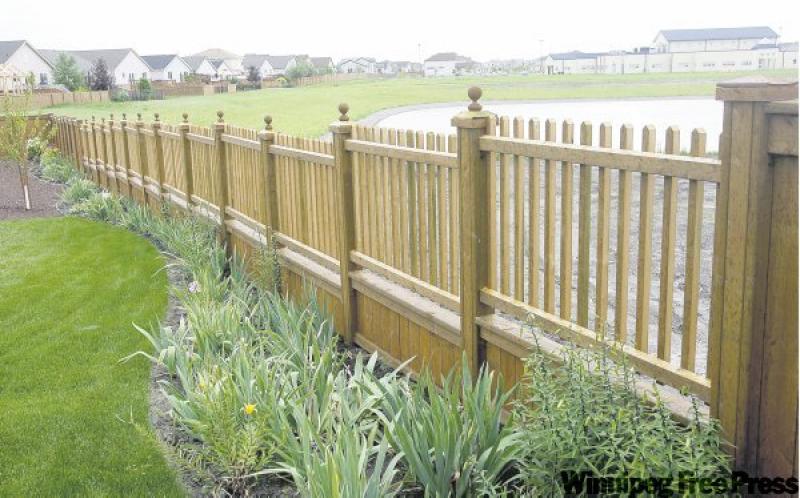
For the most part, fences delineate our property, keeping out trespassers, and offer a little bit of privacy, making our backyards true sanctuaries from the bustle beyond.
Home Depot DIY project adviser Jay Kent has seen the evolution of fence-building over the 30 years he's been in the home construction business change from chain link, which basically marks out your property, to composite plastic fencing that looks like wood, feels like wood and costs nearly four times as much as pressure-treated wood. Its upside being it will likely last longer than the person who built the fence.
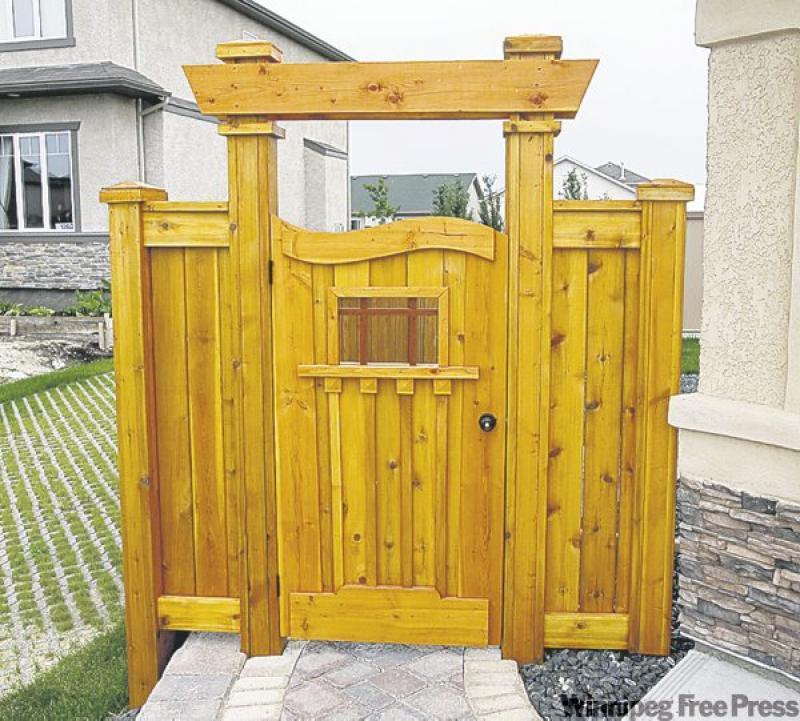
"Now (fence-building) has become a more artistic thing that enhances the property value and gives you much more privacy," he says.
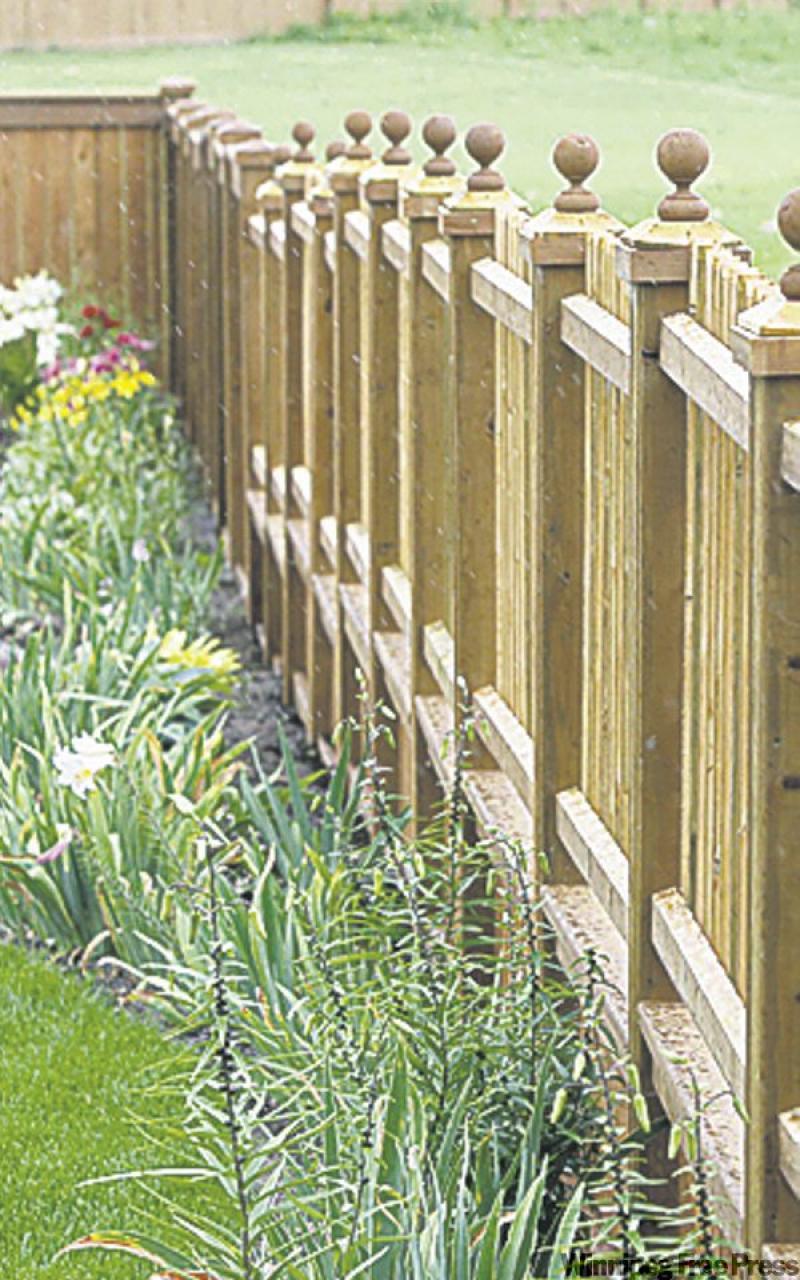
Bold do-it-yourselfers have many styles from which to choose, including the good neighbour fence, which has fence boards alternately facing outward on either side of the fence. It provides less privacy but doesn't completely block out your neighbours.
"They're cool but some people don't like them because cats and rabbits can come and go as they please," he says, adding more people now build fences with the boards spaced as closely together as possible to ensure utmost privacy.
Don't plan on building a wooden version of the Berlin Wall, however, to keep people out (or your family in). City bylaws prohibit fences higher than six feet (1.8 metres) in the backyard and four feet in the front yard (1.2 m).
Kent says a fence must do one thing when it comes to security. It must deter small children from letting the dog out to play or keep them from investigating your swimming pool -- if you've got one.
"It's not the older kids that are the problem. It's the young kids, who aren't at what we call the age of reason," he says, adding it's the homeowners' responsibility to ensure a fence stops children under age five from wandering in the yard and tragically testing the waters of the swimming pool or hot tub.
"If you have a big wood pile next to the fence that kids can climb over, you could be held accountable if anything happens."
It's for this reason, too, that he advises fence gates open to the inside with their latches on the inside as well.
"It stops the neighbourhood kids from letting your dog out to play," he says, speaking from experience.
Equally as important as the fence height above ground is how far down the fence posts should go underground. In Manitoba, the frost can penetrate the ground more than six feet -- though, no one is going to recommend placing posts six feet underground. The most commonly heard rule of thumb is fence posts should extend three feet (90 cm) below the surface.
Another common piece of advice you'll find in books and websites is using concrete to stabilize the posts and hold them in place.
"If you wrap the post in concrete, the concrete is porous so the frost will kick the post out and it won't come back down," Kent says. "After about four years, the fence is uneven. There's no easy way to fix that."
He suggests using a mixture of limestone and quarter-down gravel -- very well packed-down -- to keep the posts in place. Gravel disperses the water around the posts better than concrete does, which means it won't push the post upwards as much in the wintertime. And, you can at least bang the post back into place when it does rise up in the winter and fails to return to its original spot in the spring.
Another choice is metal ground spikes, which eliminate the need to dig post holes. The spikes are hammered into the ground, and the post is placed in a bracket at the top of the spike. Kent says to be sure to use a small piece of post to hammer in the spike. Otherwise, you'll damage the bracket, and the store won't likely grant you a refund.
Before placing the posts, however, find out the exact location of your property line and call the utility companies to mark out their lines through your yard.
The fence must also be within -- not on -- the borders of your property, unless agreed upon in advance with your neighbour. Intruding on city land can be even more of a problem and may result in additional property taxes.
After all the measurements have been made, it's time to figure out materials. Pressure-treated, four-inch-by-four-inch-by-nine-foot (10 cm x 10 cm x 230 cm) lumber is the most common choice for posts. They do come in a wide variety of sizes, Clement says.
Even more options are available for fence boards. Spruce is among the cheapest, but needs to be stained or painted about every two years. Pressure-treated wood costs about $10 per linear foot and doesn't need to be stained. The drawback is that it requires special fasteners (look for deck screws) because the chemical that preserves the wood will eat away at untreated screws.
Cedar is an expensive option that doesn't need chemicals to preserve it, but it costs about $16 per linear foot, and it will fade to a greyish/black colour over time if not stained.
As mentioned earlier, composite deck boards will outlast all other materials but are really beyond the budget of most people, Kent says.
Your local hardware store should be able to help you find out how much material you'll need. The basic rule of thumb is a fence post for every eight feet (2.4 m) of fence.
Once you've got all the materials, you're ready to begin -- almost. If you're new to the DIY experience, it's a very good idea to seek help beforehand at your local hardware store. Books are also a good source of information and have many interesting design ideas. Just remember: The more planning and thought you put into the project, the fewer times you'll be back at the hardware store. And, the faster you'll be in that Speedo, with the general public thankful that you built the fence.
Tools:
![]() Hammer
Hammer
![]() Saw
Saw
![]() Line level (attaches to mason line [really strong string] to ensure line is level)
Line level (attaches to mason line [really strong string] to ensure line is level)
![]() Four-foot level (special post level is even better... as your hardware store)
Four-foot level (special post level is even better... as your hardware store)
![]() Hand auger
Hand auger
![]() Power auger (good idea to rent one, but not necessary)
Power auger (good idea to rent one, but not necessary)
![]() Double-galvanized deck screws (specially coated for pressure treated wood)
Double-galvanized deck screws (specially coated for pressure treated wood)
![]() Double-galvanized 2-1/4-inch and 1-1/4-inch nails
Double-galvanized 2-1/4-inch and 1-1/4-inch nails
![]() Cordless screwdriver
Cordless screwdriver
![]() Measuring tape
Measuring tape
![]() String (mason line is preferable)
String (mason line is preferable)
![]() Limestone, quarterdown gravel
Limestone, quarterdown gravel
![]() Instant gate kit
Instant gate kit
![]() Fence brackets
Fence brackets
![]() Fence posts
Fence posts
![]() Fence boards
Fence boards
![]() Fence rails
Fence rails
The steps
1. Call Manitoba Hydro, MTS and cable to mark lines on your property
2. Mark corners of fence. Ensure that you're within your property line and that corners are properly squared, using the 3, 4, 5 method. It's a right triangle that is, for example three feet on the vertical, four feet on the horizontal and five feet on top to form a right triangle. Larger measurements are made in multiples of 3, 4 and 5. Keep in mind that it doesn't have to be too precise, but you want to make sure the fence will have corners that are close to 90 degrees.
3. Dig first post hole using auger. Hand ones will work, but renting a power auger for a few hours will make the job easier and faster, just make sure you have a couple of friends to help hold it steady. If you are digging near lines, you'll also need a hand auger because you won't be able to use a power auger for safety reasons.
4. Dig post hole at other corner to form straight line for fence. Kent says many people are tempted to do the post holes in sequential order, every eight feet from the centre of the post. He suggests digging the first hole at one corner and then digging the last hole at the other corner. "The straightest line is between two points," he says. Be sure to measure the distance.
5. Once post hole is three feet (or four feet is even better), add small amount of limestone mix in bottom. Place post. Ensure post is plumb (a level position for objects on a vertical axis). Fill hole with limestone mixture, packing it down as tightly as possible. Ensure post is plumb once more. If the post is leaning slightly, use a hammer to bang it into a plumb. Repeat with the last post at other corner.
6. Using string, or mason line if you can find it, tie one end to the top the first post and the other end to the top of the other post. Ensure line is level. Tie another string at the bottom of posts (12 inches [30 cm] off the ground). Make sure that line is equal length to the top line. This will ensure posts aren't leaning and are plumb.
7. Once lines are in place, mark out other post holes along lines every eight feet on centre of the posts.
8. Dig post holes and place posts, ensuring they are plumb. If the ground rises or falls more than four inches every eight feet, you'll need to use a technique called stepping, which allows you to lower the height of the fence by four inches every eight feet. Otherwise, you could have a six-foot fence at one end and three-foot fence at the other if the land has a large grade.
9. Run another string from first post to last about 12 inches off the ground. Ensure line is level. Mark where the string passes each post. Do the same for the top of the posts with a string attached to the first post and then the last about 12 inches from the top. Again, ensure string is level. Mark where string passes each post. This will tell you where to attach the clips for the rails, to which you'll attach the fence boards.
10. Using two-and-a-quarter-inch nails, attach clips to posts. Each post will have four clips, two on either side. Place clips near edge of exterior of post if you want fence boards facing outward, or at interior edge if you want them to face inwards. Ensure you place clips on the markings from where the strings crossed the posts. This will ensure the rails are level.
11. Slide rails into fence clips. Secure them using one-and-a-quarter-inch nails.
12. Attach fence boards to rails, using three screws for each rail (six screws for each board). This will help keep the boards from warping over time. Space boards as closely together as possible if privacy is the goal. Pressure-treated wood will shrink and make spaces slightly larger. If a gap is desired, use narrow edge of board to measure a consistent space between boards.
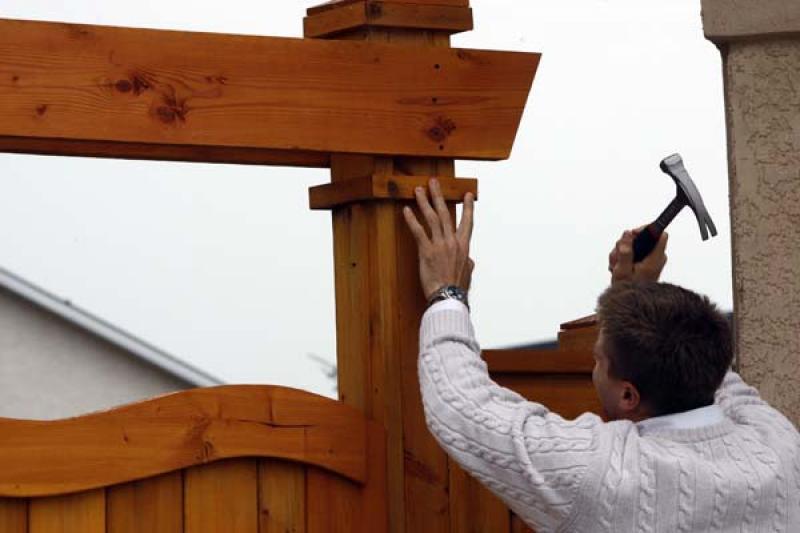
13. To make a gate, place two posts a little more than three feet (90 cm) apart. You could build your own gate, but an adjustable steel gate kit comes with a frame and hinges pre-made. You just need to hang the frame to the post and attach the fence boards, latch and handle.