Marc LaBossiere / Winnipeg Free Press
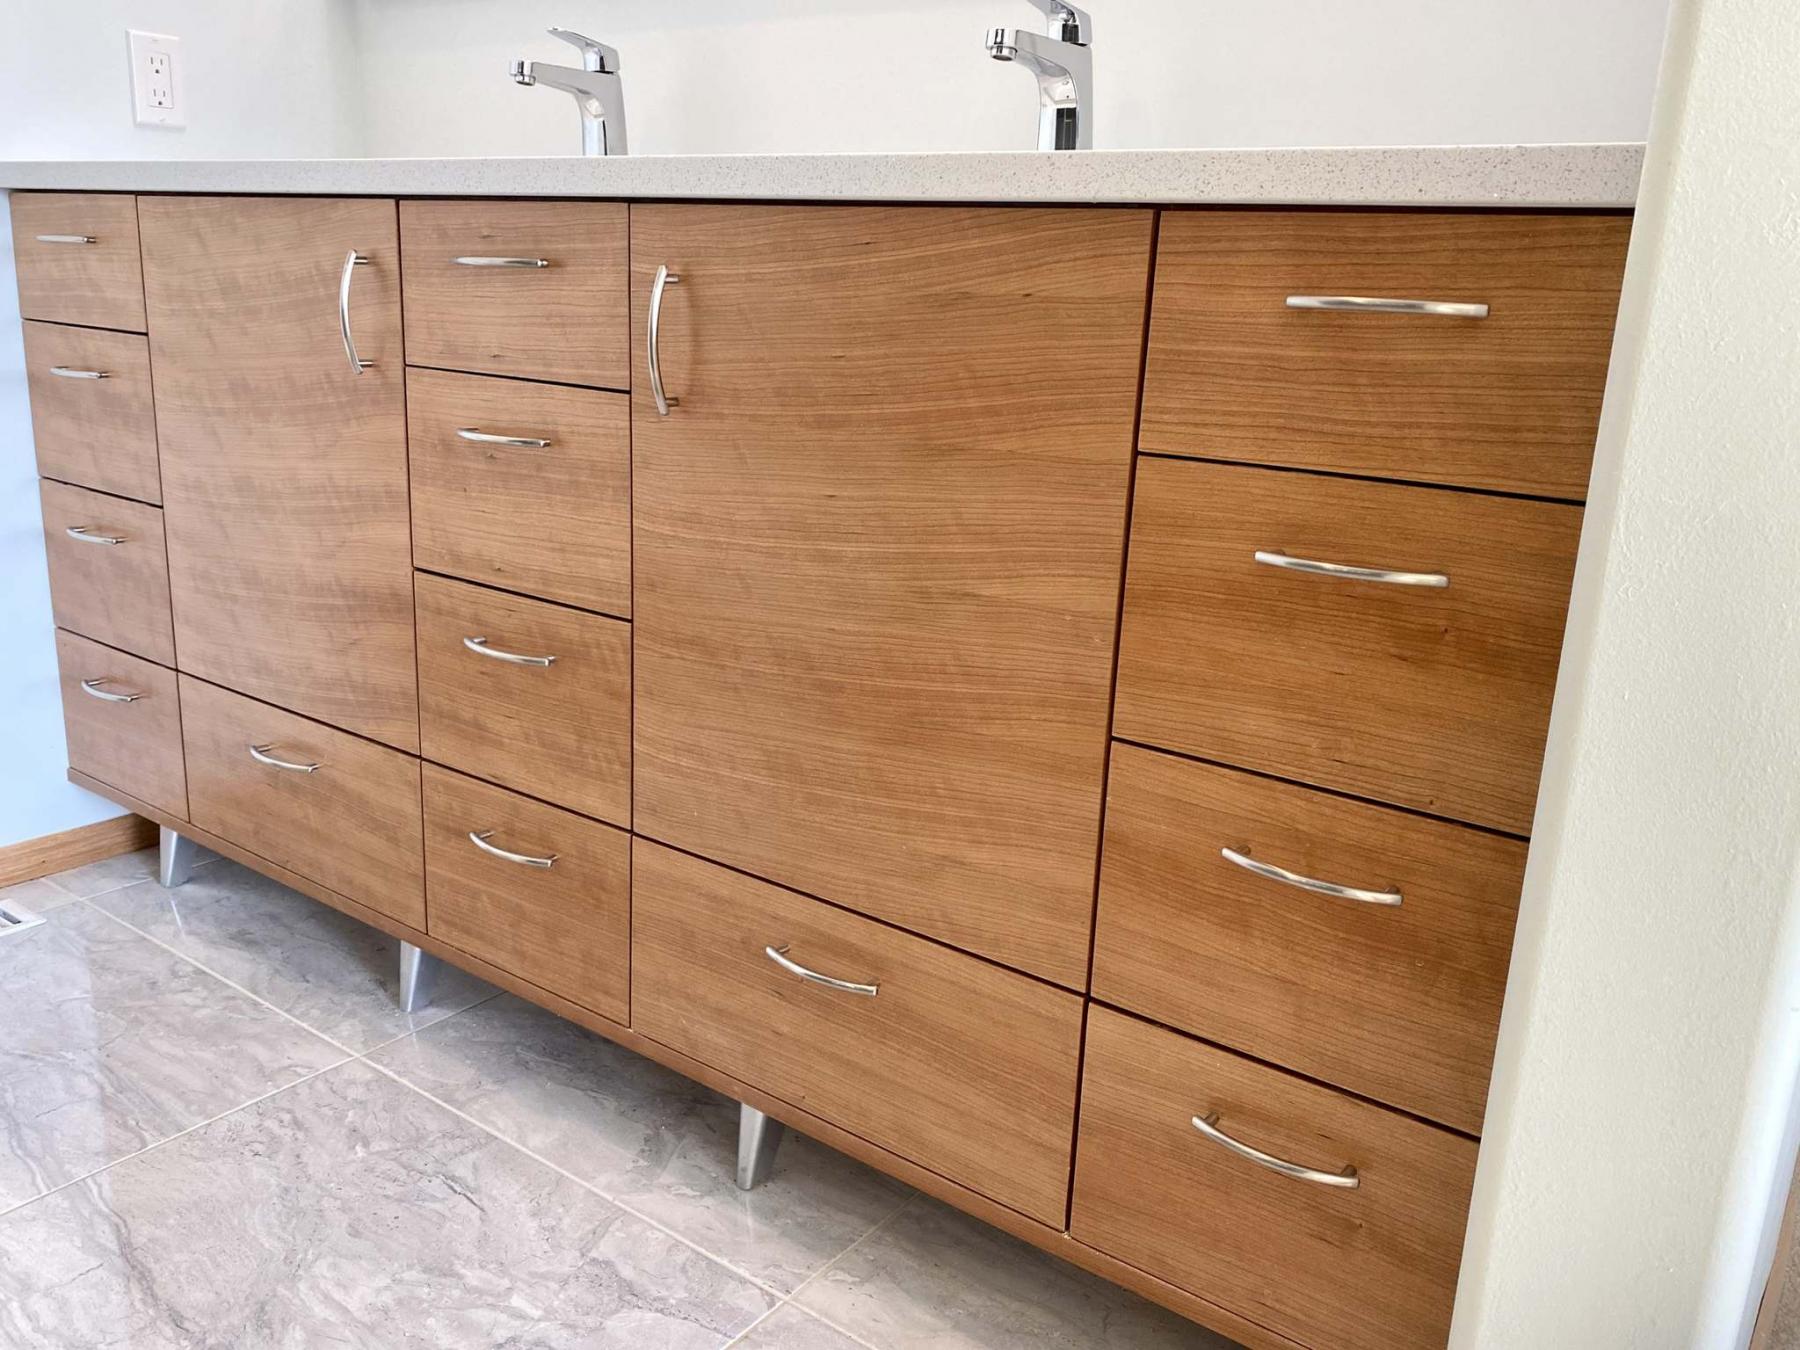
Once the careful measuring and drilling was completed all 16 handles were installed in perfect alignment.
Some of the most anxious moments can occur while doing tasks that take the least amount of time. That’s why it is so very important to ensure the proper measurements are taken, and a reliable process is undertaken.
For instance, adding the 16 handles to the door and drawer fronts of a very expensive cherry-veneer, double-sink bathroom vanity which was custom-made for a recent ensuite expansion and remodel got my heart pumping — any error was not an option, as it could not easily be rectified.
There are handle-mounting gadgets on the market. They are quite useful, albeit somewhat awkward to use. Fabricated to cater to an assortment of handle sizes, it then becomes imperative to learn how to effectively use the tool to avoid any mistakes along the way. For the few occasions it is necessary to install handles on cabinets in my varied world of renovations, I find it easiest to simply create a handle template on site, based solely on the specifications of the handles chosen for the project at hand.
During my recent ensuite expansion and remodel project, the cherry-veneer double vanity was first installed within the inset wall cavity. Once affixed to the back wall, and after the quartz countertop with undermount sinks and faucets were mounted, it was time to add handles to the cabinet doors and drawers. This can be a daunting task, if you intend to individually measure the exact location for each handle on every door and drawer, as it exponentially increases the probability of an error in placement to occur. Best to minimize the odds, with a reusable template.
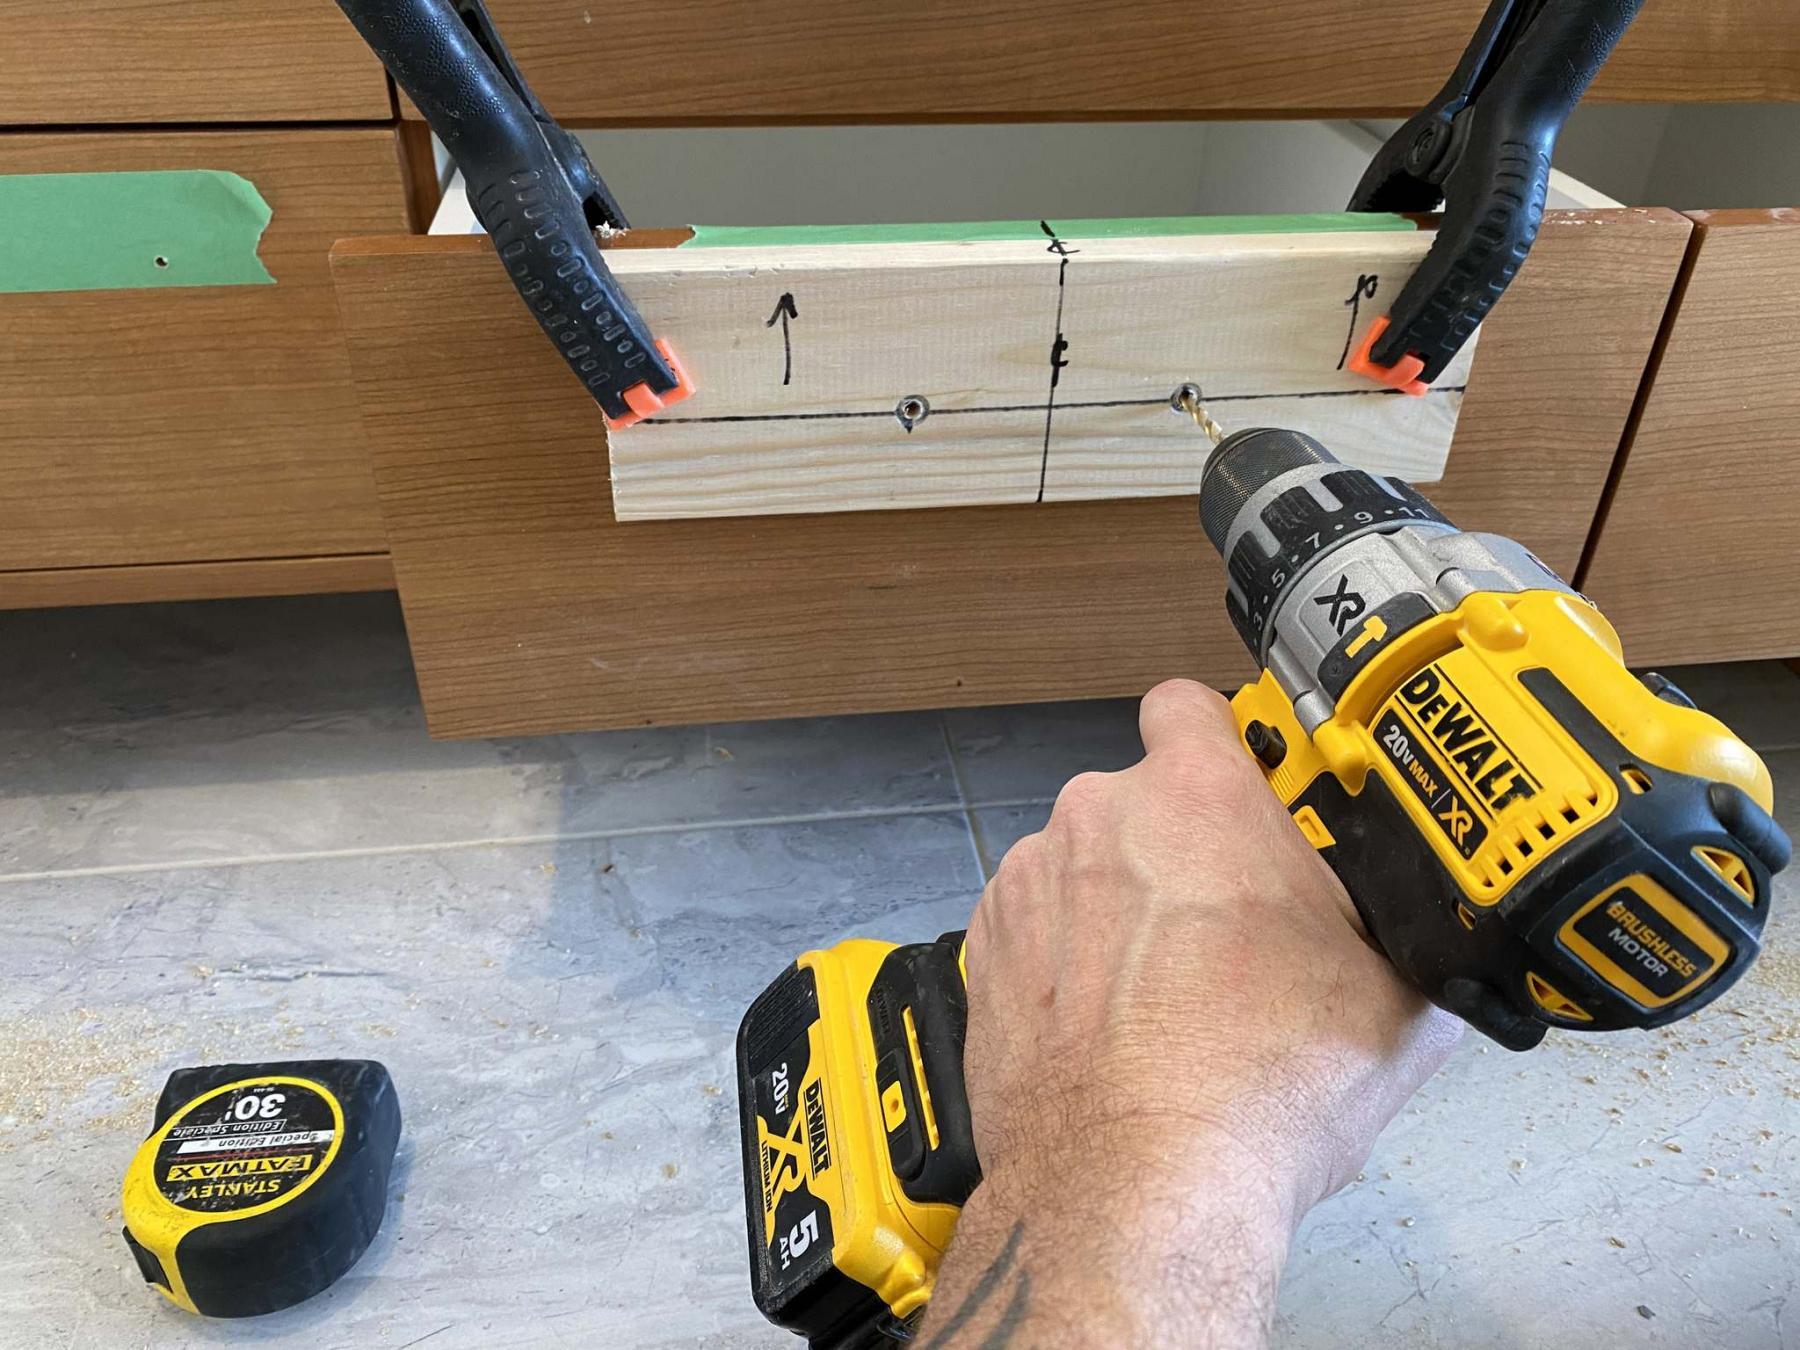
The handle template is created by cutting a short section of 1x4 spruce. A line is drawn parallel to the long of the board, at the same height differential as the intended height from the top of the drawer top to the handle placement of the drawer front. A centre line is then drawn, and marked along the template face and top edge. The distance between the two handle posts is measured, and marked onto the template, centred with the vertical centre line. Arrows are then indicated to ensure the template is always facing properly. Using a drill bit one size bigger than the handle mounting bolts, holes are drilled along the horizontal line on the template. After testing the accuracy of the hole placement by temporarily mounting a handle to the template, the process of pre-drilling holes onto the doors and drawers can begin.
At every handle location, green masking is placed to protect the surface of the cabinet fronts. As well, tape is also positioned along the tops of every drawer front, and the centre of each drawer is marked along the tape. The template is the clamped into position of each drawer front with the arrows facing upward using two firm clamps, aligning the centre mark of the template with the centre mark on the tape along the top edge of the drawer front. Both holes are then drilled through the pre-drilled holes of the template. This process is repeated for every drawer.
Although there is no written rule about where to place handles, it is my preference to position all drawer handles the same distance from the top of each drawer, rather than centred along the vertical of a drawer height. That way, the handle is always closer to the top requiring less of a reach for the lowest drawers.
As for the doors, the handles will be positioned perpendicularly to the drawers. To determine their placement, the top edge of the handle is aligned with the top edge of the horizontal handles of the adjacent drawers. Furthermore, the inset of the handle will also match this distance. To establish this, the upper hole of each door was pre-drilled after marking the measurement of the green tape. The template is then positioned so that the upper hole of the template is in line with the pre-drilled hole on the door. The template is then set perfectly vertical with a level, and clamped into place. The second and lower hole is then drilled.
Once all the holes have been drilled, the green tape is removed. The handles are then installed using the two handle bolts provided for each, carefully adjusting the lineal position of every handle before final tightening using the minor play provided by the slightly oversized holes created. By this time, my face had truly turned blue from having had held my breath throughout the entire process — there was no room for error, and thankfully all handles were mounted exactly where they should be.
The entire handle-mounting process only took about 30 minutes from start to finish. However, this half-hour window of time provided some of the most anxious moments of the entire multi-week renovation project. The process isn’t all that complex — it’s the prospect of making an error that invokes uneasiness. That is why it is so critical to create a template specific to the chosen handles, and ensure that the placement on every drawer and door front is pre-established, well before the drilling begins — measure twice, even thrice if you must — to drill once with confidence.
BossEnterprise@outlook.com