Shopping malls are decorated, wish lists are growing and children are trying their hardest to be at their best.
The holiday season is drawing to a close and Home Hardware, through it's Beauti-Tone Paint Division, has project ideas to help.
"The holiday season is the perfect time to throw understated to the wind and go all out," says Bev Bell, creative director, Beauti-Tone Paint and Home Products Division, Home Hardware Stores Limited.
"But all out does not (necessarily) mean going full Griswold! Instead, very easily and inexpensively you can create the kind of beautiful and welcoming environment that lets those nearest and dearest know how much you appreciate them."
Make memories
It's the thoughtful details and personal touches that make the most precious, lasting memories. An inexpensive drop cloth, reusable alphabet stencils, and paint is all you need to make a lasting impression.
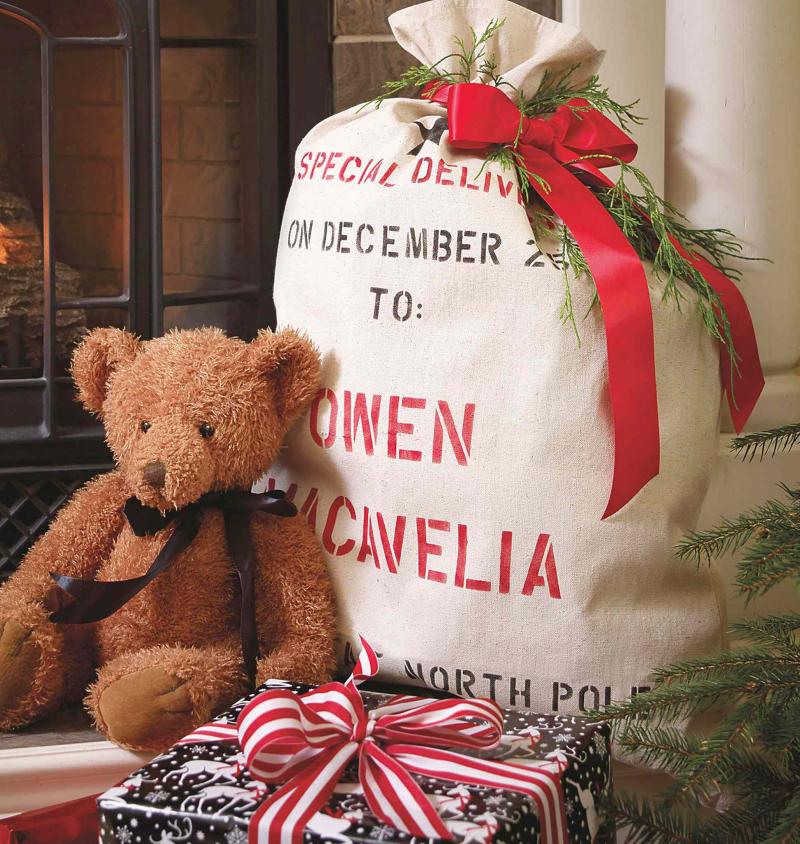
Santa sack
Imagine the smile you will bring to the face of someone special when a personalized Santa sack appears under the tree on Christmas morning!
What you'll need:
-- canvas drop sheet
-- One-inch and two-inch letter stencils
-- painter's tape
-- transparency film (8 inch by 11 inch)
-- hobby knife
-- stencil brush
-- Beauti-Tone red and black paint
-- red ribbon
Here's how
Santa sack measurement: 32 inch by 26 inch (shown). For larger size sack, use three-inch, four-inch and five-inch stencils.
-- Cut two 32-inch by 26-inch pieces of canvas. Sew three sides together, leaving the top open. Sew a 1/2-inch hem at top of sack.
-- Working from the bottom and ensuring your line is straight, stencil the first line. Use painter's tape as a guide to keep a straight line, and stencil from the middle out to ensure everything is centred.
-- Sew six inches of ribbon to the back of sack to tie.
-- Stuff with the best present ever!
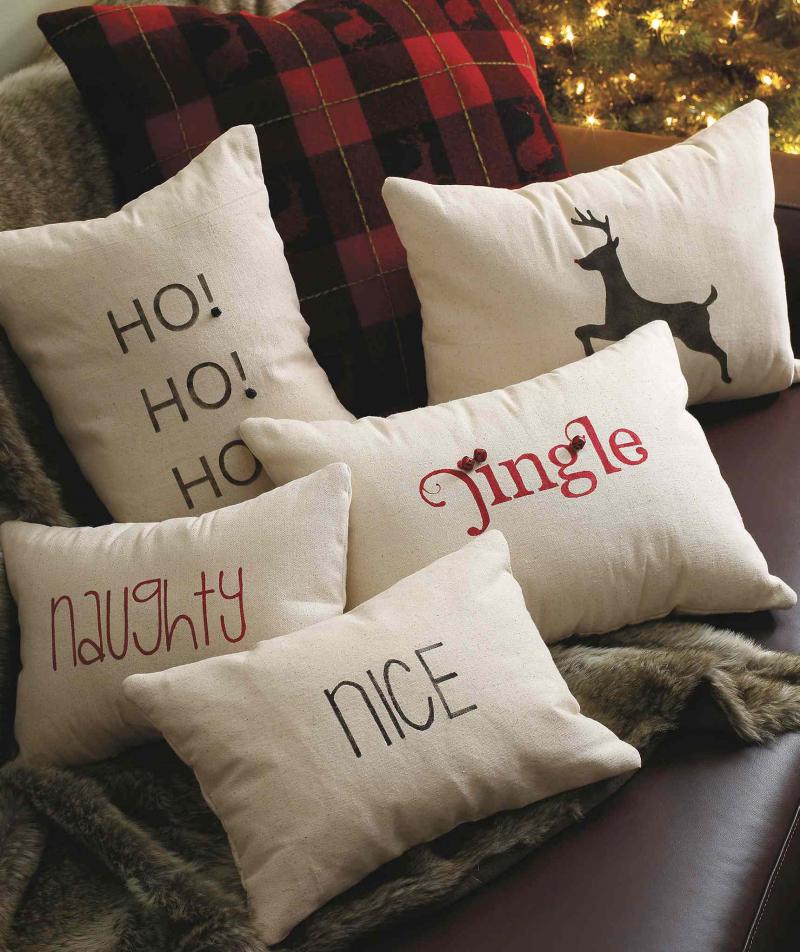
Pillow talk
Conversation pieces to decorate your home with holiday spirit.
What you'll need
-- canvas drop sheet
-- Beauti-Tone paint (featured: black and red)
-- hobby knife
-- stencil brush
-- small artist brushes
-- painter's tape
-- carbon paper
-- transparency film (8 inch by 11 inch)
-- quilt batting
-- fibrefill stuffing
Here's How
Pillow measurements: Ho! Ho! Ho! and Reindeer 15 inch by 20 inch, Naughty on one side and Nice on the other 16-inch by 12-inch.
-- Cut 2 pieces each from canvas and batting in the desired size.
-- Cut a stencil from transparency film or transfer design with carbon paper (shown), depending on your chosen design.
Stencilling: Place stencil in position on pillow front and tape in place. Use a dry brush technique: the paint on the stencil brush is wiped on paper towel to remove excess before applying to fabric.
Transfer: Trace design on front of pillow and fill in with paint and brush.
-- Sew the batting to the back of the two pieces of canvas.
-- Place the canvas sides together with the batting facing out. Sew pillow together, leaving an opening to turn it right side out. Fill pillow with stuffing and sew opening closed.
-- Casually display on your sofa knowing they were way easier to create than they look!
Make magic
Set the atmosphere for a magical evening. Mirror spray paint transforms ordinary glass into extraordinary mirrored treasures.
Star-studded affair
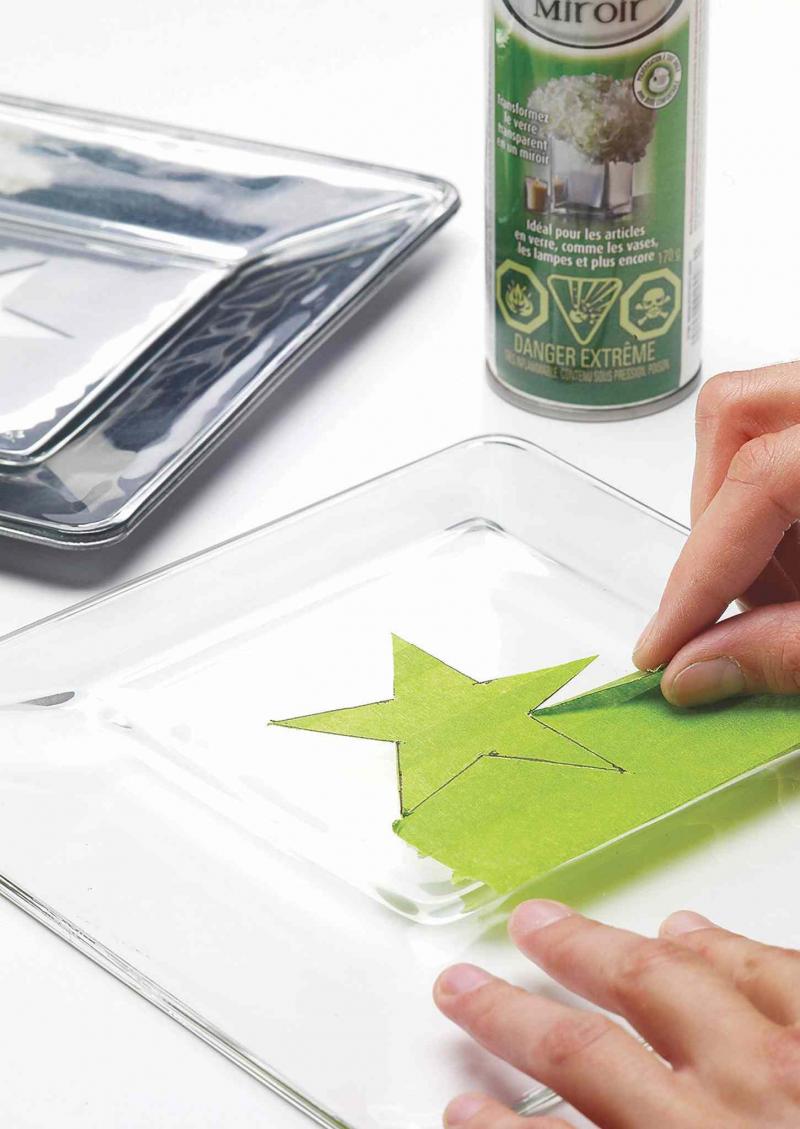
Simply spray the back of a basic 8" square clear glass plate or charger with mirror paint to add some star quality.
What you'll need
-- plate
-- mirror paint
-- painter's tape
-- hobby knife
-- clear sealer
Here's How
Place painter's tape on the back of the plate and draw a star in the middle. Cut the star out with a hobby knife. Remove excess tape, leaving the star shape. Spray the back of the plate with mirror paint. When mirror effect is complete (usually five coats -- let dry between each coat), remove star cutout and spray with a clear sealer.
Other ideas
-- Use leftover canvas to make Christmas stockings. Stencil each person's name on their stocking for a special touch. Adorn with bits of felt, bells, beads or whatever you have on hand. Don't forget about the pets. They'd love a stocking filled with treats as well.
-- Use the mirrored paint and paint stars or lettering for names on the outside of clear glasses or mugs. Give these as party favours at your Christmas party. Follow the same directions above to seal your handy work.
This is a great time of year to take a break from the mayhem and spend some quiet time creating hand-made gifts for your friends and family. Include the kid and make it a family affair.
Wishing you the best of the holiday season.
Connieoliver2014@gmail.com