Marc LaBossiere / Winnipeg Free Press
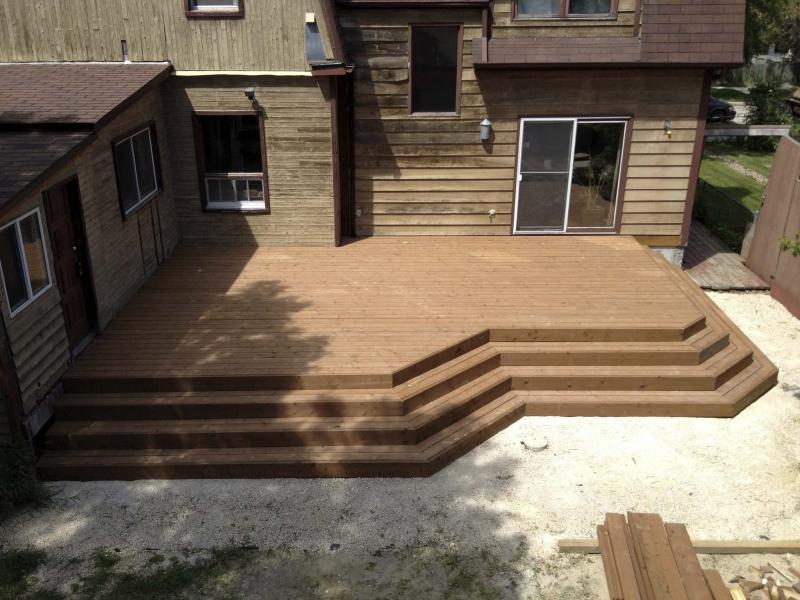
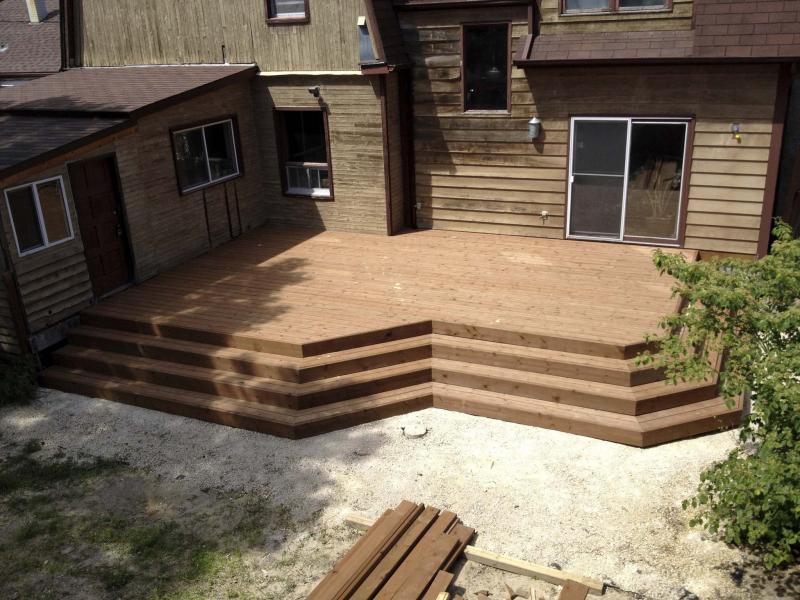
The deck adds a welcoming, useful space along the back of the home.
Marc LaBossiere / Winnipeg Free Press
This single-tiered deck was built with brown pressure-treated lumber with wrap-around stairs incorporated into the design.
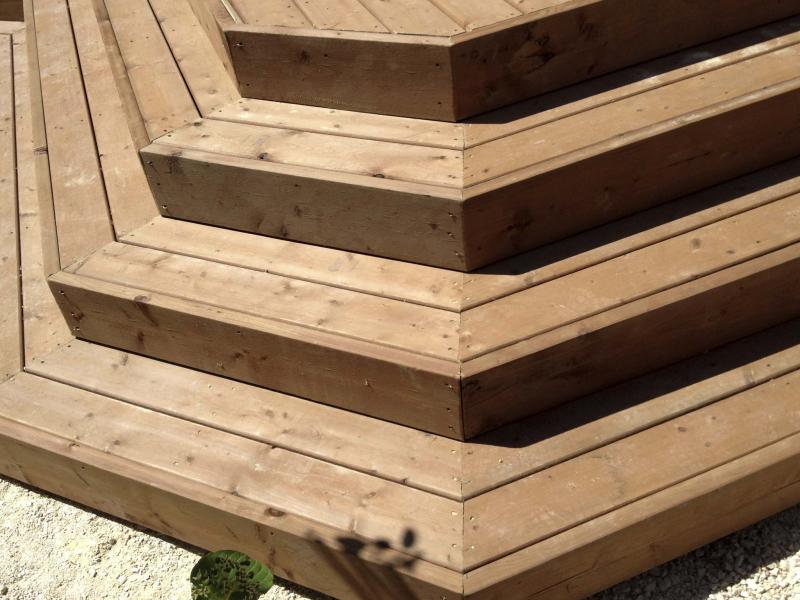
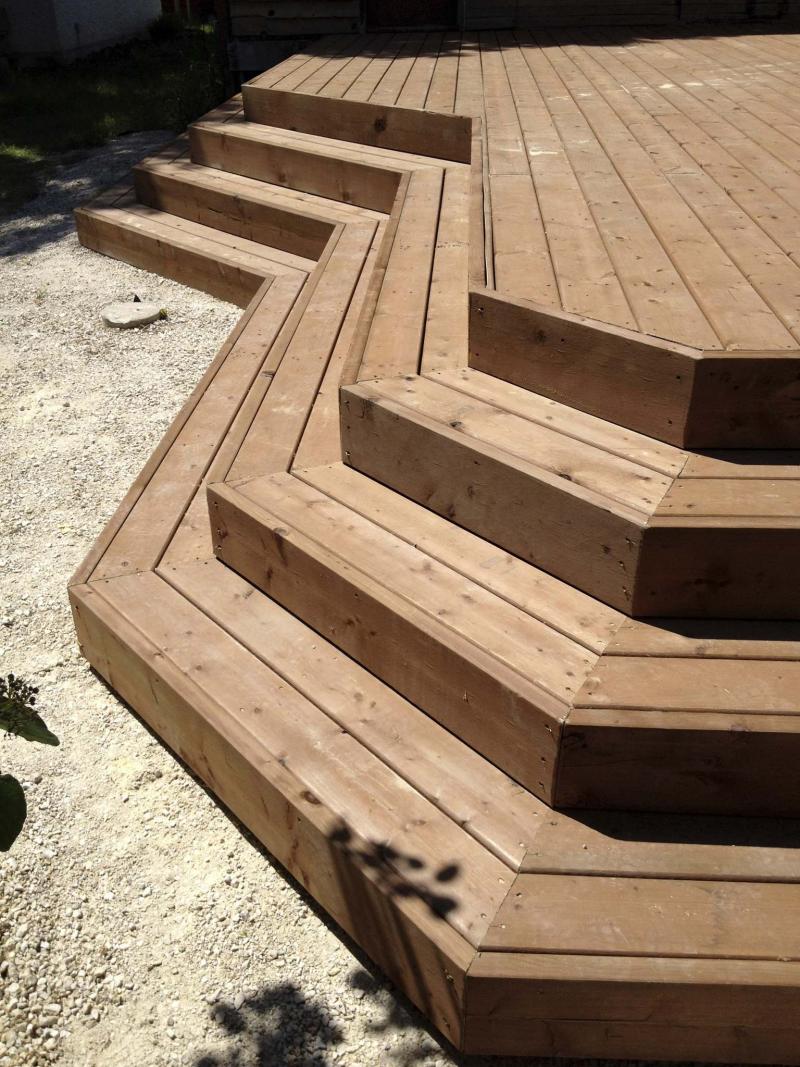
stairs detail of single tiered deck built with brown pressure-treated lumber, perimeter wrap-around stairs with 45-degree aesthetic features incorporated into the design
In the spring of 2015, a potential client, Nathalie Kleinschmit, had inquired whether a deck could be built at her St. Boniface residence in time for her daughter’s graduation party.
Following an examination of the intended deck-build location and a brief discussion with Kleinschmit regarding her deck design wishes, I agreed to the condensed timeline, and the deck was scheduled to be completed before the end of June — in time for the grad party.
Luckily, the deck plan was straight-forward enough. The single-level design with wrap-around stairs would be easy to frame, and there were no railings required. The base prep was typical — crushed limestone evenly spread throughout the deck’s intended footprint, with a slight grade from the existing foundation of the house. Bio-degradable spray paint allowed for easy marking while measuring for the precise placement of the support features of the deck’s framework. The 12-inch square, four-inch high concrete deck pads were set in place below the intended support beam locations, and the construction of the framework immediately got underway.
The main two-by-eight beams were arranged parallel to the long back side of the house. The first full-length beam location was set roughly four feet from the house. The next beam was also full-length, at the 10-foot mark. The final beam was actually split into two, as there was an angled deviation on the outer edge of the deck design, implemented for both aesthetic and practical purposes — Kleinschmit had indicated that a firepit would likely grace an area nearest the far corner of the deck, and I had suggested an inset would create a nice little nook as access to such an area. This meant half of the outer beam was placed at the 16-foot mark, and the other half at 12 feet, providing a four-foot inset.
With the beams in place, the perpendicular two-by-eight joists were arranged on 24-inch centres, until the framework was three feet from the edge of the back-exterior wall of the house. This was necessary to ensure that the stairs, which wrap along the entire outside perimeter of the deck, did not surpass the corners of the house on either side. The only obstacle I encountered during this build presented itself during the framing stage — an addition on the back of the house, onto which one main ledger was secured, was not quite ‘level.’ Apparently, the far end of the addition had sunken slightly over time. Upon discussing this with Kleinschmit, I suggested that it was best to frame to the grade of the addition, rather than build that end of the deck perfectly level, for two reasons — a level deck against the door’s threshold would be very noticeable, and, by securing the ledger to the addition following its slight grade, any future attempt at performing levelling adjustments to the addition would also correct the affected corner of the deck. Kleinschmit agreed, and the framing continued.
With the joists properly secured, and the entire framework of the deck completed, 24 stair-stringers — including specialty stringers for the inner and outer 45-degree angles at the inset and far corner of the deck — were cut on-site and carefully positioned at 24-inch intervals. Each stringer was fastened to the deck framework with TimberLok bolts, carefully levelled and set onto small concrete pads along the bottom portion of every stringer from heel to toe to ensure proper support along the entire length of the wrap-around stairs. With the stringers in place, top-decking could begin.
The two-by-six top decking boards were set in place one by one, in a parallel and staggered manner. I started from the outside and worked my way in, with every board fastened along every joist using two, three-inch deck screws. Once the decking was completed, the stairs were topped with two parallel two-by-six boards fastened to every stringer on each of the three wrap-around stairs along the entire outer perimeter of the deck.
To create the various 45-degree angles along each stair, the board ends were cut to 22.5 degrees. It was the lengths of the boards that varied greatly depending on whether the boards met at an inner or outer angle, and as the board lengths increased from top to bottom. With the top decking and stair-tops in place, the deck began to really come to life.
The final step would be the two-by-eight fascia — this stage proved to be much like installing the stair tops. Every fascia board also requires a 22.5-degree miter cut on each end to form a 45-degree angle. And once again, the precision of the board length measurements for every section of the fascia was key for aesthetic success. With the fascia in place and no need for railings, the deck was finished ahead of schedule, despite a rain storm or two.
It was finished in just a few days, with welcomed time to spare before Kleinschmit’s daughter’s graduation party.
This deck design provides a large top-decking surface that can easily accommodate a multitude of chairs and loungers. The design also incorporates access onto the deck from inside the house, at either end. The wrap-around stair layout is not just visually appealing — stairs built in this manner grant access to the deck from anywhere in the yard and can also serve as tiered seating, for a great view in front of a bonfire.
I’ve since heard that Kleinschmit’s daughter’s deck party was a success — the first of many, I’m sure.
BossEnterprise@outlook.com