Photos by Marc LaBossiere / Winnipeg Free Press
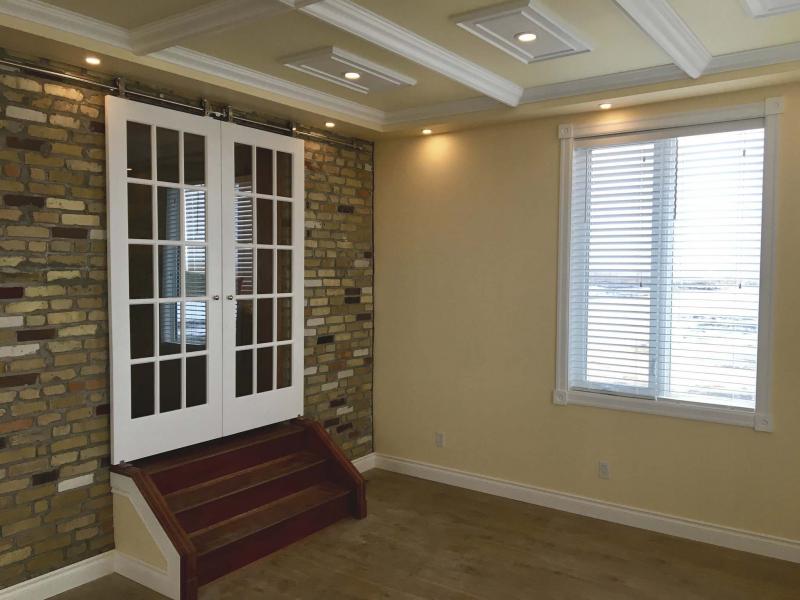
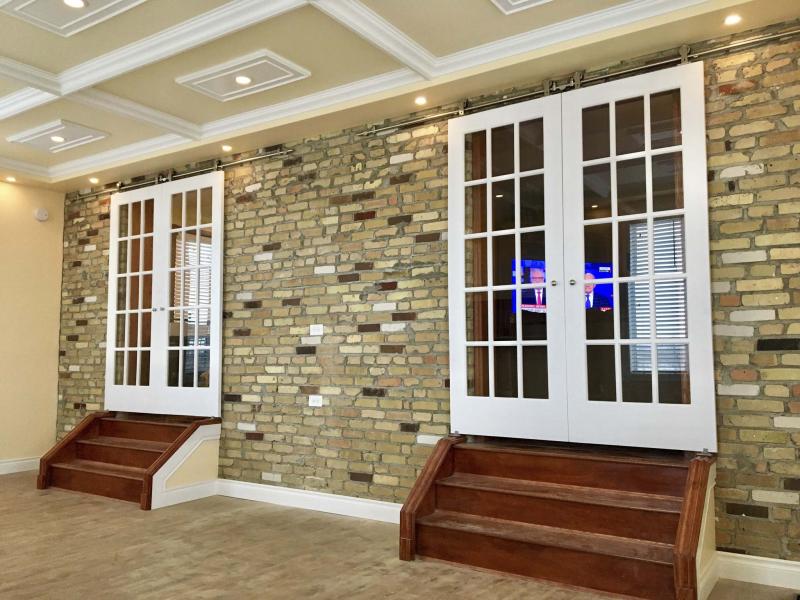
The feature wall is the exterior brick, which was retained, and the old window locations were converted to entryways.
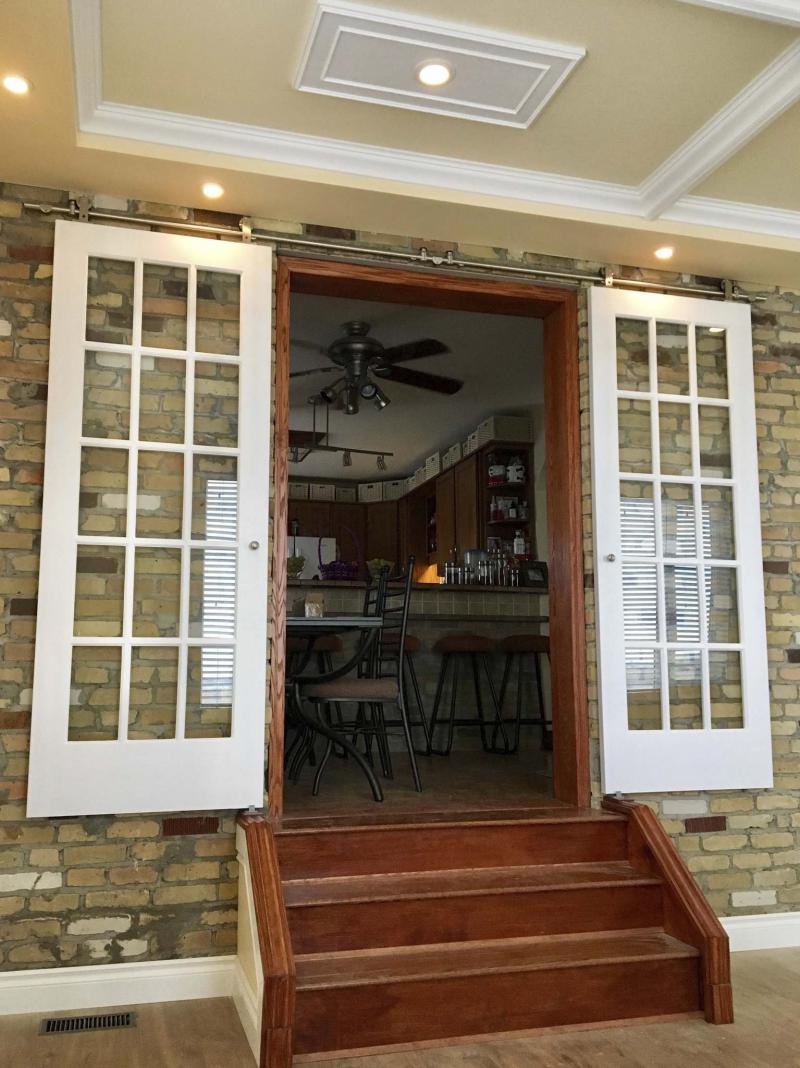
The tandem French doors open by sliding along a stainless-steel rod mechanism atop the entryway.
After months of planning, the framing of a two-storey addition to the south side of my house began on a warm and sunny day in mid-September 2017.
Luckily, the exterior was completed the day before the first official snowfall.
Amidst a rigorous schedule of catering to the renovation and construction needs of my clients, I’ve spent every free moment since tending to the numerous tasks required to complete the interior.
During the past few weeks, the to-do list began to dwindle and the end was clearly in sight.
With the decorative ceiling of the dining room completed, the wall surfaces painted and the laminate flooring installed in both the step-down dining room on the main floor and the master bedroom expansion on the floor above, it was time to tackle the intricacies of the finishing touches: the entryway oak jambs; custom oak stairs; window coverings; baseboards and casings; the four French doors leading into the dining room and the five-panel glass door leading into the master bedroom — all, of course, on custom barn-style sliding-door mechanisms; and lastly, the wall-mounted five-foot-long fireplace.
The oak jamb for the master bedroom entryway proved to be straightforward enough: one-by-10 vertical and horizontal boards levelled and fastened to the rough opening, stained with a cherry-oak tint and given three coats of Varathane.
On either side of the entryway, white casings and corner blocks (rosettes) were fastened, in keeping with the existing style of my home.
The entryways to the dining room were very challenging, as they replaced existing windows. As such, the windows were first carefully removed until just the framing of the rough opening remained.
The portion of the wall below the windows was also removed — the electrical wiring that was revealed was rerouted and the oak jambs were assembled in place, much like the entryway to the bedroom.
The main difference is an outset midway through the depth of the jamb was created to allow for a 2¼-inch oak trim to be installed on the dining room side of the entryway.
On the main floor, the casings, rosettes and baseboards are all tinted cherry oak. As such, all the trim around the jambs, as well as down the outer staircase stringers, were installed before the stain and Varathane coats were applied.
Instead of creating individual stairs treads, I happened upon a hardwood with accompanying stair nosing that exactly matched my stain.
And the width of the hardwood planks was mathematically perfect for a 10-inch stair run (top).
The planks were cut to length and installed with an inch overhang of the nosing on each stair.
With the staircases in the dining room completed, the casings and rosettes around each of the windows were tackled one-by-one, as well as all remaining trim of the upper-floor bedroom.
I left the baseboards in the dining room as the last trim step, as they presented a few difficult mitres along and around the underside of the staircase oak top caps.
At this stage, the two sets of double French doors for the dining room entryways were primed and given two coats of white semi-gloss paint on each side.
The five-panel glass door for the bedroom was stained on each side and given three coats of Varathane.
While each coat was systematically allowed to cure, window coverings for the six new windows were purchased and cut to width.
The two-inch white, faux-wood blinds selected match the existing blinds throughout the house.
The blinds were easily installed.
And once the lengths were properly adapted to each respective window height, the valances were then placed at the top of each new window covering.
I was both excited and anxious to hang the French doors in the dining room.
Although barn-style sliding-door mechanisms weren’t new to me, installing them as two sets of tandem doors cut to custom length and anchored to brick seemed a daunting prospect.
The stainless-steel rods were cut from 78 inches to 64 (to accommodate a 30-inch wide door), and the rod’s main brackets were affixed to the brick wall slightly above the entryway along a horizontal and level path, extending from the midway point of each entryway in either direction.
Once the rods were secured in place, the guide-roller assemblies were fastened two per door to the top of each door near the outside edges.
The doors were then carefully hoisted into position and dropped onto the rods — the rollers atop the rod provide an effortless, gliding process of opening or closing the door.
The doors’ stops were positioned along the rods, and guides at the base of the door were fastened to the tops of the outer stair stringer top cap to keep the doors at a constant distance from the wall.
Minor adjustments to the guide-rollers aligned each set of the tandem doors for a perfect fit when the doors are in the closed position.
The sliding mechanism for the bedroom door is of a different style.
A flat steel track was mounted on the wall above the doorway trim with spacers between the track and the wall, providing a two-inch gap.
The guide-rollers were fastened to the door along the face of the door, near the top edge.
The stops were set and secured, and the guides at the base keep the door perfectly aligned with the wall.
Once all five doors were functioning, small doorknobs were installed on both sides of each door to complete this task.
It wasn’t until the French doors were in the open position that I realized the five-foot wall-mount fireplace would not fit on the brick wall between the two entryways as originally planned — this was an oversight on my part, as the plan had indicated double 24-inch doors to accommodate the 48-inch-wide entryways.
At some point, my plan had been amended to use double 30-inch doors instead, for a variety of reasons (which included better coverage while the doors were closed).
I had not taken into consideration how this would affect the wall-mount fireplace.
Unfortunately, it was all too apparent that wider doors would no longer accommodate the four-foot-long backside of the fireplace, with the doors fully open.
As such, I elected to run a new outlet on the opposing wall, at a height conducive to hiding the fireplace plug once it was installed on the wall — a redundant task that took the better part of a day. In the end, it was well worth the extra effort.
As if meant to be, the wall-mount fireplace looks much better on its own, on the opposing wall, centred between the windows.
Had the fireplace been installed on the brick wall, it would have been hidden from view until a person was fully in the dining room.
On the opposing wall, the fireplace can be seen from all areas of the main floor.
And with that final obstacle overcome, I am happy to report that my two-storey addition is fully finished and ready to populate with the appropriate furnishings.
Quite the journey this has been! A big "thank you" goes out to everyone involved: Dave Wyllie and Mel Clubb at McMunn and Yates; Scott Schappert and the entire commercial desk crew at Rona Kenaston; James Doerkson, who helped me with the framing; Keith Peters, who tied into the ventilation system; both crews at Racka Roofing for shingling the roof and the torch-on below the balcony; Emile Morin and Lionel Curé for literally giving me a lift; Ivan Reimer and his crew at Render Construction for finishing up the exterior before the snow flew; my friends and family for their encouragement along the way; and my lovely Carole for her understanding and support during this busy time.
I joked in September that maybe it’d be ready by Easter...
Ha! Just made it!
bossenterprise@outlook.com