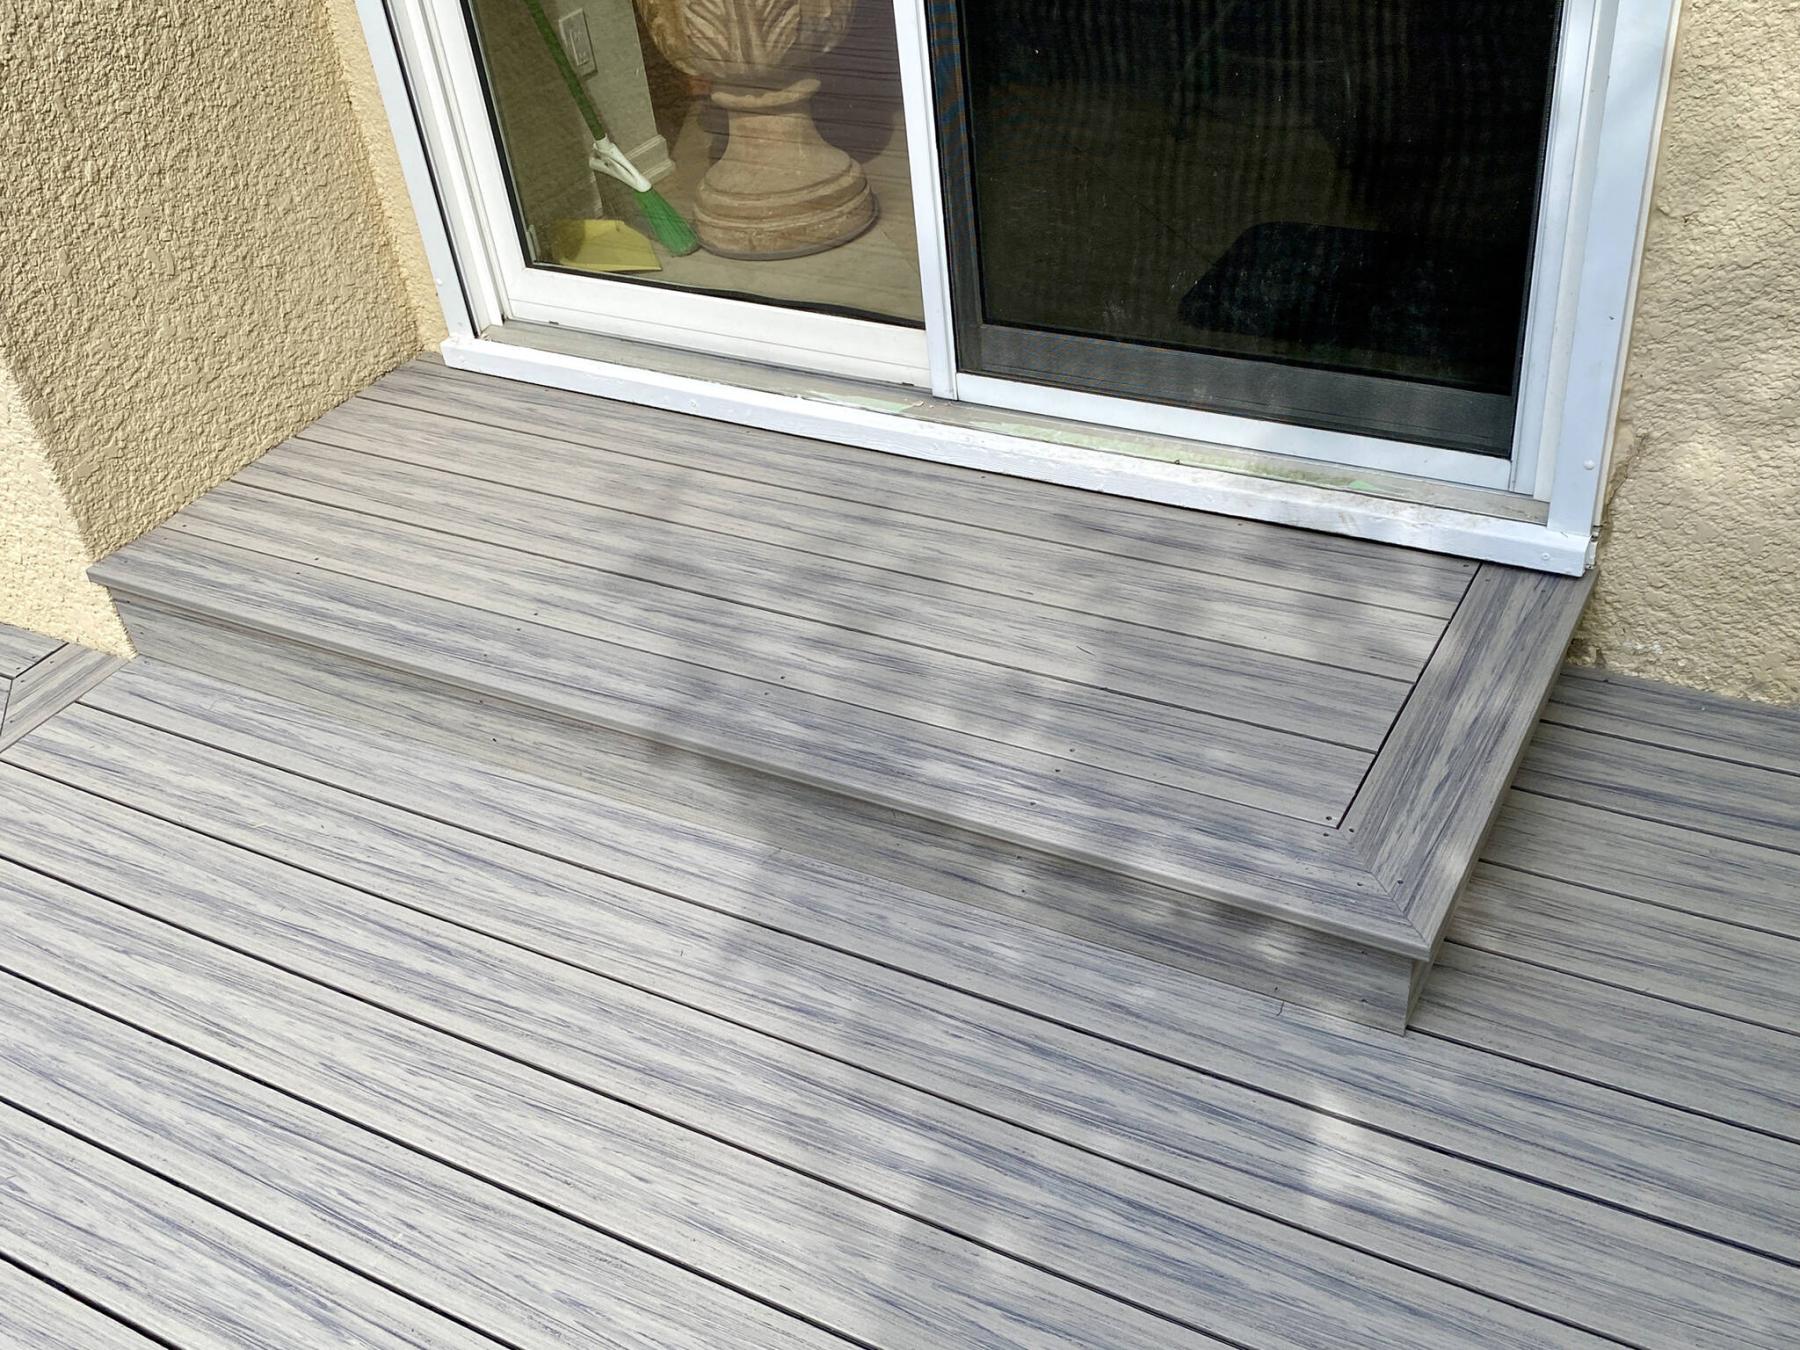
To meet the higher elevation of the sliding patio door, a removable landing was framed and sheathed in composite to match the design of the main deck
Photos by Marc LaBossiere / Free Press
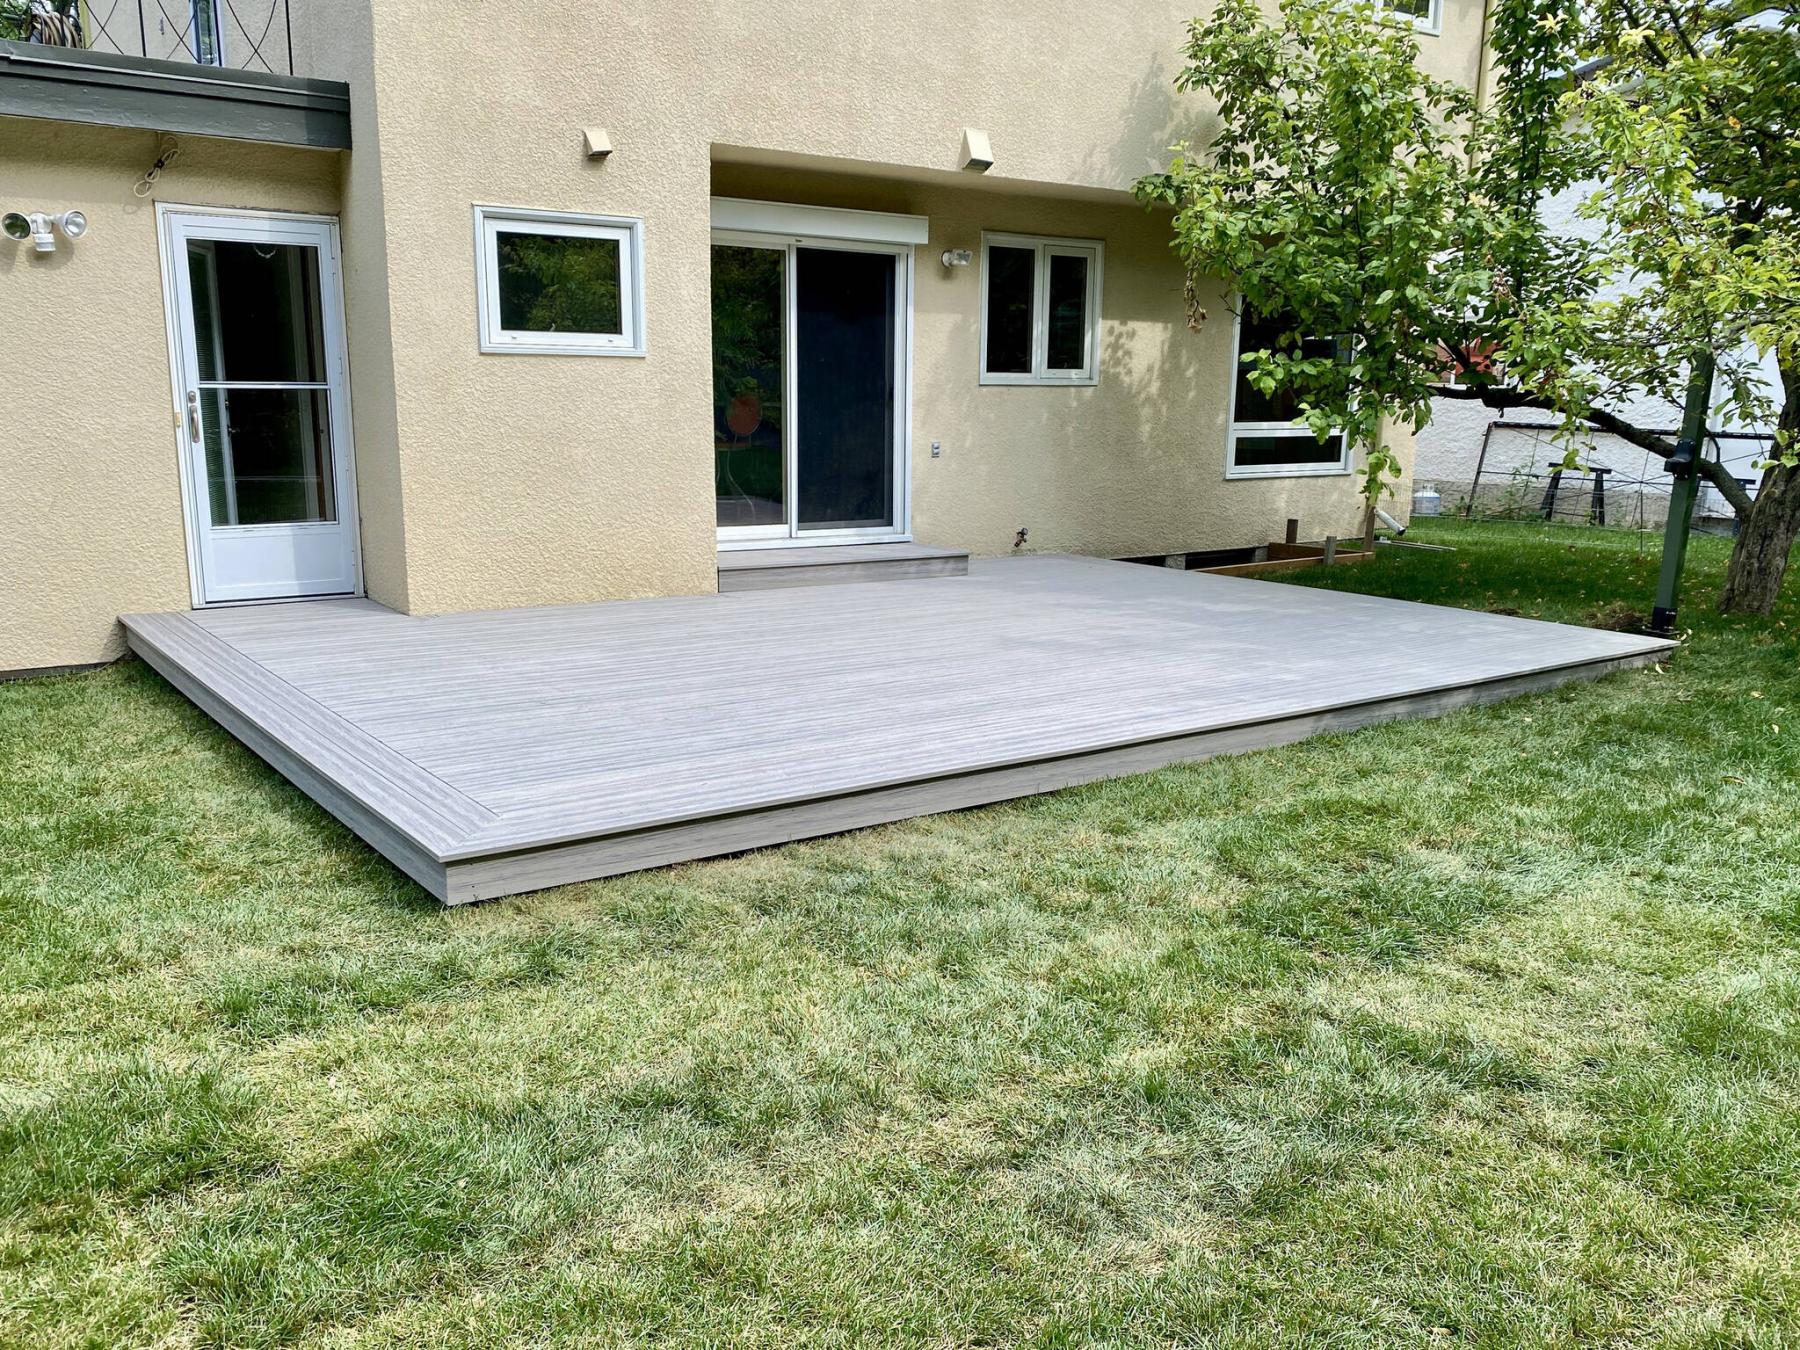
This ground-level deck was decoratively sheathed in Tundra, a popular Deckorators.com composite product.
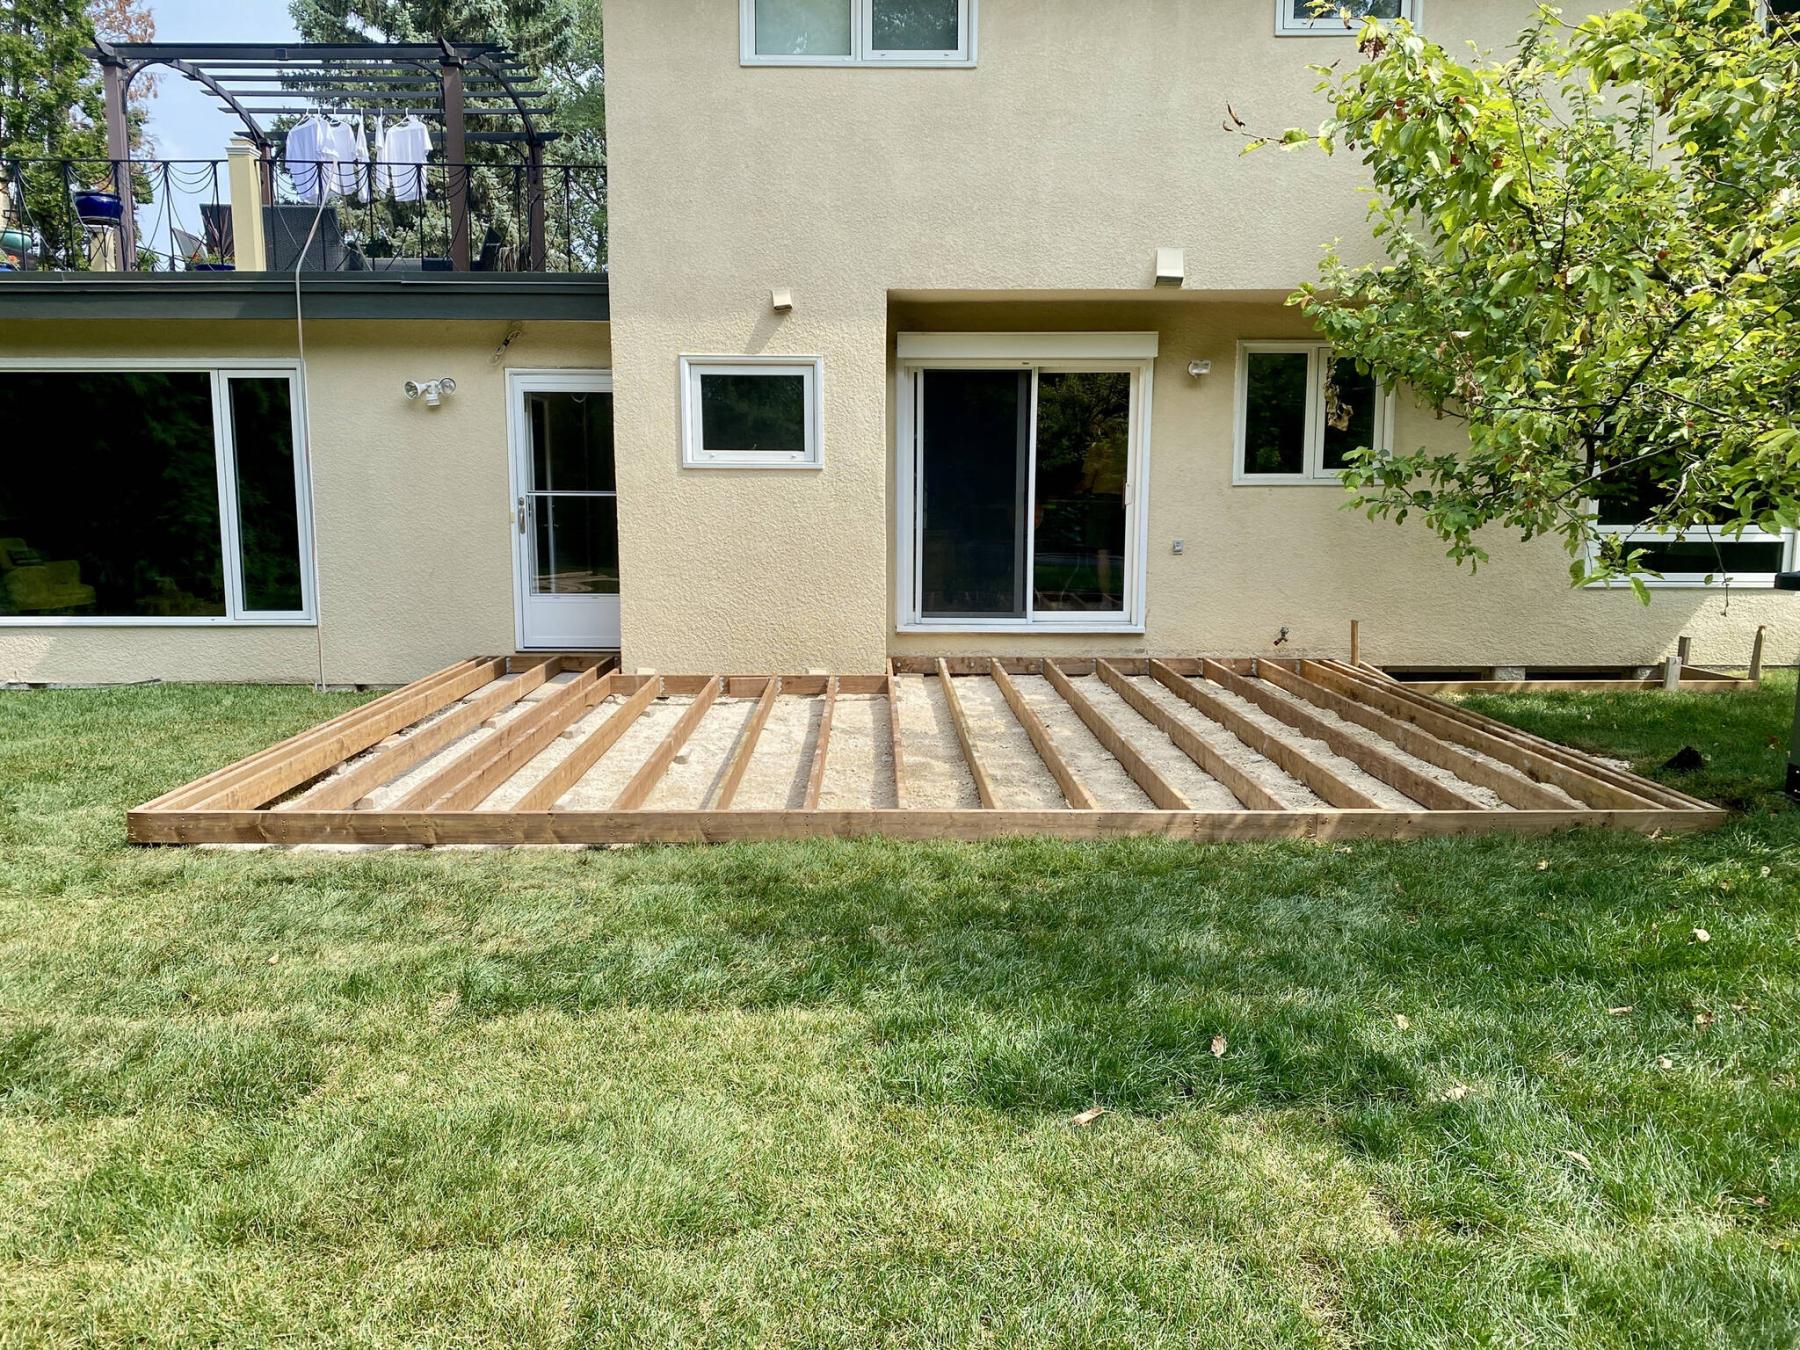
Contrary to common belief, a low or “ground-level” deck can often present bigger and more time-consuming challenges during the framing stage. Unlike the higher elevation deck built with joists that rest atop a beam, which uniformly supports and levels every joist throughout the structure, the absence of a beam on a low-level deck forces the implementation of support below every joist at set intervals, leveled individually and to each other. The framing process thereby relies heavily on proper preparation of the ground below the deck’s footprint.
Before the 22-foot wide by 16-foot deep deck project began, it was determined that the existing elevation of the backyard required a crucial adjustment, to ensure the grade at the backside of the house encouraged water to flow away from the foundation. Once the old and slanted concrete pad was removed by my good friend J.P. and his crew at Fontaine Landscaping Inc, they then leveled the yard, installed new window wells where required, prepped the impending deck footprint with three-quarter down gravel and subsequently sodded the re-vamped elevation of the backyard. With these changes implemented, framing of the new ground-level deck could begin.
The initial steps to setting the preferred deck elevation were established by choosing a height that would accommodate the lower of two back entryways. Using 2×6 treated lumber as joists atop small 2-inch high concrete pads at every four to six feet along the 16-foot joists, the framing elevation was best at roughly an inch-and-a-half below the lower door sill. As such, the main 22-foot ledger or nailer was mounted to the back wall of the house using 5-inch TimberLok lags (and concrete screws in various areas). Joist hangers were then secured to the nailer at 16-inches on-center, perpendicularly from the nailer. Once all joists were in place, the tedious task of leveling and supporting each joist began at one end, and continued to the other side until all joists were level unto themselves and each other, supported with small pads at consistent intervals using a zig-zag pattern from one joist to the next. With every joist supported, the ends of the joists were cut along a stringline to ensure a perfect lineal along the front side of the deck frame. The end plate was then secure to every joist completing the final tasks of the framing process.
Before the main composite top decking was installed, the entire perimeter was sheathed with matching composite fascia. The top-side perimeter was then adorned with two rows of squared composite boards, mitered at every corner to create a double-picture frame effect. Although visually appealing, this was also required to ensure the main composite boards, available at a maximum of 20-foot lengths, would fit within the picture-frame of the 22-foot wide deck without the use of end-to-end seams. Starting from the outside and working towards the backside of the house, the grooved top-decking composite boards were secured to the joists using hideaway clips. Along the house stucco, the final row was ripped using a tablesaw to ensure a clean long-cut.
Although the deck elevation chosen caters to both entrances, the sliding patio door is technically a full step higher than the man-door. As such, a removable back landing was framed and sheathed in composite to match the deck design, allowing for an easy transition through the patio door. As well, an unfortunate placement of vent covers along the house back-wall buildout required a tricky feature – a removeable panel was framed and jigged to fit along the buildout, allowing access to the vent covers when and if needed, without affecting the “look” of the deck. This deck was framed on the first day, and fully completed by the end of the second, despite the relentless heat and scorching sun.
There were several aspects regarding this seemingly simple ground-level deck that could have derailed the process. Luckily, the excellent ground-prep achieved by Fontaine Landscaping made framing and support of this deck much easier. And despite a few hesitations to ponder how to best address the area adjacent the vent covers, and the addition of the removeable landing at the sliding patio door (using remnants on site), the project turned out even better than expected. Sometimes, you just have to trust the process, and let things unfold organically. Although the finished product looks straight-forward, the complexities are, and will forever remain concealed below the top-decking.
RenoBoss.Inc@outlook.com