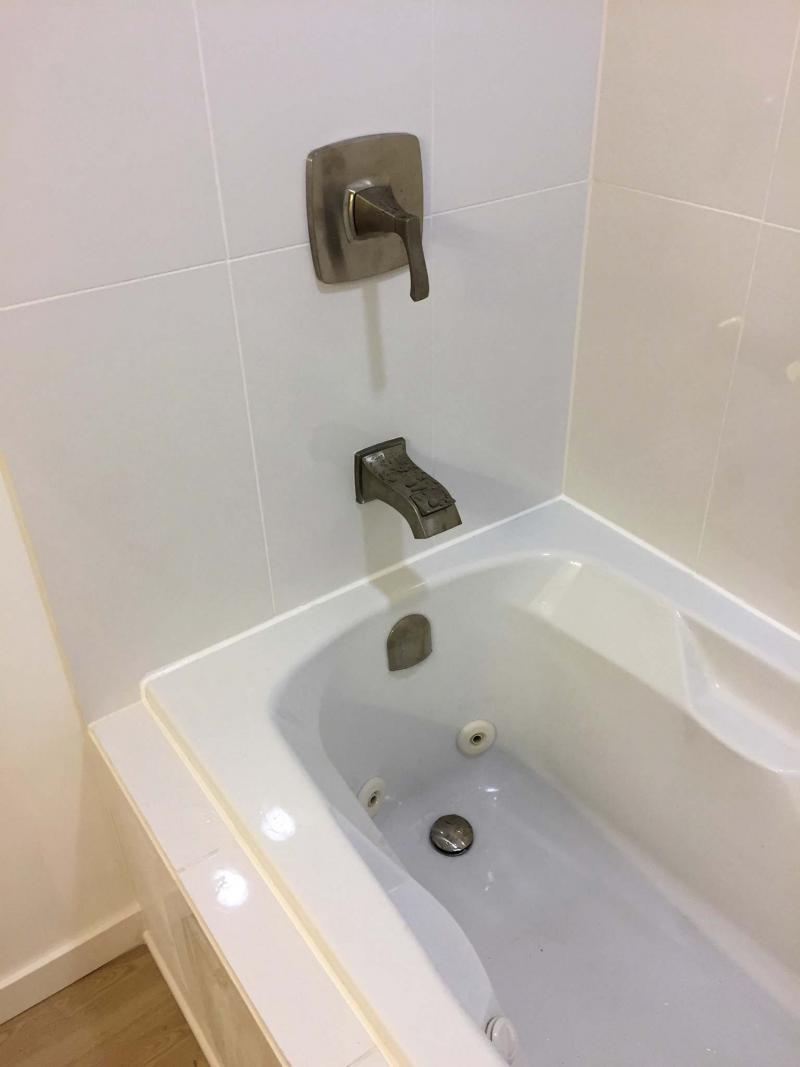
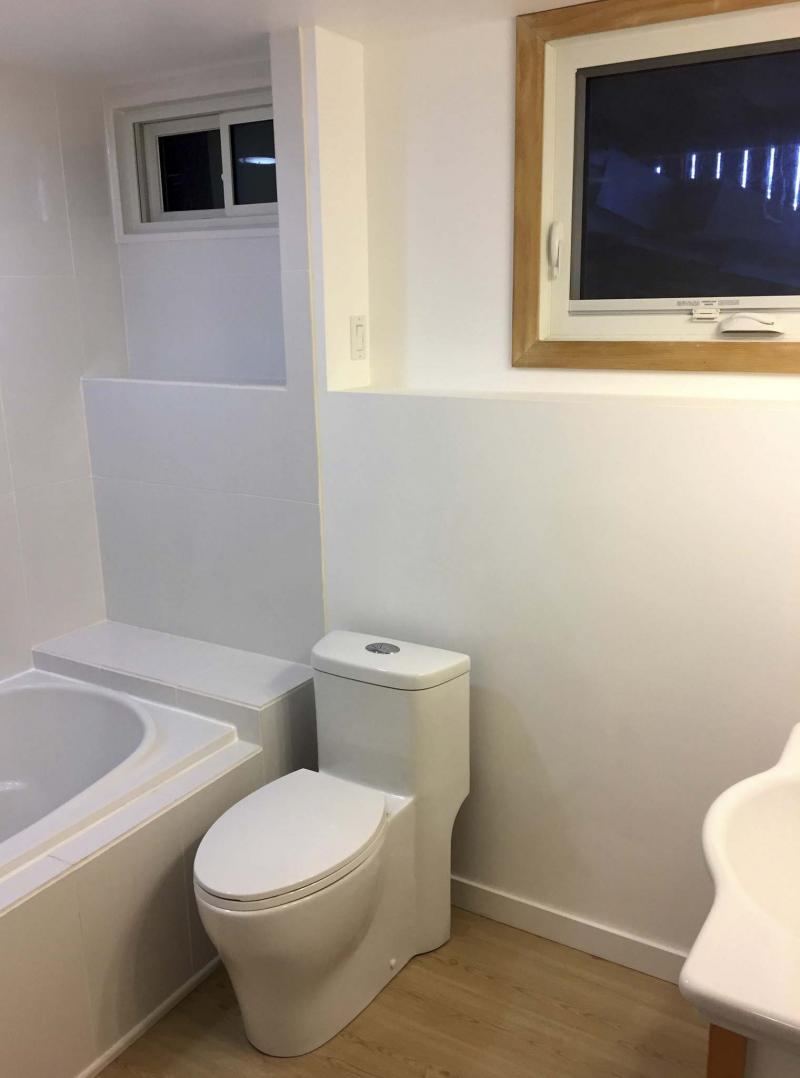
The tub was sealed along the tile edges with white silicone.
Photos by Marc LaBossiere / Winnipeg Free Press
The client wanted her bathroom to get a facelift — to go with a new tub and shower.
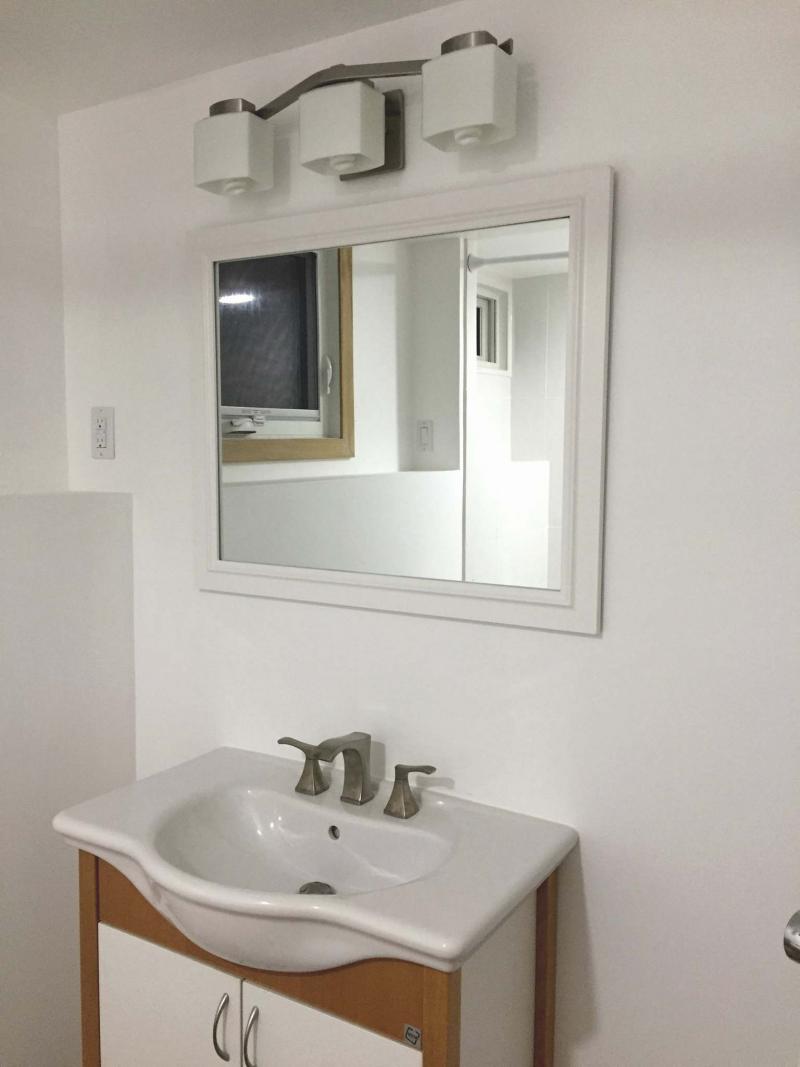
The vanity’s wood tone coincidentally matched the recycled casings for the main window.
The simplest requests can often be the most complicated to complete. Converting a two-piece bathroom into a three-piece is difficult, and introducing the required plumbing can be quite challenging.
Now, add to this the repositioning of the three pieces within the bathroom and a complete reorganization of the plumbing is required. But when the bathroom is in the basement, and access to the plumbing can only be achieved by busting up the concrete, a bathroom remodel of this nature borders on the extreme.
A while back, my column featured a laundry room, fully remodelled to promote functionality and feature better esthetics. The washer and dryer were encased in a cubby with cupboards above, cupboards along the upper perimeter of the remaining walls near both freezers and an isolated area for the new laundry tub. This was only half the story.
On the other side of the wall (which had been moved roughly two feet into the laundry room space) is a fully remodelled three-piece bathroom. It was a two-piece bathroom that hadn’t been in use for some time. My client, Barb Adams, requested that her bathroom could be given a facelift... oh, and she also wanted a tub and shower. After a long explanation regarding the complexities of repositioning and introducing bathroom services in a basement bathroom, Adams elected to proceed anyway. And here’s how it was done.
The first step: assess the existing plumbing and determine what needed to be modified in order to accommodate my client’s request. For this, I called upon my plumbing experts at RMB Plumbing. Robert Bruneau and his crew have always provided excellent advice and service. Once the general details of the impending bathroom transformation were discussed, Bruneau met me on-site for a "hands-on" look. The existing bathroom had been gutted down to the studs, including removal of the ceiling drywall to reveal any existing plumbing within the main floor joists above. With a few glances up and around, Bruneau, without hesitation, hashed out a plan. Since the wall separating the existing bathroom and the laundry area would need to move into the laundry space to accommodate the introduction of the tub, the existing "stack" would also need to be repositioned. And by doing so, much of the existing drainage pipes for the main floor would also need to be realigned. Bruneau nonchalantly explained "we do this stuff all the time," which set my client’s mind at ease.
It took the crew from RMB a couple of days to complete the tasks. On the first day, they busted up the existing concrete floor, which allowed them to locate all existing drainage lines, and reposition the new lines. Once the sink drain and toilet flange were resituated, and the tub drain introduced according to the design plan, concrete was poured and levelled to the existing concrete floor elevation. With the "underground plumbing" intact, my tasks could begin.
At this point, things for me were business as usual. The tub was of standard five-foot length. Because the width of the bathroom was close to six feet, a ledge was included while framing the back side of the tub area. Due to the existing window configuration in the bathroom, and in that there was an eight-inch ledge along the top side of the foundation, I decided to frame an eight-inch divider wall, which precisely separates the two windows, and allows for a shower curtain to maintain contact with an edge from top to bottom when using the shower stall. With the framing in place, the tub was installed and plumbed. The electrical for all lighting, the exhaust fan and outlets was run and connected, and rough plumbing for the sink was prepped. Aqua board was then installed on the ceiling and the walls. The mudding and taping steps were achieved in the usual stages, allowing each coat of mud to properly dry before applying the next. Once the final skim coat had cured, sanding could begin as prep for the painting stage.
Adams really only had one other request: "I want everything white." So, the ceiling and walls were primed and given two coats of pure white, mould-resistant bathroom paint. The shower stall and tub box were tiled with ultra-white 13" by 19" tiles. White grout was used to finish the tiling stage. The tub was siliconed along the tile edges with, you guessed it, white silicone. The "white" toilet was then installed, as well as the predominantly white sink and vanity. Because the vinyl laminate flooring that was chosen, and installed throughout the basement level, was of a light beige wood tone, the vanity that Adams chose had similar wooden trim tones, which coincidentally matched the recycled casings for the main window in the bathroom. The vanity light was installed, and the mirror hung. For the first time in a very long time, water flowed from the taps, and a functioning "flush" could be heard from this basement bathroom. And best of all, this space now features a tub and shower. A big thanks to the RMB Plumbing crew — great job!
Nothing like a good challenge to keep the creative juices flowing. It is, however, always best to leave tasks most difficult to the experts. Busting concrete doesn’t frighten me. Improperly busting concrete and inadvertently breaking underground drainage pipes, on the other hand, is something I wish to avoid. By soliciting the expertise and talents of the RMB Plumbing guys, the bathroom renovation was completed successfully, and slightly ahead of schedule. A lesson in delegation, and a great example of collaboration.
bossenterprise@outlook.com