Marc LaBossiere
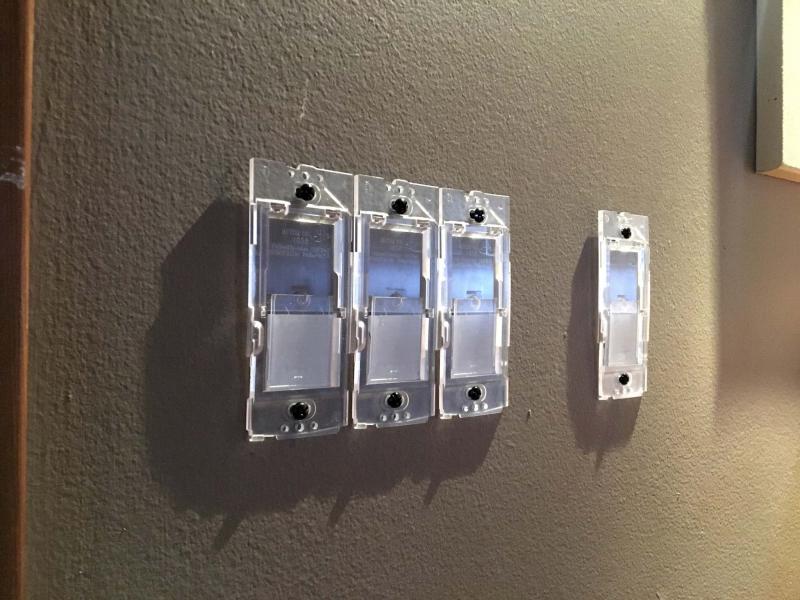
Single-pole Caséta wired dimmer switches installed on a newly framed external wall of the main floor of LaBossier's two-storey addition.
Marc LaBossiere
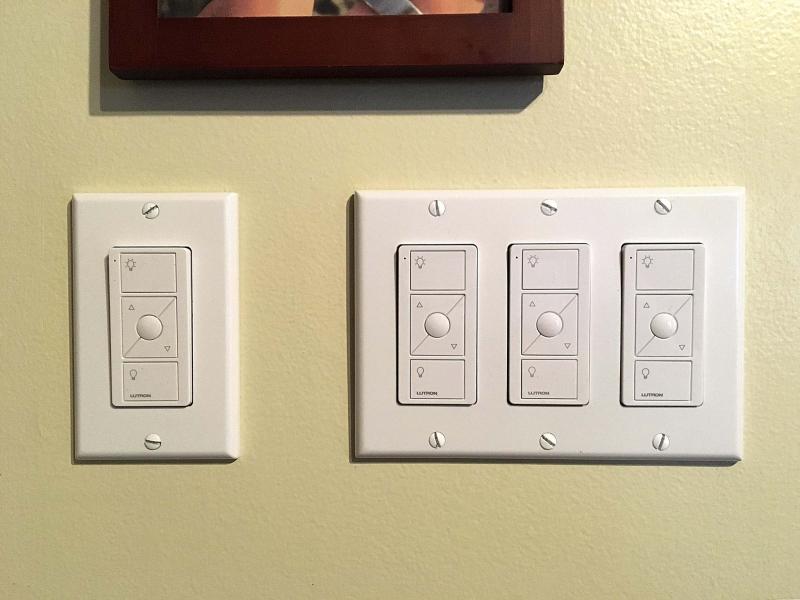
Caséta remotes mimic the look and size of a standard light switch.
Marc LaBossiere
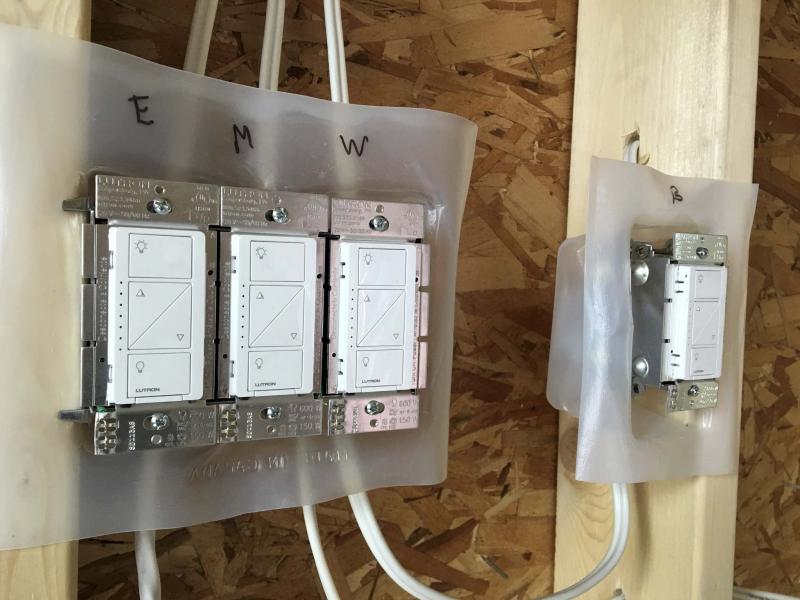
All four, single-pole Caséta wired dimmer switches installed on a newly framed external wall.
How to configure the electrical requirements for the two-storey addition recently built on to the south side of my house has been a source of anxiety in recent months.
Typically, running electrical wire throughout new framing is easy: the required holes are drilled through each stud and the wire is pulled from one electrical box to the next. This is straightforward stuff. The insulation and vapour barrier are installed after the electrical has been completed.
However, since the inner wall of the new step-down dining room on the main floor was an exterior wall and the brick on the wall’s exterior was retained as a decorative feature within the new dining room space, the introduction of new lighting switches presented a big headache — a plethora of electrical wire would need to be pulled through the wall, from below, to satisfy four instances of three-way fader switches.
That was the plan — until a new product by Lutron caught my eye!
Walking down the electrical aisle at the local hardware superstore has never been more complicated than it is today. There are a multitude of switches, dimmers, faders, timers and outlets from which to choose. Some switches only work with incandescent lighting, while others are optimal for LEDs. To avoid a return trip, you need to know exactly what it is you seek. My pursuit was simple — to satisfy the four individual instances of LED pot-lighting within my new dining room ceiling, controllable at each of two entryways into the dining room, I’d need a total of eight three-way switches that work with LED lights.
At first, I intended to buy four three-way fader switches and four standard switches. The faders would be installed adjacent to the entryway that would get the most traffic and the standard three-way switches adjacent the other entryway — this made sense to me. Once in hand, I’d then have to breach the existing wall at each entryway and fight with the insulation within the wall in an attempt to pull both 14/2 and 14/3 wire at several locations from within the new space, down into the basement and up into the wall cavity.
Once the necessary wires were pulled through and visible at each breach, four-gang electrical boxes would then need to be mounted once all wiring had been first secured into each box, to a stud adjacent to each breach of the existing wall. It was a daunting task, but I was prepared to complete this last of electrical steps, no matter the obstacles that arose.
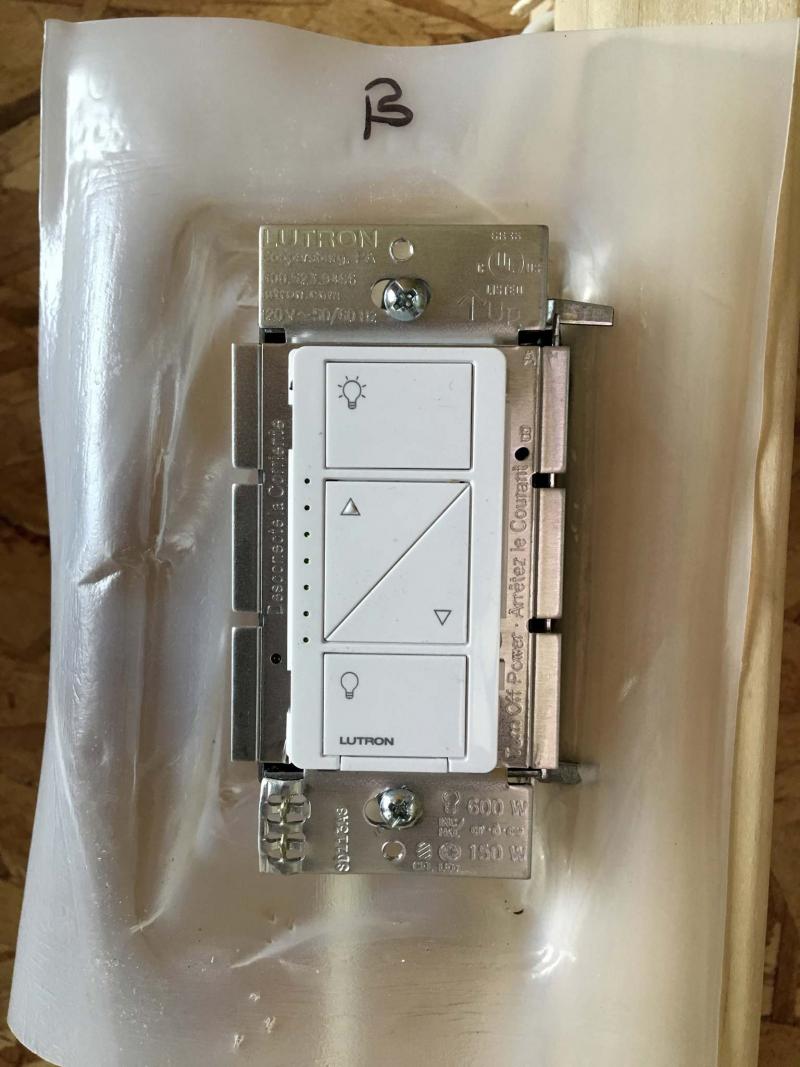
And then there it was — behold the dawn of ever-increasing feats of technology! Atop rows and rows of switches that do either this or that or both, a nicely packaged combo pack sparked my curiosity. Lutron, a company well-known for manufacturing specialty light switches, amongst other electrical solutions, has implemented their newest line of switches — the Caséta wireless switch. In a nutshell, the combo pack includes two separate devices; the LED-rated dimmer switch, and a battery-operated remote control. The remote once "paired" with the light switch, can control the lighting of that instance from anywhere within a 60-foot uninterrupted radius, or 30-foot radius separated by interior walls.
I began to get excited. Up until this point, it was necessary for me to breach existing walls and pull wire through inconvenient wall cavities just to allow a modicum of control over the new dining room lighting as I enter the new space. Could I now avoid all of this?
I elected to call the manufacturer directly — I had many questions! The gentleman from Lutron informed me that once the wired switch was connected and powered, there was no limit to the number of remotes that could be paired to that one switch. The remote itself is powered by a simple watch battery that lasts up to 10 years before it needs to be replaced. I was also informed that the ‘pairing process’ included the serial number of the wired switch, rendering each switch and the paired remotes a unique "pair".
And just like that, my wall breaching anxiety was vanquished: this was a solution I had not even imagined was possible. Not only could I avoid digging into my existing walls to introduce switches, I could technically have multiple remotes for each switch, where desired.
With this newly found approach, I elected to install the wired switches within the new dining room space, on a newly framed wall at the base of the stairs. Controlling the lighting at each entryway from within the existing part of the house would now be via remotes, two paired to each of the four wired switches, eliminating wire-pulling through existing exterior walls altogether.
Pairing was extremely simple — hold the "off" button of the wired switch for six seconds until the switch indicator lights begin to blink, then hold the remote’s "off" button until the lights on that circuit fade on and off three times, indicating a successful pairing. Systematically, all eight remotes were paired, two for each of the four wired switches.
And — upon further investigation (this is the best part) — Lutron conveniently manufactures a Caséta switch wallplate bracket called Pico, because the Caséta remote mimics the dimensions of an actual wired switch, the Pico bracket provides an easy wall-mount application of a remote. Essentially, this plastic bracket simulates the installation of an actual switch, mounted to a standard electrical box OR surface-mounted to the drywall.
The bracket has a sleeve on which the remote can slide. By carefully measuring and subsequently mounting the brackets in a way that satisfies the gang-switch configuration so desired, the remotes appear as normal light switches once the cover plate has been installed. What a truly amazing, time-saving discovery!
Overall, it took less than one hour to install four wired Caséta switches for my dining room lighting configuration, perform the pairing of two remotes to each of these four switches and mount and install the Pico brackets, remotes and cover plates. This technologically advanced Caséta switch by Lutron is a game-changer. It is now possible to create three-way (or more) switches without having to introduce new wiring. Furthermore, Lutron also offers a wireless hub which can control up to 50 separate instances from any handheld device, using their App over Wi-Fi.
What will they come up with next? I can hardly wait!
BossEnterprise@outlook.com