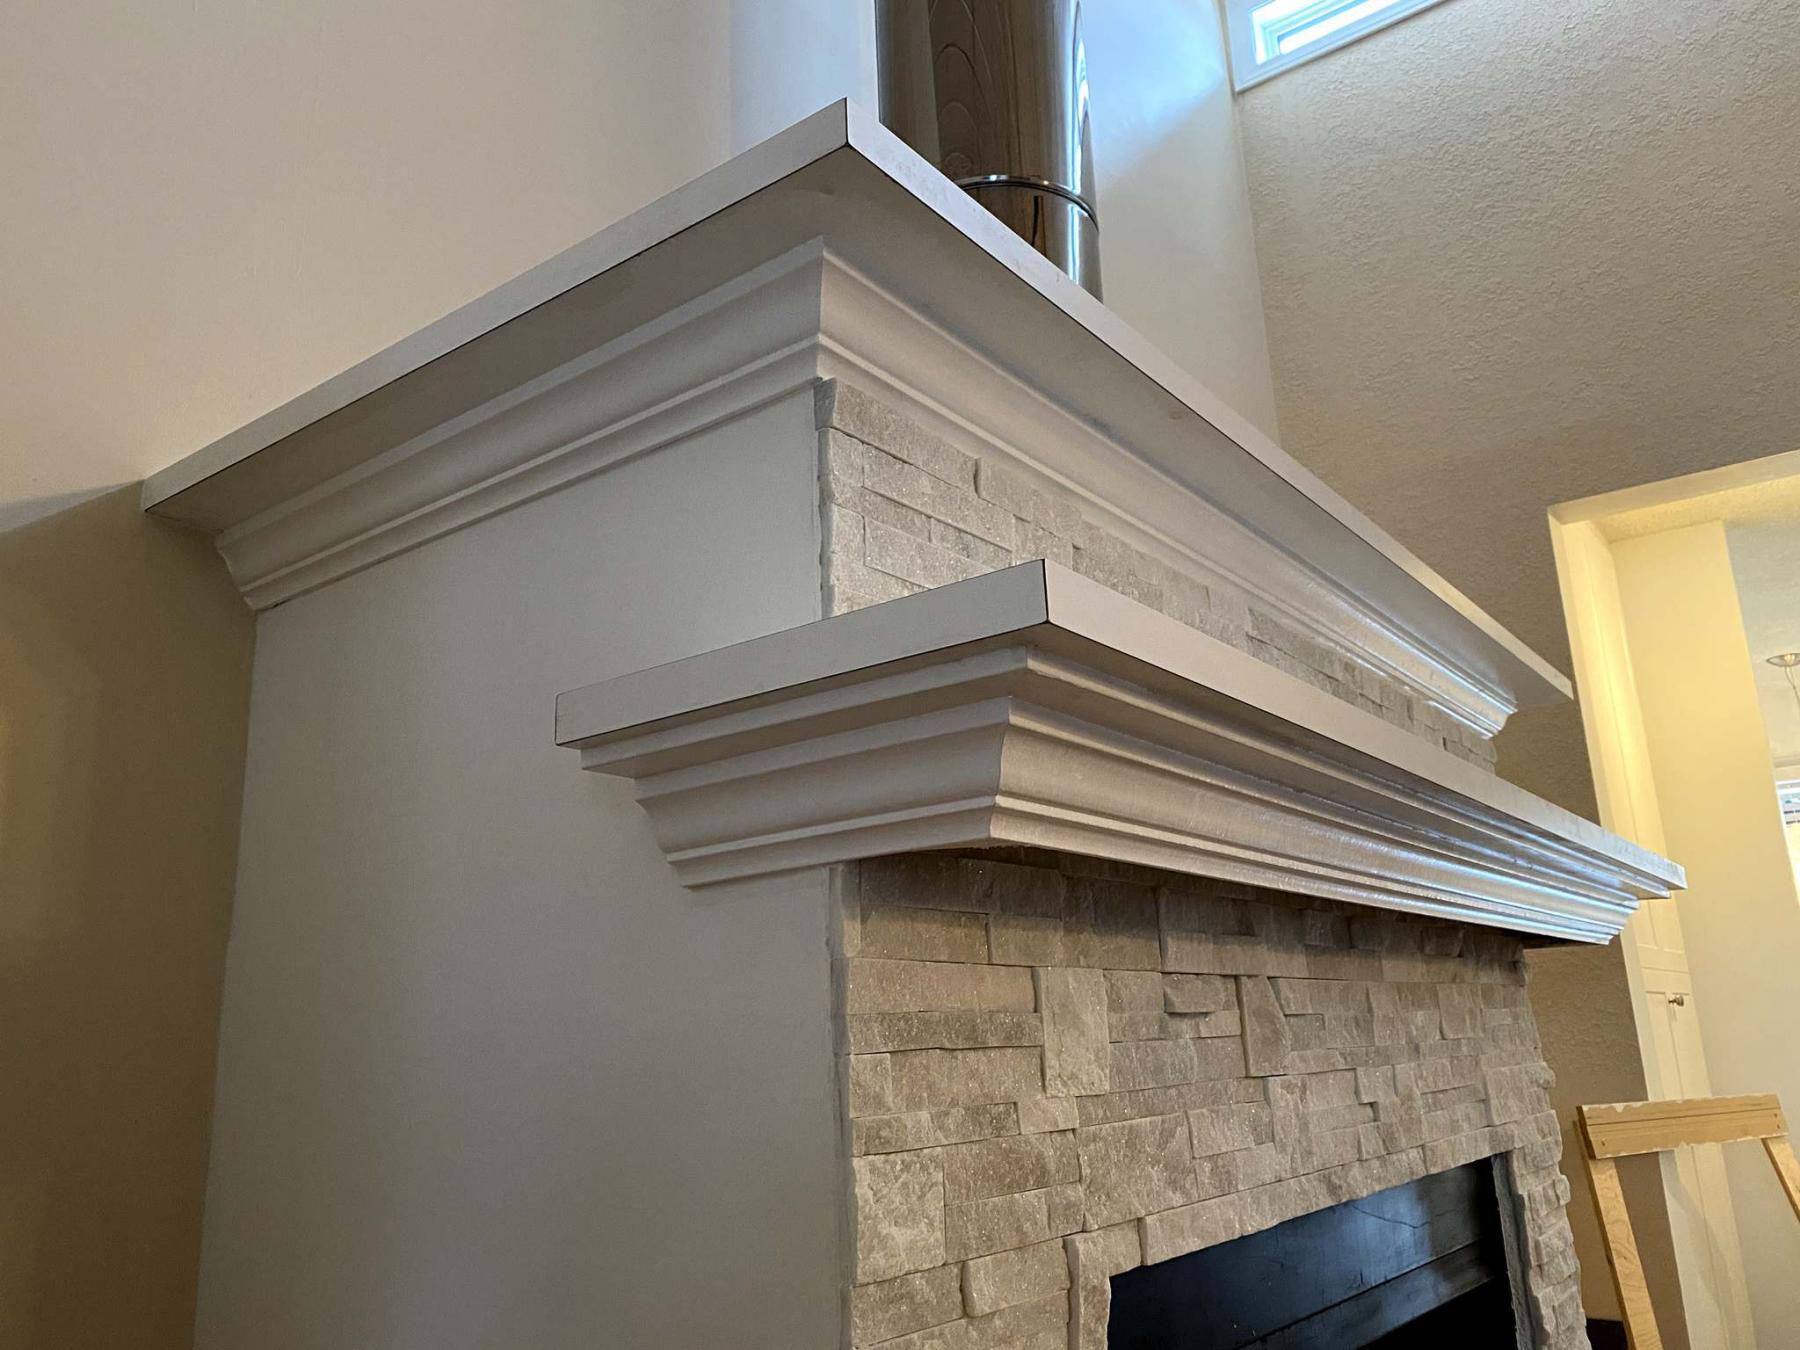
The mantel and top are built-up with crown moulding and strategically placed layers of trim and all seams and edges were filled with caulk to eliminate any gaps.
When a homeowner wanted to update the look of a living room fireplace without removing or breaching any of the existing framework the search for an approach that yielded the best results seemed daunting. Luckily, the perfect plan ultimately revealed itself once overall objectives were discussed.
The fireplace is located at one end of the living room at the midway point along the exterior wall. The firebox opening and surround were set within a framed cube sheathed in drywall, roughly six-feet wide, five-feet high, and just over two-feet deep. On either side of the firebox were outdated roman-style jambs with a thin shelf in lieu of a proper mantel. A visible stainless steel flue protruded from the top of the drywalled structure. Needless to say, the entire area was not visibly appealing.
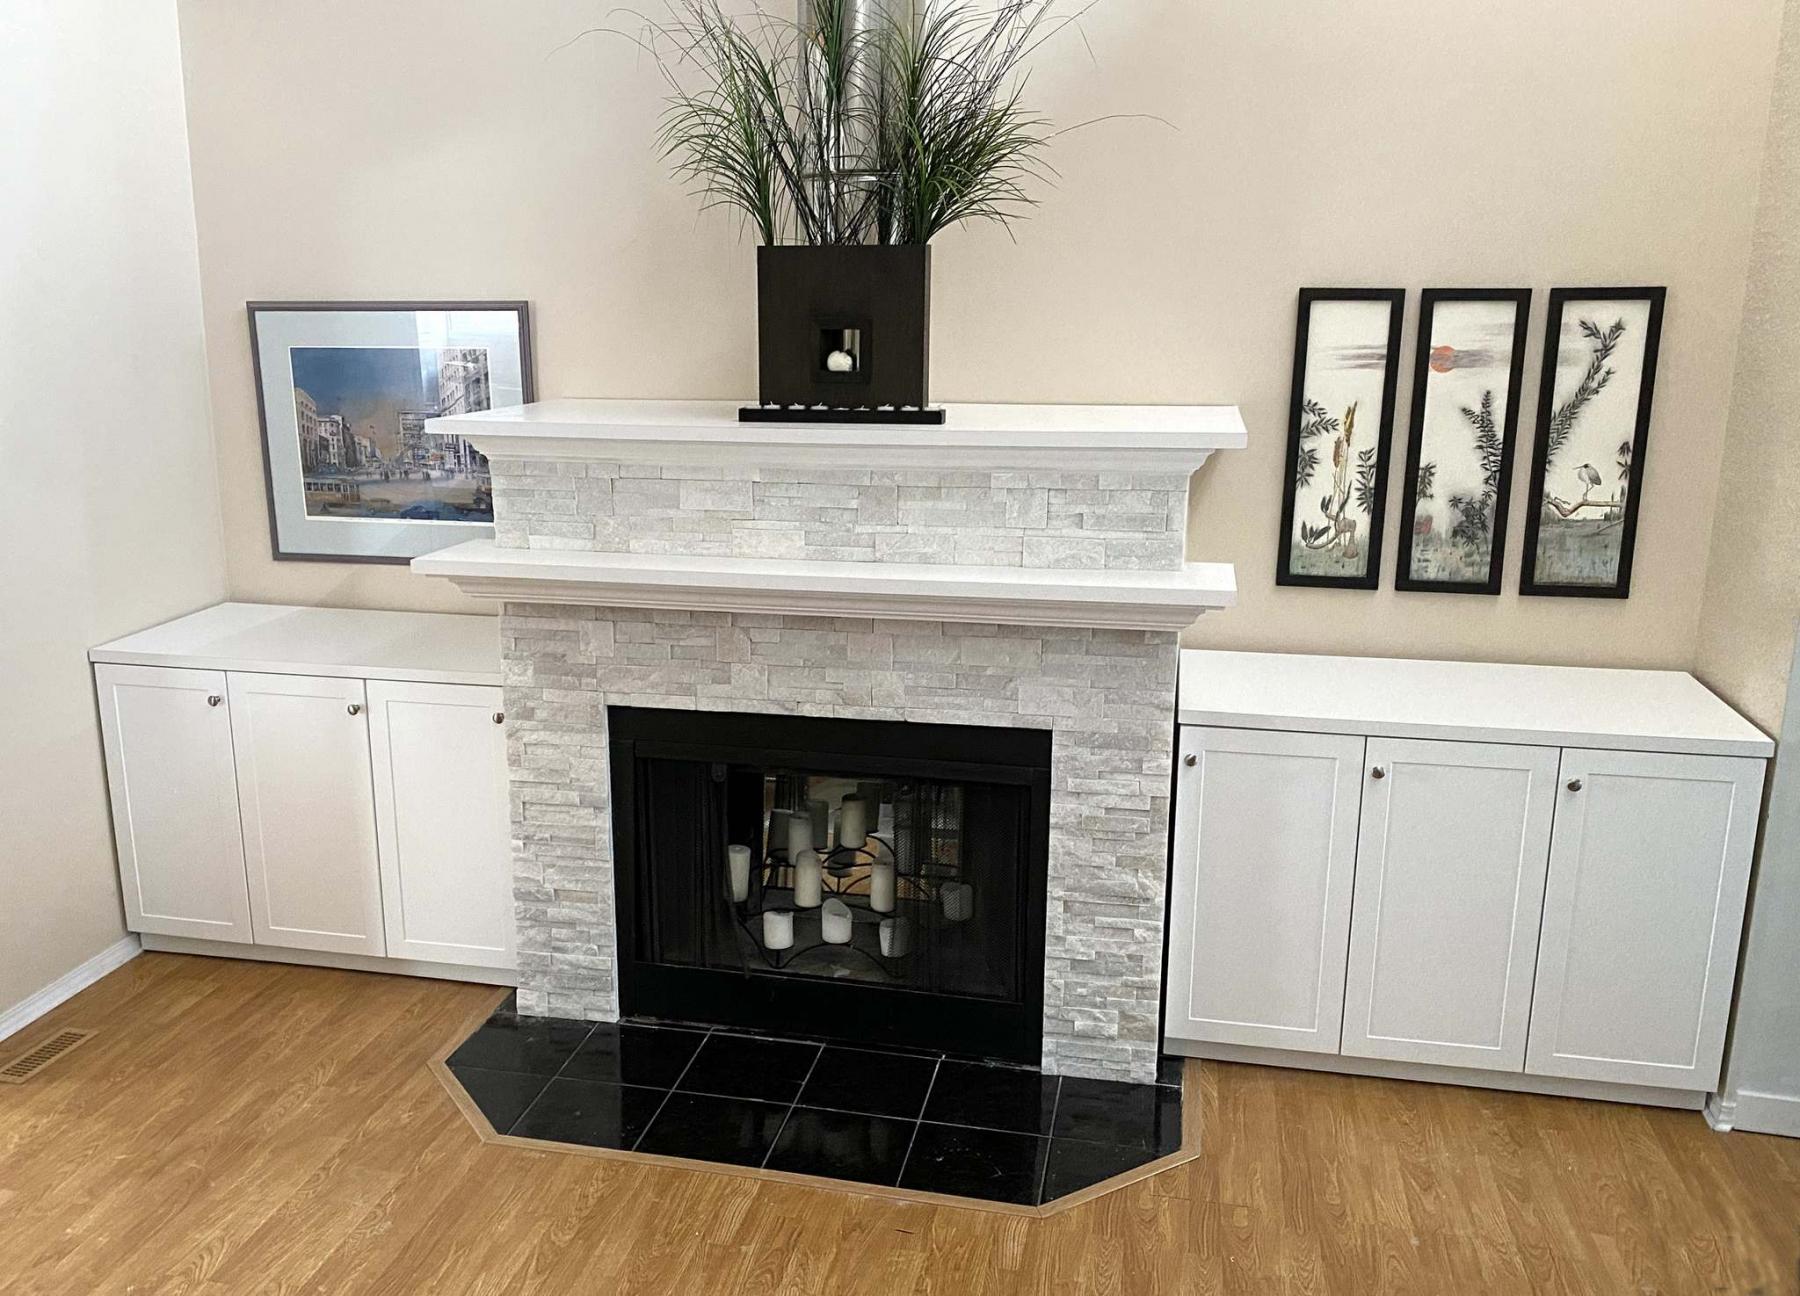
To remedy this design flop the fireplace required an eye-catching white stone veneer, a proper mantel, and a matching top that rests above the overmantel.
To expand upon the aesthetics of the project, the client also requested mobile cupboards on either side of the fireplace, fitted with white countertops to match the decor of the room. For the sake of consistency, two additional countertops were ordered to spec — one for the main mantel, and another above the overmantel. Each were designed and sized accordingly, to create the appropriate overhangs.
To prep the existing fireplace, the visible sides of the drywall were painted white. The two supplemental countertops were prepped for installation. For the top above the overmantel, the centre-rear section of the counter was jigged out to allow the top to slide into position, past the exposed stainless-steel flue. The mantel counter was notched to fit, recessed four inches past the face of the fireplace and secured into position using angle-brackets underneath. That’s when the real fun began.
By using crown moulding and a series of strategically placed layers of trim, both the mantel and top were built up to create the illusion of girth below each respective countertop. Once firmly installed, the seams along mitered joints were caulked and all visible areas below each countertop were painted with a white semi-gloss paint. Now, it was time for the stone face installation.
Starting from the bottom of the fireplace face and along the tiled hearth, the first row of horizontal stone veneer was secured using a high-grade stone adhesive. Every stone section was cut to the precise width using a wet saw. With both jambs on either side of the firebox in place, a temporary support was fitted just within the firebox cavity to keep the first full row of stone along the top of the firebox cavity from sliding out of position. Horizontal rows continued until the last row, which tucked up and in behind the underside of the mantel. Stone was then installed above the mantel, to the bottom edge of the overmantel top crown moulding. The following day, once the stone had set, the temporary support was removed. The visible gaps between the stone and drywall were then filled with a white caulk as a final step. The fireplace facelift was complete.
It wasn’t until the mobile cabinets were placed on either sides of the newly refreshed fireplace that the grandeur of the project truly revealed itself. Not only was sought-after storage space achieved by implementing the new side cupboards, the fireplace has been transformed from an eyesore to a focal point simply by expanding upon what already existed. No doubt this beautiful and functional enhancement will be a source of pride and joy for many years to come.
BossEnterprise@outlook.com