The deep saw cuts three inches into the concrete on its first pass, and the material between the blade cuts is chiseled away to allow for the next pass

One of the most unnerving processes during an invasive renovation is the breach — stripping away what is there to facilitate the merging of new construction to the existing structure.
During the summer months, my two-storey addition began to quickly take shape. And once the foundation was completed, it was necessary to perform two initial tasks: cut a 12 by 24-inch opening through the existing foundation to enable ventilation into the addition, and prep the existing exterior walls on the south side of my house for the framing to come.
Regarding the latter, new ledgers and studs would need to be fastened to the sheeting of the existing outside wall.
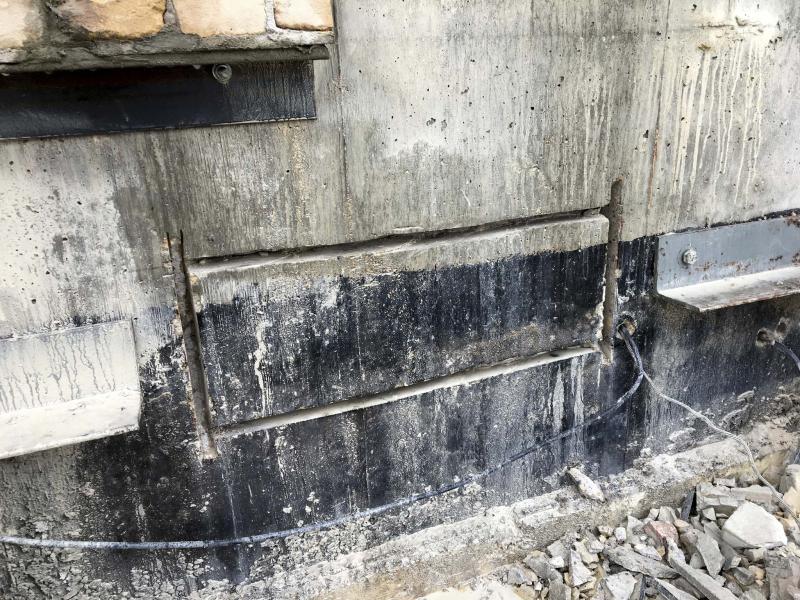
Due to the brick exterior, the old sheeting needed to be exposed, presenting an enormous challenge – how to carefully remove the brick where required, while preserving the brick in all other areas of that wall. It proved to be a lengthy process — proper tools were essential.
Breaching the foundation
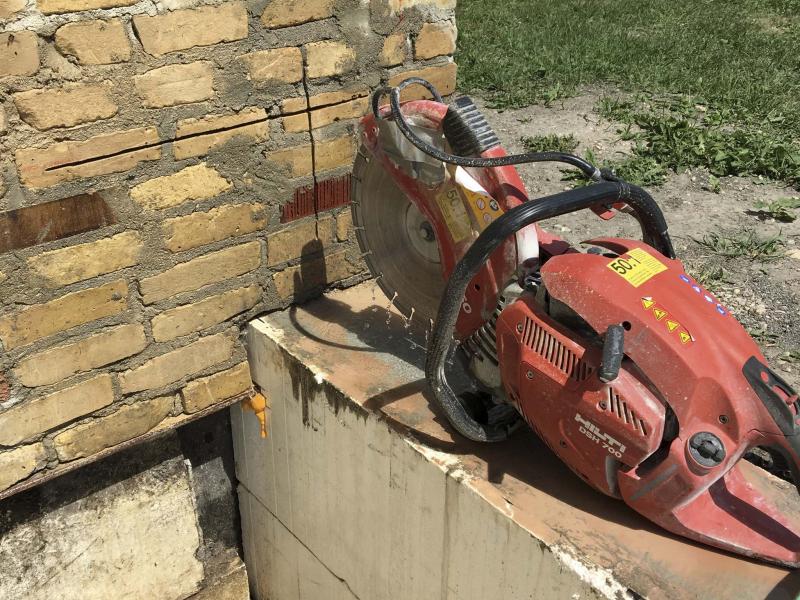
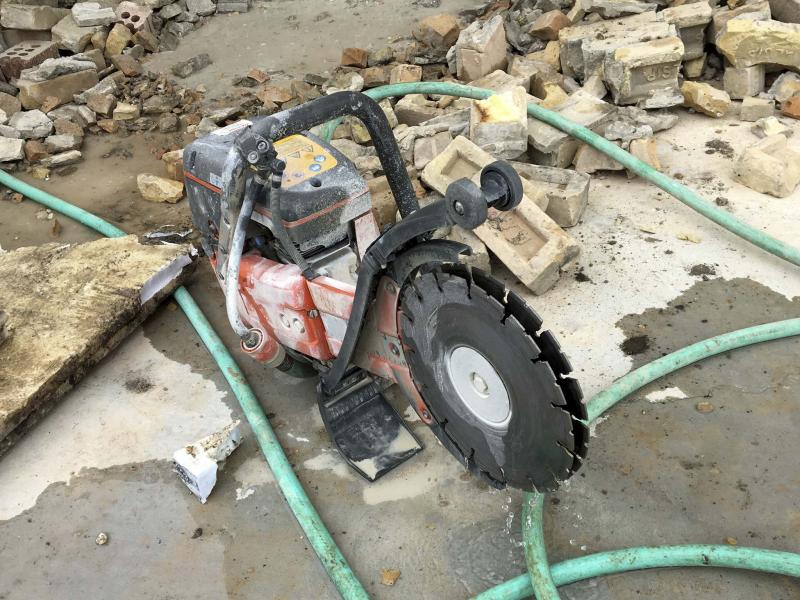
My existing concrete foundation is eight inches thick. Although I had rented masonry saws in the past, I could not recall ever having to cut through eight inches of concrete — a 16-inch masonry saw can only cut five inches deep.
Upon inquiry, a new tool was revealed to me — the 16-inch deep saw. Much like the standard single-blade masonry saw, the deep saw is gas-powered, with a hose attachment that feeds water onto the circular diamond blade to reduce friction. However, there is one major difference — the deep saw has two eight-inch circular blades that sit roughly an inch and a half apart and cut in tandem. The blades are mounted to the arm of the saw and are flush on the exposed sides of either blade. After the first pass along the cut line, the inner portion of the material being cut is chiseled out, allowing the next pass to go that much deeper. The process continues until the saw breaches through the material being cut, up to a depth of 16 inches.
Pilot holes with a hammer-drill were created from inside my basement to accurately mark the required breach location. Once the rectangular cut area was marked with a wax pencil on the exterior foundation wall, the cutting began. I powered up the saw, initiated the flow of water onto the blades, and began my first pass along the cut lines. The blades surprisingly cut through the concrete quite easily. The material between the two cuts was then chiseled out and this process was repeated.
Each pass was approximately three-inches deep — it would take a minimum of three complete passes. When it became clear that a total breach would occur on the third and final pass, I started that final pass on the bottom — the weight of the concrete block being removed would crush anything below it once it let go of the foundation. By cutting the bottom out first, this ensured that once the block dropped, it would drop safely. It took roughly three hours to complete this task and I was glad it was done.
Purge and preserve
The first step of the brick removal was measuring and marking the sections to be removed. With scaffolding in place and a level in hand, I started at the highest point and made my way downward, marking the brick with a wax pencil as I went along. The second floor was straightforward — all the brick would be removed, up to the gable peek. The main floor was trickier. Based on the design I had planned, the brick face on the main floor would remain as a feature wall, in what will become my step-down dining room. Thus, 12-inch high horizontal cuts — roughly four rows of bricks, about 24-feet long both above and below the wall — would be removed for the respective ledgers, as well as seven-inch wide vertical cuts on either side of the brick wall for the studs of the new exterior walls.
The horizontal cuts presented the biggest challenge — without anything to hold the brick, the entire wall could let go under its own weight. Therefore, angle-iron would need to be installed as the brick was being cut. I decided to introduce new five-inch wide angle-iron in four-foot sections as I began cutting out these 12-inch high horizontal rows of brick, leaving gaps in the iron supports where the doorways would be. It took several days of arduous and meticulous cutting to remove the brick in preparation for the ensuing framing of the two-storey addition. I’m happy to report that other than a few minor shifts in the brick mortar in a few locations, the process proved successful — the angle-iron had done its job.
Use extreme caution
Masonry saws are bulky and heavy. And because they are water lubricated, things get messy and slippery very quickly. The r.p.m. of a diamond blade can exceed 3,000, providing a tremendous amount of torque during use. It is crucial to maintain control of this tool at all times. Always give yourself proper footing. Never over-extend your reach — raise or lower the platform on which you stand to accommodate the sawing motion required. Steel-toed boots, ear protection and safety goggles are a must.
When used properly, a masonry saw does much of the work.
For a vertical cut, start high and slowly penetrate the material until you reach the blade’s full depth. The saw will then "want" to move downward, under its own weight. Horizontal cuts present a bigger challenge — the saw’s handle really only allows you to cut one way conveniently (usually from right to left). And it’ll be up to the operator to carry the weight of the saw as it’s guided along the cut line. Establishing a comfortable footing and saw height can be the difference between a tough job and an impossible one. Take the time to do a dry pass before the masonry saw is engaged. It is a dangerous environment — take the necessary precautions.
My biggest fear during the masonry sawing activities was the brick I wanted to preserve crashing down. Luckily, the brick was originally installed properly with retention clips fastened to the plywood sheeting behind, and set within the mortar at roughly four-foot intervals. With all the masonry cuts completed, every brick was carefully hammered out individually — the process took forever.
However, the results were well worth the effort.
With my two-storey addition nearing completion, I’m so very glad the brick on the main floor was retained during the brick-removal process. It truly will become the feature wall I had envisioned in the new dining room, long ago. All that pre-planning has paid off.
BossEnterprise@outlook.com