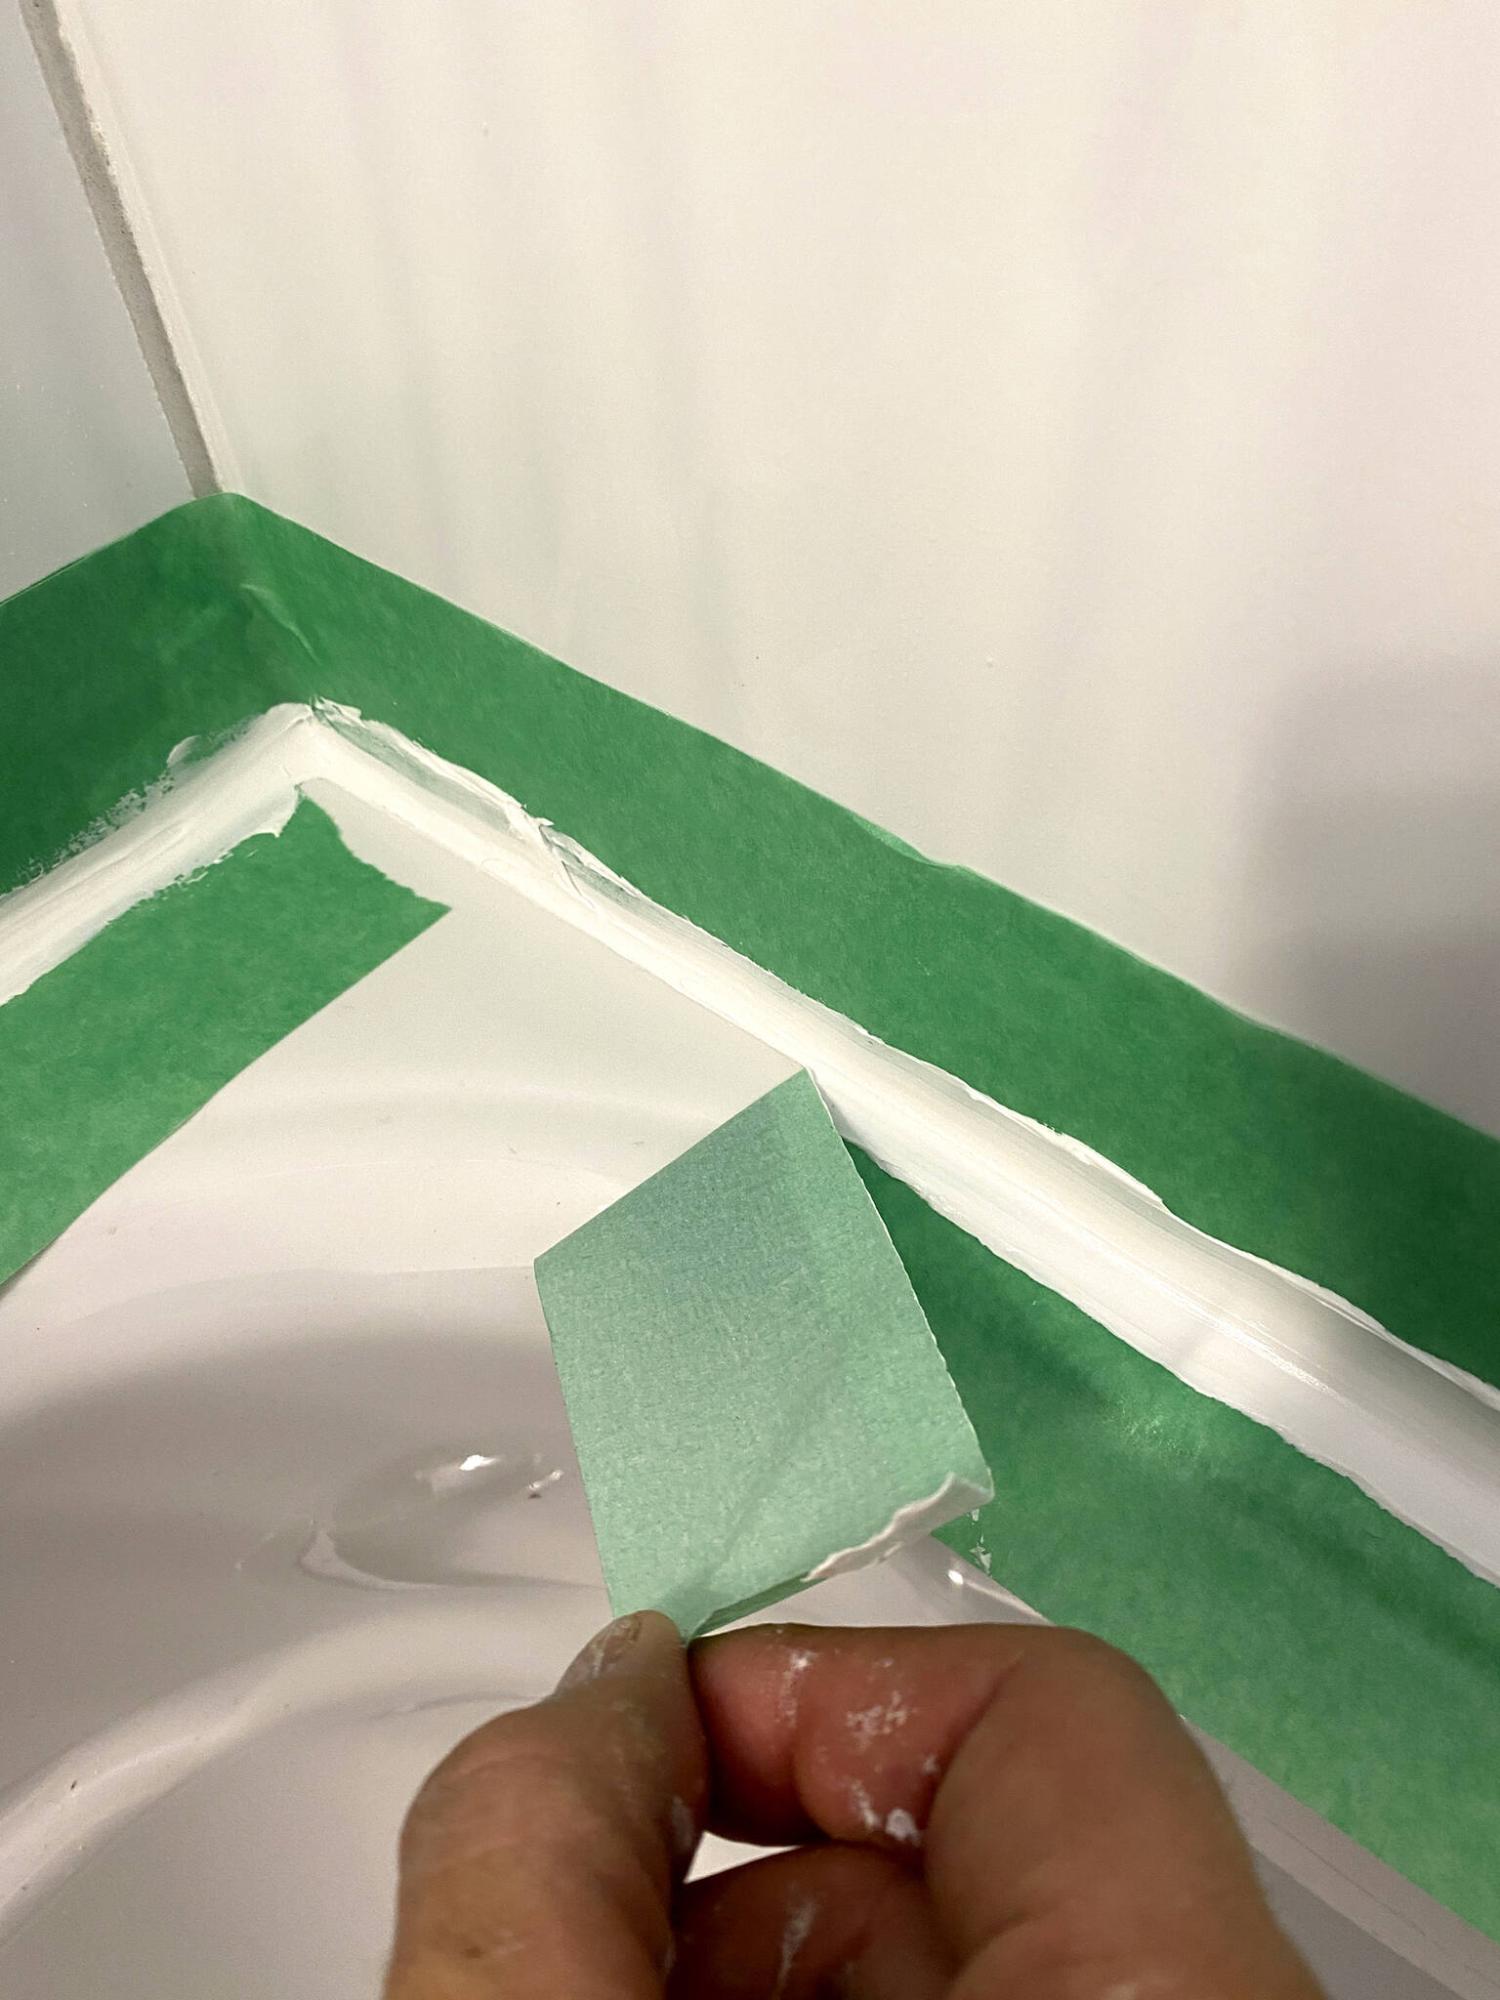
Taping areas prior to applying silicone results in clean and straight lines.
Photos by Marc LaBossiere / Winnipeg Free Press
Painter’s tape works well to create a guide for silicone. Once the silicone has been applied the tape should be removed immediately.
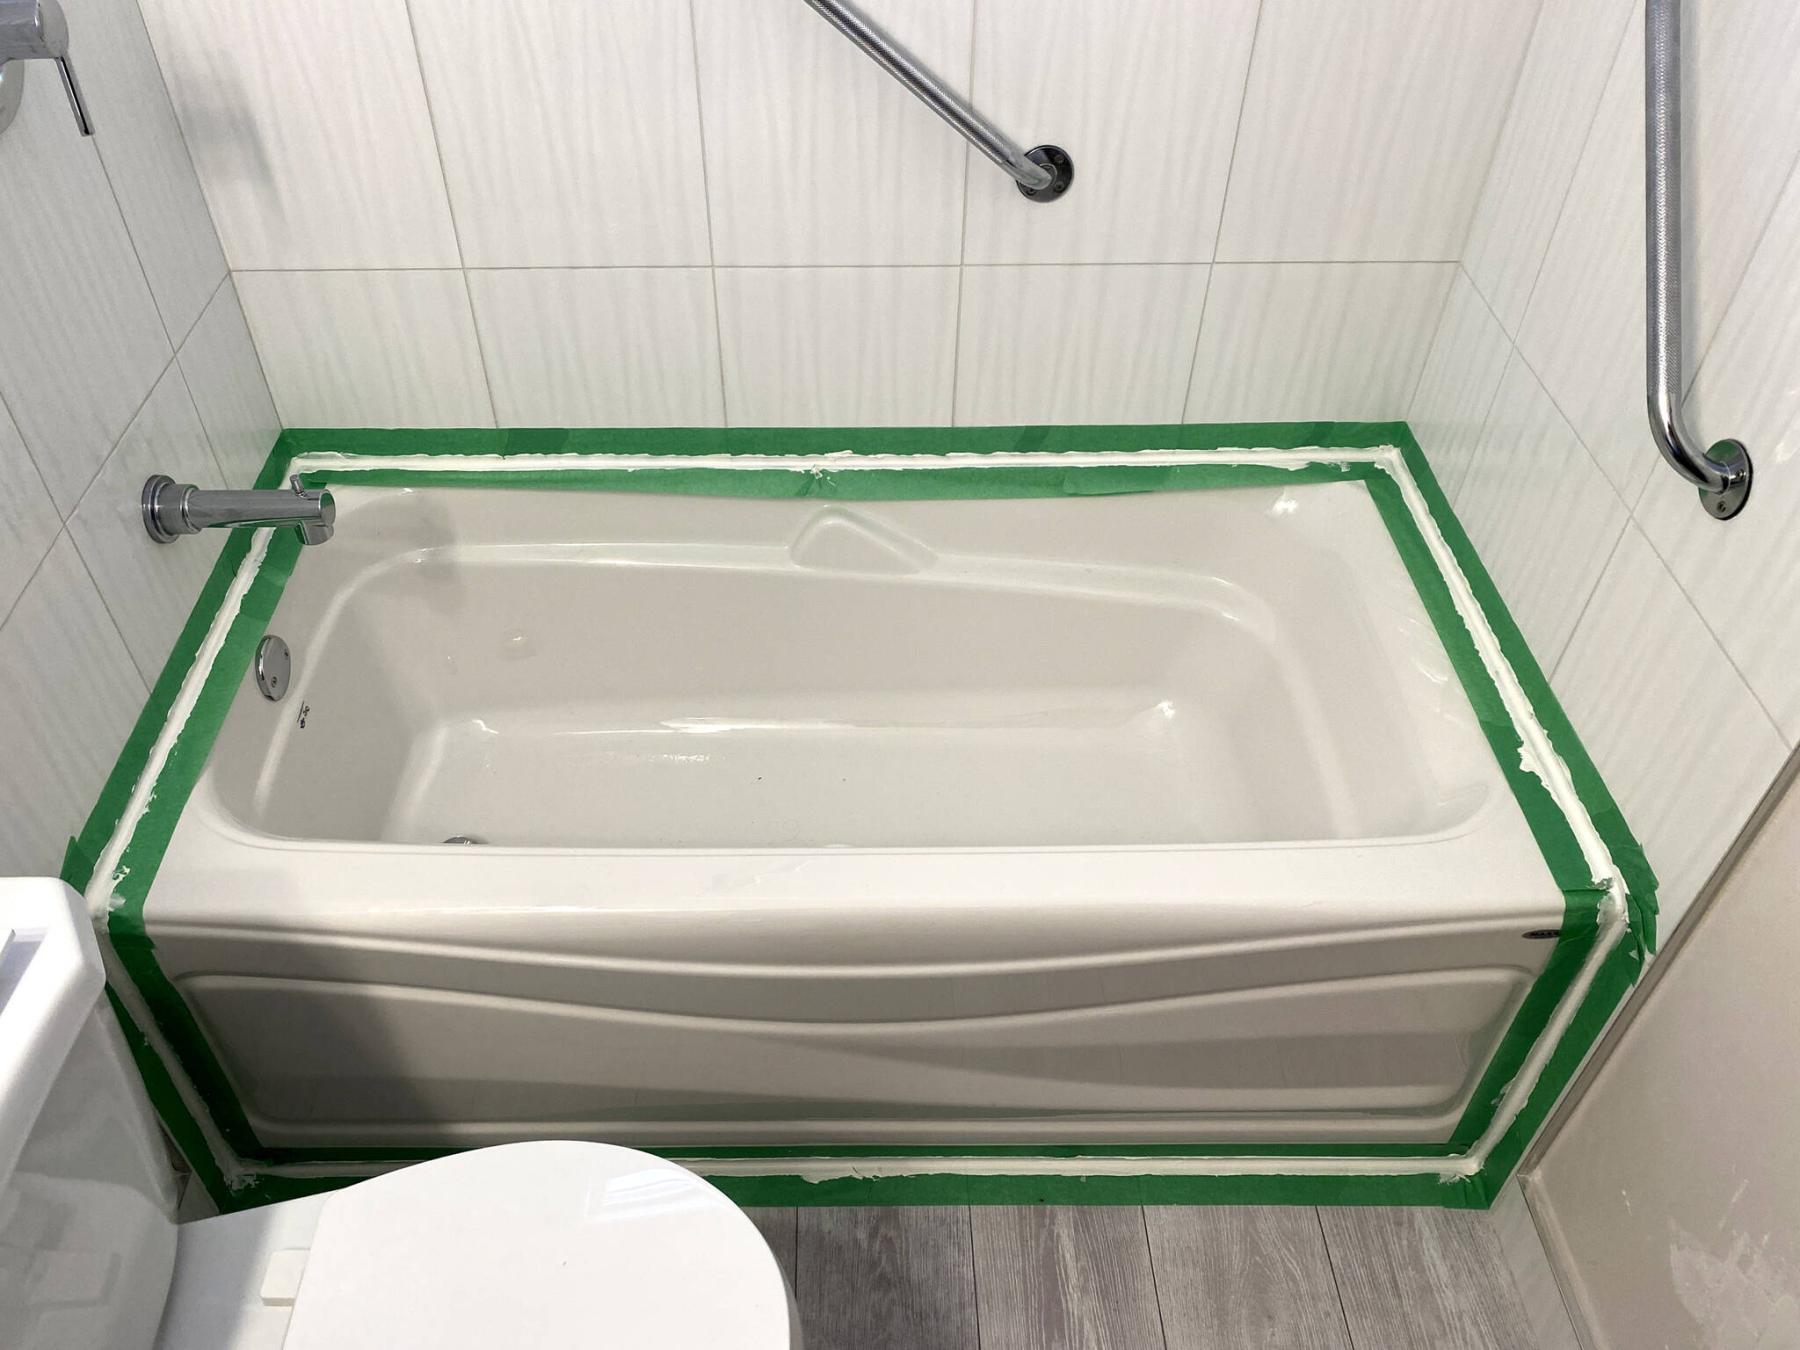
The silicone along the seam between the tub top and wall tile is highly visible, and should be applied carefully.
One of the aspects of tub and shower ownership, is the eventuality of silicone failure. No matter the diligence in ensuring to dry areas of the tub, at some point the silicone along the perimeter of the tub will begin to show signs of wear, discolouration, and gapping that may lead to an unwanted water breach. When this occurs, it’s time to remove and replace the old silicone. Although this seems like a daunting prospect to most, the process is rather easy, with a bit of patience.
For some reason, homeowners are hesitant to replace their own silicone. I assume it’s because of the messiness of the task, or maybe they become dissuaded due to an inherent fear of doing it wrong, and possibly causing bigger issues. No matter, the process is quite simple and can be achieved in less than an hour with the proper materials, and a focused approach. Whether siliconing a new tub after installation, or re-applying silicone to an existing tub, the steps are basically the same in both instances.
The gap between the lower edge of the wall sheathing (for example, tile as shown in the photos) and the tub must be free of any dirt and moisture (and old silicone for scenarios with existing tubs). It can be advantageous to clean the area with a mild solvent, and subsequently sand the tub top below the tile with a fine grit sandpaper (800+). This will ready the tub surface for the greatest adherence potential for silicone application. After sanding, ensure that the tub surface is dry and free of any dust created by sanding. I prefer to again use a mild solvent, quickly wiping all areas.
With the tub surface prepped, painter’s tape is used to quarantine the area for silicone by taping off the tub top at roughly three-eighths of an inch from the wall along all edges, as well as along the tub sides (and including the floor in this instance). The same taping process is repeated on the tiled wall (and flooring) roughly three-eighths of an inch from the gap, providing a uniform separation between both rows of tape. The silicone can now be added within the taped off areas.
Silicone application is quite simple, when using tape. The silicone tube placed into the caulk gun with a hole of roughly a quarter-inch at the tip will allow a generous amount of silicone to pass through and into the channel between the tub surface and the bottom edge of the tiling. The key is to fill the void with slightly more than enough silicone required so that when your finger runs along the top of the bead of silicone with constant contact against both the tub and the tiles (flooring respectively), only a slight amount of excess spills over onto the tape on either side of your finger. If there is no excess, not enough silicone was used. Conversely, too much excess simply indicates to use less next attempt. To control the consistency and smoothness of the silicone throughout (especially when using a quick drying brand), it is best to do no more than a 12-18 inch bead at first, until you get the hang of it. Once a section is done, the silicone beading steps are repeated, carefully blending any overlaps until the entire perimeter has been achieved.
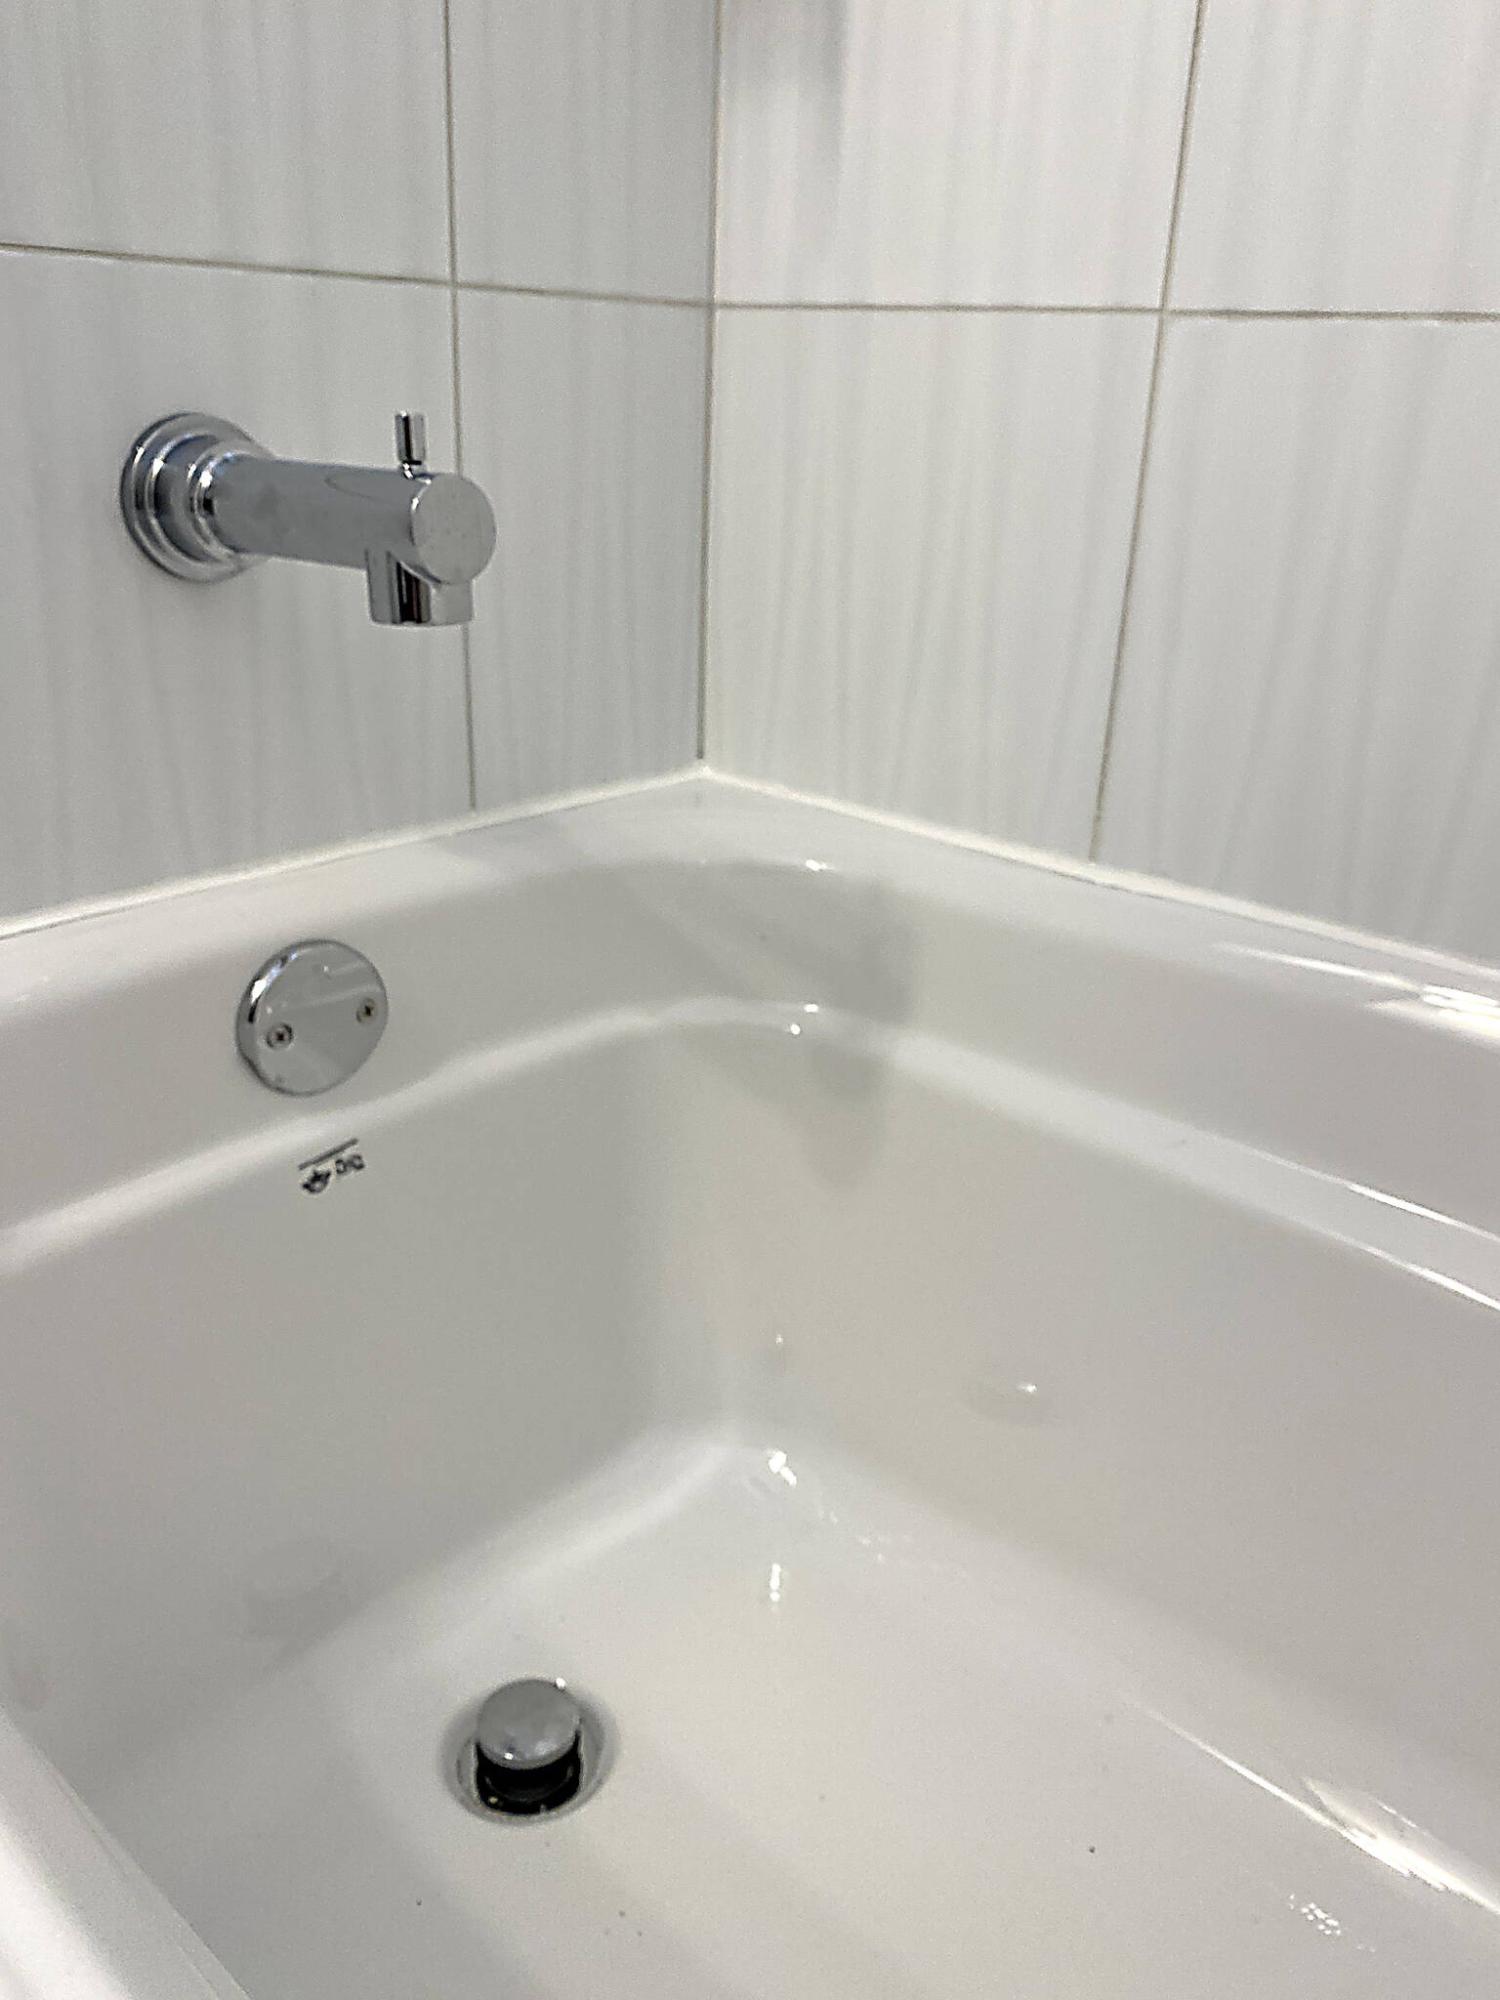
Contrary to conventional thinking, all taping should be removed promptly after the entire silicone bead has been completed. The tape along the tub top is first pulled up in one area, at an angle slightly greater than perpendicular. Then in one continuous motion, the tape is pulled consistently away from the silicone bead. This step is then repeated with the tape along the tiled walls (and flooring), until all the tape has been removed. If the tape creates a blemish in the silicone at any point, adjustments to the silicone should be made immediately before the silicone begins to set. For the most part, your bead of silicone will have perfectly clean and straight lines along the tub top and wall tiling (and flooring), once the tape has been removed. And as long as the silicone is allowed to properly dry and cure, this decorative step will also provide an enduring preventive measure against water breach. How long it will endure will depend upon the brand of silicone, the steps taken to rid the areas of moisture after use, and most importantly, how often the tub and shower are used on a daily and/or weekly basis.
The first time I attempted re-siliconing my tub in my first house proved futile – the area had not been properly prepped, and with gun in hand I just began squeezing silicone along the seam between tub top and tile. Despite running my finger along the bead as carefully as possible, the excess silicone spilled over and onto the tub and tile surfaces, ultimately making a huge mess. The lines were blotchy, it just looked terrible. It wasn’t until using tape for painting that I realized the same process could be adapted when applying silicones and caulks. From that day forward, tub installations have been less daunting. After all, the final step is the silicone, and will remain highly visible. Fortunately, clean and straight lines can be achieved, thanks to the many uses of painter’s tape – I never leave home without a roll or two, ‘cuz ya just never know when you might need it!
RenoBoss.Inc@outlook.com