Marc LaBossiere / Winnipeg Free Press
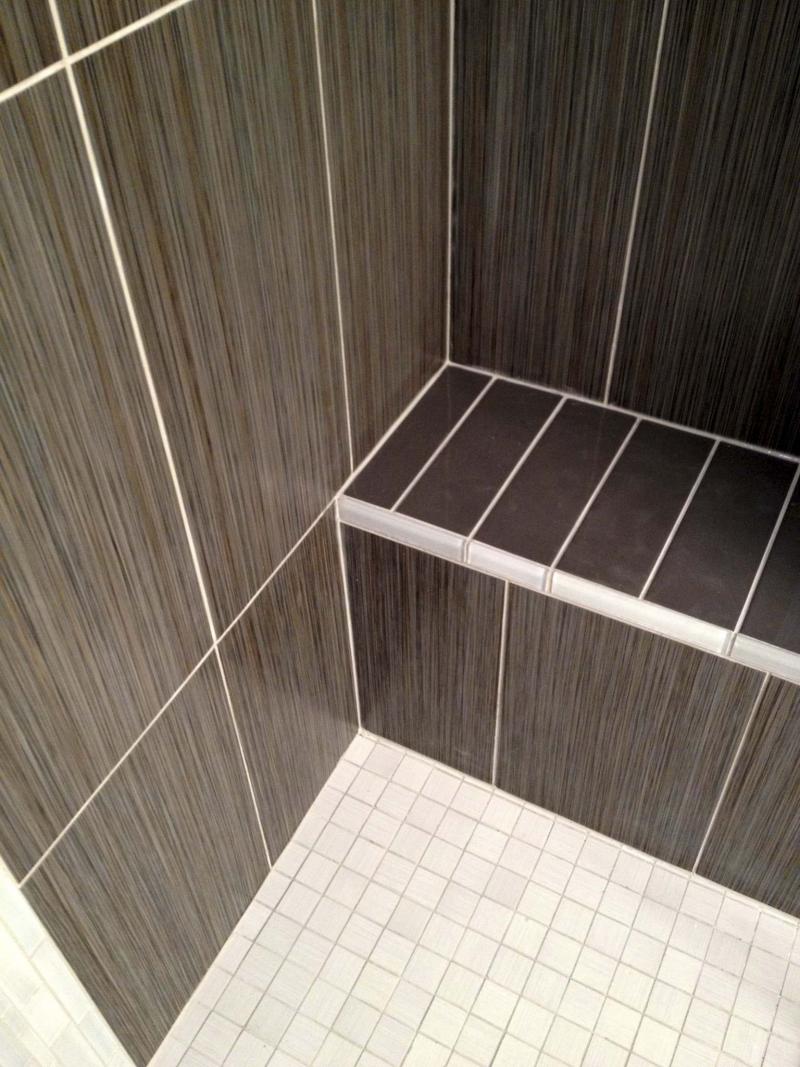
Custom shower stall tiling and bench design can be done on your own.
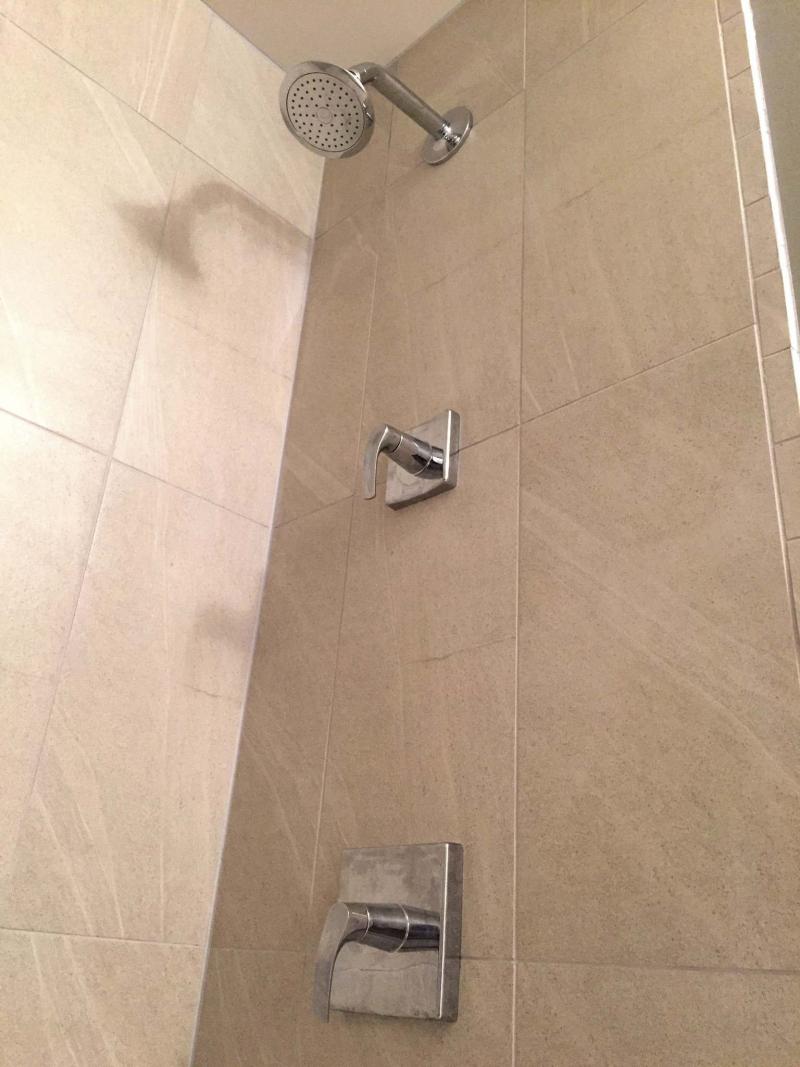
Custom shower stall wall tile with faucets and shower head centred and a smaller tile border design.
Marc LaBossiere / Winnipeg Free Press
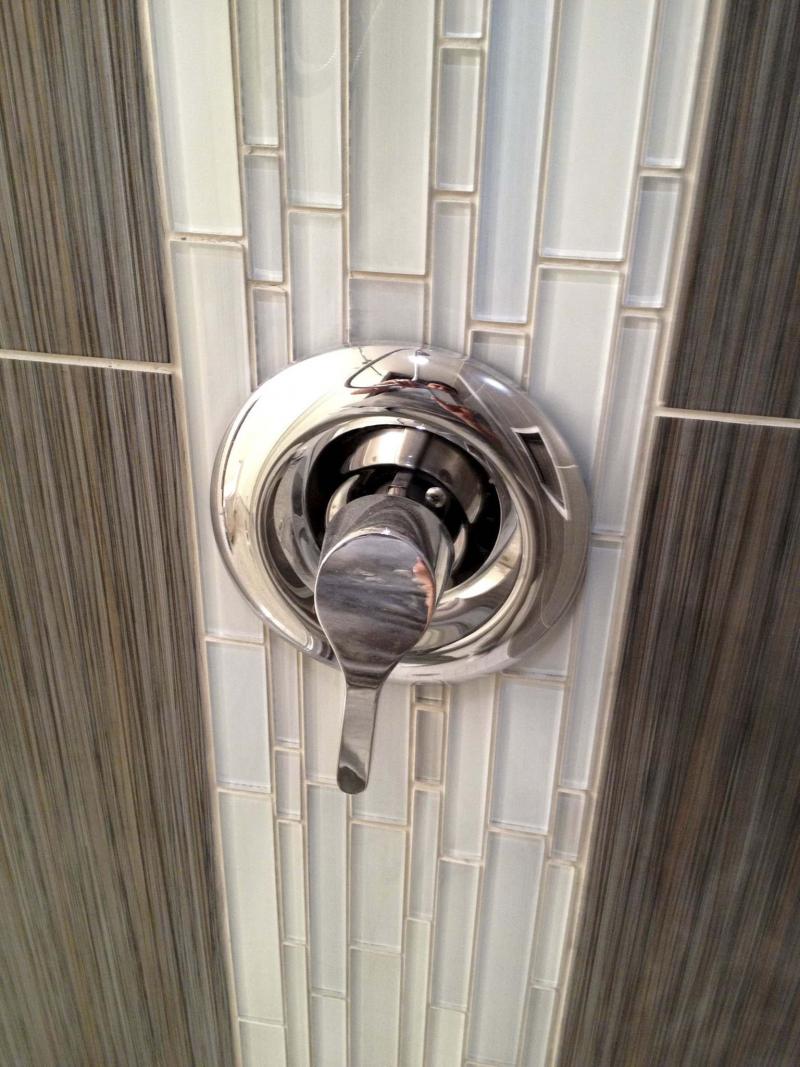
Novices should get help when cutting holes for faucets and shower heads.
The most interesting features of any bathroom renovation involves the subjective elements — the colour scheme, the flooring and how you populate the space with the type of vanity, style of faucet and choice of commode. Custom tiling a tub or shower stall can really reflect your personal tastes — there are really no rules when choosing a tiling design layout provided you know the tiling basics.
Tiling can be a simple process if you properly pre-plan the tile layout. Calculate the square footage of tile required for every surface and add 10 per cent to your order (rule of thumb). This overage allows for odd cuts and the occasional mistake — nothing worse than running out of tile when you’re close to completing a project.
The first step is to prep the surface on which the tiles will be installed. Ensure that all surfaces are free of bumps and/or large divots — such as if you’ve removed old tile and the surface of the drywall has been damaged, it’s always best to replace the old backing with new aqua board or backer board. Either product can be used for shower stall applications. They are both water-and mould-resistant.
For shower stalls with a tub or pre-fab shower base, the custom tiling process will comprise wall tiles only. Using one individual tile as a guide, mark out a preliminary layout on each wall surface to be tiled, using the exact tile dimensions, and determine where best to begin the initial horizontal row of tile and initial vertical rows on each wall. Be sure to incorporate the spacer widths you have chosen when marking your layout. Failing to do so will incrementally throw off your planned layout. After making the necessary adjustments, ensuring proper level, centring and alignment, you can begin installing the tile.
For tub-free shower stalls without a pre-fab shower base, the custom tiling process will consist of both wall tiles and tiling the shower base.
Extra steps are required to prep the shower base. The base itself must taper gradually towards the drain, which is usually centred side-to-side, located slightly more toward the wall which houses the shower/tub faucet and shower head. Although there are shower-base "kits" that can be purchased that are relatively easy to install, they can be quite pricey. A slight taper can be achieved just as easily by building up the outer edges of the base with layers of thinset tile adhesive prior to the installation of the tile.
Ensure that the base edge which borders the bathroom floor is built up slightly — generally two inches in height will suffice — to prevent water from escaping the shower stall when in use. Using the same thinset, a water-resistant cloth is installed along the entire base, six inches up each of the walls, as well as up and around the base edge. Once the cloth adhesive has cured, the decorative drain cap is installed and aligned, and set to a height slightly lower than the adjacent tiles after install. This will allow the water to drain properly and not pool around the drain cap. With all the preparation in place, the process of marking out the preliminary tile layout can begin, as previously discussed.
There are very few rules when it comes to choosing tiles, a tile design and tile layout. You can combine wall tiles as you wish, rectangular tiles can be set horizontally or vertically — it really doesn’t matter as long as that is what you want or intend. However, you can avoid some pitfalls in the following manner:
• Use a high-grade thinset adhesive to set your tiles — this prevents slippage.
• Be sure to have enough tile spacers before you begin.
• Avoid slivers of tiles. Plan your layout so you never end at a joint or corner with a tile that is less than half its original width. This may mean instead of centring a tile on a wall face, you centre the joint instead.
• On the wall which houses the faucet and shower head, these features should be centred in a tile layout when possible. It may appear lopsided if you don’t.
• When tiling walls above a tub, make sure to use spacers between the tub surface and the initial row of tiles — newer tubs especially flex slightly when subjected to weight. A gap between the tub lip and the first row of tiles prevents unwanted pressure that if exerted, could dislodge tiles.
• When tiling a custom shower base, remember to use smaller tile — the integrity of the gradual taper from the outer edges of the base toward the drain will be lost if larger tiles are used.
• Best to tile the walls first and then tackle the shower base once the wall tiles have set.
Tile cuts are easier, faster and more precise when using a wet-saw.
For cutting holes in a tile (the tub nozzle, shower faucet and shower head), it may be necessary to out-source this service. There are ways to do it, but it involves removing the safety guides of the blade of a wet-saw and slowly cutting through to the top by holding the tile above the exposed blade (not recommended for the novice tiler).
In some instances, metal edges can detail your tile work. Note that these edges are installed concurrently when tiling — plan ahead!
Once your tiling has been completed, it is important that the tiles set properly before attempting to grout. Grout colour is subjective and should complement your tile schemes. Although I generally prefer sanded grouts for flooring applications, as they are very durable, non-sanded grouts are usually preferable when tiling shower stalls. When the chosen wall tiles have smooth or glass-like surfaces, sanded grout may harm or scratch a smooth surface during the application process. Always best to investigate and inquire prior to purchasing grout.
The final tiling step once the grout has cured for at least a day is to apply a grout sealer. This will protect the grout from discoloration and deterioration over time.
Annual or semi-annual grout sealer application is sometimes recommended to increase the longevity of your grout. If you’ve tiled a stall above a tub, silicone is applied along the top edge of the tub where it meets the tile. Matching caulk-grout can be used in other areas as a finishing touch, such as along the wall where the tiling ends, if you have not incorporated decorative metal edges. A trick to ensuring straight silicone and/or caulk lines is to use green painters to designate the width of the caulk line.
With tape in place, apply your caulk and slowly remove the tape before the caulk cures — your caulk lines will appear straight and flawless.
Tiling can be fun, once you understand the process. If you’ve measured properly and your design layout is pre-determined, cutting and placing the tiles is much like piecing together a big puzzle. Tiling can also be somewhat frustrating on occasion — be patient and methodical throughout the process and it will all work out. By letting your creativity shine through your tiling design, your shower stall will not only become an aesthetic part of your bathroom, this little private sanctuary will also be a source of pride.
BossEnterprise@outlook.com