Marc LaBossiere / Winnipeg Free Press
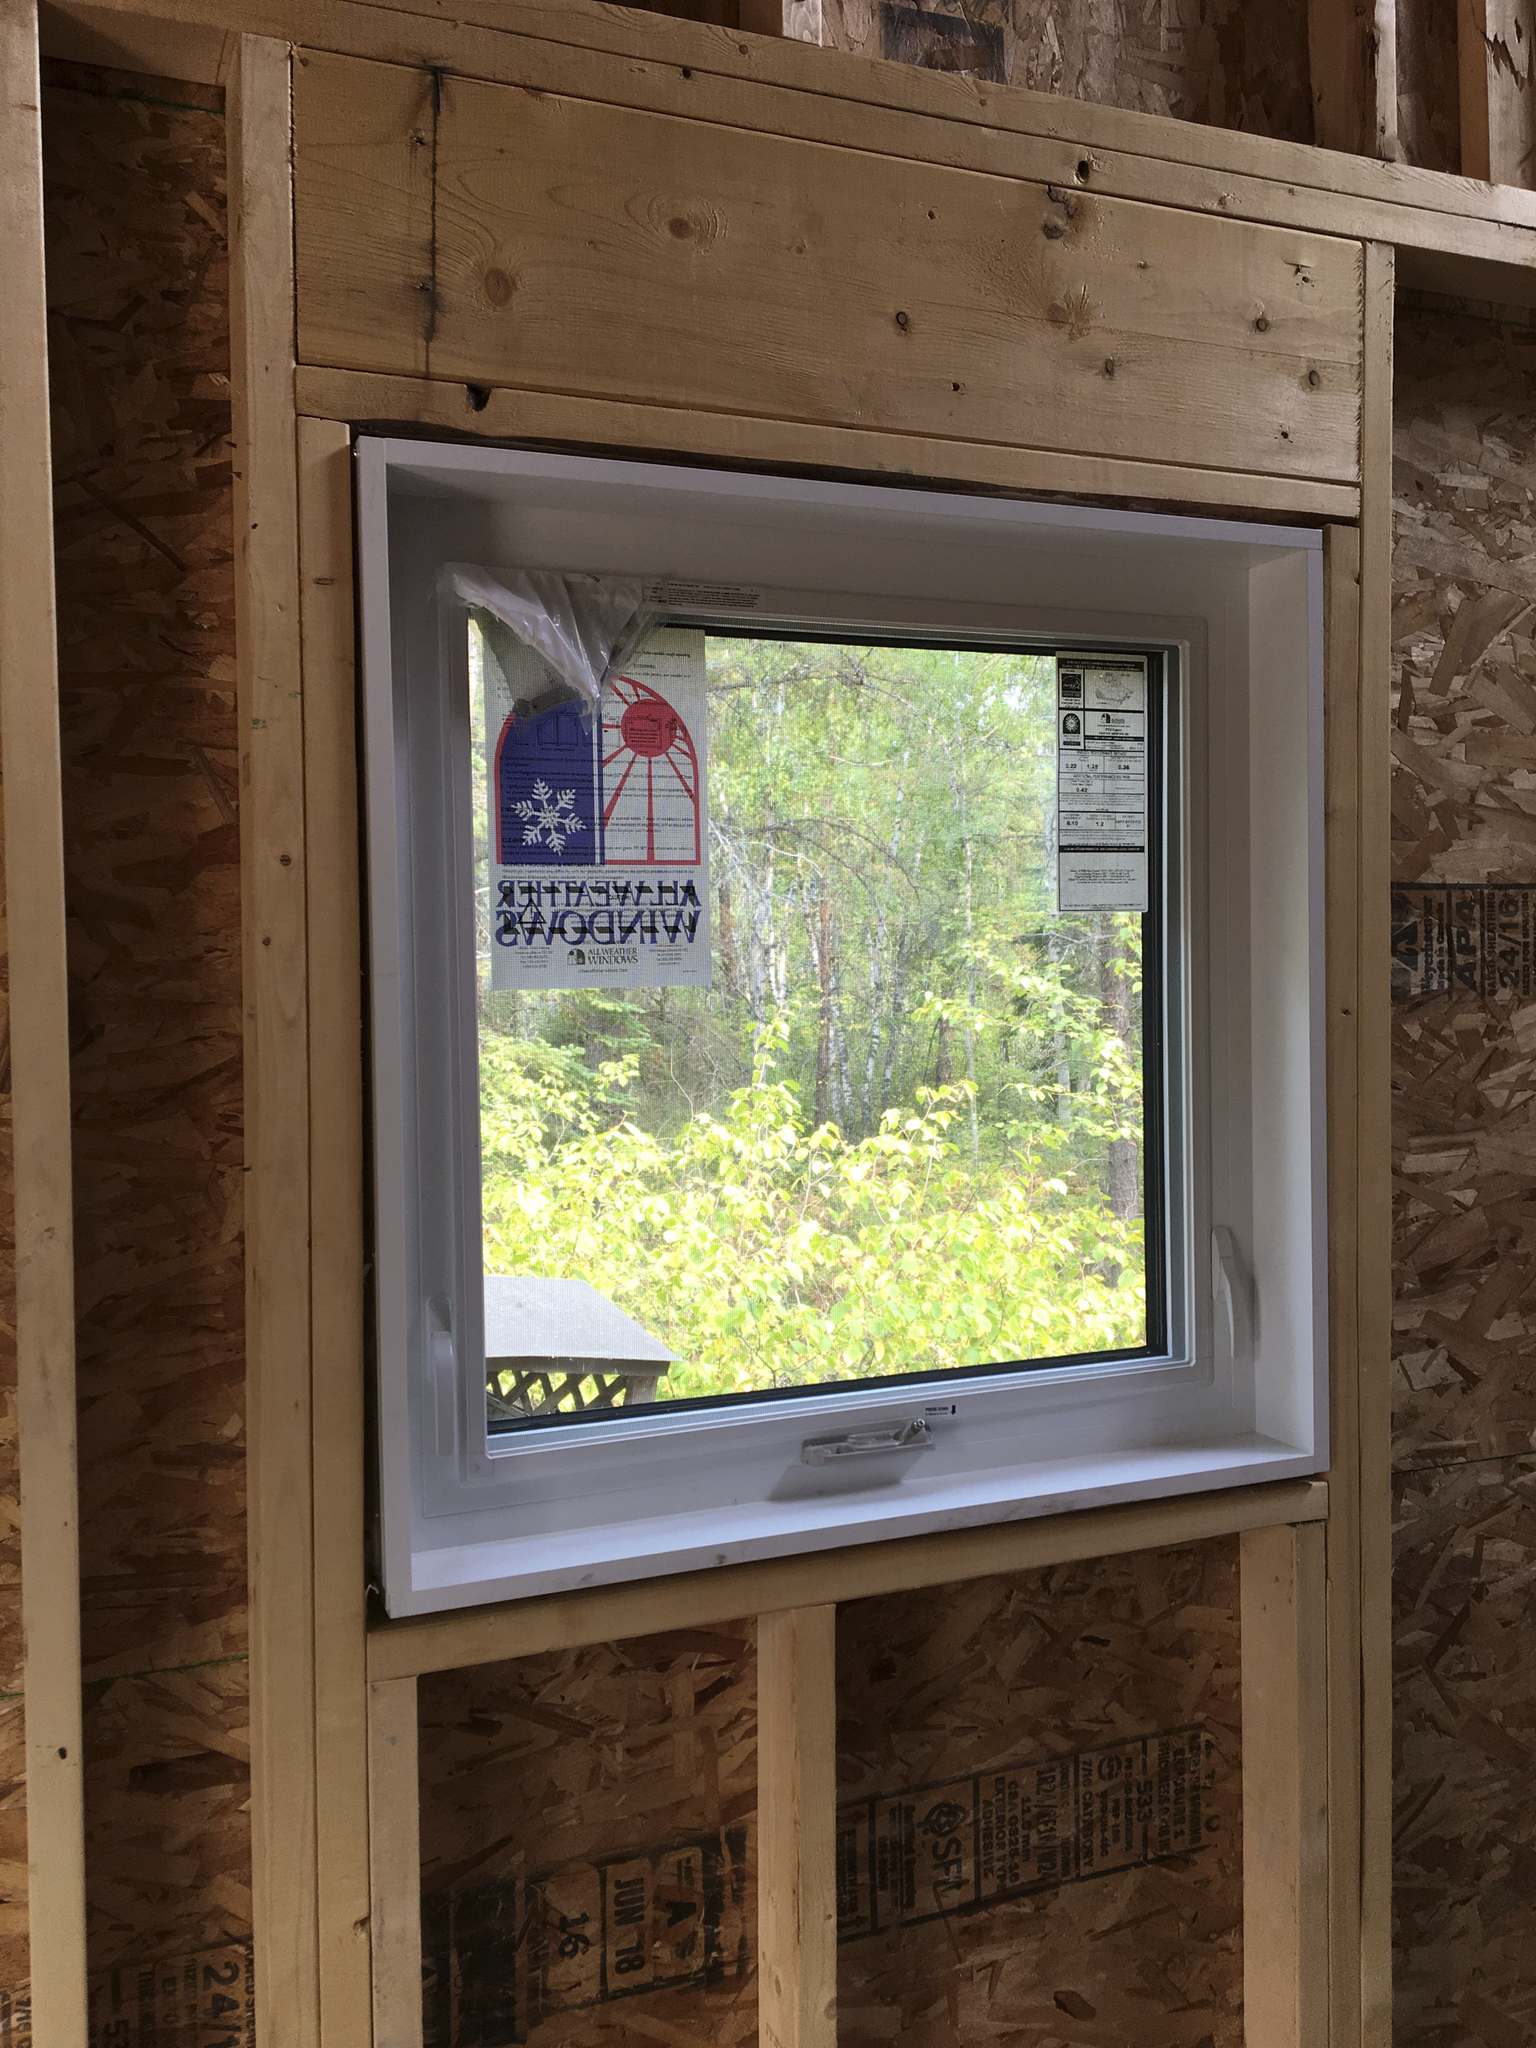
Provided the window was ordered with the proper jamb depth, the inside edge should sit a half-inch further than the framing to lie flush with the drywall once installed.
Marc LaBossiere / Winnipeg Free Press
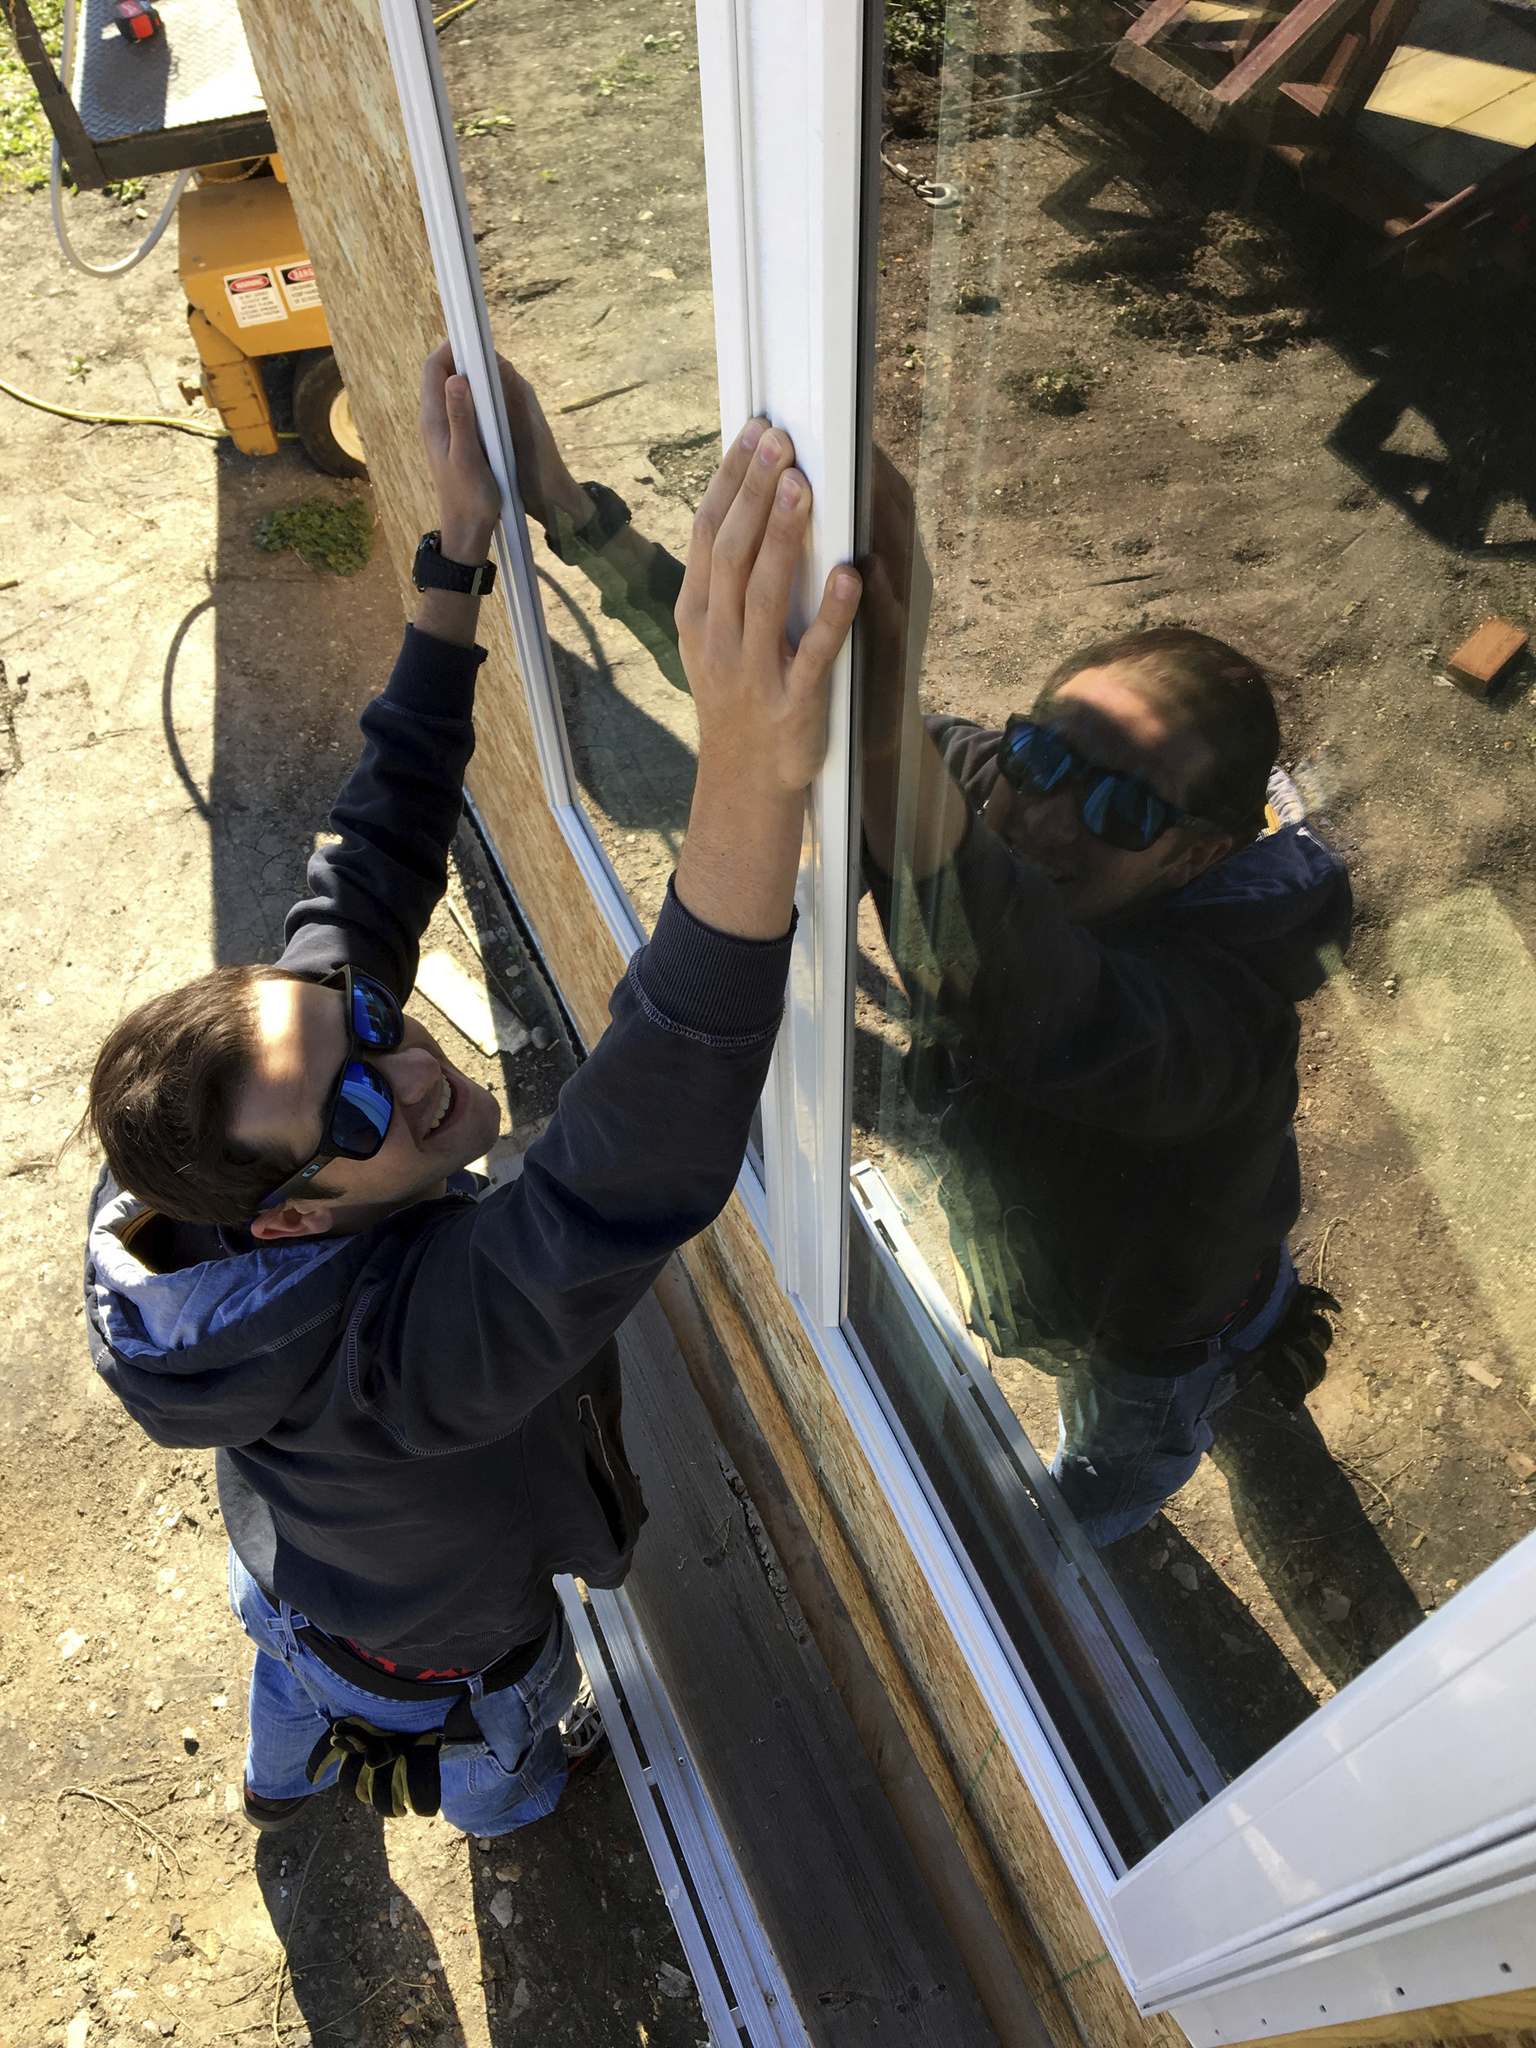
It is often necessary to have a second set of hands to hold a large window in place within the rough opening until it can be fastened — Edward Doiron, my cousin’s eldest, came to lend a hand (well, both hands) during the south-side addition.
Marc LaBossiere / Winnipeg Free Press
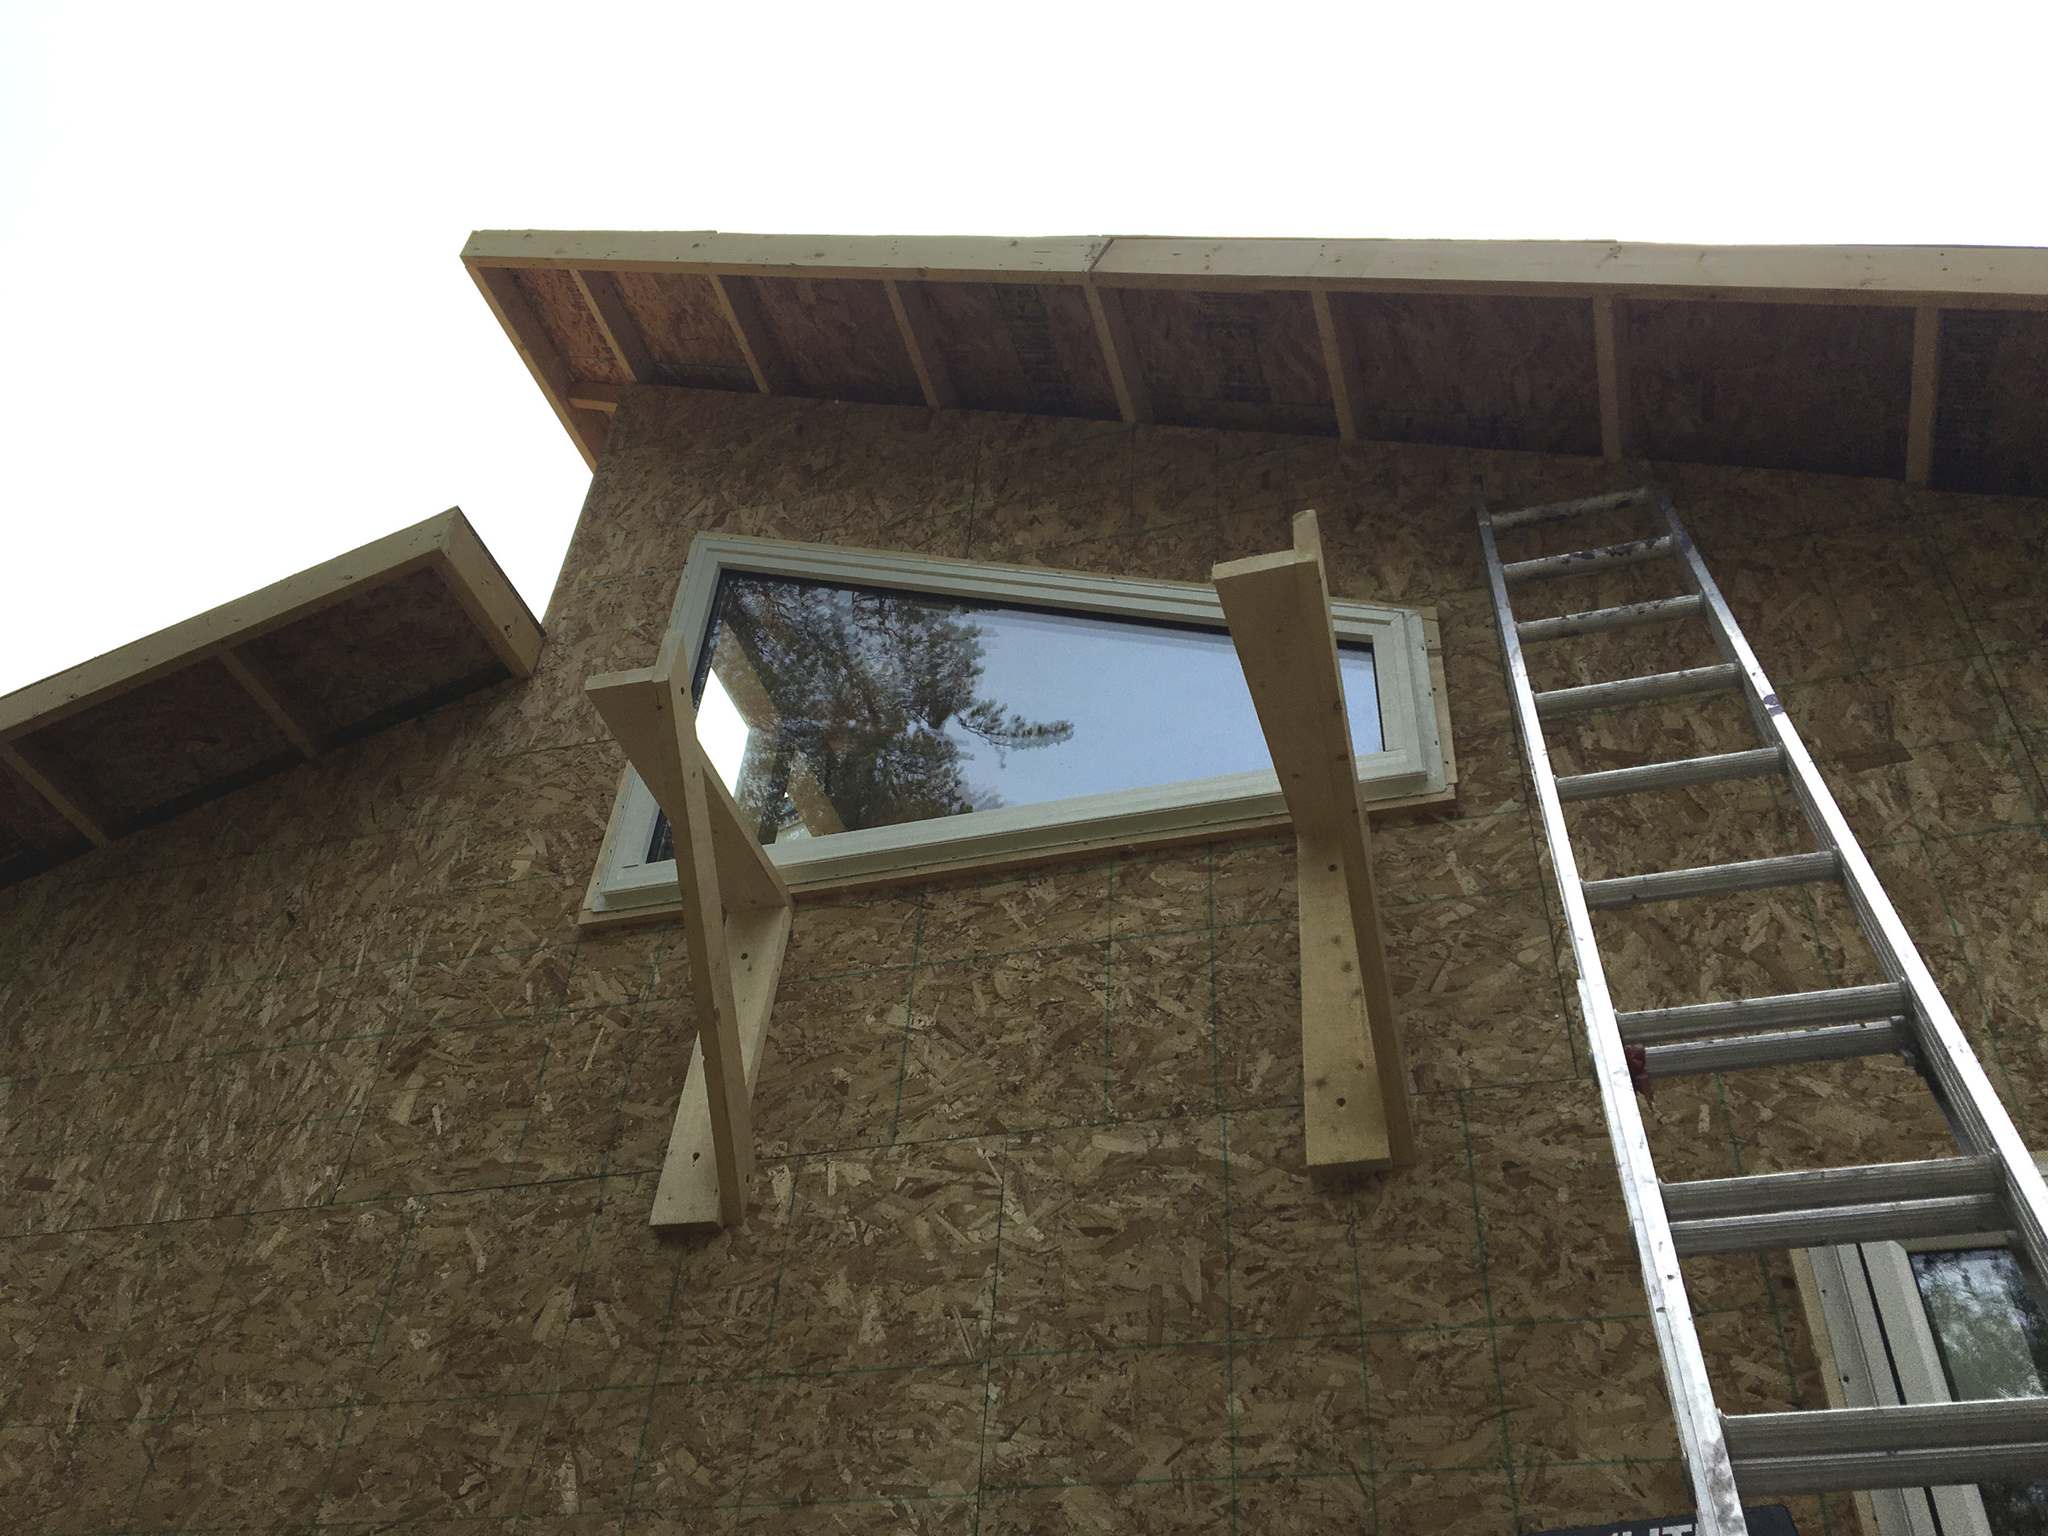
This five-foot-wide and three-foot-high rakehead window is first hoisted into position using the interior scaffolding, angled out onto temporary supports, before being placed into the rough opening and secured into place — it took four of us to achieve this!
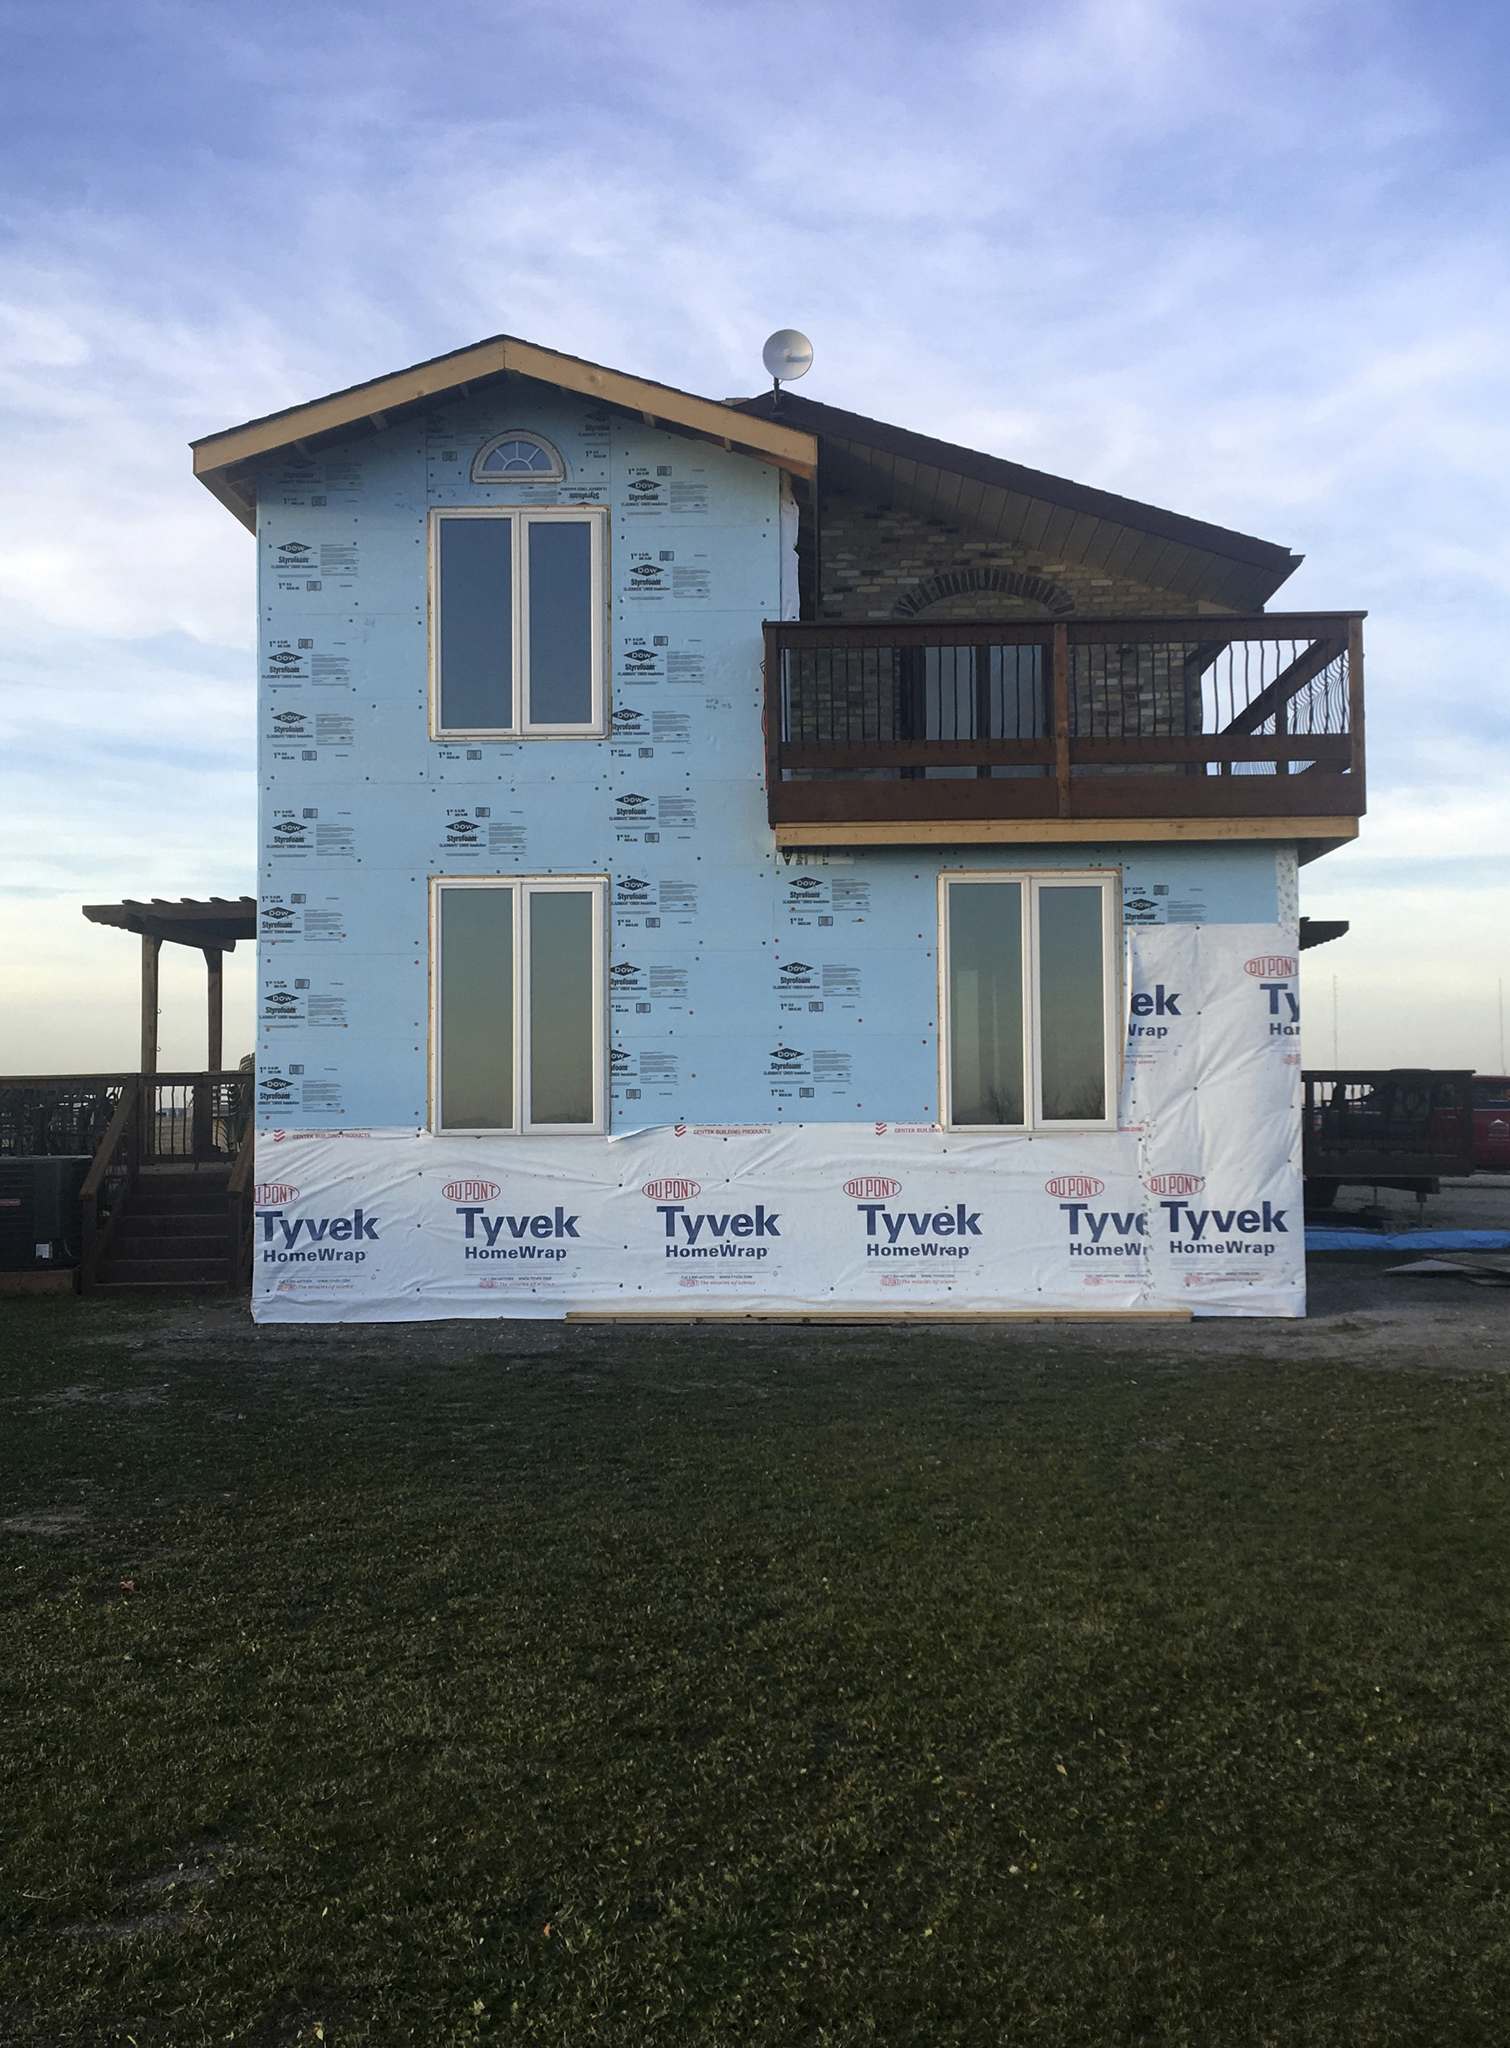
Marc LaBossiere / Winnipeg Free Press
Once the windows were installed on the south-side addition and the one-inch rigid insulation was installed, the Tyvek housewrap was eventually sealed along each window perimeter with Tuck tape.
Window installation can be a daunting task — not only must the windows be pre-ordered to exact specifications, the rough openings must be prepped slightly bigger than each of the windows respectively during framing to allow for an efficient mounting process. Although smaller windows can sometimes be installed on your own, it is often a two- or three-person job. But it is the nailing fin that really expedites the installation process.
When replacing windows, or if the introduction of windows is required for a new build, the height, width and style of each window dictates the esthetics. Unbeknownst to most, it is equally important to establish the depth of the window jamb prior to placing the order. The window jamb depth is directly proportional to the depth of the rough opening — the inside edge of the jamb should lie flush with the finished interior wall once the window is mounted from the exterior. Despite the ability to approximate this depth based on how the framing and exterior sheathing are achieved, it is always prudent to take careful measurements before placing a window order.
During the south-side addition build on my property in the fall of 2017, changes to the building codes revealed that the window jamb for this addition was required to be deeper than the windows installed during the recording studio build, which was completed in 2005. For the studio build, the jamb depths were calculated by adding the various layers that make up the wall depth: two-by-six framing (which is actually 5½ inches, not six), half-inch drywall along the interior and five-eighths OSB sheathing on the exterior. Once mounted, the window jamb had to be 65/8 inches deep, so that the inside edge of the jamb sat flush with the drywall. Due to an increase in required R-value, simply using insulation within the two-by-six framing would not suffice — additional one-inch rigid insulation was required to meet the new code for the build in 2017. As such, the window jamb depth for the south-side addition had to factor in this depth increase. The windows were subsequently ordered accordingly with a jamb depth of 75/8 inches.
Once the windows arrived on-site, the installation task was quite simple. To expedite the process, the base of the rough opening was pre-shimmed to level so that the window would sit nearly centred, top to bottom, within each rough opening which was framed three-quarters of an inch wider and higher than the actual jamb size of each window. With the window resting atop the shims, it is also centred left-right and proper level and square were again confirmed before the window was tacked into placed by securing a few screws along the outer nailing fin, to hold the window in place. The window was then permanently secured with screws at every second hole along the entire perimeter nailing fin.
Because the windows on the south-side addition were installed before the one-inch rigid insulation was affixed to the outer sheathing, one-inch expanders were created by ripping a two-by-eight down to one-inch strips, secured along the perimeter of each rough opening. By doing this, the windows could be installed before the rigid, by securing the nailing fins to this one-inch expander, allowing the window to inevitably lie flush with the exterior rigid insulation, once it was installed. Despite this minor extra step, all seven windows on two floors were installed in less than four hours.
With the windows straight and level, and permanently in place, Tyvek housewrap was then secured to the exterior and sealed at each window with Tuck Tape. Expandable foam was used to fill the gap between the window jamb and framing along the rough opening from the inside. After the interior insulation was carefully placed within all the stud cavities and then lined with vapour barrier, Tuck Tape was used to seal the vapour barrier along the inside perimeter of each window jamb, providing the best protection against the elements.
It is quite an undertaking to install new windows — preparation is key. If the window measurements are precise and the rough opening is accurate, the actual installation process is straightforward and can be achieved rather quickly, simplified by the nailing fin. Provided the window unit can be safely hoisted into position, it only takes a few screws to secure the window into position. From that point on, permanent installation is simply a matter of adding fasteners along the entire perimeter nailing fin, before sealing the unit both outside and in — easy!
Consequently, installing a window without a nailing fin must be considerably more difficult. Based on my limited window-installing experience, all with fins, I’d probably find a way to add a fin — just sayin’.
bossenterprise@outlook.com