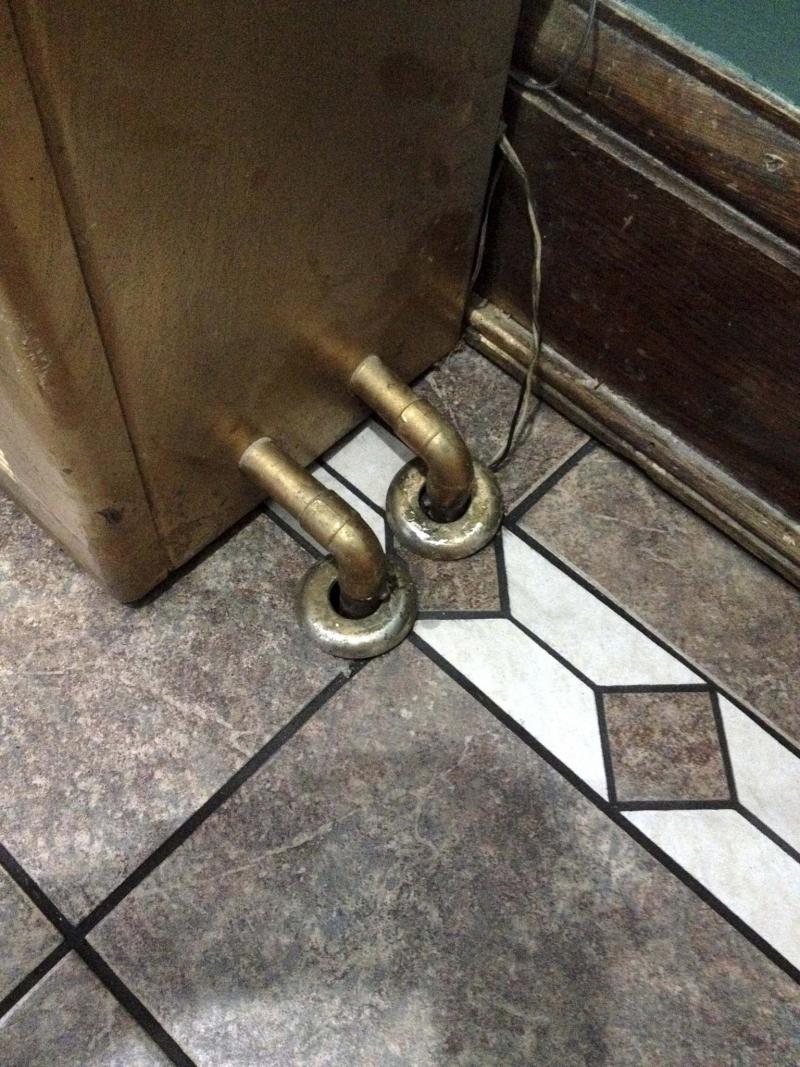
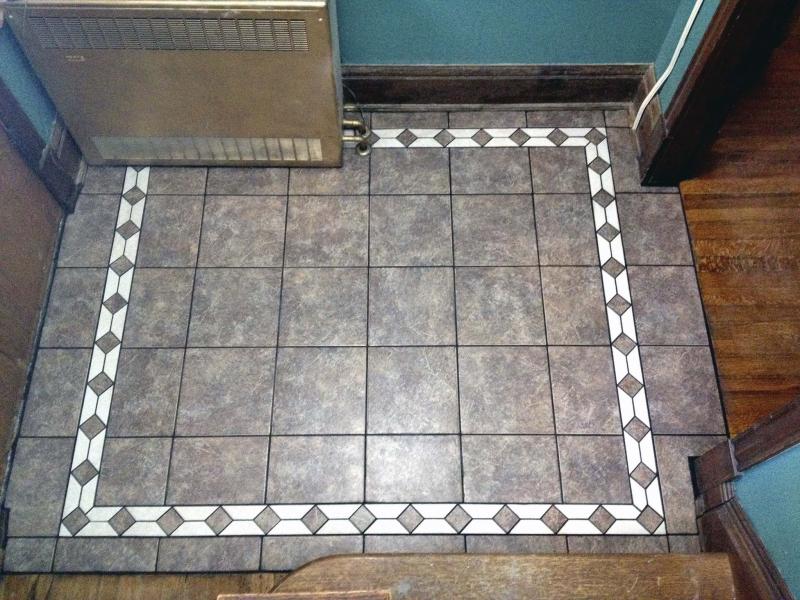
Some tiles were cut to accommodate existing features of the space.
Photos by Marc LaBossiere / Winnipeg Free Press
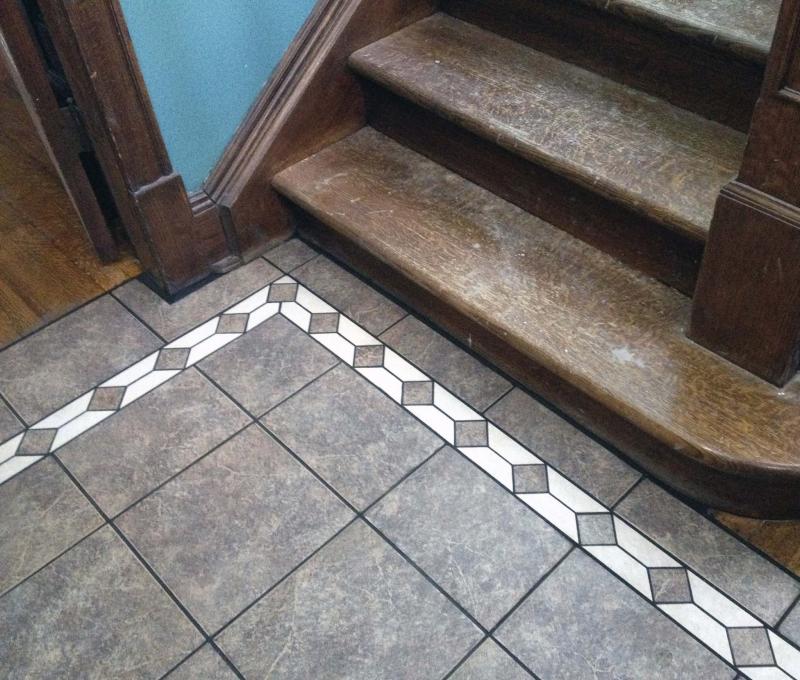
A tiled area with a decorative border replaced the old terracotta tile at the landing of a three-storey brick house on Wellington Crescent.
Tiling can be a forgiving activity, provided adequate time is taken to preplan the tile layout. Failing to do so can result in unparallel lines, awkward cuts, and slivers of tile which create an unbalanced area. Any of these scenarios attract the eye like a magnet and force you to notice imperfections that can easily be avoided.
The best way to avoid any oversights is a dry run.
During a several month-long, multi-room facelift in a three-storey brick house on Wellington Crescent sometime in early 2014, Renate Singh suggested the existing tiled landing at the front entrance on the main floor of her home had deteriorated beyond repair — corners of the old terracotta tiles had chipped away, and many of them had cracked into pieces all together. The area is located at the base of a multi-tiered staircase which leads to both the second and third floors. It was evident the area receives a lot of foot-traffic and would require a complete redo. As such, the old terracotta tile was removed (most popped up with little effort), and the concrete base was then cleared of all remaining debris. Although the tiled landing measures only 7½ by 6½ feet, the nooks and crannies along its perimeter would require accurate measurements for multiple tile cuts.
Once the concrete subfloor was free of old tile and fully prepped, Singh and I briefly discussed how best to create a more aesthetically pleasing tile layout. Since this is the first area of the house where guests would traverse, a ‘wow factor’ was important. Singh suggested we introduce a border within the tiled area. The appropriate tile was sought out, and the work began.
To implement a border, it is very important to consider the length and width of both the border tiles, and the main tiles. All the tile within the border is centred from left to right, as well as from back to front. As well, if main tiles are to be introduced along the outer perimeter of the border, left-to-right and back-to-front measurements should also be included during the layout planning stage. It is for these reasons, it is so important to perform the dry run.
Once a tile design has been established, tiles are laid out in the planned pattern within the tiling area. This process eliminates potential errors before they occur — once a series of tiles are set into place with thinset, you only have a limited time to move them slightly to achieve any placement adjustments. While performing the dry run, mark the subfloor with a felt marker (and be sure to factor in the width of every grout line). This is the best and most accurate way to ensure the intended tile layout will fit. This process allows you to easily modify intended tile placement if it doesn’t.
Implementing a border within your tile layout increases difficulty, because it is unlikely the dimensions of the main tiles within the border area are exact multiples of the border tiles adjacent to the inside perimeter of the border tile layout. Once the size of the intended border is established, the tiles along the inside perimeter will likely need to be cut to fit along all sides adjacent to the inner perimeter. The main tiles resting along the outer perimeter will almost always experience a similar fate, for the same reason — the border tile width, length and depth will rarely allow full tiles on all, if any, adjacent sides.
Keeping this in mind, the border tile was first mapped out and marked on the concrete subfloor. The main tiles within the border area were centred and marked on the floor. The main tiles on the outside of the border would be set into place later, once the inner tiles are set into their permanent positions.
For this project, the outer tiles also required many cuts to fit around the front-door threshold, the old-school radiator, main-floor entrance and the various contours which accommodate the existing baseboards and trim. Once all the tiles were placed and allowed to set over night, dark grout was chosen to outline and emphasize the tile edges and border-tile features. The tile colour enhances the existing wooden trim, while the white mosaic border creates the illusion of uniformity amid the many idiosyncrasies along the base of the walls and throughout the outer perimeter of the tiled area. The result is a vast improvement over the old and decrepit terracotta tile — which has since been easily forgotten.
The easy fix would have been to simply install main tiles throughout the entire area of the landing. The introduction of a border tile clearly increased the complexity of tile layout design.
Other than the additional tile cuts to accommodate a border, the actual tiling process remained exactly the same. It did, however, take much longer to achieve. And the dry run was the only way to achieve it successfully.
bossenterprise@outlook.com