Whether remodelling a kitchen, or giving the master bathroom a facelift, a new countertop can revitalize the overall look and feel of the room, quickly becoming the focal point of a completed facelift.
In recent years, quartz may well be the new standard.
Many years ago, in my first home, a choice was presented to me that due to budgetary constraints, wasn’t really a choice at all. At nearly four times the cost, a granite countertop was way beyond my price-range. As such, my modest kitchen renovation received many cosmetic upgrades, including new but affordable arbrite countertops. Although these countertops were easy to install and did serve the purpose for many years, they did begin to show wear and tear after only a few years, primarily at the mitered corner seams and along the edges.
These days, a new choice has sky-rocketed to the top of the list — quartz.
Quartz countertops are fundamentally an engineered stone, made from ground-up particles of actual stone mixed together with plastic resins. The resulting product is extremely durable, and virtually maintenance-free. Unlike a natural stone such as granite, which requires a sealant every six months or so, the polished resin surface of quartz is non-porous, and can simply be wiped down without worry. Although it is a manmade product, there are a few constraints that apply once the installation process begins.

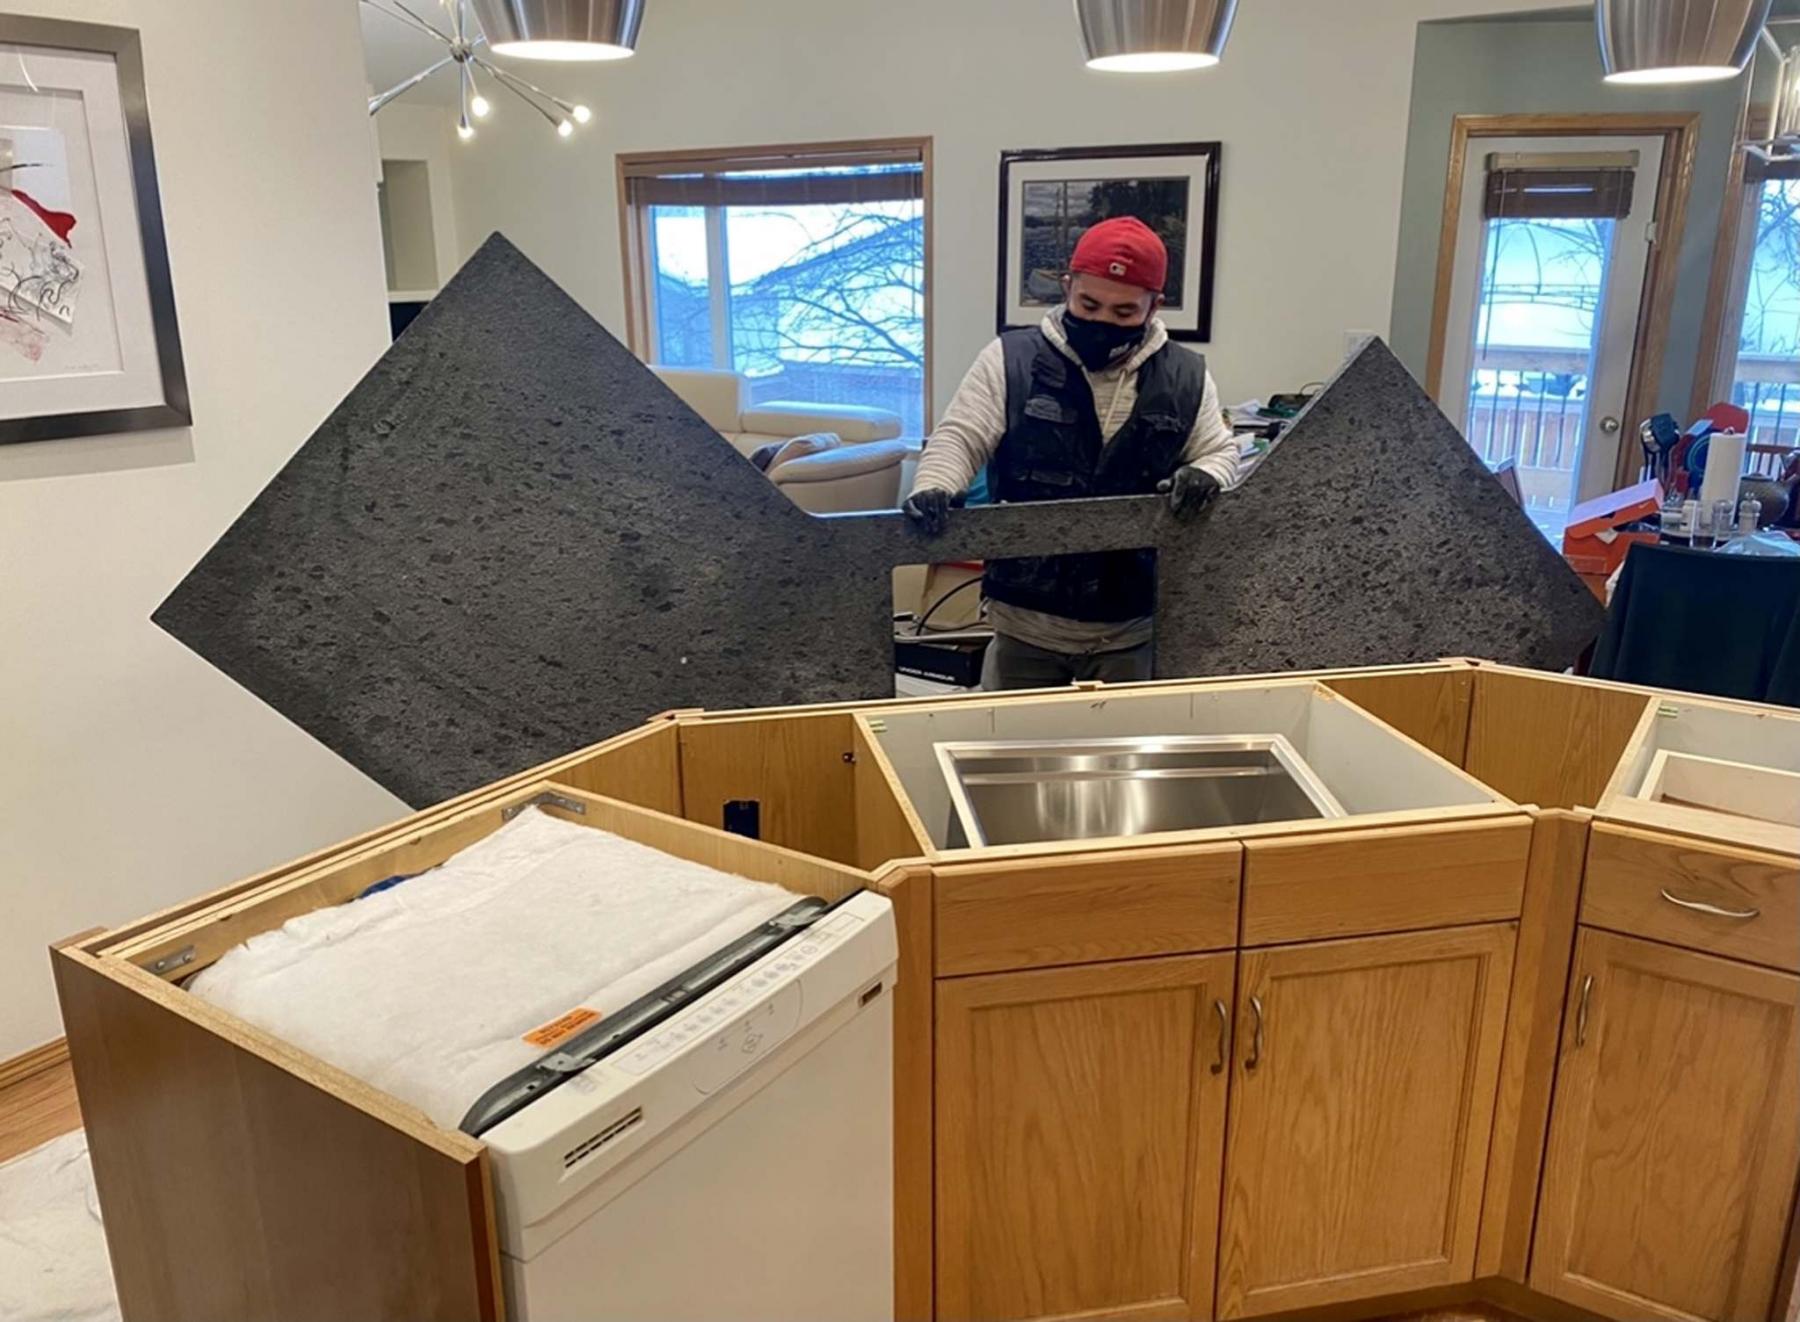
The faucet hole is the only aspect of the installation cutting process that is done on site. (Marc LaBossiere / Winnipeg Free Press)
A slab of quartz can be extremely heavy. So heavy in fact, that the largest of sections must be rolled into the space on a wheeled dollied that supports most of the weight. It then takes two or three individuals to hoist the pre-cut slab on to the top of the cabinet. When designing the countertop layout, the goal is to minimize the number of seams, despite any corners when and if possible. For instance, if the stove is close to the corner L-wing of a lower kitchen cabinet configuration, the quartz can be cut into the L shape provided the tail of the L does not exceed the original width of the slab. When a seam is inevitable however, the installers use a clamp tool and resin to both glue the edges of two slabs together, all-the-while ensuring both slabs are perfectly level, and the seam is filled nearly undetectable to the touch.
At a recent kitchen remodel, that involved retaining the existing cupboard and simply replacing old arbrite countertops with new quartz, the kitchen cabinet configuration along the back walls was very simple; three separate countertops were required, two on either side of the stove and adjacent the side of the pantry, and another small slab between the far side of the pantry and the fridge. The largest pre-cut slab for the kitchen’s island would prove most challenging. The island consists of a main cabinet area with sink at a 45-degree set to the wall cabinets, with two wings that spawn from each end of the main island at 45 degrees themselves back towards their respective proximities to the wall cabinets. The length of the island was within a slab length. However, the width of the original countertop would be increased to introduce an overhang on the far side of the island, to accommodate a nook to support an area for eating, underneath which a couple of stools would be placed.
Upon taking careful measurements, and subsequently supplying them to the quartz supplier Solid Stone with a diagram of the design, it was established that the slab chosen was indeed wide enough to support the dimensions required. As such, the island countertop could be pre-cut in one piece to meet these specifications.

The enormous one-piece island countertop provides an overhang on the close side as an eating area with stools below. (Marc LaBossiere / Winnipeg Free Press)
A week prior to the installation, all countertop locations are laser-measured to allow for any slight anomalies along the back of the lower cabinets along the walls. With those measurements, along with the island design and on-site confirmation of the dimensions, all the countertop slabs were delivered as individual pre-cut solid sections of quartz, that would not require any seams. The installation crew from Solid Stone carefully placed each of the smaller countertop sections along the main lower cabinets on the back walls.
The enormous island slab was then hoisted on to the island cabinets, moving it slowly into final position. Once in place, measurements were taken all around to confirm its proper placement and the quartz was then glued into position using a silicone sealant along the underside of the countertop at the place of contact with the lower cupboards. The undermount sink was then affixed to the underside of the countertop using sealant and four brackets. Finally, the faucet hole was drilled on site, in line with sink which is centred along the length of the island.
It is always amazing to experience the introduction of new quartz countertops. And because most of the work regarding custom quartz countertops is achieved off-site prior to the date of installation, the Solid Stone crew had all four (including that behemoth of an island countertop) fully installed within an hour or so. And even though my clients had waited years for new kitchen counters — that hour still felt like an eternity. The excitement and anxiety not-withstanding, there’s no doubt about it, it was well worth the wait.
BossEnterprise@outlook.com