Photos by Marc LaBossiere / Winnipeg Free Press
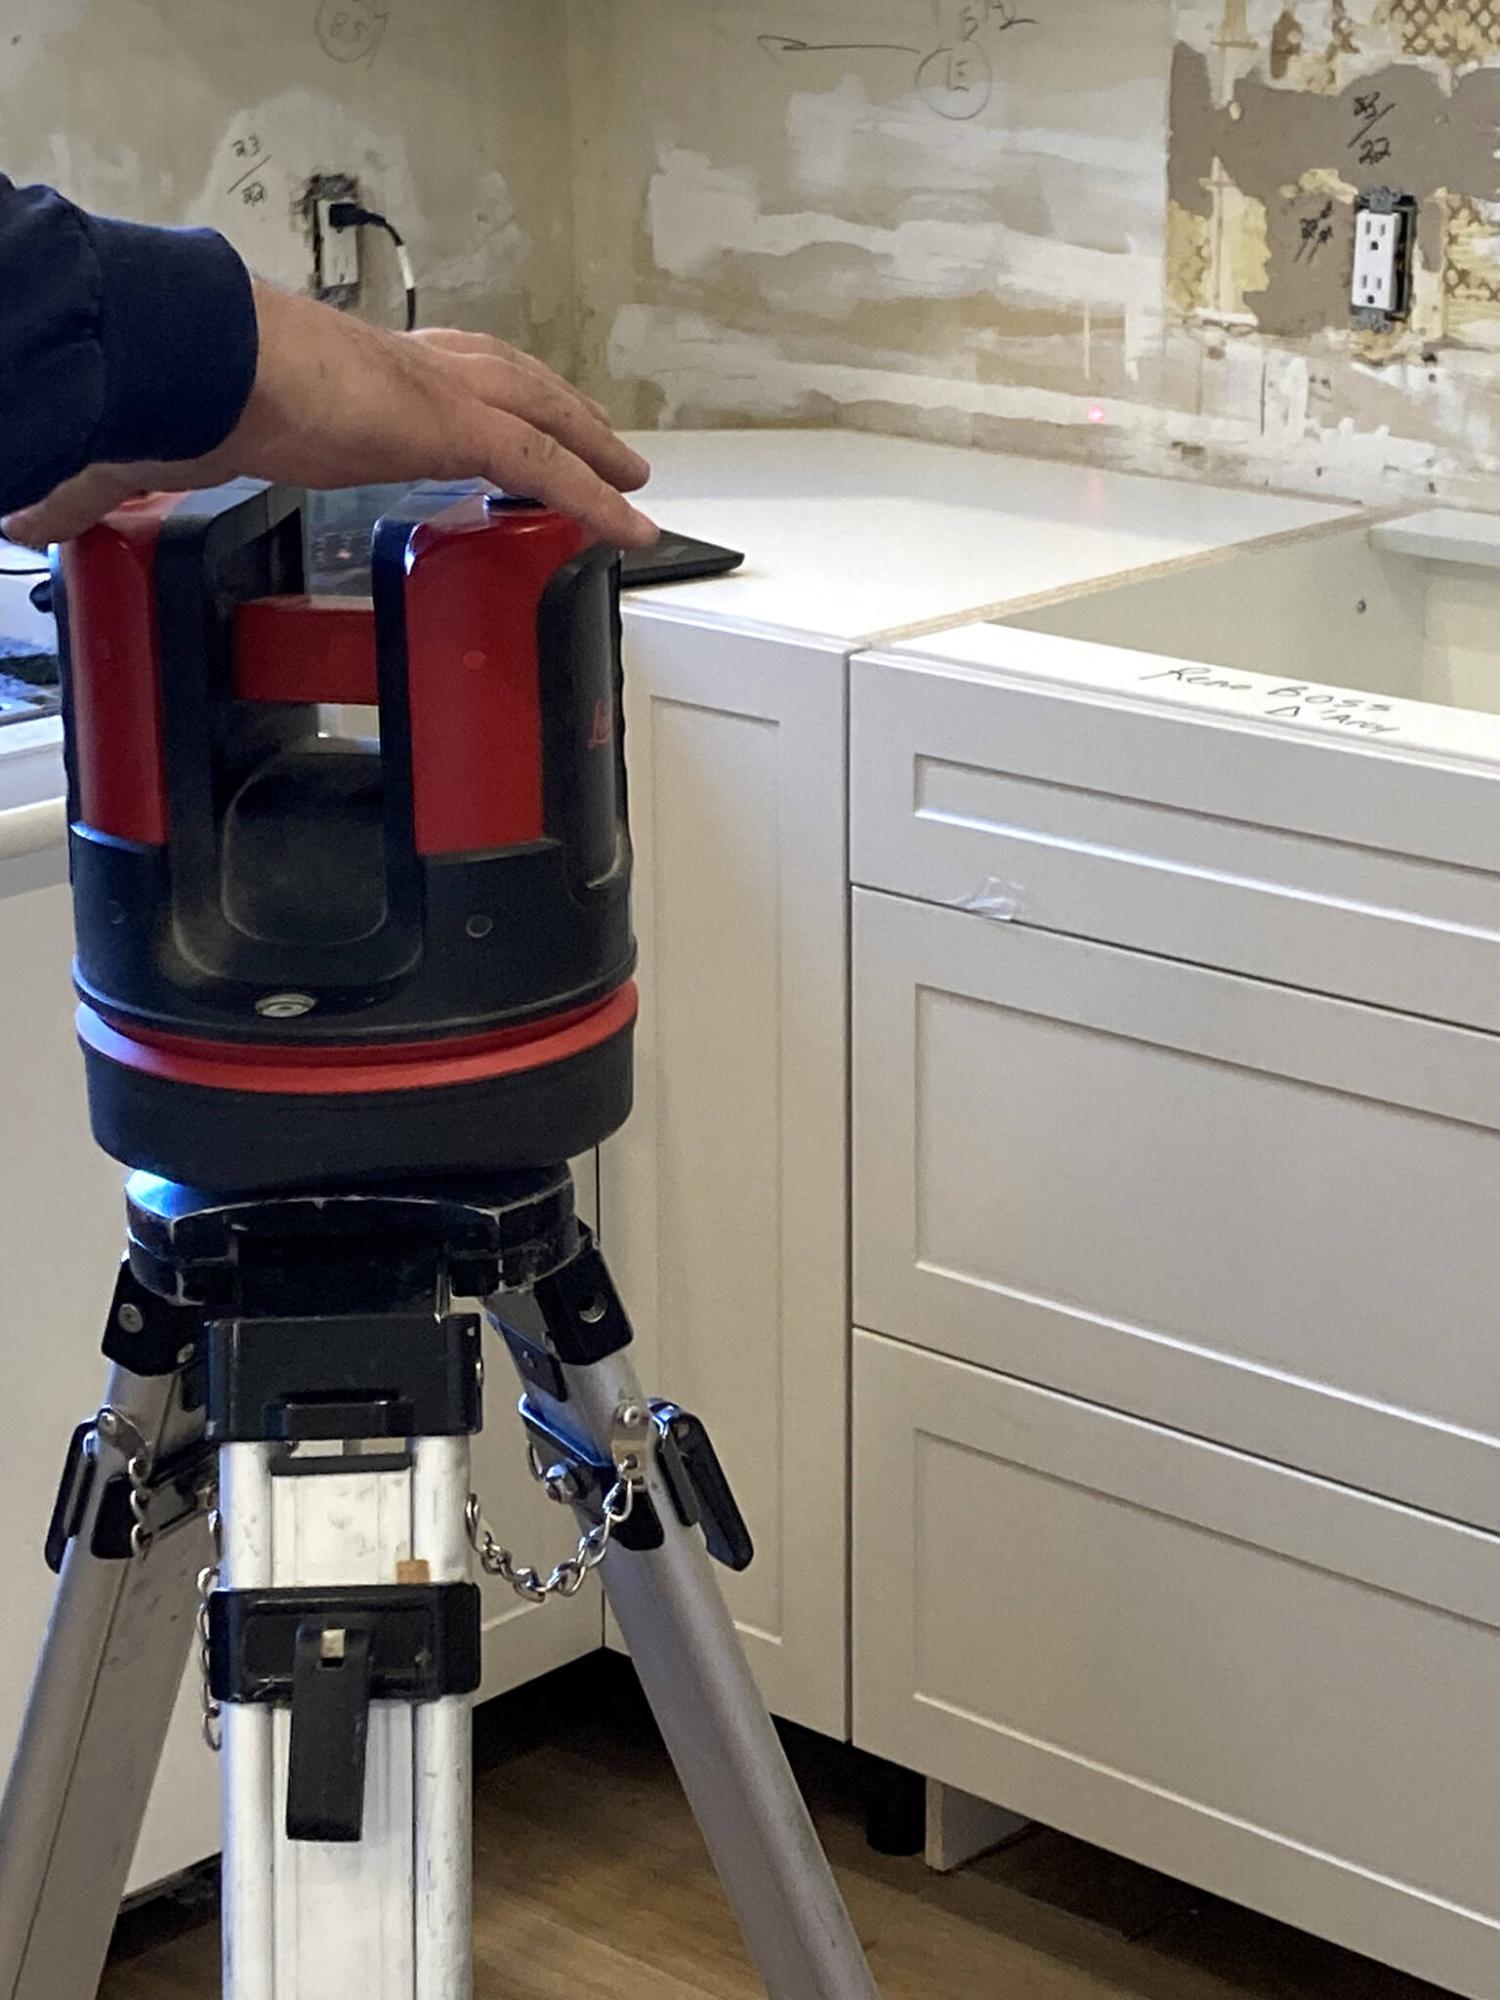
The quartz installation process begins with proper measurements, using a laser tool that records depths and stores the dimensions on a laptop.
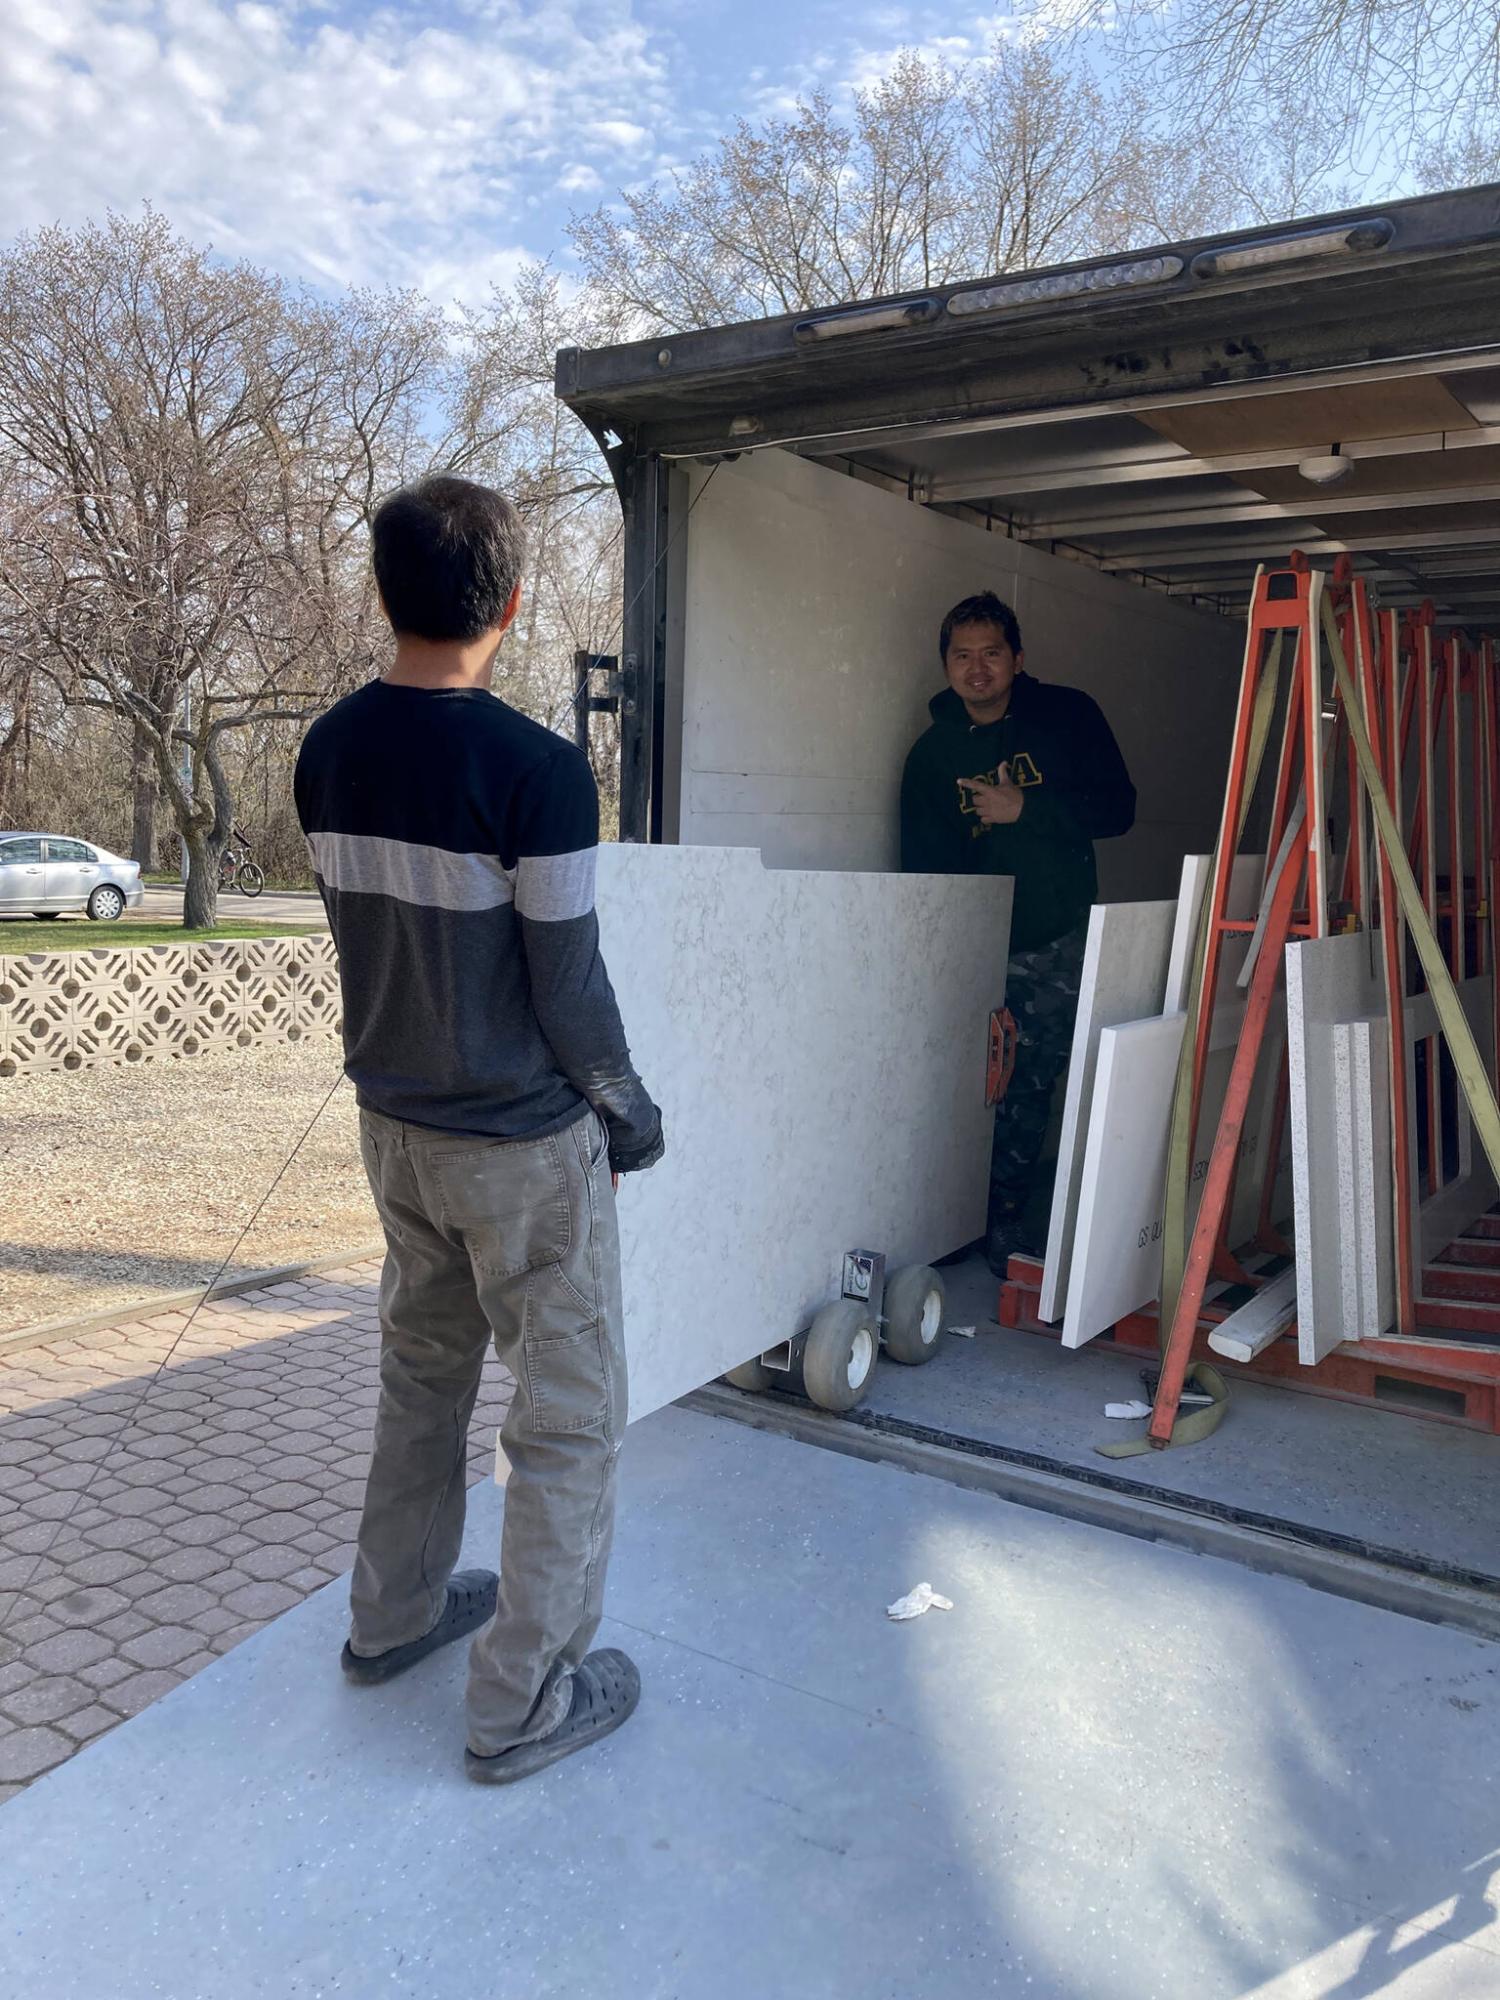
The heavy sections of quartz countertops are wheeled in using a dolly.
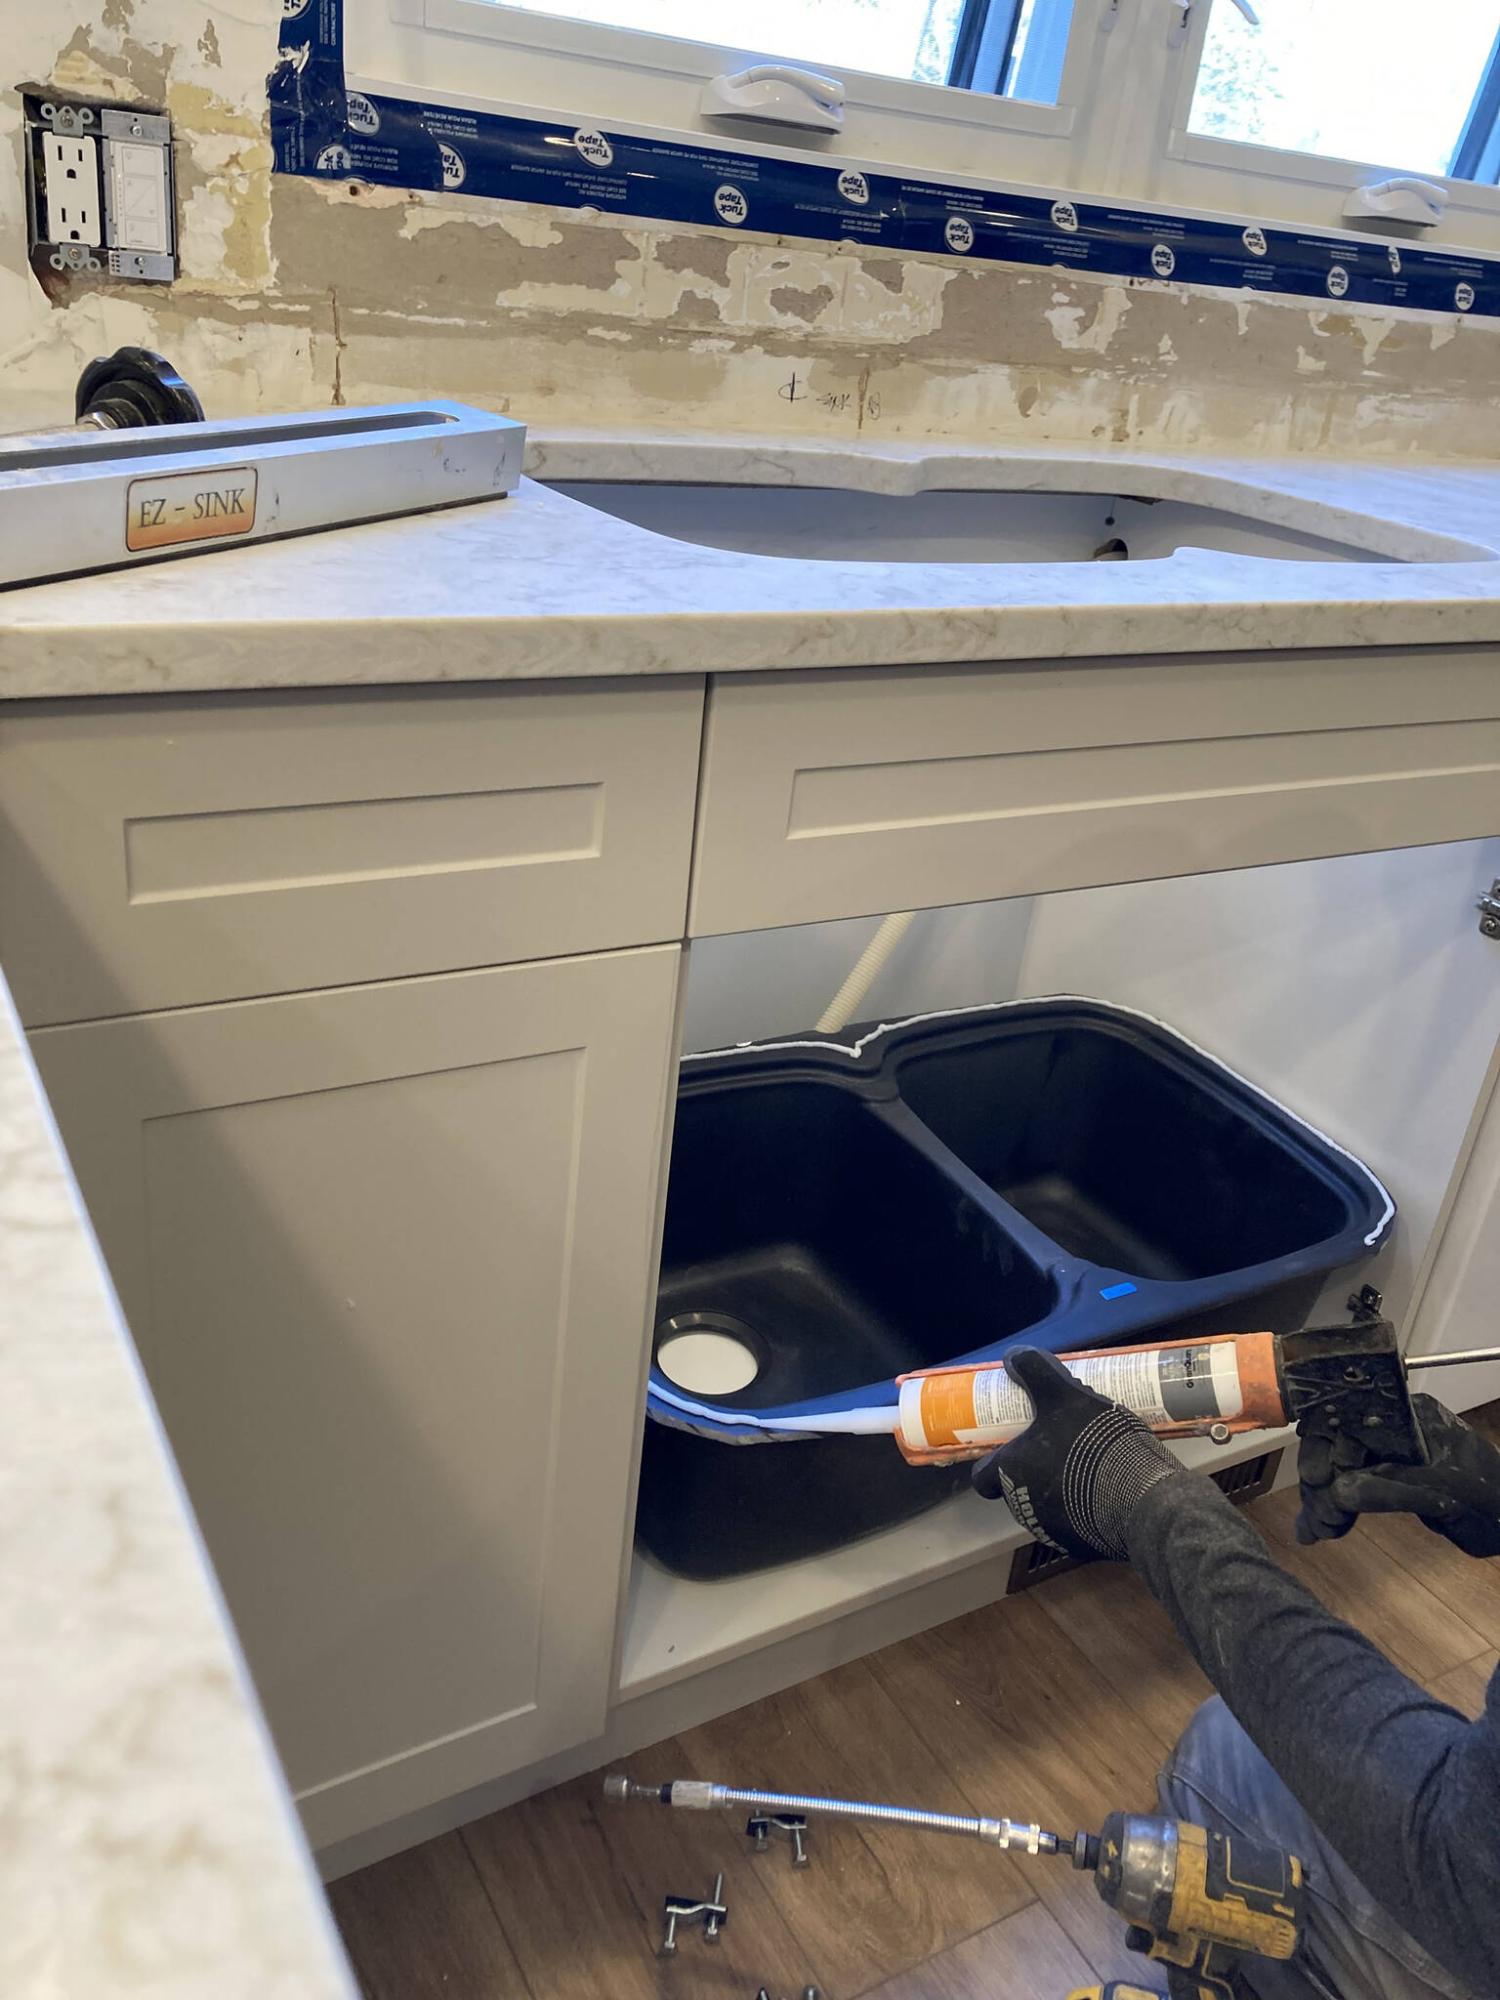
The sink is pre-loaded with adhesive along the upper edge before being lifted into place and fastened below the pre-cut sink hole.
Over the past few years of interior renovations, a dozen or so kitchen renovations have been completed. Although only half were quite extensive, which involved fully gutting the space to introduce new cupboards in a newly designed kitchen layout, all received new quartz countertops. It appears quartz has become the popular choice of late, for good reason. Quartz is truly maintenance-free, and available in a wide range of styles and colours within a very reasonable price range. Whether planning a full kitchen remodel, or simply updating your countertops, quartz selection and subsequent installation process is straightforward, when dealing with the pros at Solid Stone Countertops.
The first step is choosing the quartz style and colour that best suits the kitchen design. When new cupboards are involved, choosing a countertop that blends well with the cupboard style and colour choice is imperative, without being overbearing. Clients sometimes choose their cupboards first and search for the best companion quartz selection. Other times, the quartz comes first, and the cabinets are chosen based on the quartz. No matter, it can be a daunting experience. My advice has always been to narrow down choices to no more than two or three options – otherwise, the final selection process becomes extremely tedious, filled with wavering and uncertainty.
However, once the quartz decision has been finalized, the countertop replacement and/or installation process begins with an initial calculation of square footage. Based on the placement of lower cabinets, the lengths and depths dimensions of all countertop areas are provided to the supplier, and the total area of quartz required is calculated. Because quartz is general priced by square-foot, an estimate for the supply and install can be quickly attained. If the costs of your quartz choice falls within your budget, an order is placed and the next step is scheduled: templating.
Templating is necessary to ensure quartz countertops are cut with precision before arriving to the jobsite. To achieve this, a professional “templater” arrives on site a week or two prior to the tentative installation date to obtain exact measurement of the lower cabinet areas upon which the countertops will be placed. These dimensions are obtained by laser, which stores the information within a program on the templater’s laptop. The laser reads the lineal imperfections along the walls behind the cabinets, allowing these (sometimes) imperceivable idiosyncrasies to be accurately transferred to each respective countertop section, guaranteeing a snug fit during installation. The templater also gathers the undermount sink template (or the sink itself), to ensure the sink cut-out is also prepped correctly during off-site manufacturing.
Once the countertop sections have been prepared, the installation crew arrives with the newly cut sections. The sections are set into place, leveled where required using shims between the bottom of quartz and top and lower cupboards. Typically (unless the kitchen is a galley layout), quartz countertops will incur at least one seam, especially when counters include a 90-degree corner. As such, the countertop sections are prepped in such a way as to allow the two sections to meet perfectly, so that a “seamless” seam can be introduced. Once leveled and in position, an epoxy is added between the two edges to be joined. The quartz sections are then placed together. A nifty gizmo (I did not get the formal name of the device, but may be called a “seam setter”) which consists of clamps and suction that draws and levels the two pieces of quartz together, hastens the bonding process. The excess epoxy is then shaved away using a utility blade edge.
With the bulk of the quartz installation process achieved, only a few tasks remain. The undermount sink is prepped for installation by adding an adhesive to the top lip of the sink, which will bond along the underside perimeter of the pre-cut sink opening. Retention brackets placed at the four corners of the sink are also used to ensure the sink does not shift as the adhesive sets. The faucet (and soap dispenser) hole is then drilled on site using an auger bit, to ensure proper placement. And finally, the underside of the quartz is sealed with caulk along, and all visible surfaces are cleaned and polished. The subsequent tasks of installing the faucet and plumbing tie-in can usually be achieved on the same day, as well as a tiled backsplash, if that’s part of the plan.
A quartz countertop upgrade will completely revitalize the kitchen, providing smooth, easy-to-clean surfaces that never disappoint. The installation process is always a sight to behold, and the Solid Stone crews never disappoint. Beyond the expertise required to ensure a successful countertop installation, lets not forget the importance of proper measurements – without the templater’s attention to detail, the countertop sections could not be accurately prepped, which in turn would make it impossible for the on-site crews to do what they do so well with accurate cuts. A big shout out to my favourite quartz crews at Solid Stone – you make my job easier by making yours look easy.
RenoBoss.Inc@outlook.com