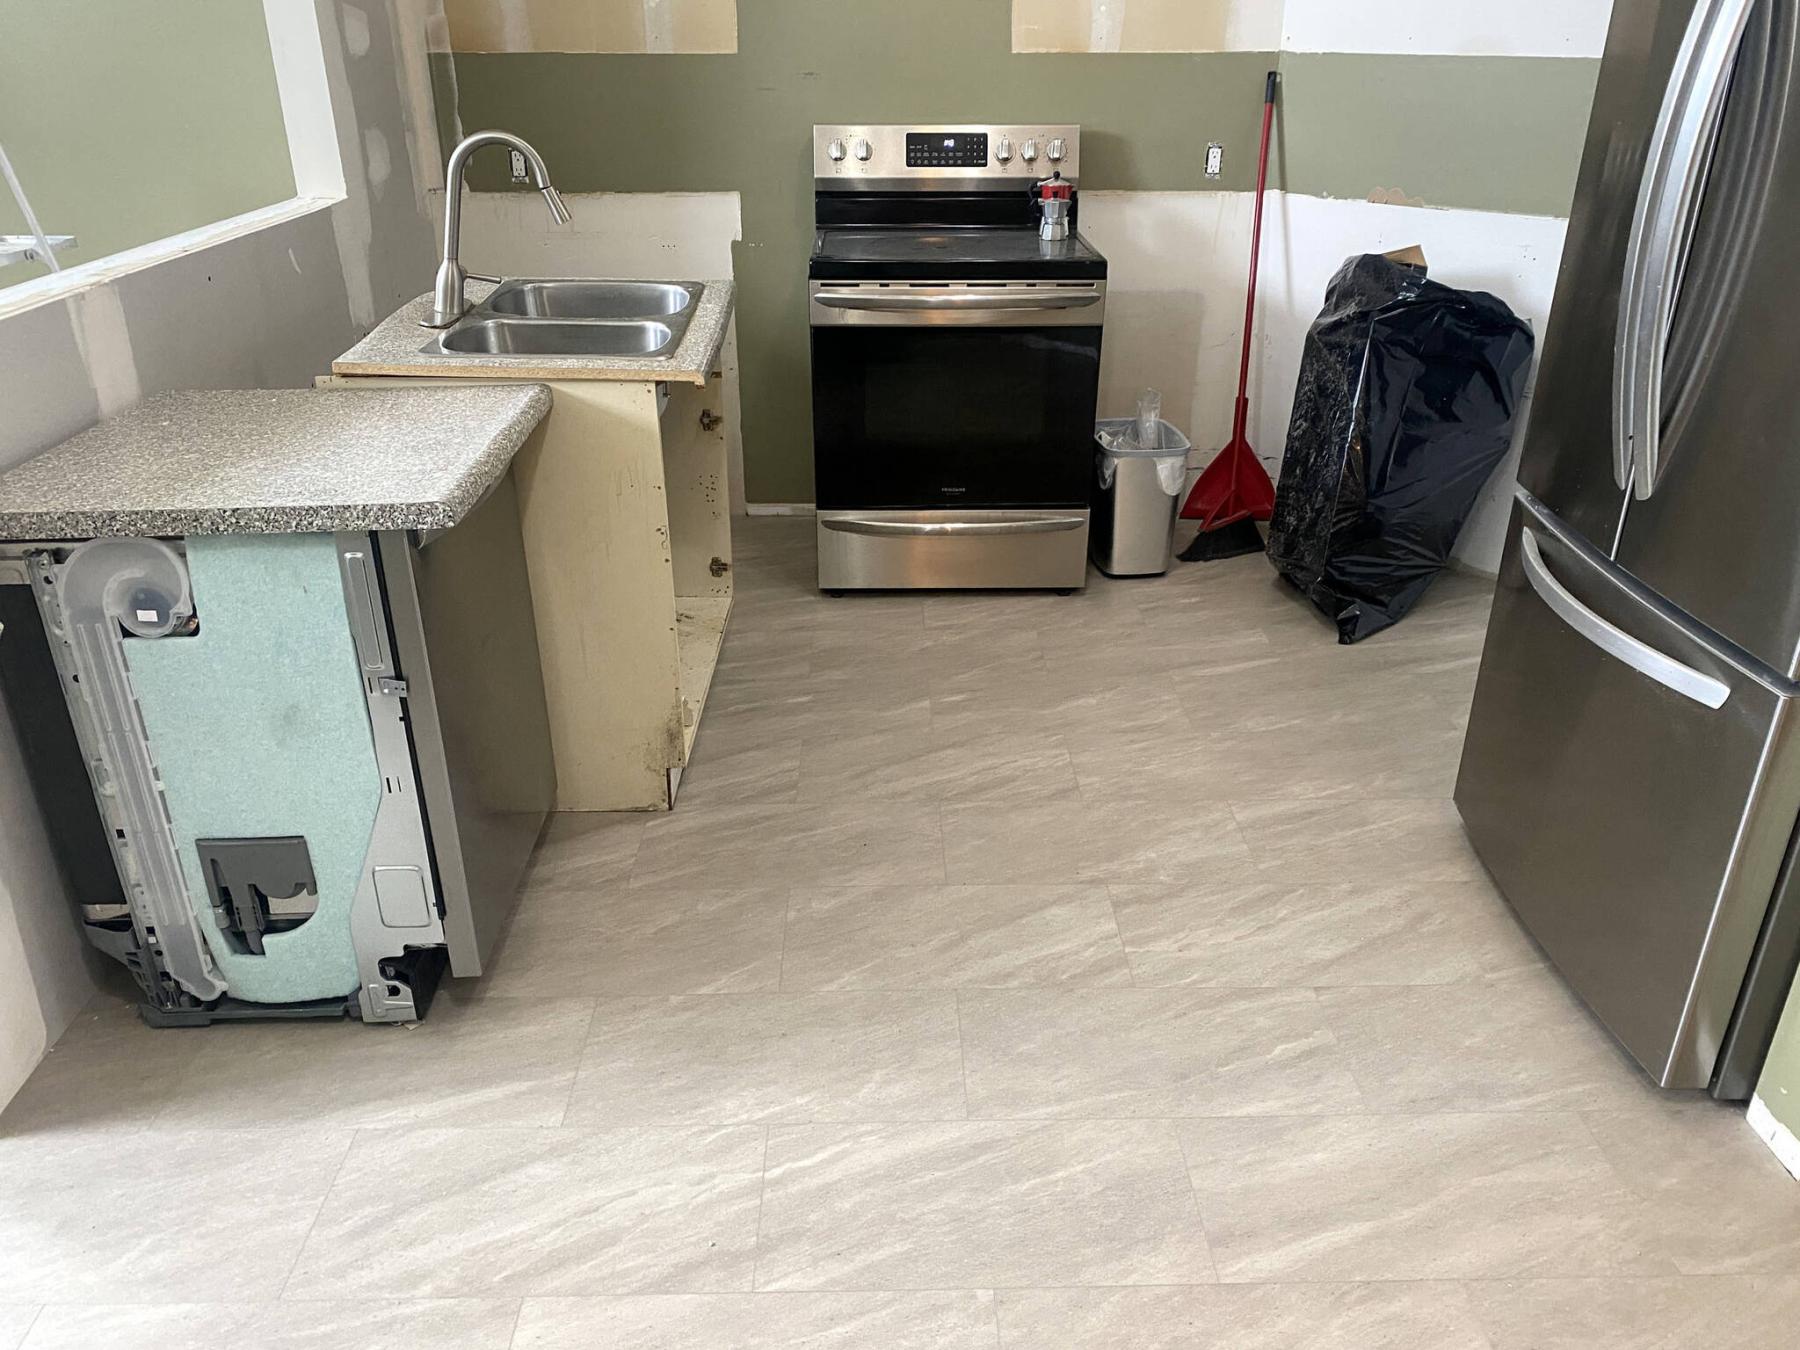
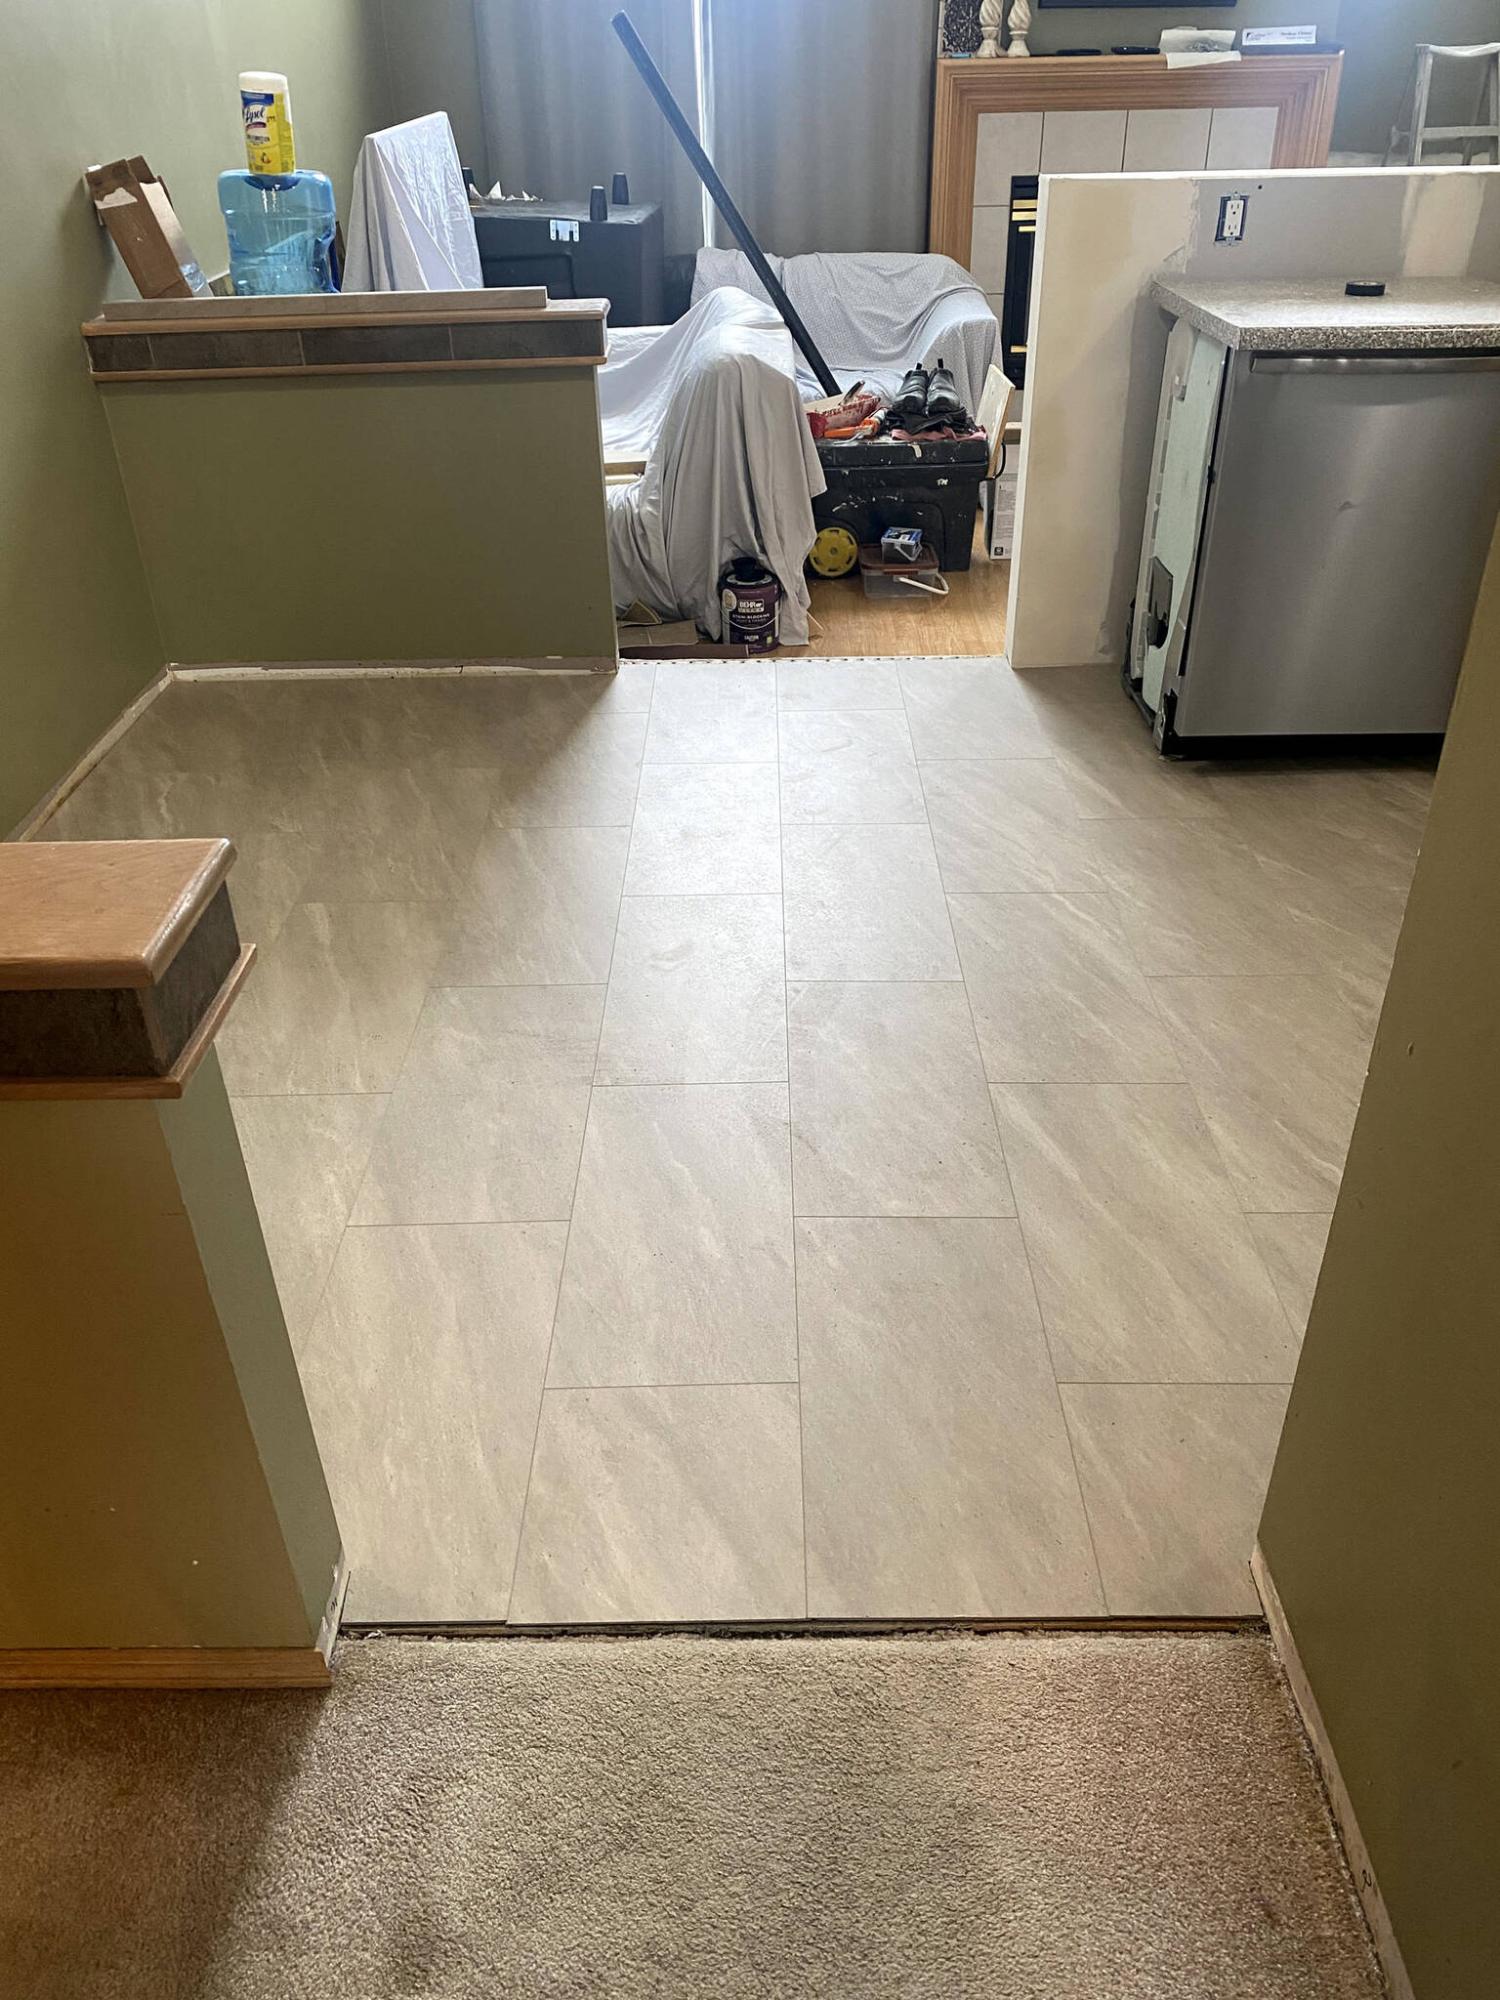
The new vinyl-plank flooring completes the kitchen shell prep stage.
MAIN VINYL Marc LaBossiere / Free Press
To maintain the flow of the room, vinyl orientation was set parallel with the entry to the kitchen.
PHOTOS BY Marc LaBossiere / Free Press
The new vinyl planking is installed throughout the kitchen over top of the old linoleum, before the re-introduction of upper and lower cabinets.
In my world, the difference between a kitchen facelift and a full kitchen renovation is whether a large percentage of the existing space remains, or the entirety is gutted and repopulated once the shell has been prepped.
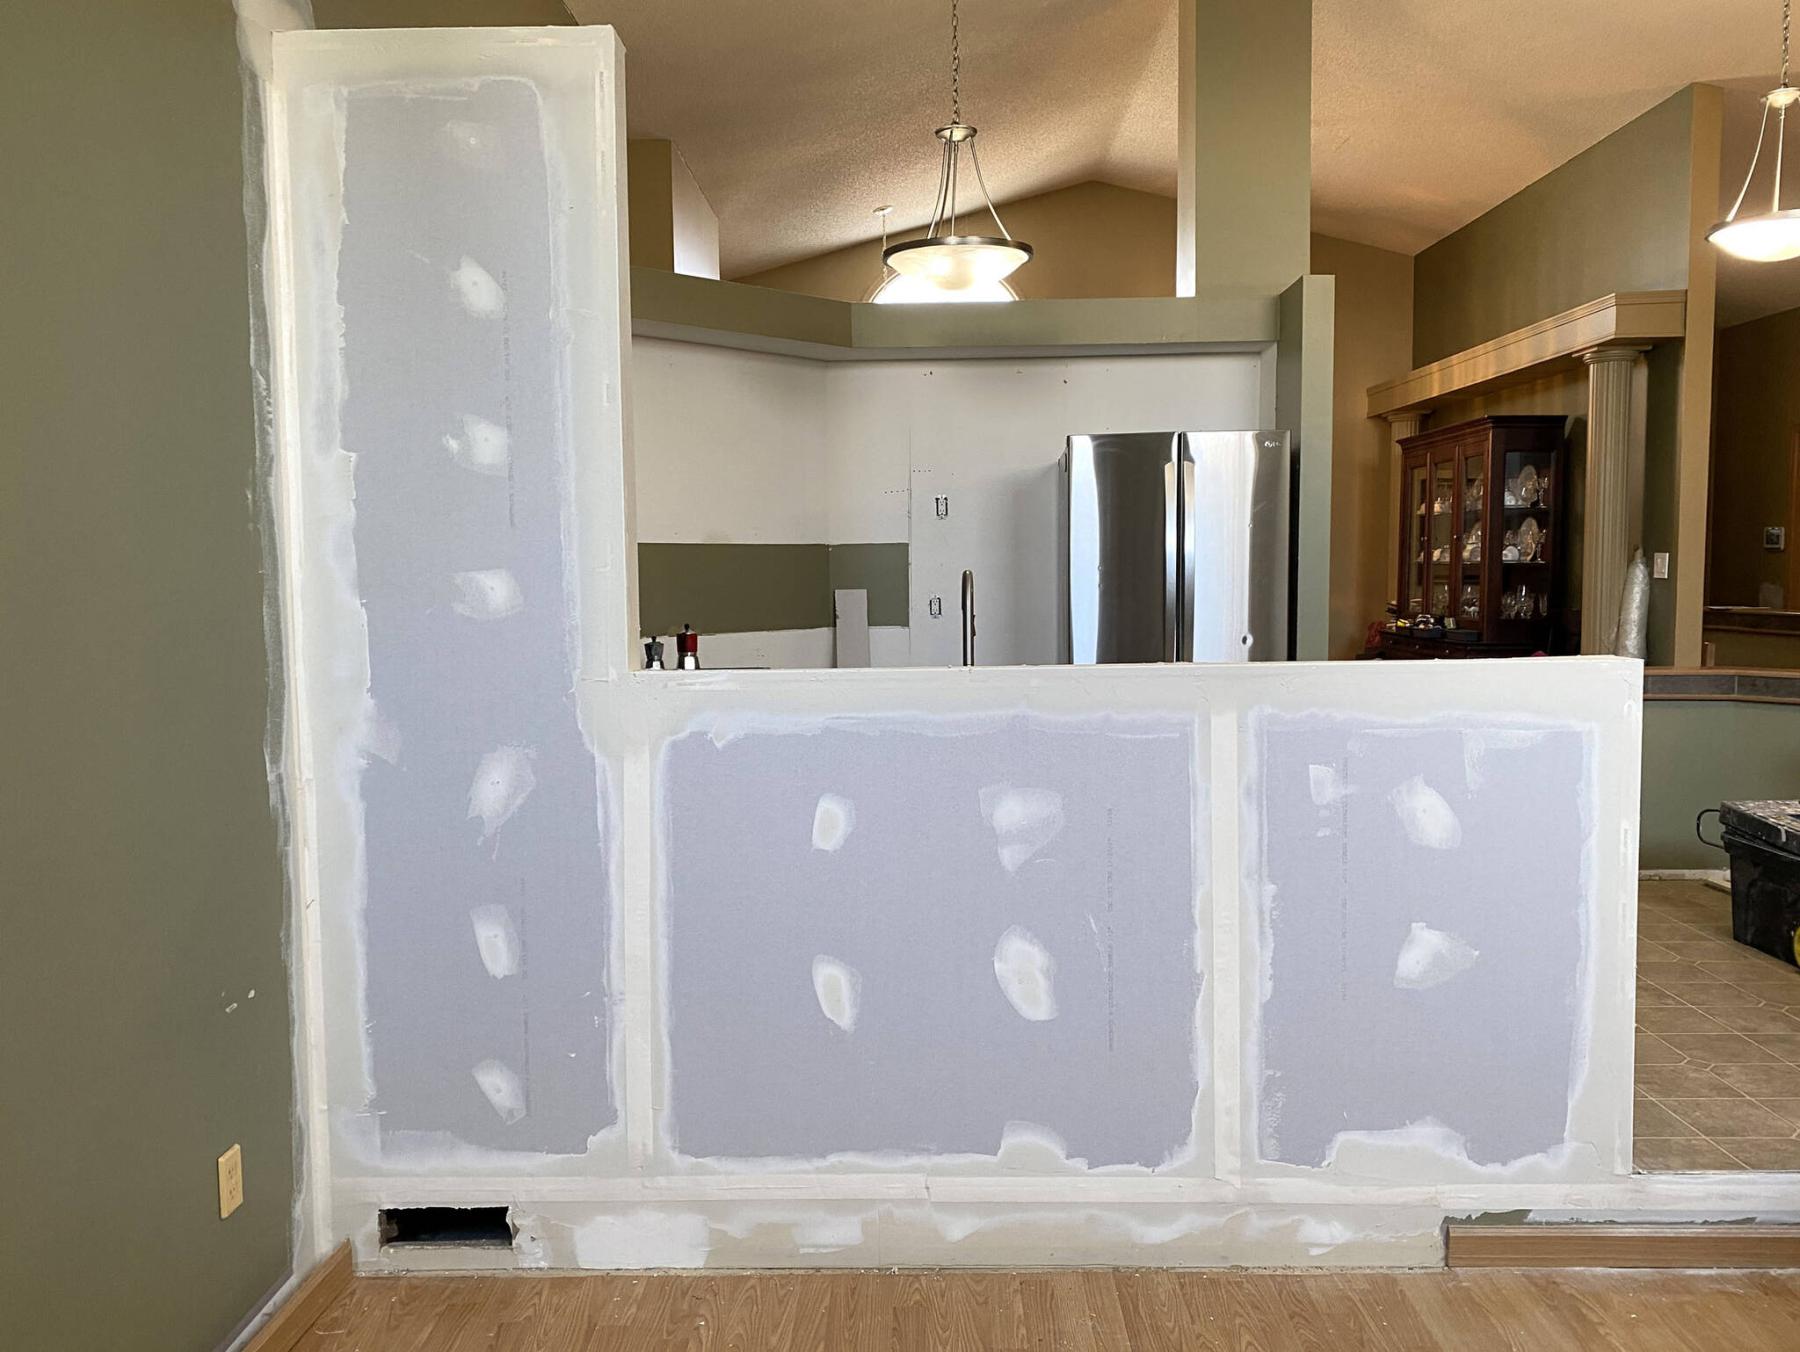
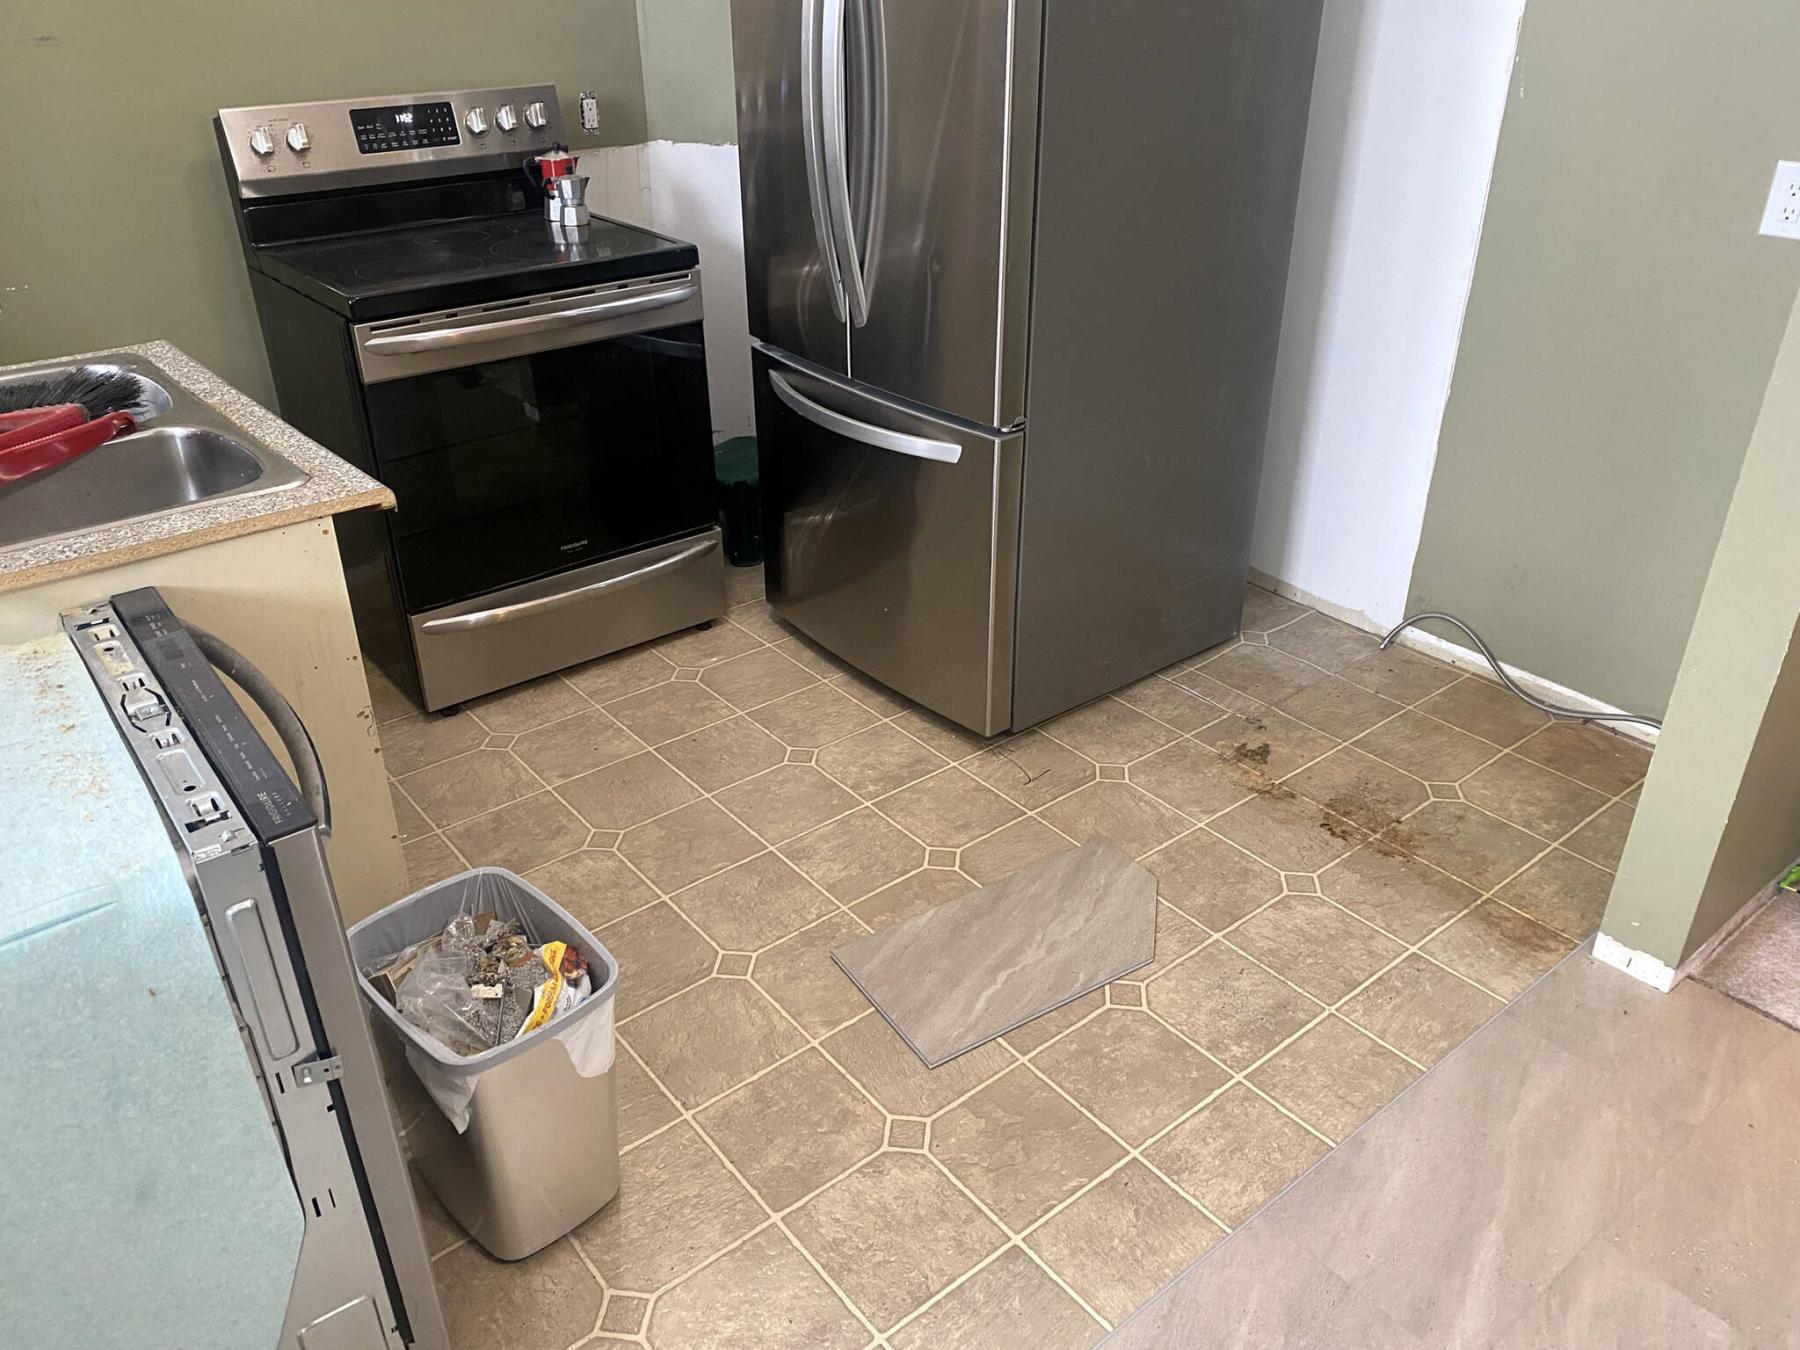
At a recent job site, the homeowners elected to revamp the entire space, which involved tearing out all the old to make way for the new. And in this instance, the shell prep included adding a new partial wall to the design, and installing new vinyl-plank flooring before the cupboards are set into position.
Generally, I’ve always advised clients to keep their existing upper and lower cupboards, so no great changes are required. And should the esthetics badly need an upgrade, the cupboard doors and drawer fronts can always be replaced.
Beyond the cabinetry, a facelift may then involve new quartz countertops, sink and faucet, as well as a newly tiled backsplash, all visual upgrades to enhance a tired-out space.
However, if the existing cupboard layout requires a redesign, or if the cabinet boxes themselves are beginning to fall apart, then a full replacement is suggested for the best and longest-lasting results.
The current kitchen project involves three legs of cupboards, whereby two legs are positioned against walls and the third is tantamount to a peninsula “island.” The old design featured a couple of unflattering areas, such as a floor-to-near-ceiling cabinet beside the fridge that greatly diminished countertop space, as well as sunken upper cabinets above the fridge that could not easily be accessed.
The new design remedies these issues, and improves the look and functionality of these areas.
Along the peninsula, the countertop simply ended on the far side, adjacent to a sunken living-room area.
The backside of the cupboards was boarded with plywood painted white. And although a couch was positioned against this “wall” partition, it never really did the room justice.
Once the old cabinets were removed, including this albatross of a cabinet backside, a new partial wall was framed to match the existing wall on the far side of the fridge, not only for consistency, but also to provide a stop against which the peninsula’s new lower cupboard could be secured. The wall was also extended by roughly 15 inches, to house a garbage pull-out next to the dishwasher.
With the shell layout prepped, the new vinyl-plank flooring was installed prior to populating the space with new cabinetry.
Fortunately, the old flooring consisted of thin linoleum atop a secondary sub-floor, which nearly met the elevation of the carpeted area along the hallway access to the kitchen.
Because linoleum is thin and fairly rigid, the new vinyl planking was simply installed on top of it, without having to remove anything. (Removal would have been extremely time-consuming, for little to no gain, with the possibility of creating areas of inconsistency in elevation, should the linoleum have been stubborn upon attempted removal.)
Once the baseboards (which in this instance will be reused) were removed, any areas lacking the existing linoleum were built up to meet the linoleum’s elevation (beneath the dishwasher, and at the stove area where the new cabinet design created a stove-placement lateral offset).
The new vinyl planking was then initiated along the far wall, working toward the back wall of the main lower cupboards. In that the plank size is 12-by-24-inches, the planks were laid in a brick pattern in a parallel manner with the entry to the kitchen.
With the vinyl in place, the kitchen shell was then painted to meet the homeowners’ desired colour palette, which is of course in line with their choices for cabinet colour and style, which also complement their quartz and backsplash selections.
The approach to kitchen shell prep is extremely important, and requires an abundance of forethought. The placement of the newly introduced partial wall predetermined not only the available space governing the sizes of the new cabinets, but it also just so happens the sink and dishwasher are positioned along that peninsula wing.
As such, the water feeds and drain needed to be re-routed to coincide with these newly established dimensions, as were the electrical feeds to power the dishwasher, garburator and kitchen outlet.
With the kitchen shell fully prepped, the first step of repopulating the space could then begin with installation of the upper and lower cabinets.
RenoBoss.Inc@outlook.com