Photos by Marc LaBossiere / Winnipeg Free Press
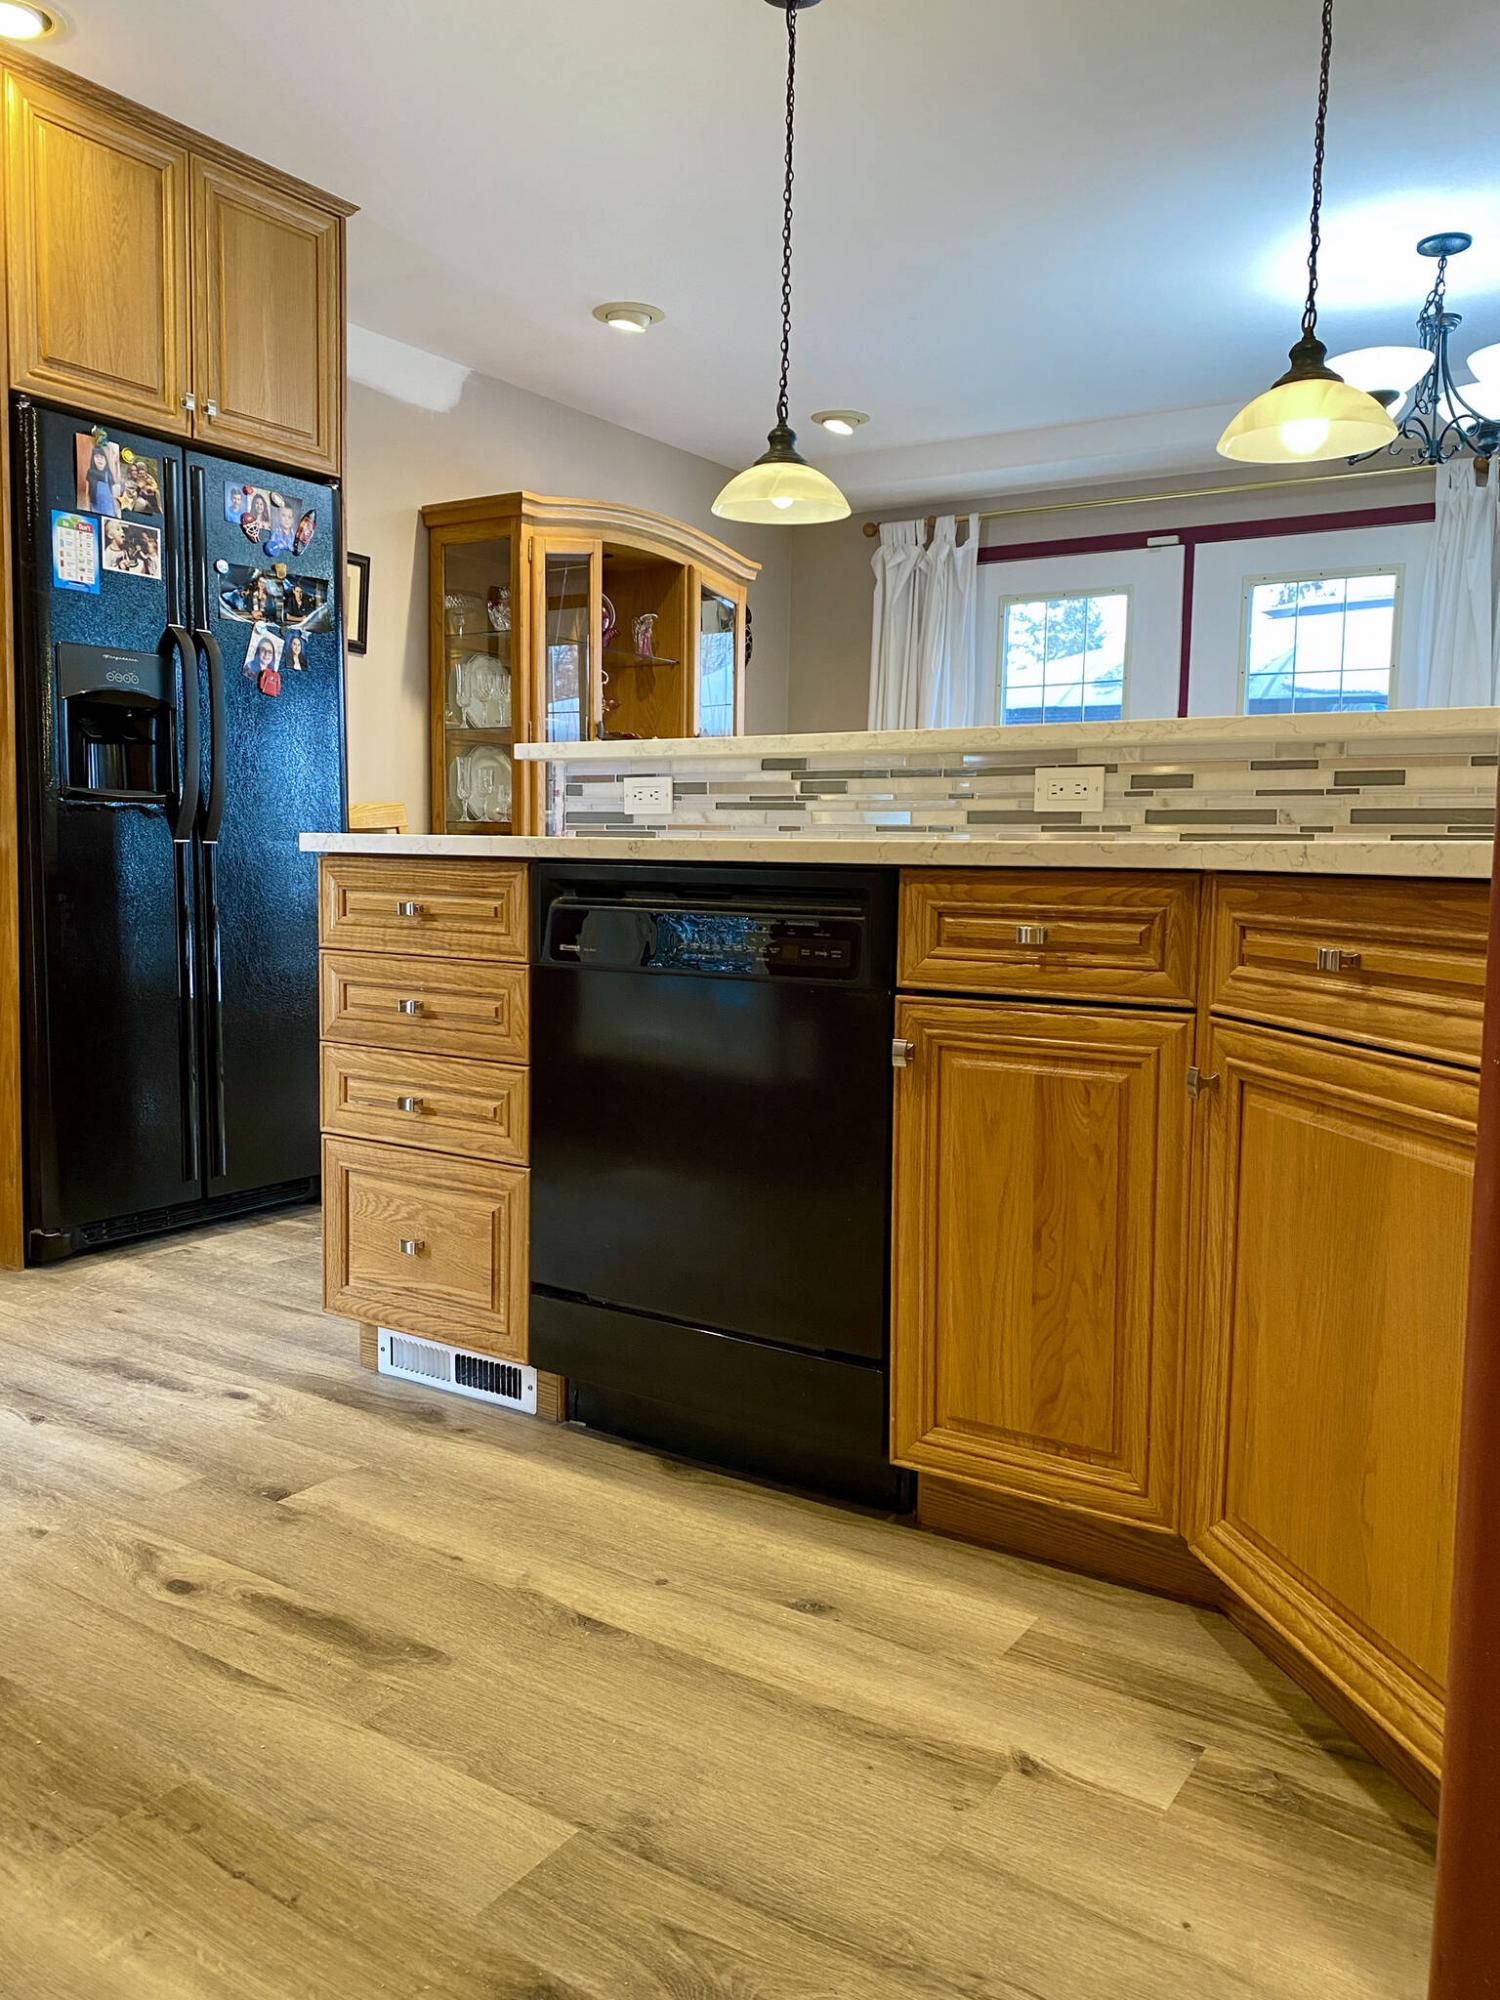
The existing cabinets take on a whole new look with new vinyl plank flooring below, and quartz countertops with mosaic backsplash above.

The mosaic backsplash consists of multiple rows of white, grey and stainless-steel tiles of varying heights and lengths.
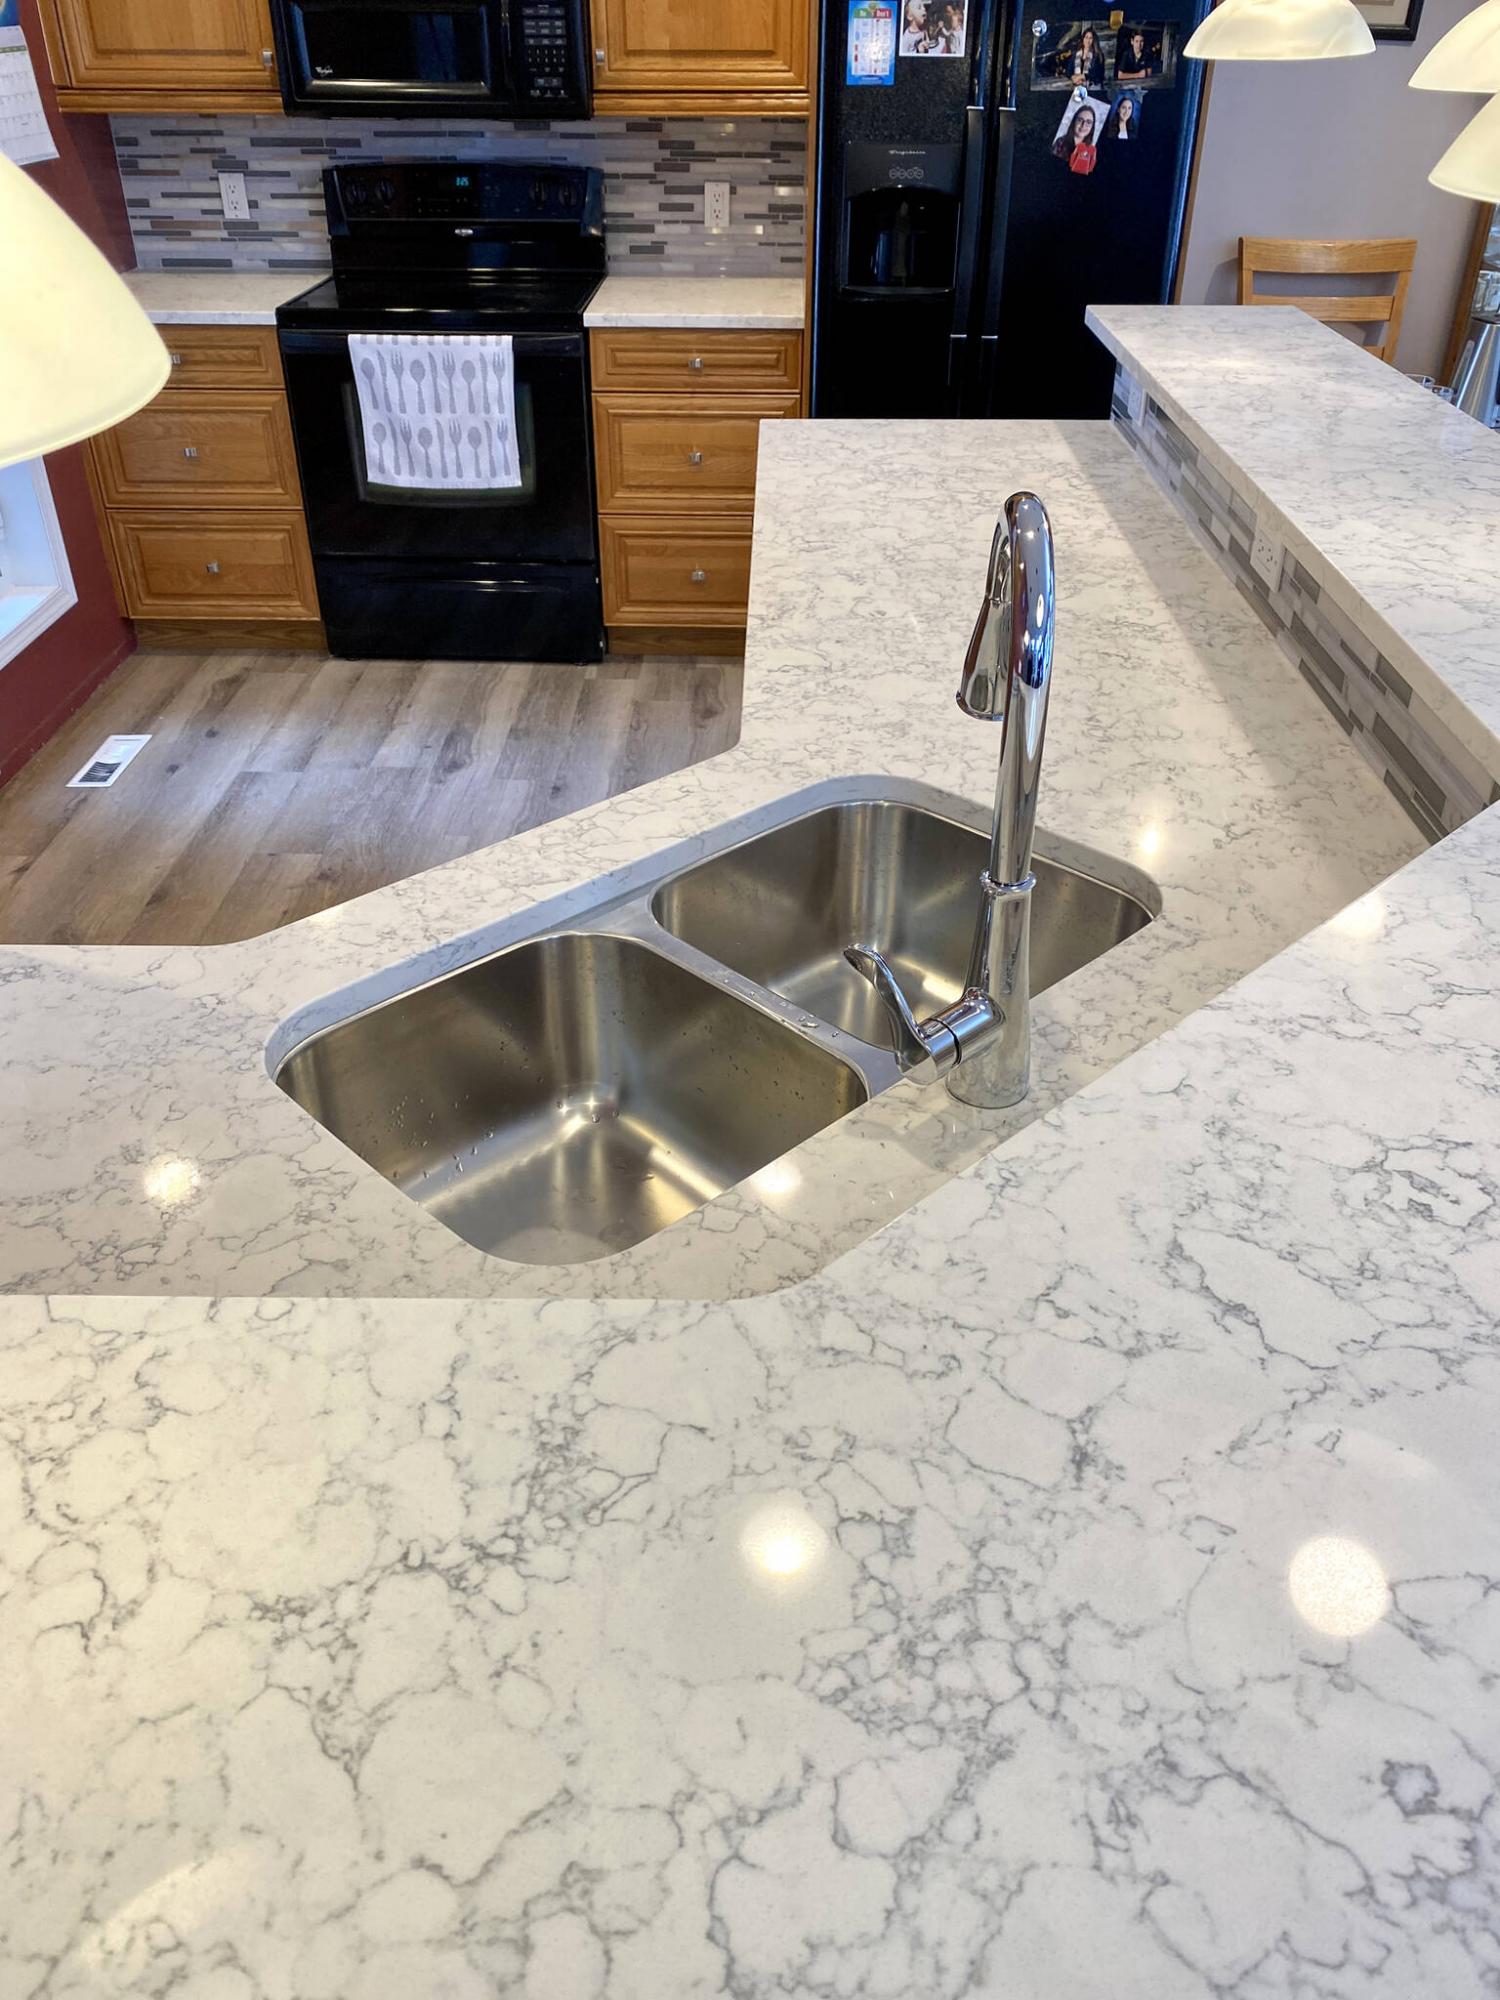
A white with grey squiggly pattern quartz from Solid Stone was chosen for the kitchen countertops upgrade.
A kitchen remodel can be a complicated project that requires a great amount of effort, time and money.
That is why a kitchen facelift can often do the trick — with minimal downtime and on a reasonable budget.
The homeowners of a recent kitchen upgrade had realized the time had come to make a change — their kitchen seemed outdated, and a tad worn out. Like many of us, it seemed an outrageous expense to gut the entire kitchen and start from scratch, since the cabinetry had always remained neutral and matches the natural oak flavour throughout the house. As such, they opted for a relatively non-invasive approach, that minimizes downtime and offers the biggest bang for their buck.
The cupboards are well laid out with upper and lower cabinets along the back wall surrounding the stove and microwave adjacent the fridge on the right, and a floor to ceiling pantry along the wall facing the peninsula island, which itself provides a slew of lower cabinets on either side of the dishwasher.
The old countertops, however, were of a forest green-esk arbrite that had seen better days. The linoleum flooring was also in poor shape. Upon discussing the project a plan was devised to rid the space of all that dated the kitchen, while retaining the elements that are timeless. And properly coordinated, the entire project could be achieved in less than a week.
The homeowners selected the style and colour of new quartz countertops, a new double stainless-steel sink and faucet, a mosaic backsplash that blends with the countertop choice, and finally a vinyl plank with pad in an inviting colour that ties-in the ensemble.
Once these items had been selected (and the sink and faucet were on site), my good friends at Solid Stone were scheduled for the laser-measure and templating process for the countertops. With that digital information at their disposal, the separate countertop pieces could be pre-cut offsite. For the large counter at the sink area, the sink hole is also pre-cut before installation, to expedite the process while on site.
With the measurements in their system, and the countertops being prepped, an installation date was chosen on a Tuesday in early February. This allowed preparation of the countertop areas the day before, which involved temporarily shutting off the water feeds to the old sink, and removing the existing drain and trap. The old faucet and sink were discarded. The two smaller arbrite countertops on either side of the stove were removed first. The large L-shaped counter that held the sink was then removed from the peninsula island. The upper tier countertop was then disassembled and taken off in several pieces. The cabinetry and upper tier frame were now ready to receive the new quartz.
The following day, the Solid Stone crew arrived and summarily installed each of the new quartz countertop elements. To our delight, both the lower and upper tier quartz sections of the peninsula island countertops were cut of individually whole sections, completely eliminating the need for seams anywhere. With the counters in place, the new undermount sink was fastened to the underside of the quartz using brackets and adhesive. Once the Solid Stone crew had successfully drilled the hole for the faucet, the new kitchen faucet was mounted, and the water feeds attached. The drains for the double basin stainless-steel sink were then installed, before the new ABS trap was configured and tied-in to the main drainpipe. The adhesives were allowed to cure until the following morning.
By day three, the bulk of the facelift had already been completed. It was now time to introduce the mosaic backsplash, which consists of multiple rows white, light and dark grey and a few stainless-steel tiles of varying heights and lengths, set in a random pattern of 12x12-inch sheets. To fill the six-inch gap between the main countertop along the peninsula island and the upper tier, the mosaic sheets were first cut in half before the installation process could begin. Chrome tile edges were used to border the tiled area in lieu of leaving exposed tile edges. Systematically, the tiled area was built from one end to the other, accommodating for the multiple power outlets along the six-inch back wall. A similar process would adorn the back wall between the countertop and upper cabinets along the back wall, and behind the stove.
On the final day, all areas of backsplash were grouted with a platinum-coloured resin-based grout. While the grout was allowed to cure, the old linoleum flooring wase easily removed throughout the kitchen area. The light grey wood-tone vinyl plank installation then began along the pantry wall, slowly moving towards the peninsula island ever so carefully following every contour of the lower cabinet layout to minimize the gap between vinyl and toe-kick and wall. Both the stove and fridge were displaced to allow the process to unfold, repositioned at the conclusion of the vinyl installation. The existing oak transitions between kitchen floor area and the existing hardwoods throughout the house were once again fastened to the floor. The baseboards were left off, so the homeowner could repaint them before reinstallation, after deciding to repaint the kitchen walls himself, to rid the space of the dark burgundy-wine colour. A total of four days from start to finish, and only one day of downtime with the sink and faucet has provided a magnificently updated kitchen space, well below the costs of an entire kitchen remodel.
When a kitchen space remains functionally convenient, it is always worth investigating the prospect of a facelift instead of a full remodel. Changing out the old countertops, sink and faucet, and adding a new backsplash are the easiest and most cost-effective ways to update a kitchen. And of course, new flooring is always a bonus.
RenoBoss.Inc@outlook.com