Photos by Marc LaBossiere / Winnipeg Free Press
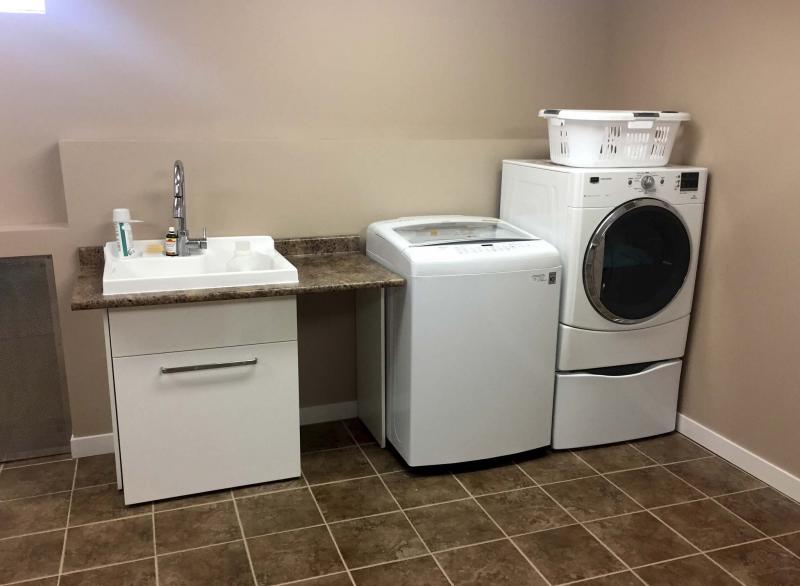
Moving and reinstalling the washer, dryer and laundry sink onto an opposing wall in Lynn and Gene Lakusiak’s laundry room presented more hurdles than expected.
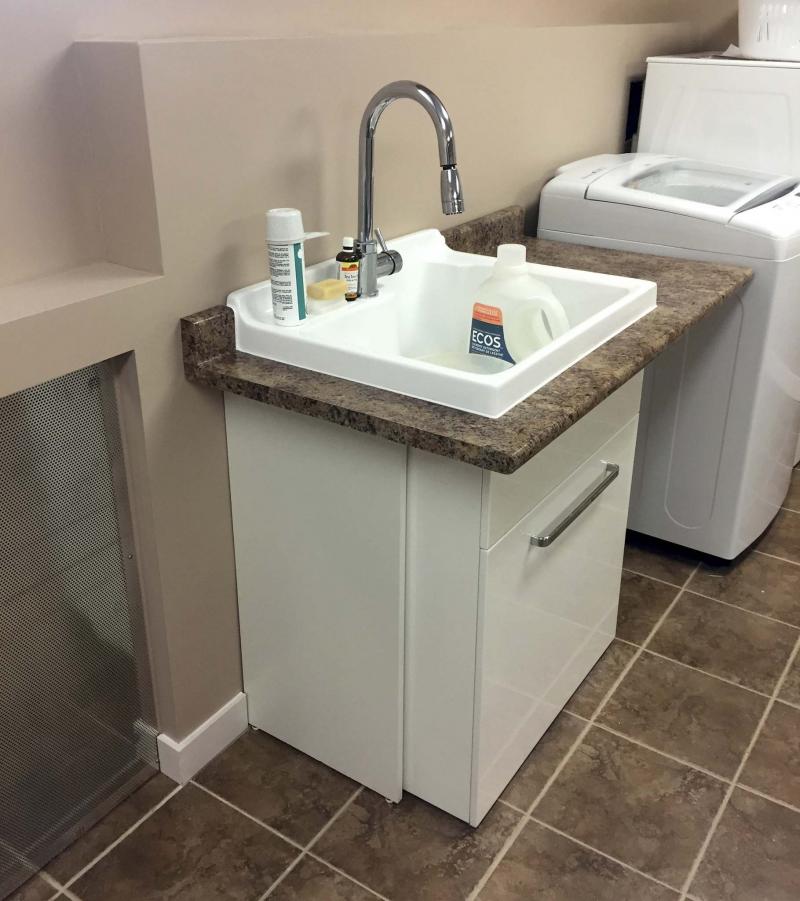
A one-piece sink and cupboard unit was placed slightly away from the washer for a small counter surface.
There are repeat clients who have kept me extremely busy throughout the years. So much so, I sometimes forget about certain projects, and how many have ultimately been completed.
One of these projects came to mind the other day, while I was assessing a remodel of my own, in the basement of my house. My laundry room remains unfinished. I did, however, already reposition the washer and dryer to accommodate my impending basement-bathroom shower expansion. And just then, the laundry room I did for the Lakusiaks popped into my head.
Multiple bathrooms, the basement rec room, the front-entry foyer, privacy walls in the backyard, the kitchen backsplash, the living room fireplace upgrade, a 900-square-foot deck at their cottage near Sioux Narrows — as well as a few other tasks — a variety of projects have been achieved for my very good clients Lynn and Gene Lakusiak over the past four or so years. A couple of years ago, while enthralled with a huge kitchen/dining room/living room expansion for another client, I managed to squeeze in a laundry-room upgrade for the Lakusiaks. It seemed a simple request — reposition the washer, dryer and laundry sink on to the opposing wall, as well as tackle a few esthetics of the room. If only it were that simple.
With a washing machine and laundry sink comes water feeds and drainage pipes and the appropriate electrical requirements. And the dryer that requires a 30-amp, 240-volt outlet and the ability to vent to the exterior. Upon assessing the current setup of their services, it became clear that abandoning the existing drainage locations and busting through the tiled floor to route new drains was not a viable option. As such, I proposed an alternative solution — faux walls (that would also tackle a few of the esthetic upgrades) could be erected to allow rerouting of all the needed services, which would then be hidden behind these new walls once the drywall was completed. The Lakusiaks liked the proposal, and I got to work.
At the new intended location of the washer/dryer and sink, a partial wall was constructed to house the electrical, water feeds, ABS drainage pipes (and vents), as well as the dryer venting through the outside wall. Along the far side and back towards the old location of the services, studs placed roughly two inches from the existing wall were erected from floor to ceiling to create the faux walls around the partial perimeter of the room. The water feeds were run along the inner side of the studs, as well as the ABS pipe. The drainage pipe was fastened to the backside of the studs in such a way as to encourage water flow, using the required grade until tie-in with the existing drain. Venting was then mapped above the drainage pipe. New electrical was introduced for the washing machine, as well as a few outlets along the faux wall. And the 30-amp feed for the dryer was extended from the old location to the new 30-amp dryer plug. Once the services were all in place and tested, the drywall was installed, mudded, sanded and painted.
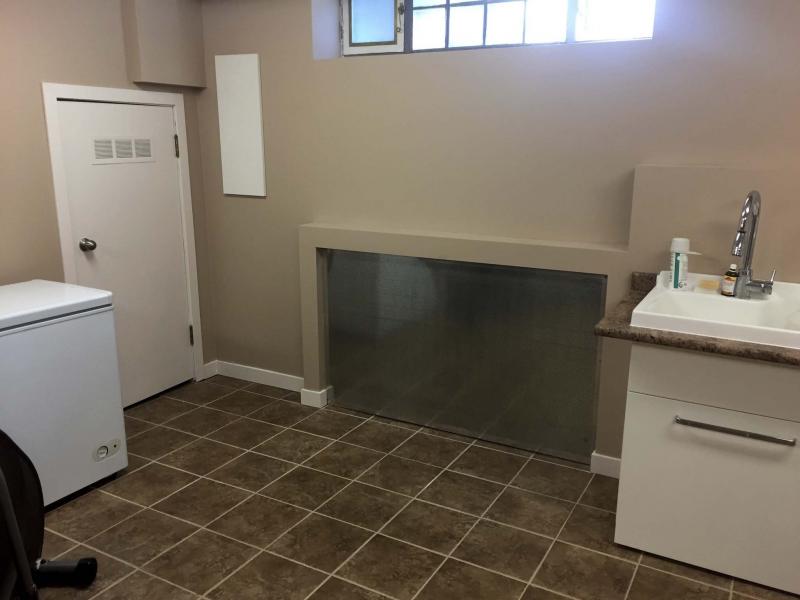
With the washer and dryer set into their new positions, I suggested that the one-piece sink and cupboard unit could be placed slightly away from the washer, so that a small counter surface could be introduced in between. In order to achieve this, a small countertop was fashioned to slide in and around the sink top, by cutting away a portion of the counter slightly bigger than the sink top. Once the counter was in place, supports on either side of the sink and near the washer were fastened to the bottom of the counter and the counter was then caulked to the perimeter of the sink. With the laundry station completed, the final esthetics upgrades were tackled; new baseboards and casings were installed where required, small trap doors were introduced in a few spots along the ceiling where shut-off valves could be easily accessed, and a custom metal grid added a decorative face to an old but functioning heat register. The new layout of the room clearly offered better functionality, and now looked great while doing so.
The Lakusiaks’ laundry room was one of those projects that lingered on for a while, largely due to the fact that I had so many other ongoing commitments. I had forgotten how many individual hurdles had been overcome. Looking back, it was a very successful upgrade — the washer, dryer and laundry sink were moved from one side of the room to the other. If only it were as easy as it sounds, like repositioning a piece of furniture in the spirit of feng shui.
Oftentimes, the complexity of an upgrade is outshined by the project’s successful outcome. And honestly, I suppose that’s the goal for any project.
bossenterprise@outlook.com