Marc LaBossiere / Winnipeg Free Press
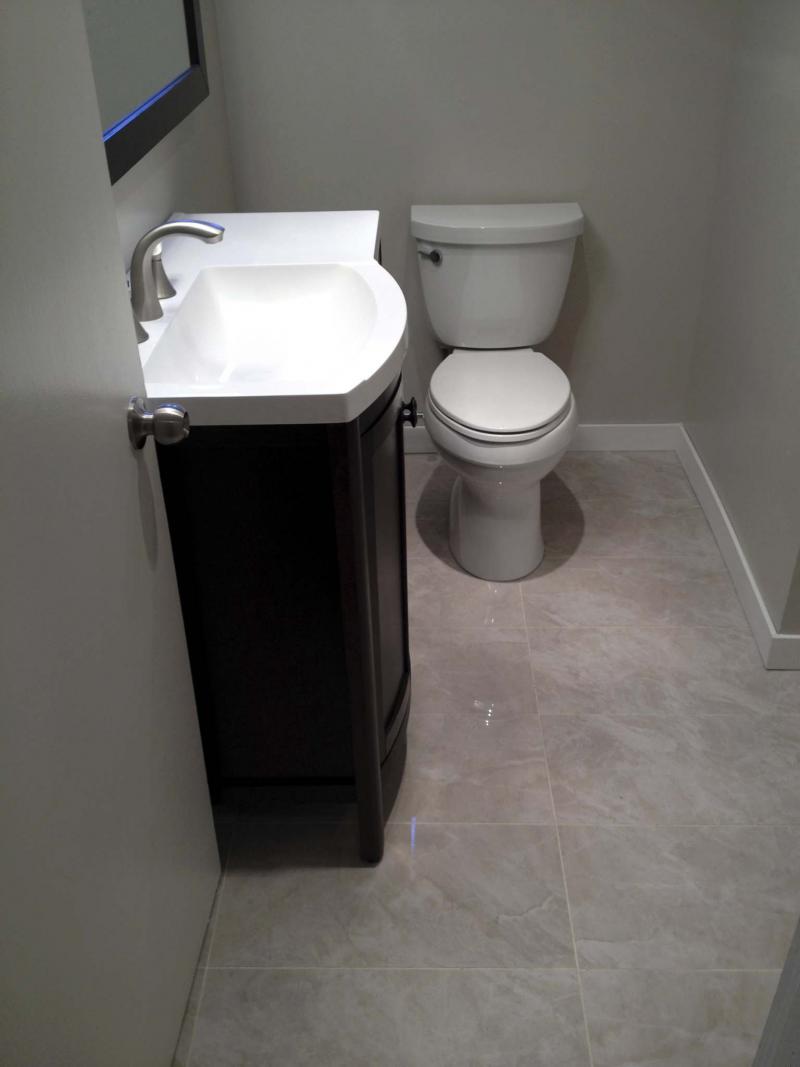
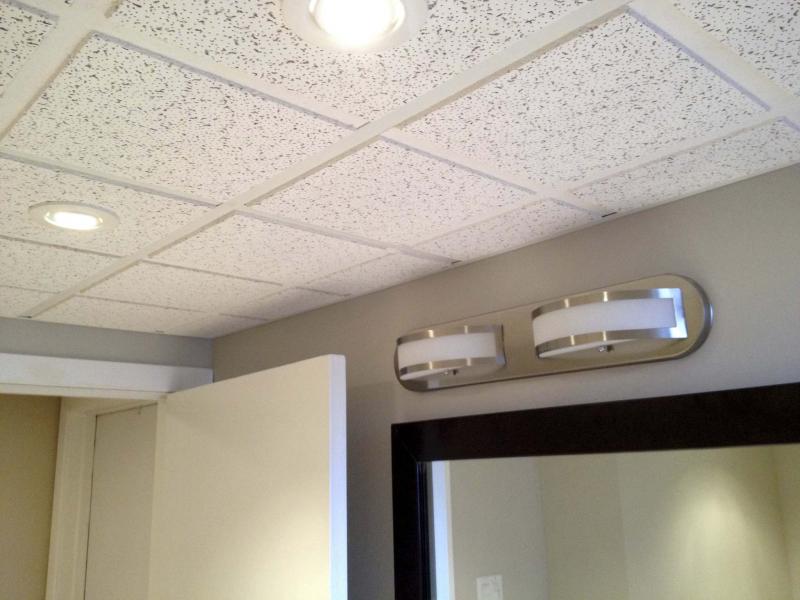
The new vanity was fitted along the wall to just allow clearance for the bathroom door to fully open.
Marc LaBossiere / Winnipeg Free Press
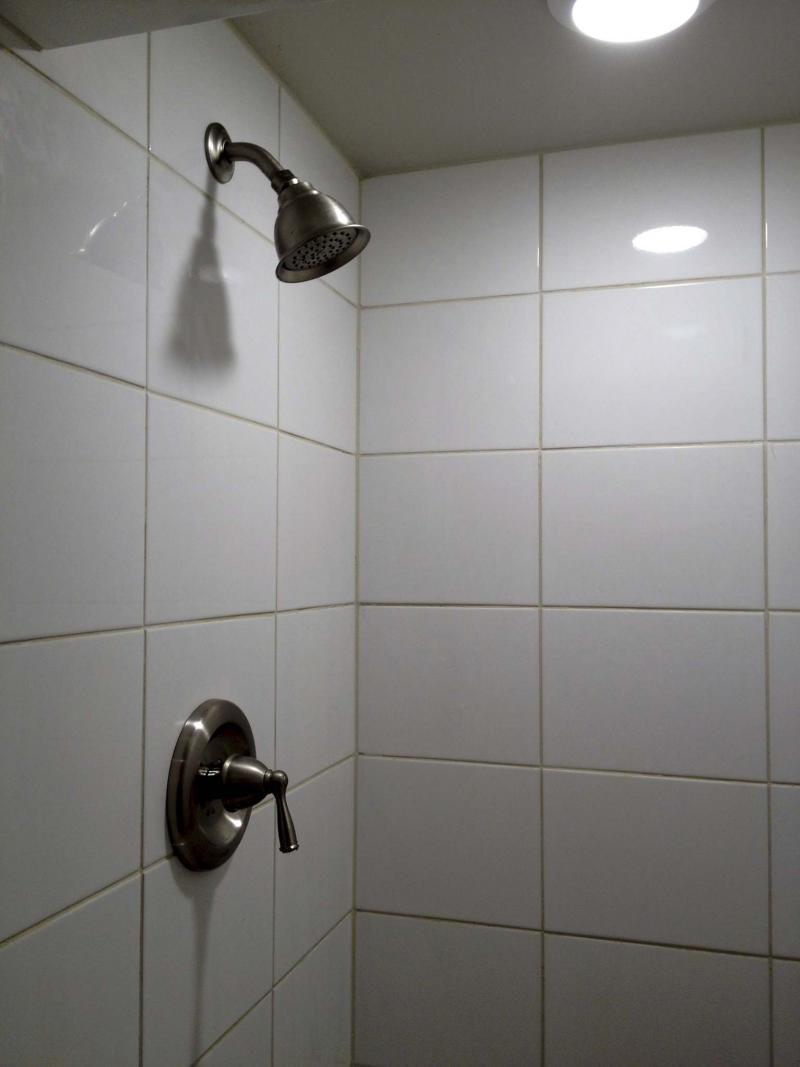
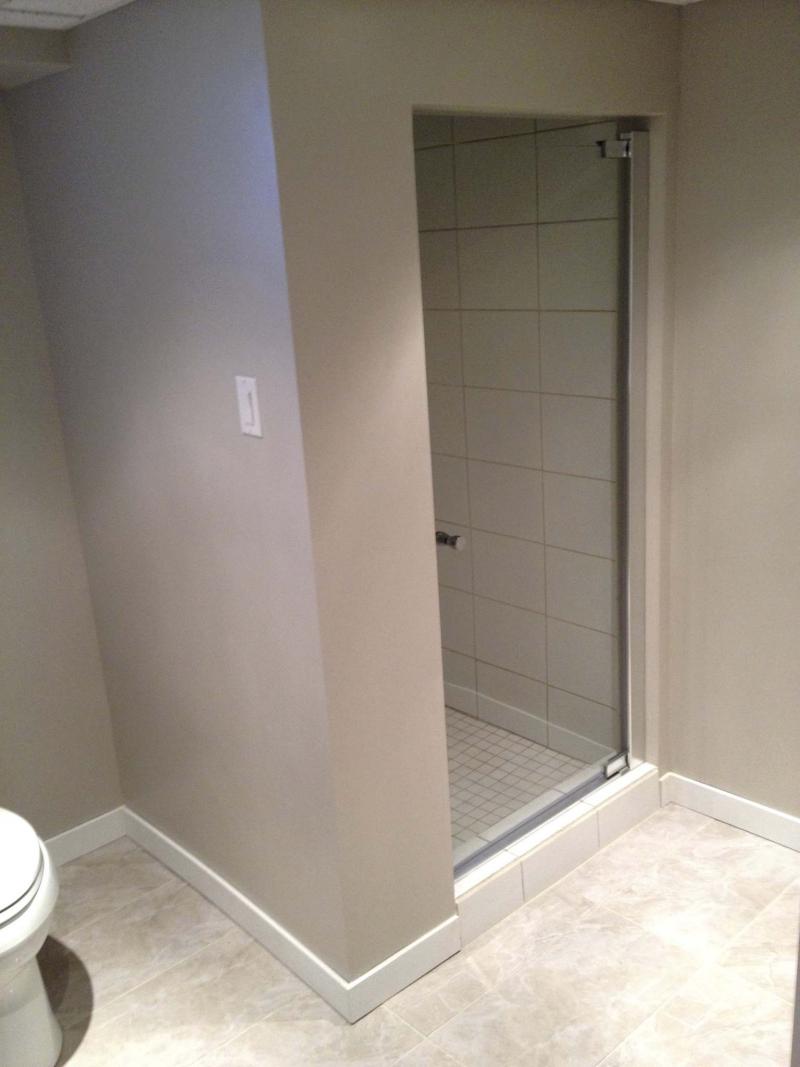
The shower was tiled over the old tile and a new shower head and faucet were installed.
Marc LaBossiere / Winnipeg Free Press
The old panel ceiling was removed to make way for suspended ceiling tiles.
Marc LaBossiere / Winnipeg Free Press
The shower was tiled over the old tile and a new shower head and faucet were installed.
Repeat clients and their referrals have been the bread and butter of my business. Any contractor knows the benefits of repeat business — the familiarity of clients and the job site can easily reduce anxiety caused by an impending renovation.
However, despite the feel-good vibes, certain tasks can still weigh heavy until the job begins. One such situation occurred during a basement-bathroom remodel.
Throughout the past four or five years, Lynn and Gene Lakusiak have been upgrading their home. Nearly the entire main floor has been given a facelift, with only a few outstanding tasks yet to achieve. The basement has also been beautified, including the old three-piece bathroom... which, at first glance, looked very retro with its mint-green tile and fixtures, including the shower stall walls and base. Lynn had mentioned that this was primarily Gene’s bathroom and it would be nice to give it a facelift. And so began the design stage, sometime in late 2014.
The Lakusiaks’ house was built in a very unorthodox manner — every plaster wall was encased with a sheet of rigid steel mesh, on which the mortar was affixed. And the mortar/plaster was so thick that blending drywall next to it required sometimes nearly an inch of spacing behind the drywall to render the merged materials flush along any given wall.
That being the case, it was decided that the tedious tasks of removing all existing plaster and mortar was the only way to truly provide clean lines in their basement bathroom, with new drywall secured to old studs. The toilet and old sink were removed and the demo began.
During the demolition process, the old panel ceiling was removed to make way for suspended ceiling tiles. And because the ceiling’s footprint was so small, I suggested using a two-by-four-foot standard grid with tiles that simulate 12-by-12-inch tiles (eight simulated square-foot tiles, per main tile). By using smaller looking tiles, the ceiling’s esthetics would appear better suited for the size of the space. An electrical circuit for new pot lights was also introduced, adapted from an old circuit. The biggest challenge would be the area adjacent the window — the elevation of the top of the window was roughly 10 centimetres higher than the highest-possible elevation of the suspended ceiling grid. To accommodate the grid, I elected to encase the window area by framing a boxing along the back wall which not only isolated the window within its own cavity, it also provided a vertical surface onto which the suspended ceiling grid could be fastened along that back wall. The boxing depth was such that a whole ceiling tile could drop into the grid along that wall, thus giving the entire ceiling-tile layout a "planned" look.
Once the drywalling and painting stages were achieved, the suspended ceiling was then fully installed and fitted with several pot lights.
The next challenge was the shower stall. An attempt to bust out the existing tile indicated that the wall thickness varied from two inches of mortar to nearly three in certain locations.
The effort required to remove the tile and then recreate the stall would be extensive.
Lynn had asked, "Can we just tile over the tile?" Best I could recall, I had only done so on one other occasion. Upon further discussion, we determined that tiling onto the existing tile in this particular situation proved less invasive, less time-consuming and more cost-effective. As such, the old shower head and faucet were removed, and the tiling began. Because the shower drain had been installed at a fixed height, the existing shower base mosaic was the only tiling to be removed. All the existing wall tile would remain in place — the new glossy-white tile was installed onto the old with a high-bond adhesive. The floor, which consists of glossy 24-by-12-inch marble-esque ceramic tiles, was then installed and all tiling was completed with matching grout. Once the baseboards and casings were in place, the space could then be populated.
I began by installing the vanity light and mirror below it. The toilet was then secured into place before the vanity was slid into its resting position. Once the sink drain and water feeds were tied in and tested, the towel racks and toilet-paper dispenser were affixed to the walls in their respective locations. The new shower head and faucet were then installed in the shower stall. The new glass shower door was the final step and fortunately, it went in smoothly. With everything now in place, the bathroom graciously revealed its grand transformation. What was once a dated and dingy space is now a welcoming area worthy of the upgrades throughout the rest of the Lakusiaks’ home.
Until a job has been fully completed, I truly live and breathe the tasks. It isn’t uncommon for me to jump up in the middle of the night with an "aha" moment, the result of sourcing a solution to a hindrance that has plagued my mind... This bathroom was the bane of my existence for several weeks. Through persistent thought and anxiety-ridden deliberation, each of the obstacles was eventually overcome, one by one.
And now that I’m back at the Lakusiak home for the next wave of renos, the opportunity to visit this little bathroom, now completed and functional, truly puts a great big smile on my face.
bossenterprise@outlook.com