Marc LaBossiere / Winnipeg Free Press
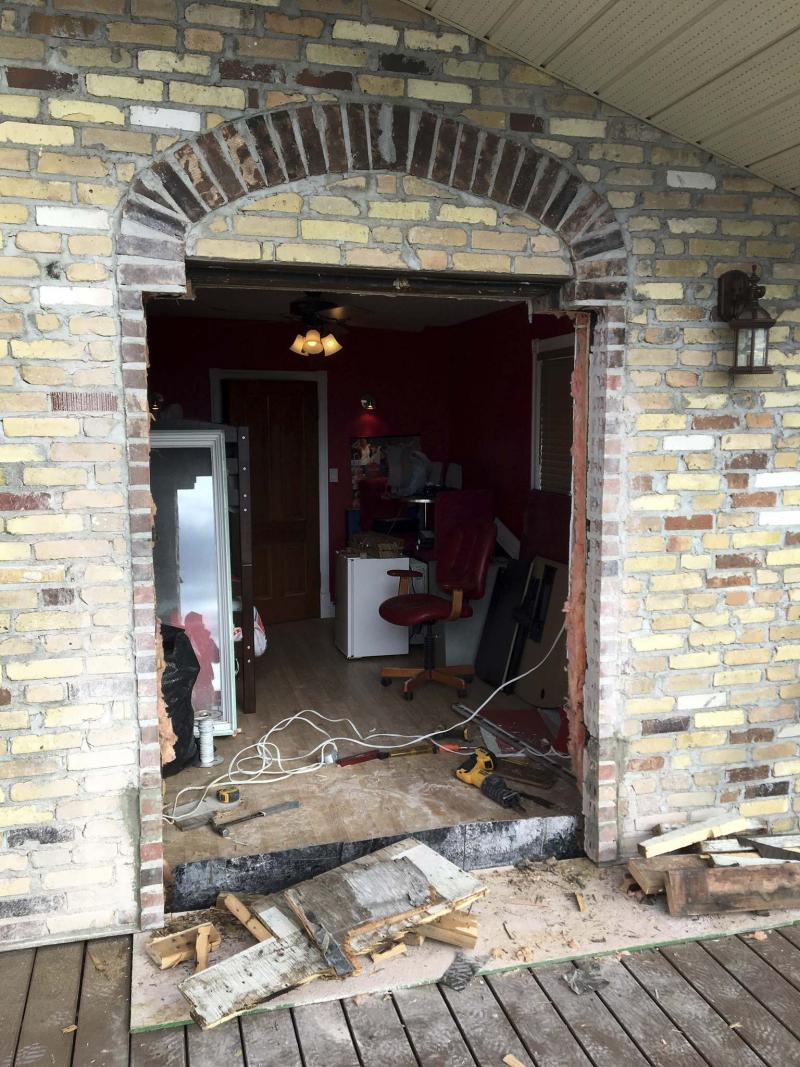
The window opening had to be widened to accommodate the larger sliding door.
Marc LaBossiere / Winnipeg Free Press
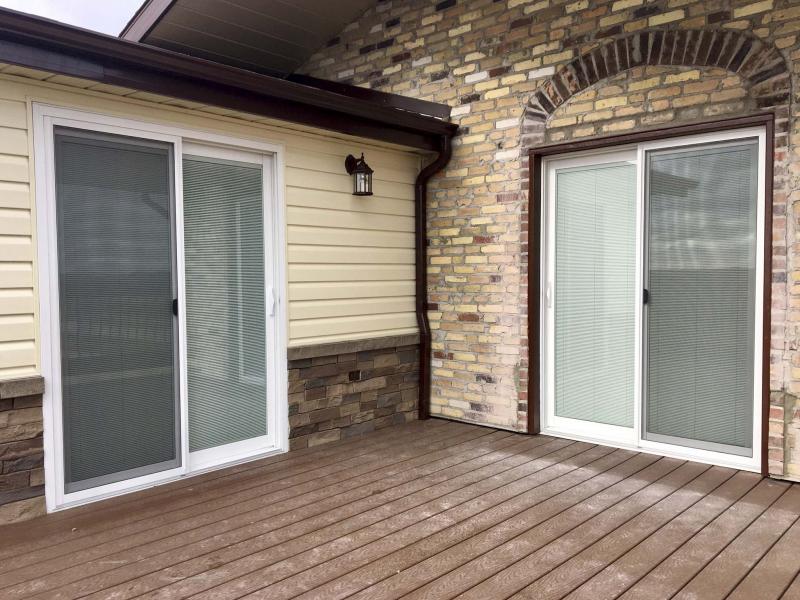
The sliding patio doors lead from two bedrooms out to a corner balcony on the second floor of the house.
With any renovation project, it is often the retrofit which presents the greater challenge. When building new, materials are ordered to specifications based on the design plans, and the tasks are completed systematically with few, if any, surprises.
A renovation, however, must adapt to existing features, which can often lead you down an unknown path.
During the two-storey addition build at my house, the master bedroom expansion on the second floor had been long-awaited. Once completed, the existing bedroom would become the walk-through closet, furnished with massive IKEA armoires to accompany the existing built-in closets, allowing the new bedroom to be closet-free, which maximizes the actual bedroom’s footprint. My favourite feature is the five-foot sliding patio doors which lead to a newly built corner balcony.
At some point during the planning stages of the second-floor bedroom and balcony, I decided to include sliding patio doors from the existing spare bedroom — the balcony would be a meeting point from both bedrooms. The installation of each of these sliding patio doors would be very different in that one is set within new construction, and the other would replace an existing window inset within the exterior brick of the house.
Although the wall depth of the existing house is much deeper than the new build, due to the exterior brick, it was necessary that the door jamb of the new build be an inch deeper than the jamb of the patio door which would replace the window set in the existing brick — current building codes require inch-thick rigid insulation be applied to the exterior of the new build prior to installing the vinyl siding, to meet the required R-value for efficiency. As such, both sliders were ordered from Jeld-Wen via Dave Wyllie at McMunn & Yates, and they arrived on site just prior to when they were to be installed.
I began with the easier of the door installations — the slider for the new master bedroom. Once the OSB had been fastened to the two-by-six exterior framing, the rough opening for the door was cut out using a reciprocating saw. The opening provides roughly a half-inch gap around all sides of the door jamb, to allow for slight levelling adjustments to ensure the door is plumb when secured to the OSB and framing behind. The patio door was positioned onto the balcony decking in a manner that, when lifted into position, it can then be fastened to the perimeter of the rough opening with screws through an-overlapping nailing strip located along the outer edge of the jamb — a few screws at first to hold the door in position while levelling is achieved, and then a screw at six-inch intervals to ensure the door remains rigid. Because the door was installed before the insulation had been installed, I ripped one-by-one-inch spacers and pre-fastened them along the perimeter of the opening so that once the door was fully installed, the nailing strip would be flush with the one-inch insulation. With this first door in place, the exterior could now be competed.
The second five-foot patio door took much more planning because it replaced a four-foot window, which was set in the exterior brick. The opening needed to be widened by roughly six inches on either side of the existing window to accommodate the five-foot-wide slider. This had already been achieved when all required locations of the existing brick were cut away using the 14-inch wet saw I rented from Home Depot on a variety of occasions throughout the build. Longer angle-iron was set into position above the rough opening of the brick to act as the brick’s lintel. From the interior, the process became more challenging, the window was removed in its entirety, drywall below and on either side was then cut away based on the new door’s dimensions, insulation was removed, the studs below the old window rough-opening were removed, electrical wiring was rerouted, and the outer plywood was then cut away with the reciprocating saw. Now that the opening could cater to the dimensions of the new door, it was necessary to introduce a longer header above the door location. Because the top of the door would sit about four inches lower than the existing window did, an added row of bricks was required above the door and would be achieved in the finishing stages. It did make the door installation easier, however. The jamb of this slider was ordered for a standard two-by-six frame. It also came with a nailing strip. After a while of negotiating with the brick, the overlapping nailing strip was eventually eased past the exterior brick which allowed the door to be secured to the existing sheathing of the house, behind the brick. The completion of this door’s exterior aesthetics involved many extra steps, including some trim to bridge the gap between the sides of brick and the door’s outer frame, painted in chocolate brown to match other features of the house.
The interior finishing of both doors was straight forward, and similar in process; drywall before tape and mud, sanding and painting, casings and rosettes, and custom wooden thresholds. And, as I had hoped, both doors look identical from the interior of each respective room. It isn’t until you’re on the balcony looking back at the two patio doors that their differences in installation are revealed.
With the plethora of individual and separate tasks that had not yet been achieved, I must confess the possibility of eliminating that second patio door from the plans crossed my mind on occasion. In retrospect, the decision to forge on through and complete the task was clearly the right, and only, choice.
As luck would have it, the patio door set in brick was completed the day before the first cold and wintery day last fall. I sure am glad I didn’t decide to wait until spring to finish the job — procrastination remains my nemesis.
bossenterprise@outlook.com