Marc LaBossiere photos / Free Press
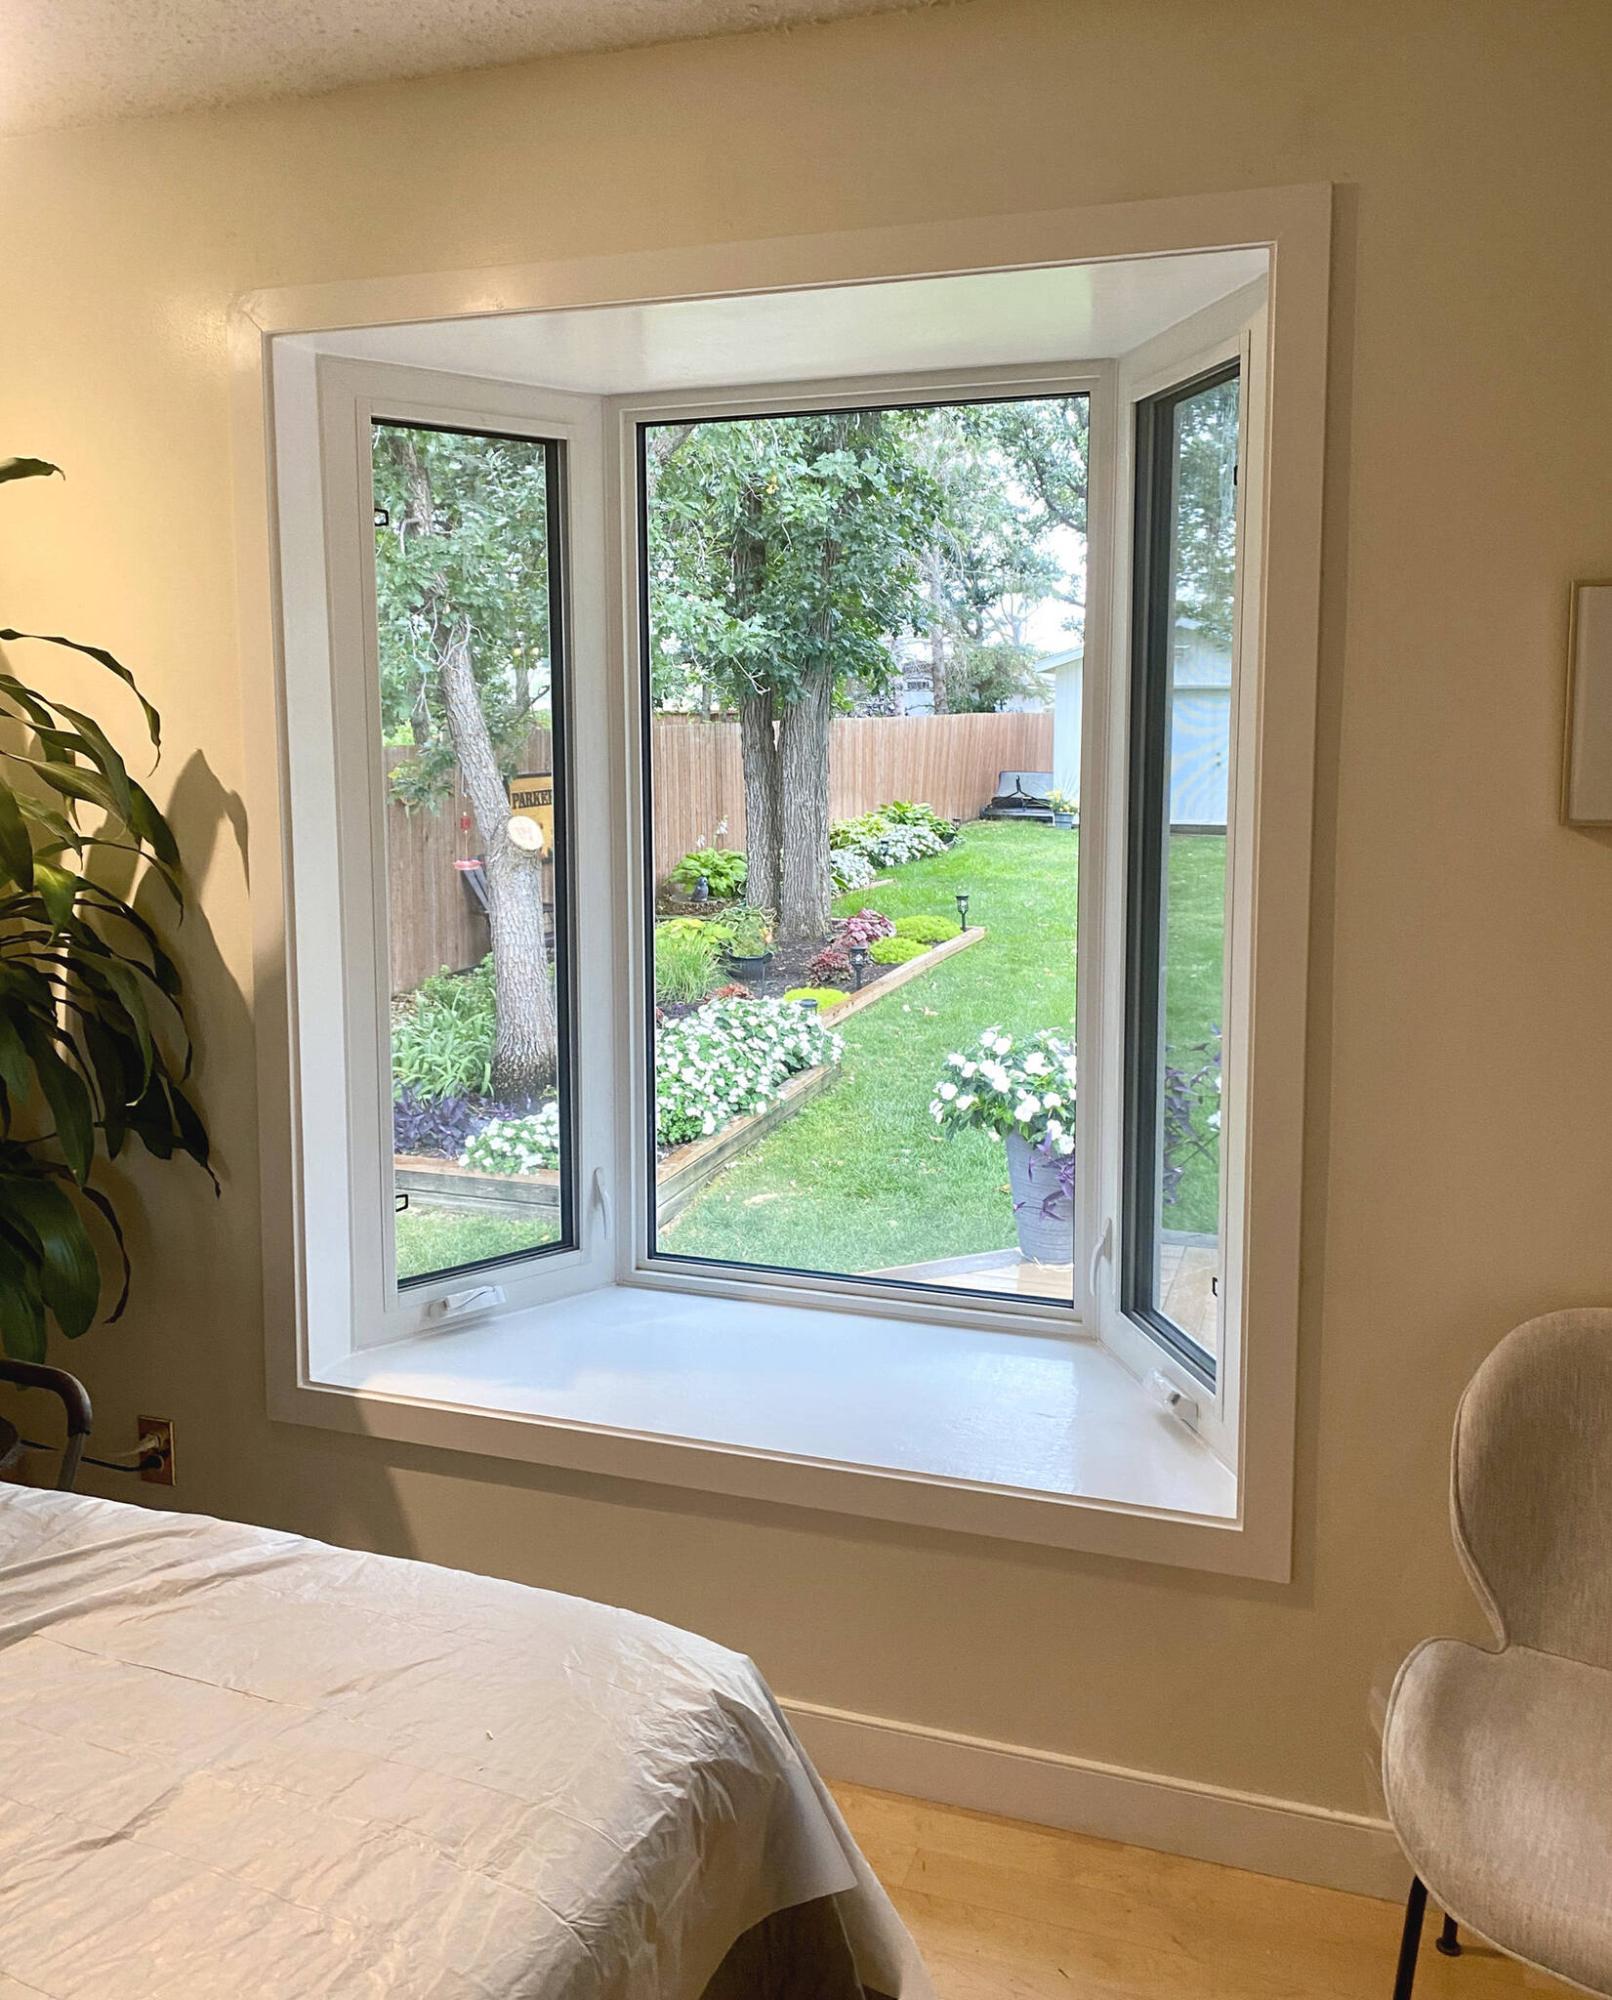
The headboard and seatboard were painted white to match the window casings.
Marc LaBossiere photos / Free Press
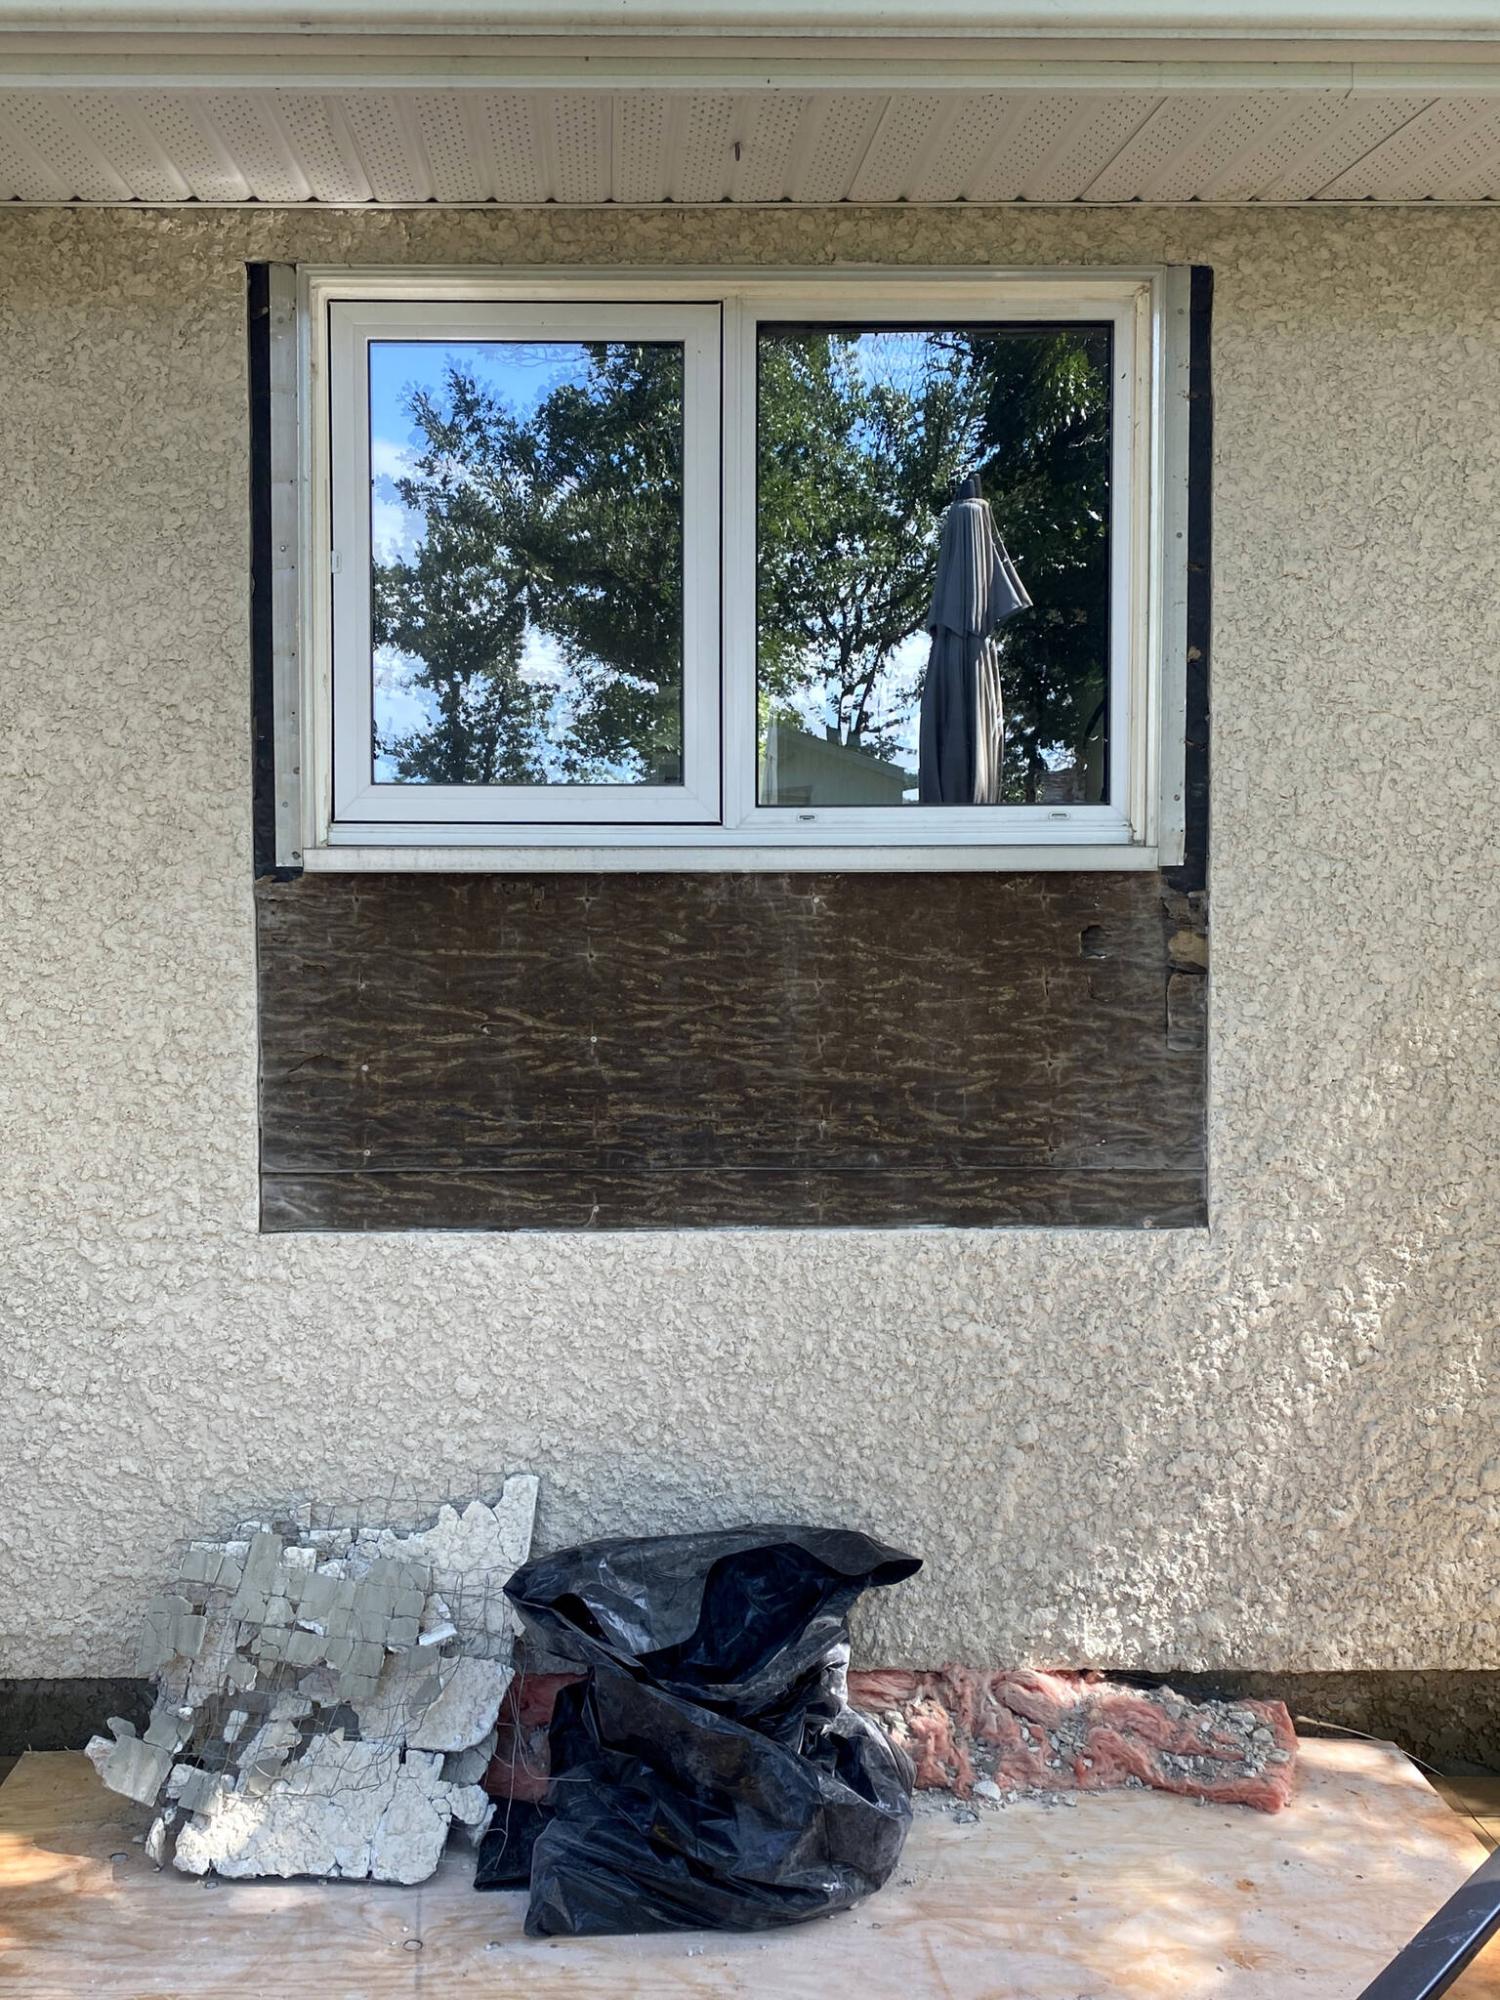
Stucco was removed to accommodate the size of the rough opening for the new bay window.
Marc LaBossiere photos / Free Press
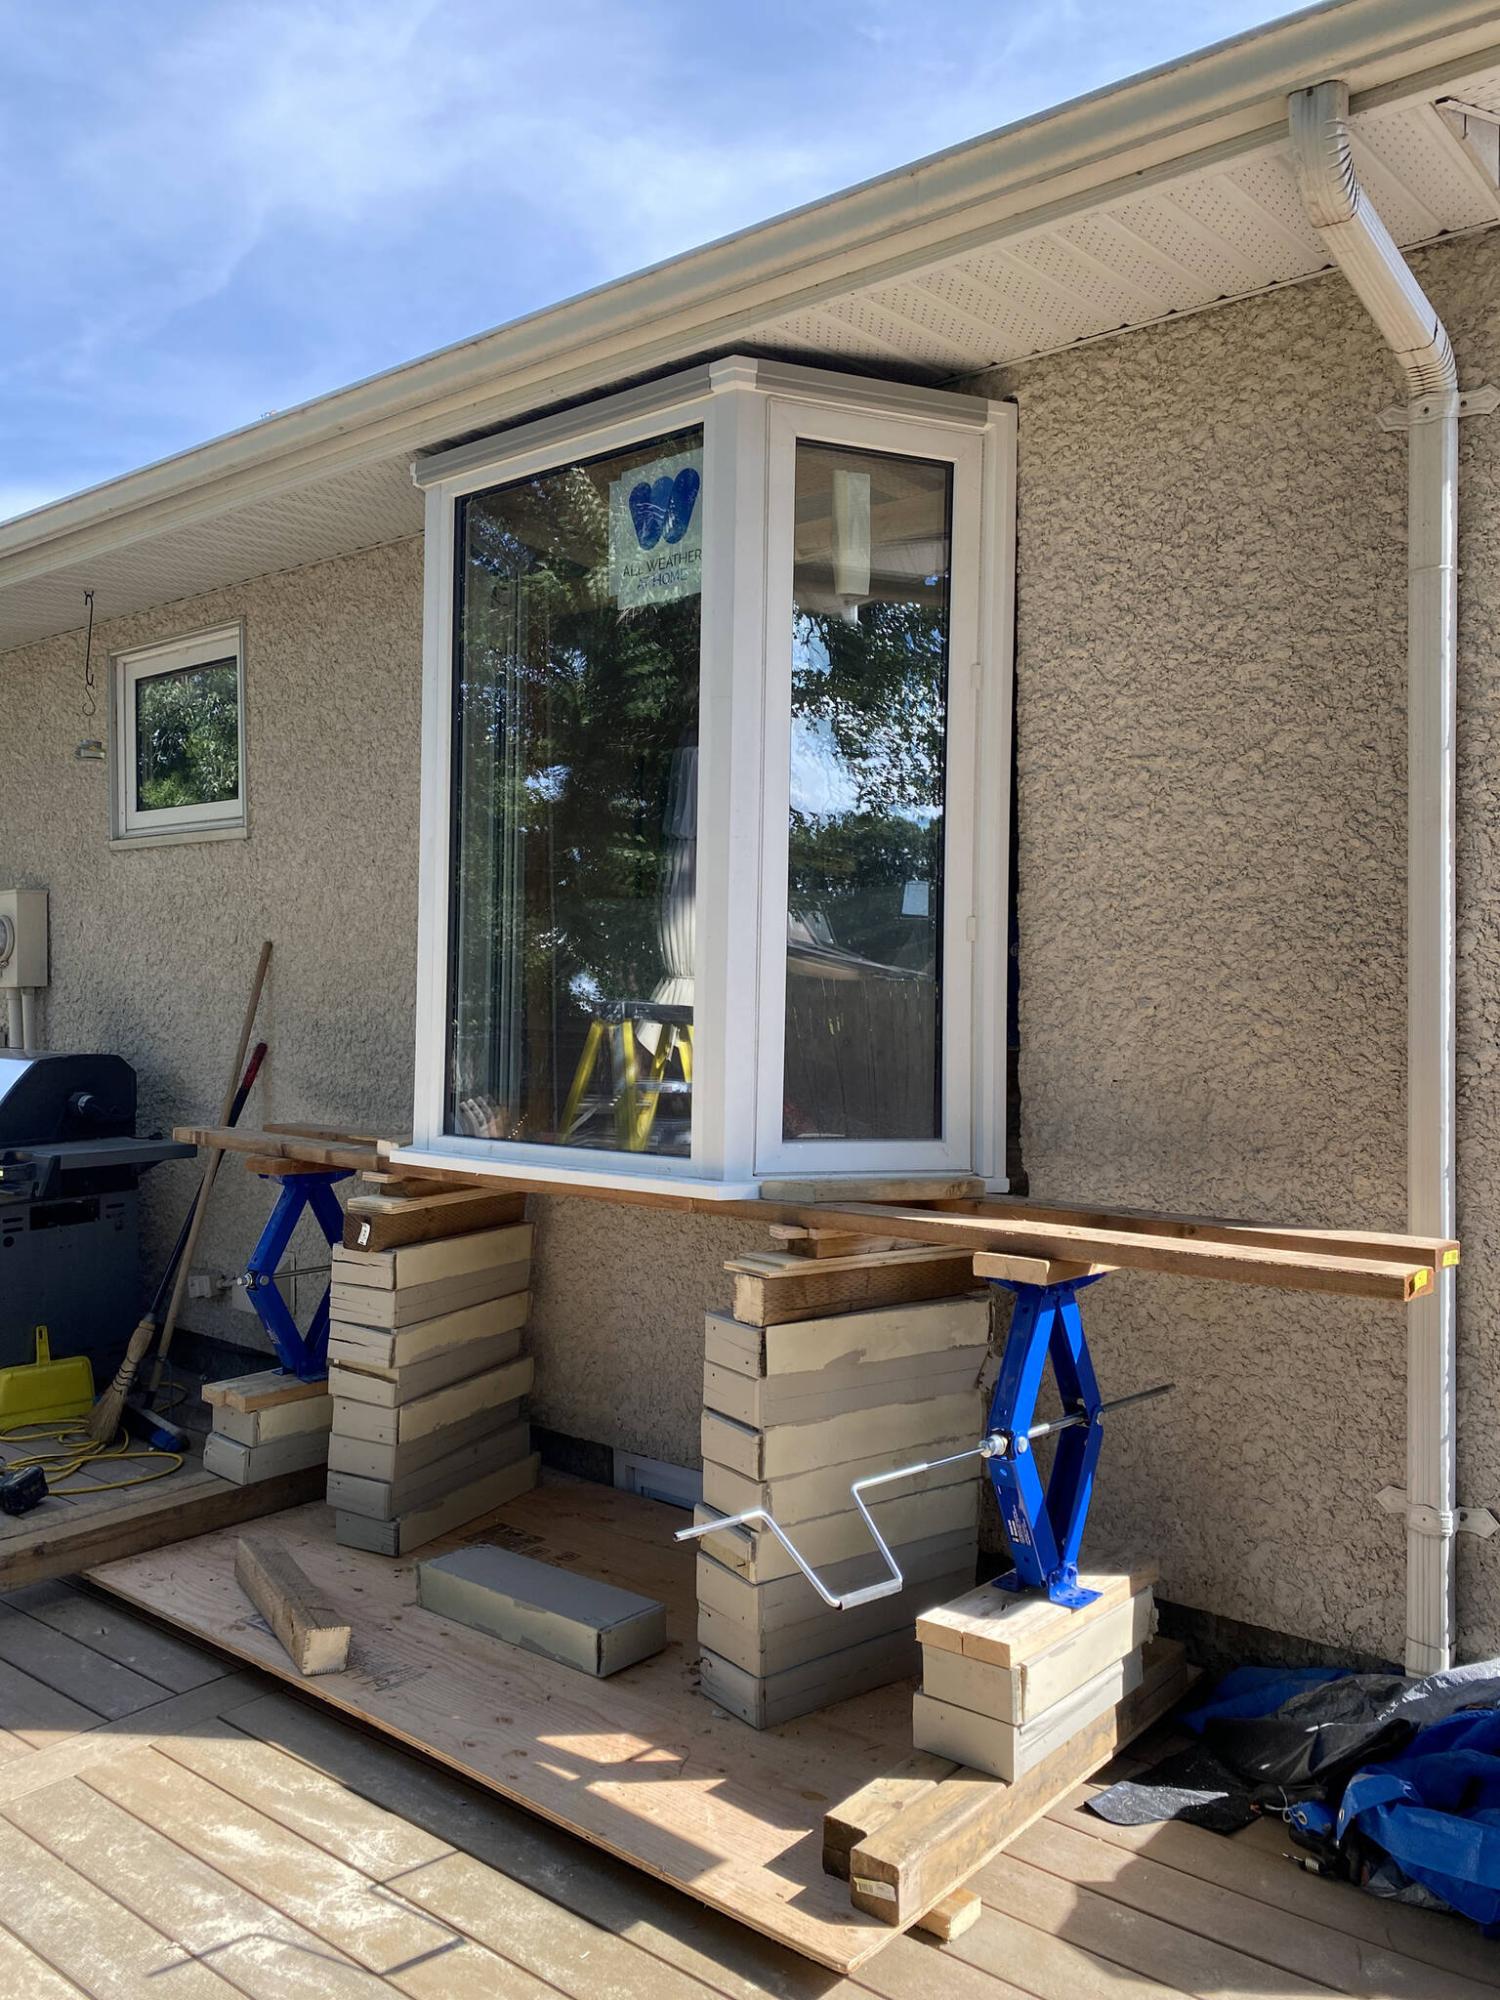
A pair of car jacks were used to lift the window to the proper elevation for installation.
Marc LaBossiere photos / Free Press
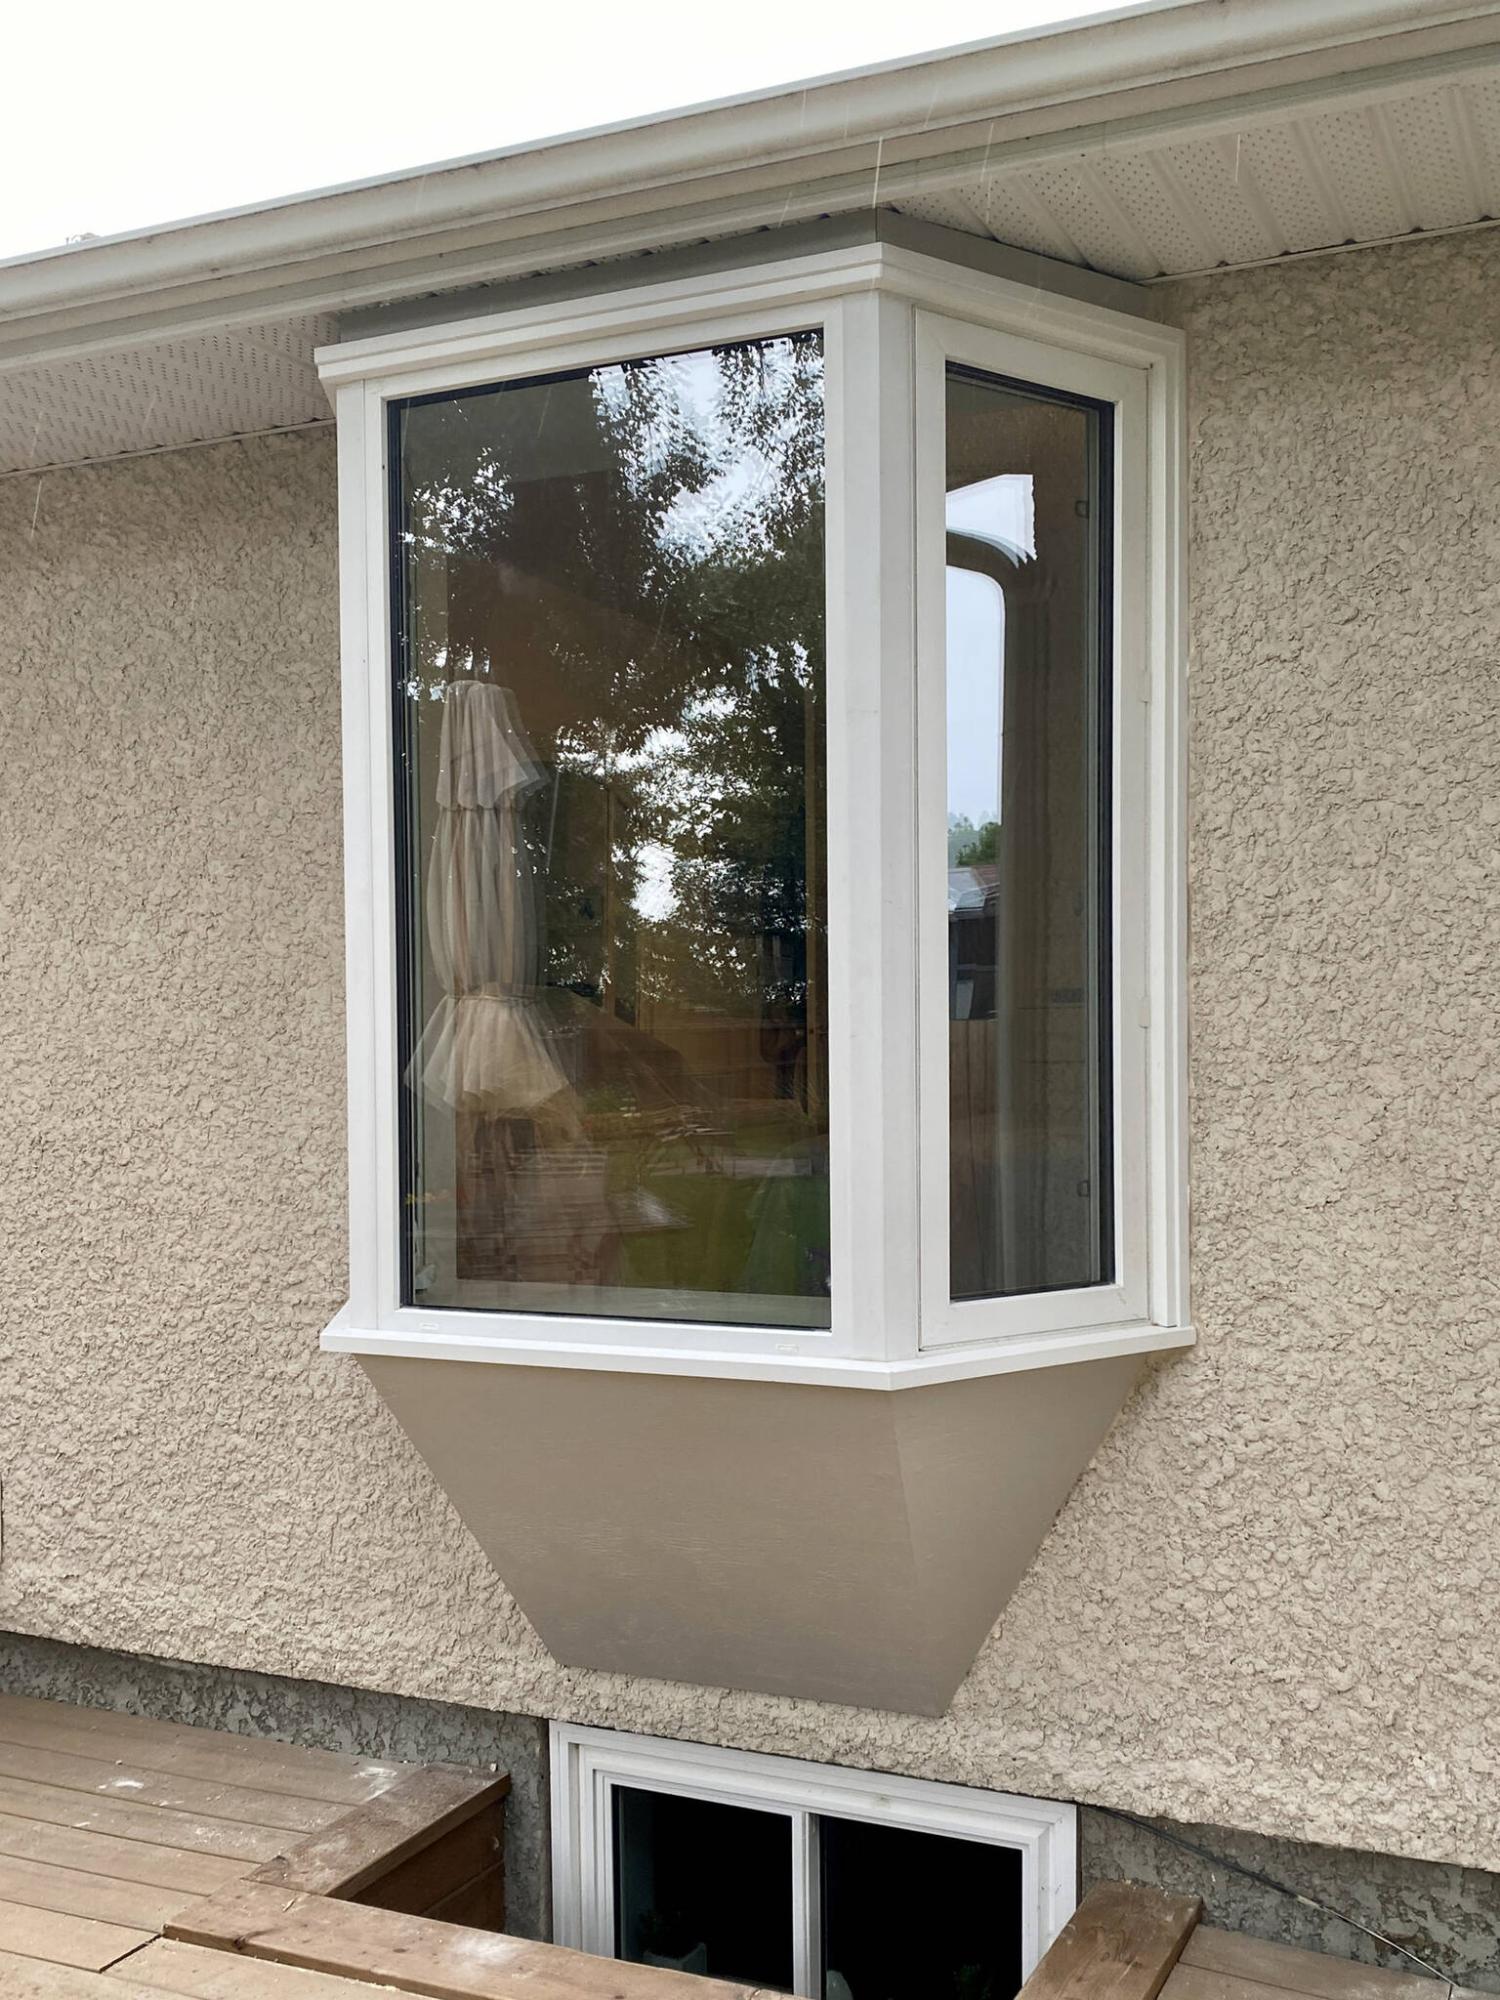
The new bay window blends in nicely with the existing features of the house.
This spring, a homeowner asked if the window in their master bedroom could be replaced with a new bay window, and for good reason — the property features a huge, beautiful yard, and the existing window didn’t provide the best view.
After a quick inspection, I established that provided the window remained the same width, the existing rough opening could simply be made deeper to accommodate a bay window. Once the window was delivered several weeks later, the logistics of the installation loomed.
Unlike a typical window replacement — which entails removing the old window and frame and installing a similarly sized new window, this project would require a few extra steps. For starters, a portion of the bottom wall would have to be removed to accommodate the deeper window.
The required area of drywall below the old window was cut away inside the bedroom using the rough opening specifications for the bay window. The vapour barrier and insulation were also removed, revealing the empty stud cavities and reverse side of the exterior sheathing. The stucco along the exterior wall was cut away using a masonry blade on a circular saw, and a grinder for the tighter areas. Vertical strips of stucco were also removed to ensure the exterior of the new window would tuck in neatly.
With the interior and exterior sheathing prepped, the studs were cut down to one-and-a-half inches below the drywall that had been cut away, ensuring that a new 2 x 4 length could be installed along the top of the cut studs to create the base support upon which the new bay window could be placed. Once the new rough opening was cut to the proper size, the actual installation could begin.
A bay window presents a few challenges when attempting to lift it into position. Not only does it weigh a lot, it is also awkward and face-heavy and tends to lean forward — a dangerous combination. The greatest challenge was developing an approach to safely lift the window to an elevation that allowed easy manoeuvrability into the rough cavity.
To achieve this, the bay window was first jostled onto a sheet of three-quarter-inch plywood that provided support along the basement window well, and shimmed to create an ever-so-slight tilt towards the exterior wall (to encourage the bay to fall against the wall, should there be an issue). Each end of the bay was then placed atop two 2 x 6 boards at 12-foot lengths.
Once on these boards, thick flat shims were used to support the boards as the bay window was being lifted by a pair of two-tonne car jacks placed on each side. As the jacks were being lifted (one at a time), a shim was placed until the bay window’s lower edge surpassed the top edge of the bottom side of the rough opening. At the proper height, the top of the bay was temporarily fastened inside the bedroom using a T-frame guide along the vertical sides of the interior wall. This permitted an unabashed process of urging the bottom to slide into the cavity whereby the entire unit could then be levelled using shims before being permanently secured to the rough opening.
Once in place, the unit was sealed along all interior seams, with expandable foam used to fill the gaps between the unit’s frame and the rough opening’s studs. A multi-angled contained framework was then created below the bay window along the exterior wall. The lower build-out was decoratively sheathed to match the Hardie board used on other areas of the house, but its primary function is to shield the bottom of the bay window from cold and moisture. It was insulated with vapour barrier and sealed along all edges using high-grade caulk. Exterior framing was created along the top of the bay for the same reason.
Along the interior of the bay window, both the headboard and seatboard required slight extensions to meet the drywall edge. Once that was achieved, both surfaces were sanded, primed and painted with four coats of paint, as were the newly fashioned casings that create the decorative perimeter of the bay window.
Standing at back of the bedroom, it’s clear that the bay window is indeed a perfect way to soak up the view of the backyard. The sill or seatboard of the bay — whether used as a seat with a cushion, or as a table for coffee and a potted plant or two — seems to greatly increase the size of the bedroom.
The homeowners are overjoyed, with the bay window project surpassing all their expectations.
That’s the greatest outcome you can hope for when you fulfil a client’s request.
RenoBoss.Inc@outlook.com