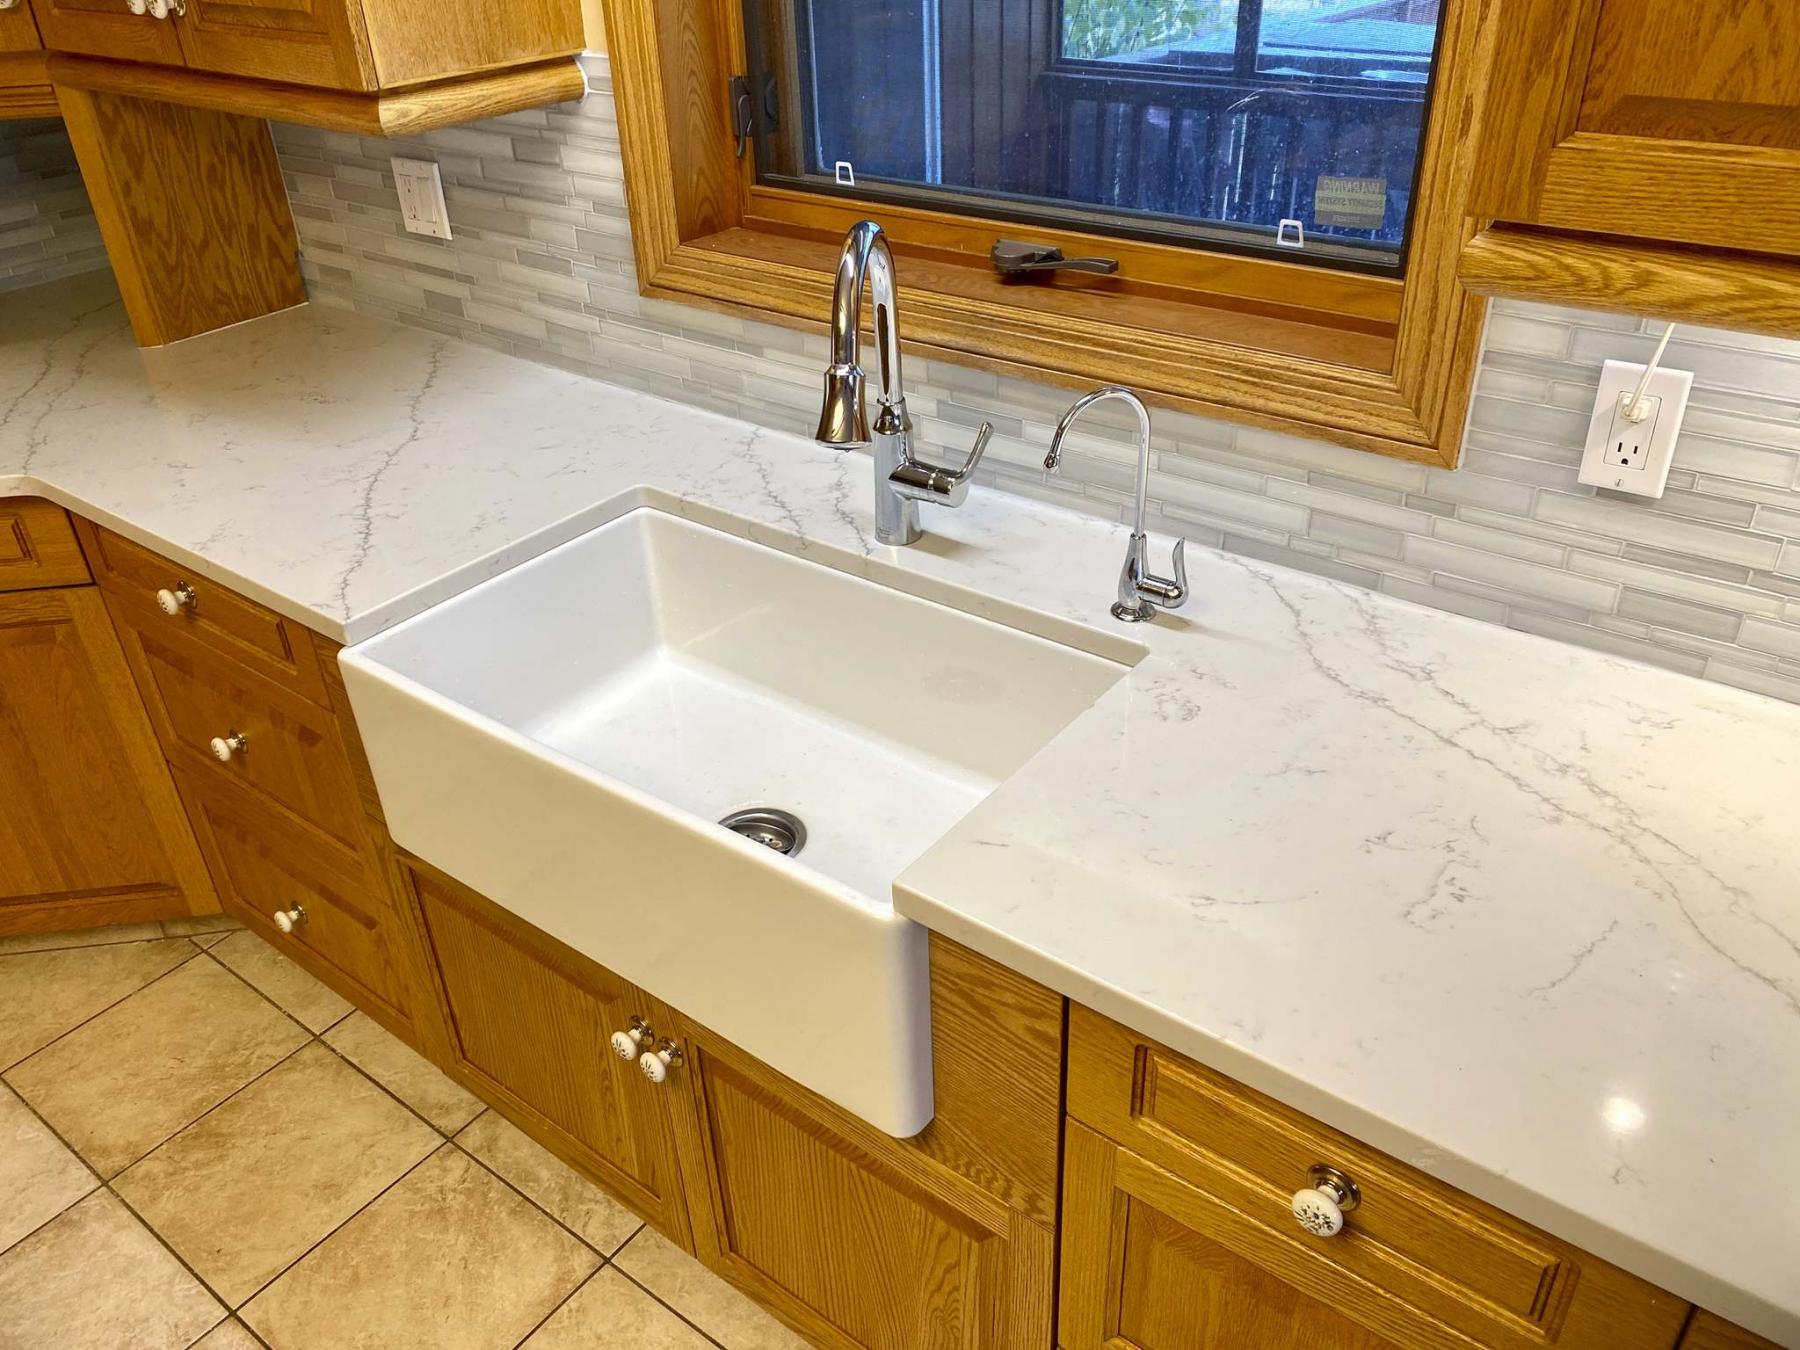
Unlike the old sink, the apron protrusion past the front face of the lower cupboards required new shorter custom cabinet doors below the sink.
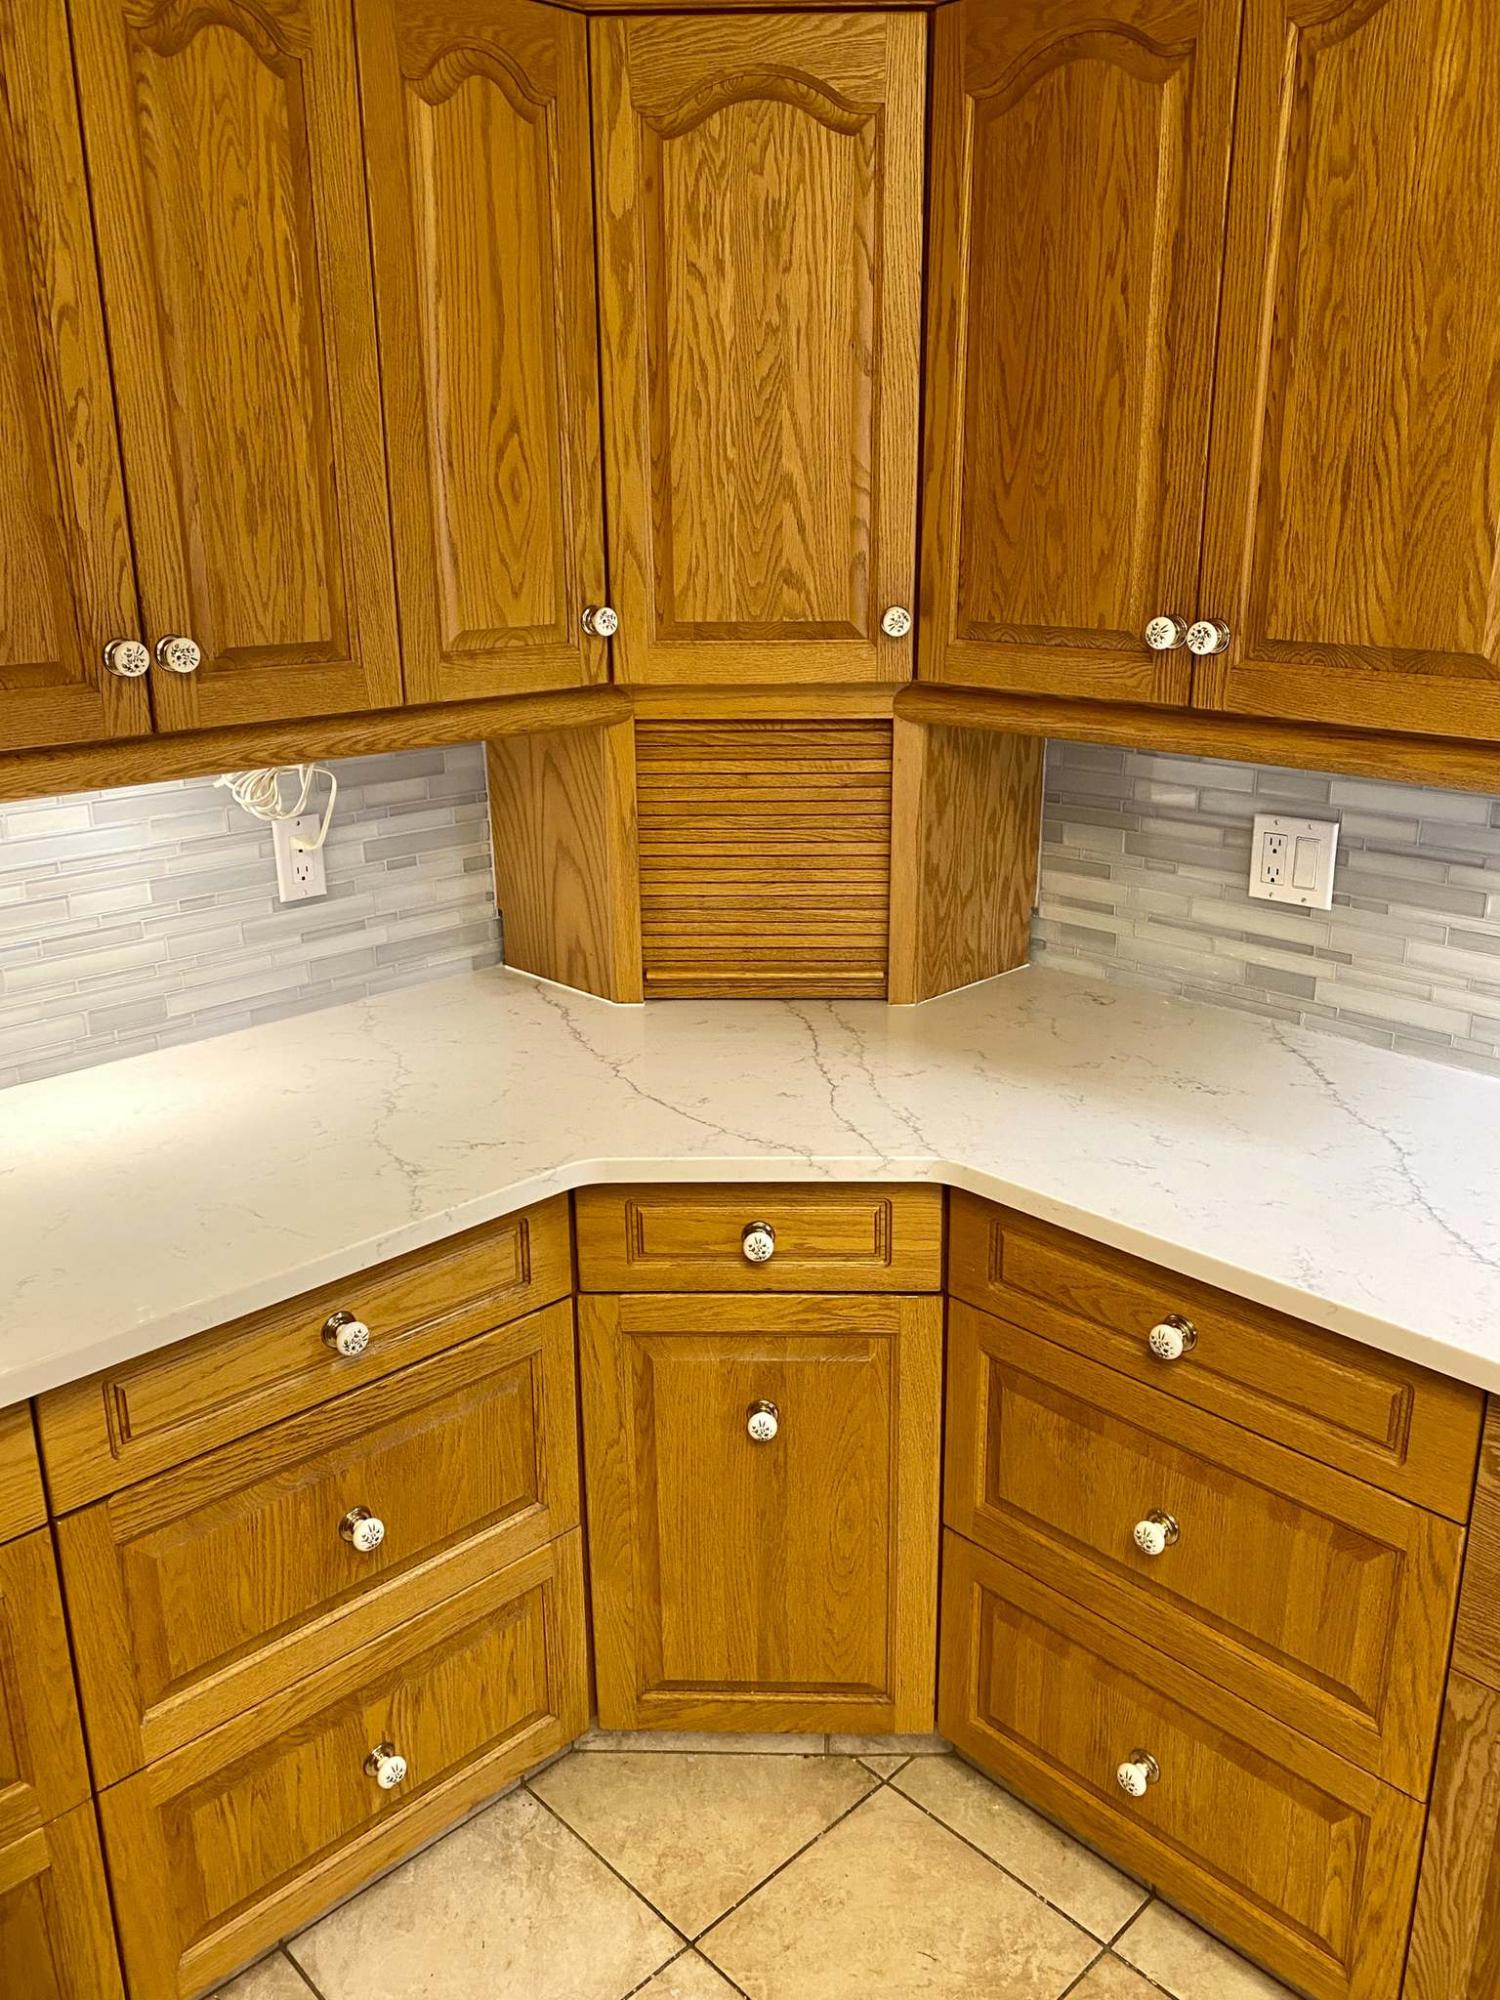
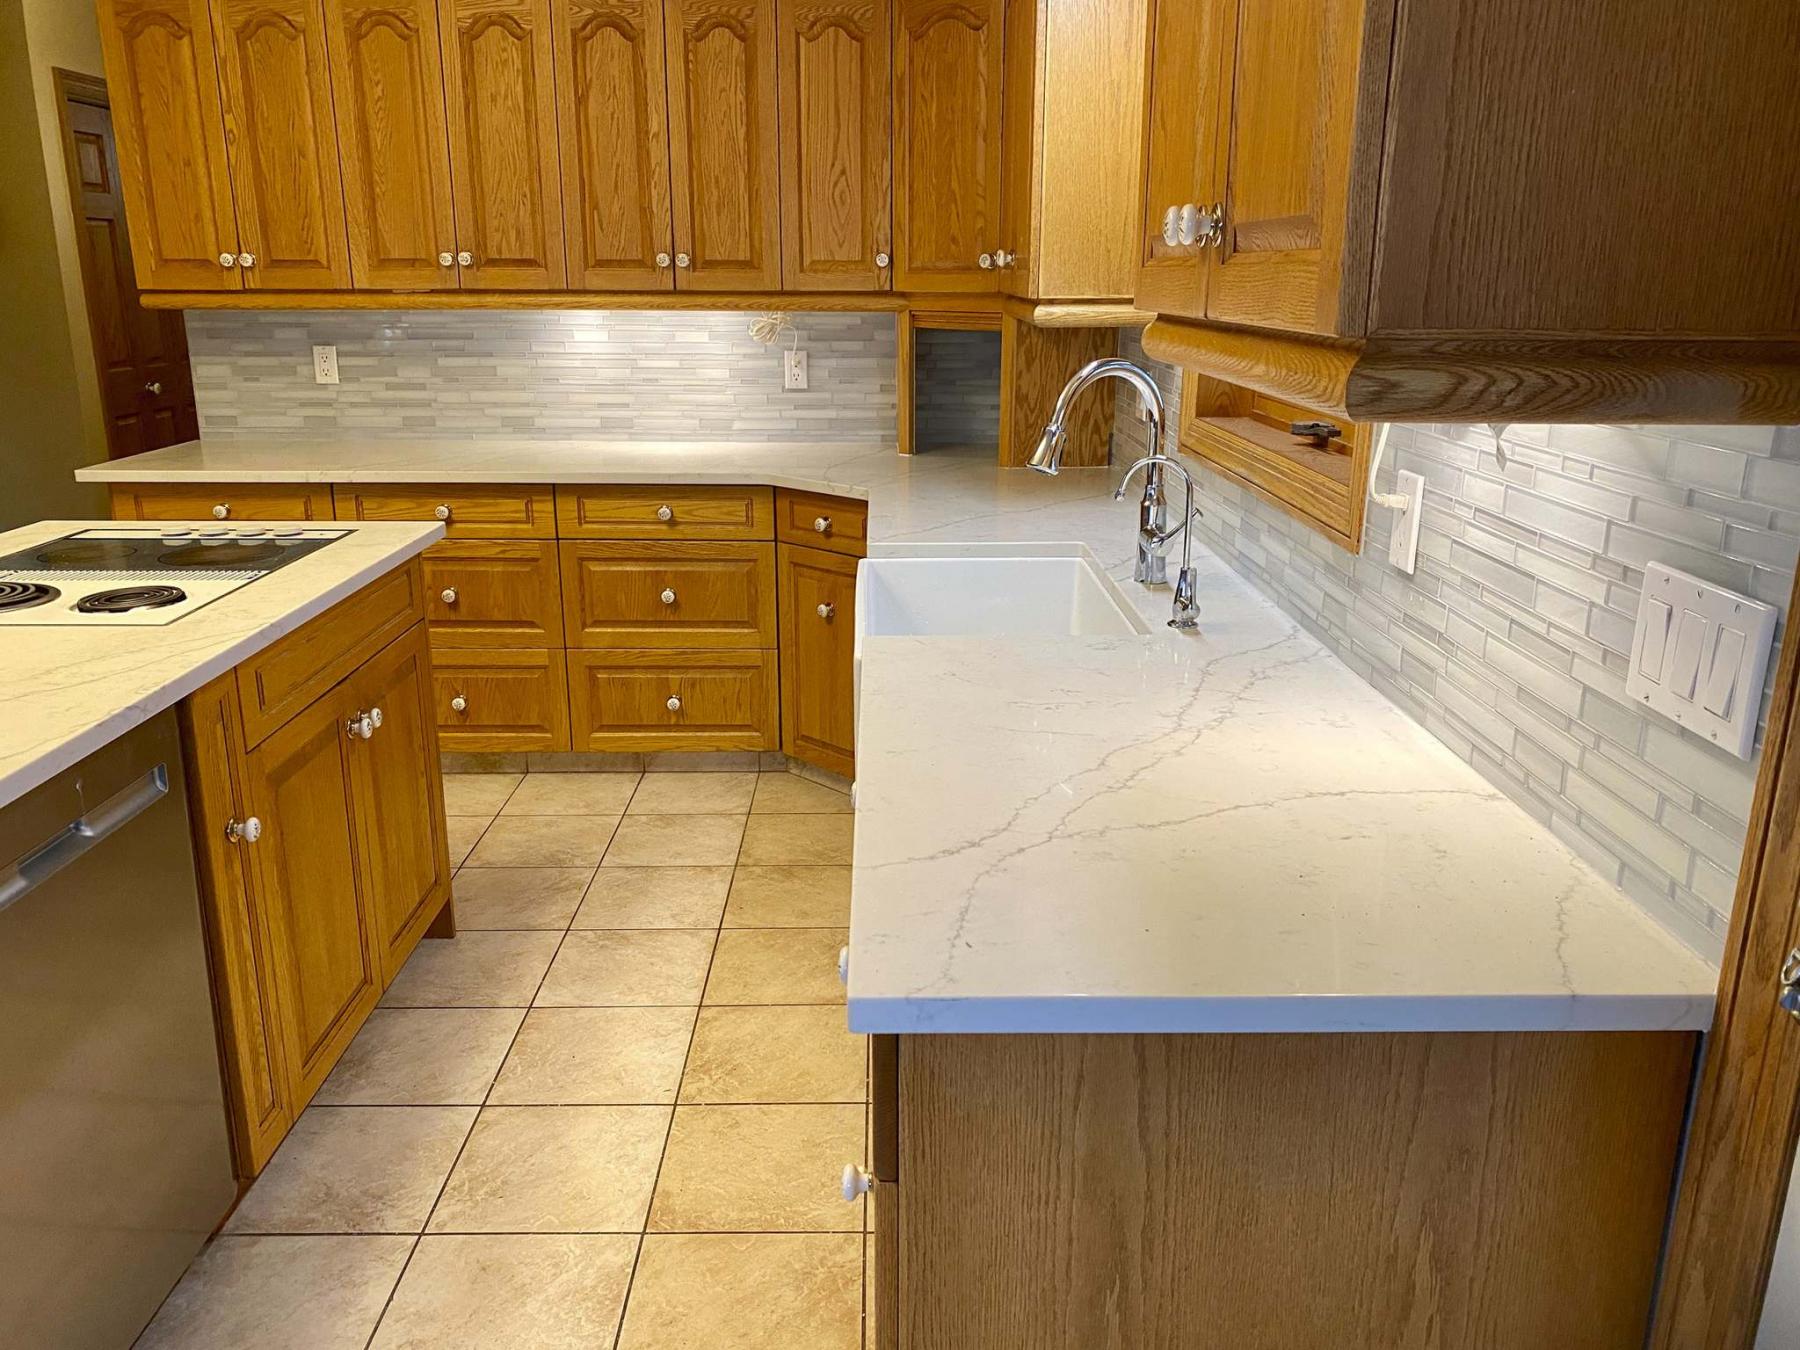
The appliance garage was temporarily removed during countertop installation by strategically dismounting certain upper cupboard valances, all repositioned after the quartz was installed. The mosaic backsplash works around a collection of outlets and switches.
The glass mosaic backsplash works around a collection of outlets and switches, which required a tremendous amount of cutting with the wet saw.
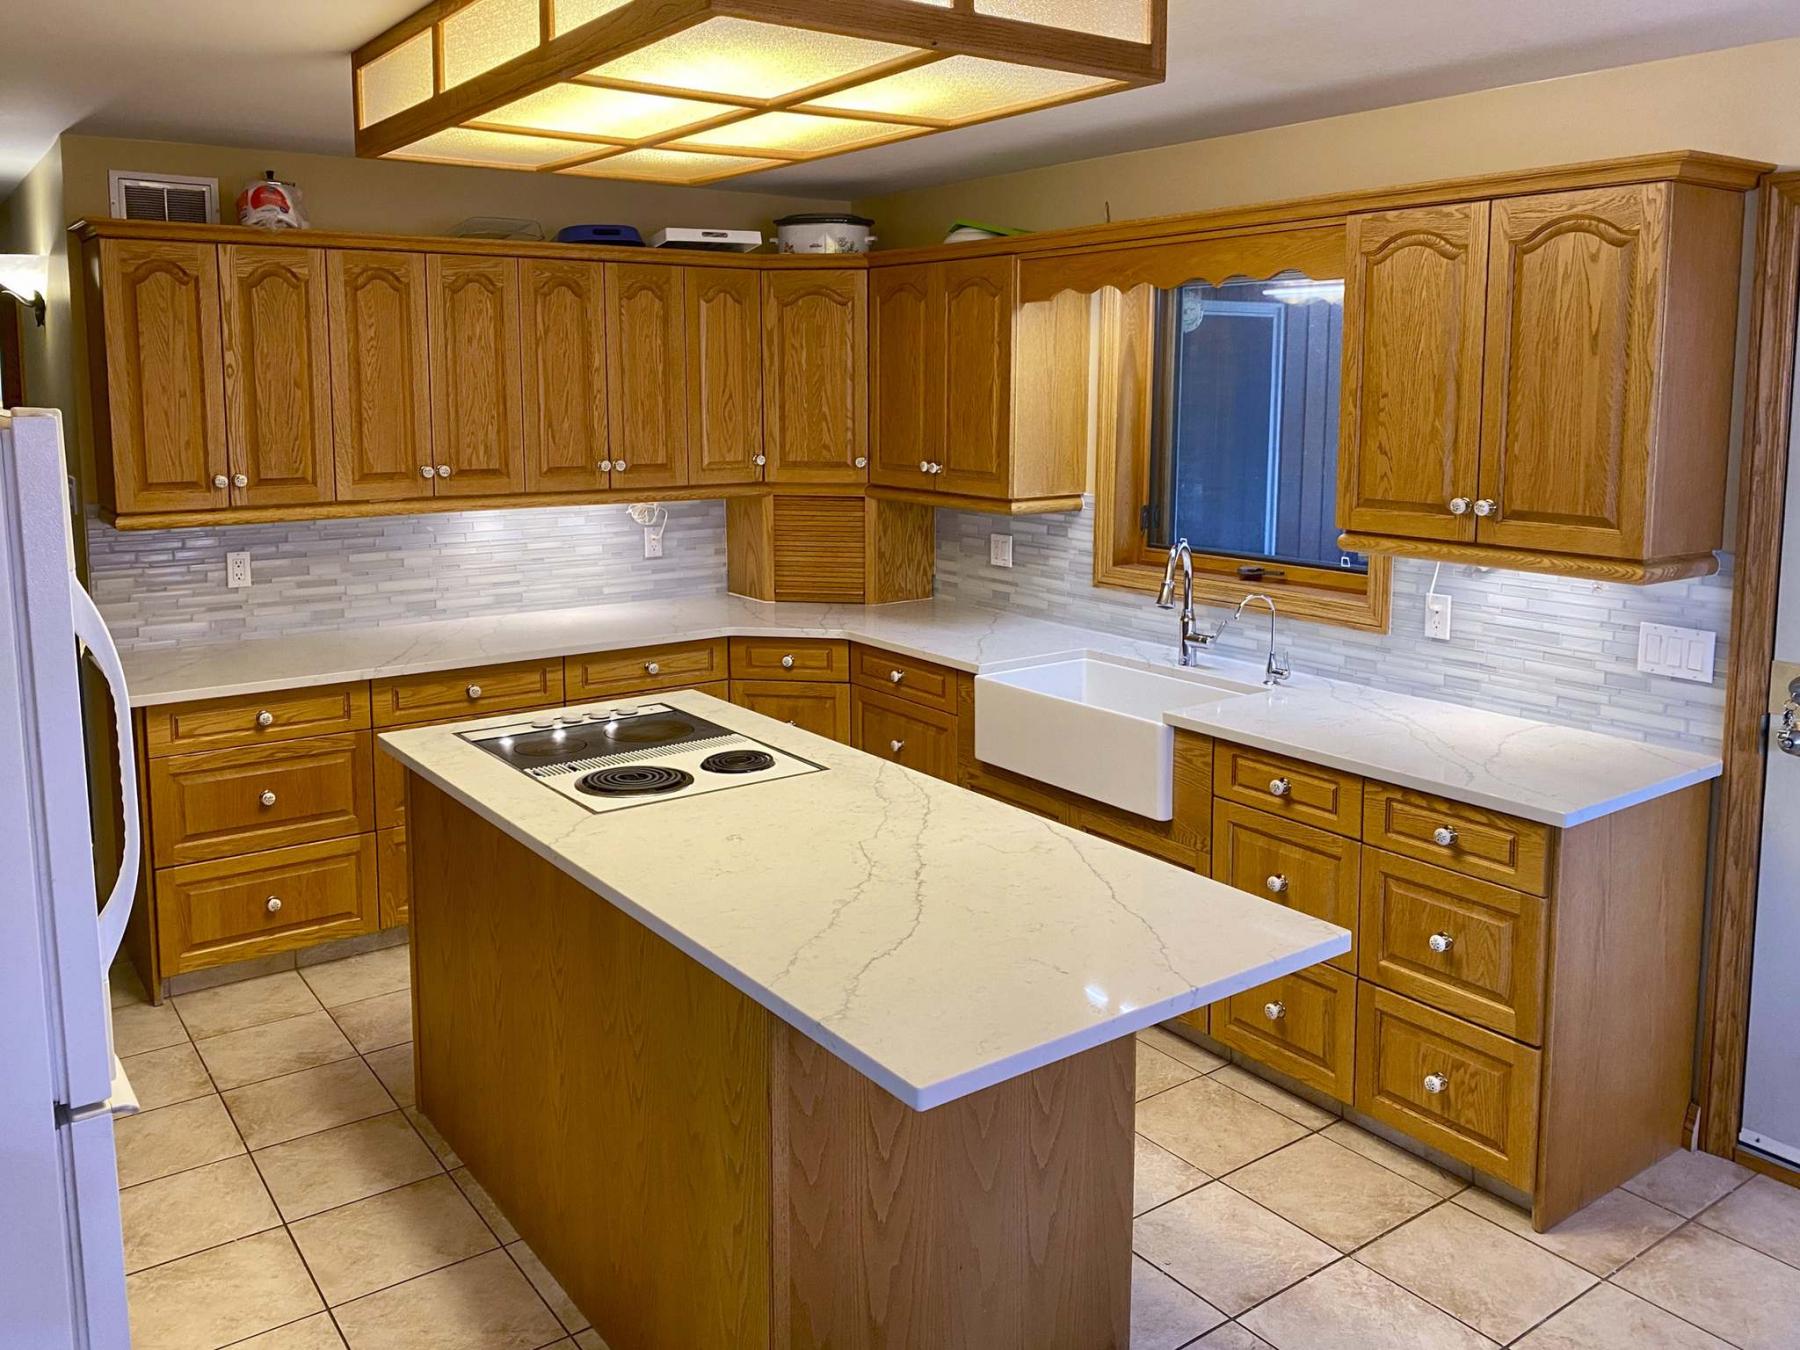
The costs of a complete kitchen overhaul can be somewhat shocking, and even cost-prohibitive if your budget simply refuses to allow the expense. However, by eliminating elements that may not need to be replaced, pricing will begin to fall within an acceptable range. With a recent kitchen facelift, the rustic feel of the existing cupboards was retained, which better than halved the potential costs of the renovation.
Once the homeowner decided to keep the cabinets, her list of upgrade essentials quickly revealed a less abrasive overall cost. These improvements included: an apron sink to replace the old stainless steel double sink (as well as a new faucet and purified-water dispenser); new quartz countertops to rid herself of the old dark and gloomy arborite counters (with the introduction of an extended end on the island); and a mosaic tiled backsplash from quartz-top to the underside of the cupboards along every wall.
Due to the recent and ongoing supply chain issues, my client’s homework early on would be to make her choices regarding all the new elements as soon as possible, to avoid any delays once the project was scheduled for installation. After choosing a beautiful white apron sink, it soon became apparent that due to the nature of the protrusion of an apron sink, the existing cupboard doors below the sink area would also require some customization (the sink was deeper than allowable by the height of the existing doors). As such, two major tasks would be tackled way ahead of time.
Beyond the selection of new items to populate the kitchen space, a couple other jobs were also done. The countertops were laser-measured by the good folks at Solid Stone (so that once the exact quartz style and colour was confirmed, the countertop sections would be pre-cut before the install date). New cupboard doors (that mimic the style and stain colour of the existing cabinets) would be manufactured by Richard Rochon and his Cabinet Corner crew to a height that clears the bottom edge of the apron sink protrusion by an inch-and-a-half, with a ‘plant-on’ section that would be jigged to meet the contours of the apron sink on site, after installation of the sink by Solid Stone.
While these two crucial tasks were being addressed, the homeowner chose a white coloured quartz with hints of light grey grain for her countertops, both faucets, as well as a white and light-grey clear mosaic backsplash tile style. With these preliminary steps under our belt, we awaited confirmation that the custom cupboard doors were ready so we could then notify Solid Stone as to when we could schedule the countertop installation that suited everyone’s hectic calendars. It is always imperative (to me) to co-ordinate all tasks to minimize kitchen downtime, when possible.
An early October Tuesday seemed to work best for countertop installation, allowing me to prep the kitchen space on the Monday. The old countertops were discarded after disengaging the old faucets and sink and temporarily disconnecting the stovetop set within the island countertop, which was also removed in preparation for the next day’s installation. To ease the process of mounting the apron sink, the existing two ‘too-high’ doors were also completely removed, including the old cross-brace. Later, portions of the upper cabinet valance were disassembled to temporarily dislodge the appliance garage, which would have been in the way of the new countertop placement process.
As planned, the Solid Stone crew arrived on Tuesday morning. By early afternoon, the entire ‘L’-shaped main countertop was set into position, as were the tops for the island and small lower cupboard adjacent the fridge. As a final task, the crew also mounted the apron sink and fortified its support with two sections of two-by-four lumber.
On the Wednesday, my first objective was to re-establish the water feeds and drain to the new apron sink. The purified-water faucet was also reconnected and tested. With the water flowing again, the new shorter under-sink cabinet doors were mounted, allowing the template for the plant-on section to be created with the jigsaw — it fit like a glove, subsequently secured to the cabinet framework. The old cross-brace was then recycled and affixed below the front-edge two-by-four sink support. Cabinet Corner really outdid themselves this time — it is virtually impossible to decipher what are old and what are new cabinet doors. Finally, the appliance garage was re-positioned, allowing the re-introduction of the various upper cabinet valances. Lastly, the stovetop was urged back into the island top through an opening that had been pre-cut off site. Unfortunately, the hole required a little bit of extra work with a grinder so the stovetop could properly ease into place — no matter, better too small than too big in this instance. In no time, the stovetop was once again operational.
On the Thursday (and final day), the glass-tile mosaic backsplash was installed section by section, from the close edge of the ‘L’ along the wall past the sink and window, to and within the appliance garage, and around the other wall to the far side of the main countertop. From countertop to the underside of the upper cupboards, the measurement is roughly 18 inches on average. Above the smaller countertop adjacent the fridge, the height of the backsplash topped 24 inches, due to the lower height of that particular cabinet. The task involved catering to several outlets and multiple switches, which always takes up more time. Luckily, the glass tile was fairly easy to cut using the wet saw. And after allowing the backsplash to set for roughly two hours, a faint grey grout was sponged in throughout, and wiped down until the glass tile sparkled. Any and all remaining seams were caulked, and the countertops were wiped down to a shimmer.
Because of our diligence in project preparation early on, and a masterful co-ordination with the various manufacturers and installers, this kitchen facelift process lasted only four days total (despite having maneuvered behind the scenes for well over three months). This is a credit to the professionals at Solid Stone and Cabinet Corner — another kitchen success story, and the client is overjoyed!
Not only did the homeowner receive the kitchen facelift she desired at a very reasonable cost, the ‘less invasive’ approach allowed the process to unfold in a very timely manner — only two days without a functioning kitchen sink and stovetop. A full kitchen renovation can last anywhere from four to six weeks, at great expense. And it is likely essential kitchen features would remain non-operational over most of that time frame. Sometimes, a less aggressive project approach truly is the better way to go.
RenoBoss.Inc@outlook.com