Photos by Marc LaBossiere / Free Press
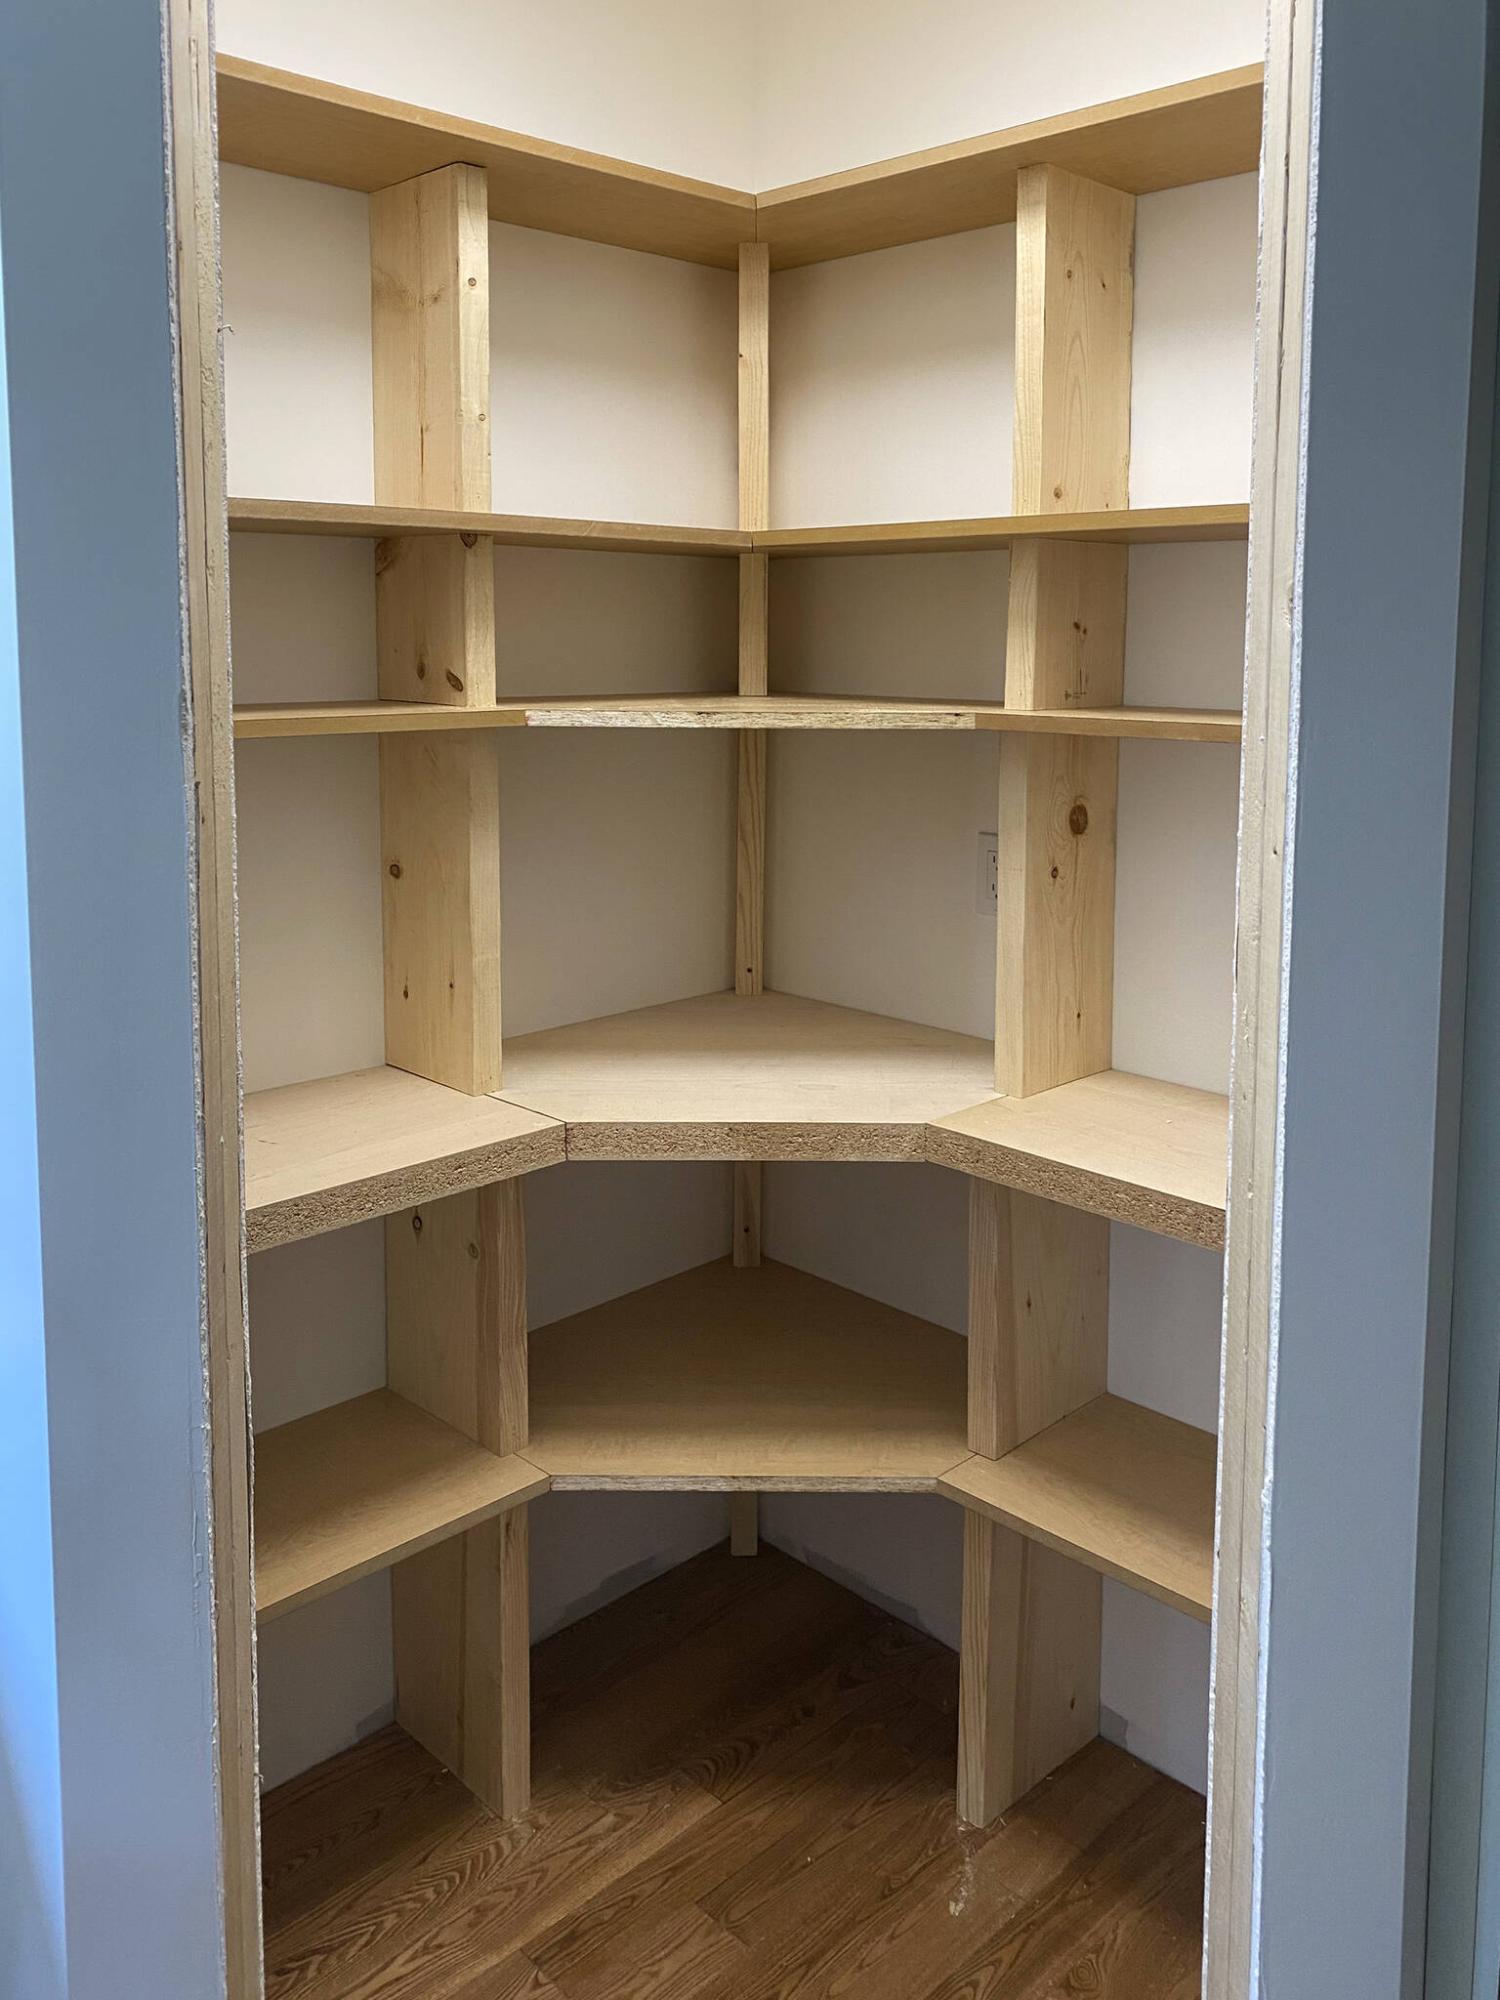
Veneer slabs were cut on site to create custom pantry shelving, along with a two-inch countertop.
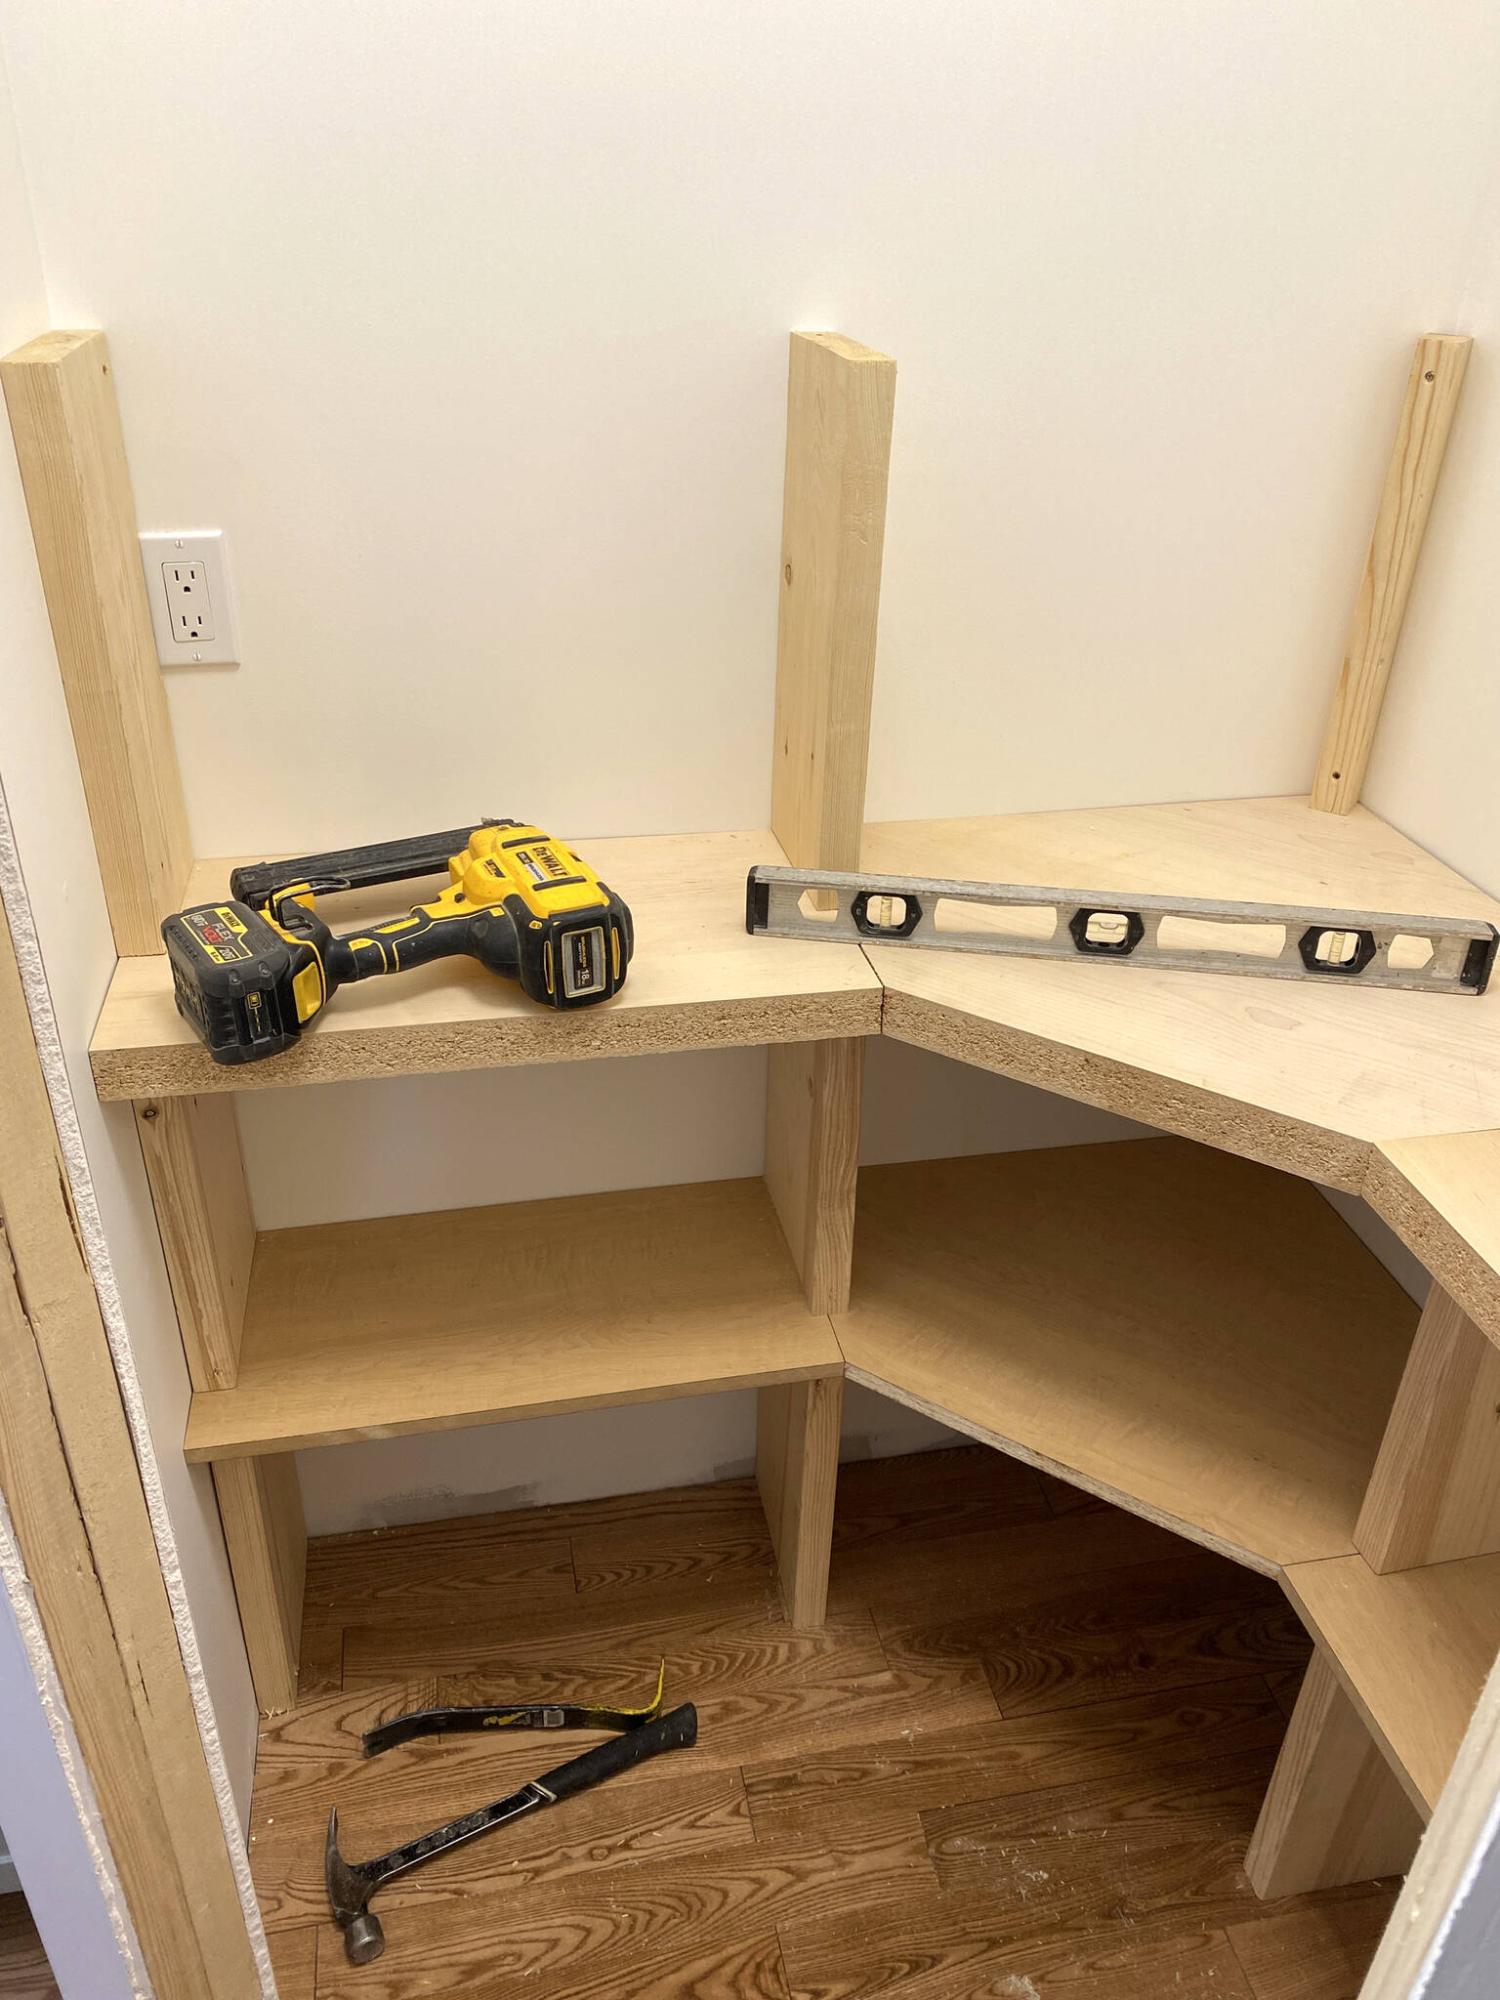
Between every row legs were positioned for support.
Sturdy legs were set into place before the first shelving was permanently secured.
Another “while you’re here” moment occurred recently at a current kitchen expansion and renovation project. The design involved the removal of a wall that partitioned the old kitchen space from the existing dining room. Without the wall, the kitchen cabinets would now extend into the old dining room, allowing the introduction of a standard-sized corner pantry at the far end of the old kitchen, with an entry door at a 45-degree angle.
Although framing the pantry had always been part of my tasks, subsequently populating the interior of the pantry with shelving had never really been discussed, nor was it part of my on-going purview throughout. One morning, shortly after the pantry had been framed, and the drywall stage had begun, the homeowners inquired as to how best establish a shelving layout to maximize the space. It became clear to me quite quickly that pre-fab shelving systems were not at the top of their list. I then began sketching some ideas. As luck would have it, the homeowners already had the materials required to complete the shelving task. However, it would take several steps to prep the material to fit the proper dimensions.
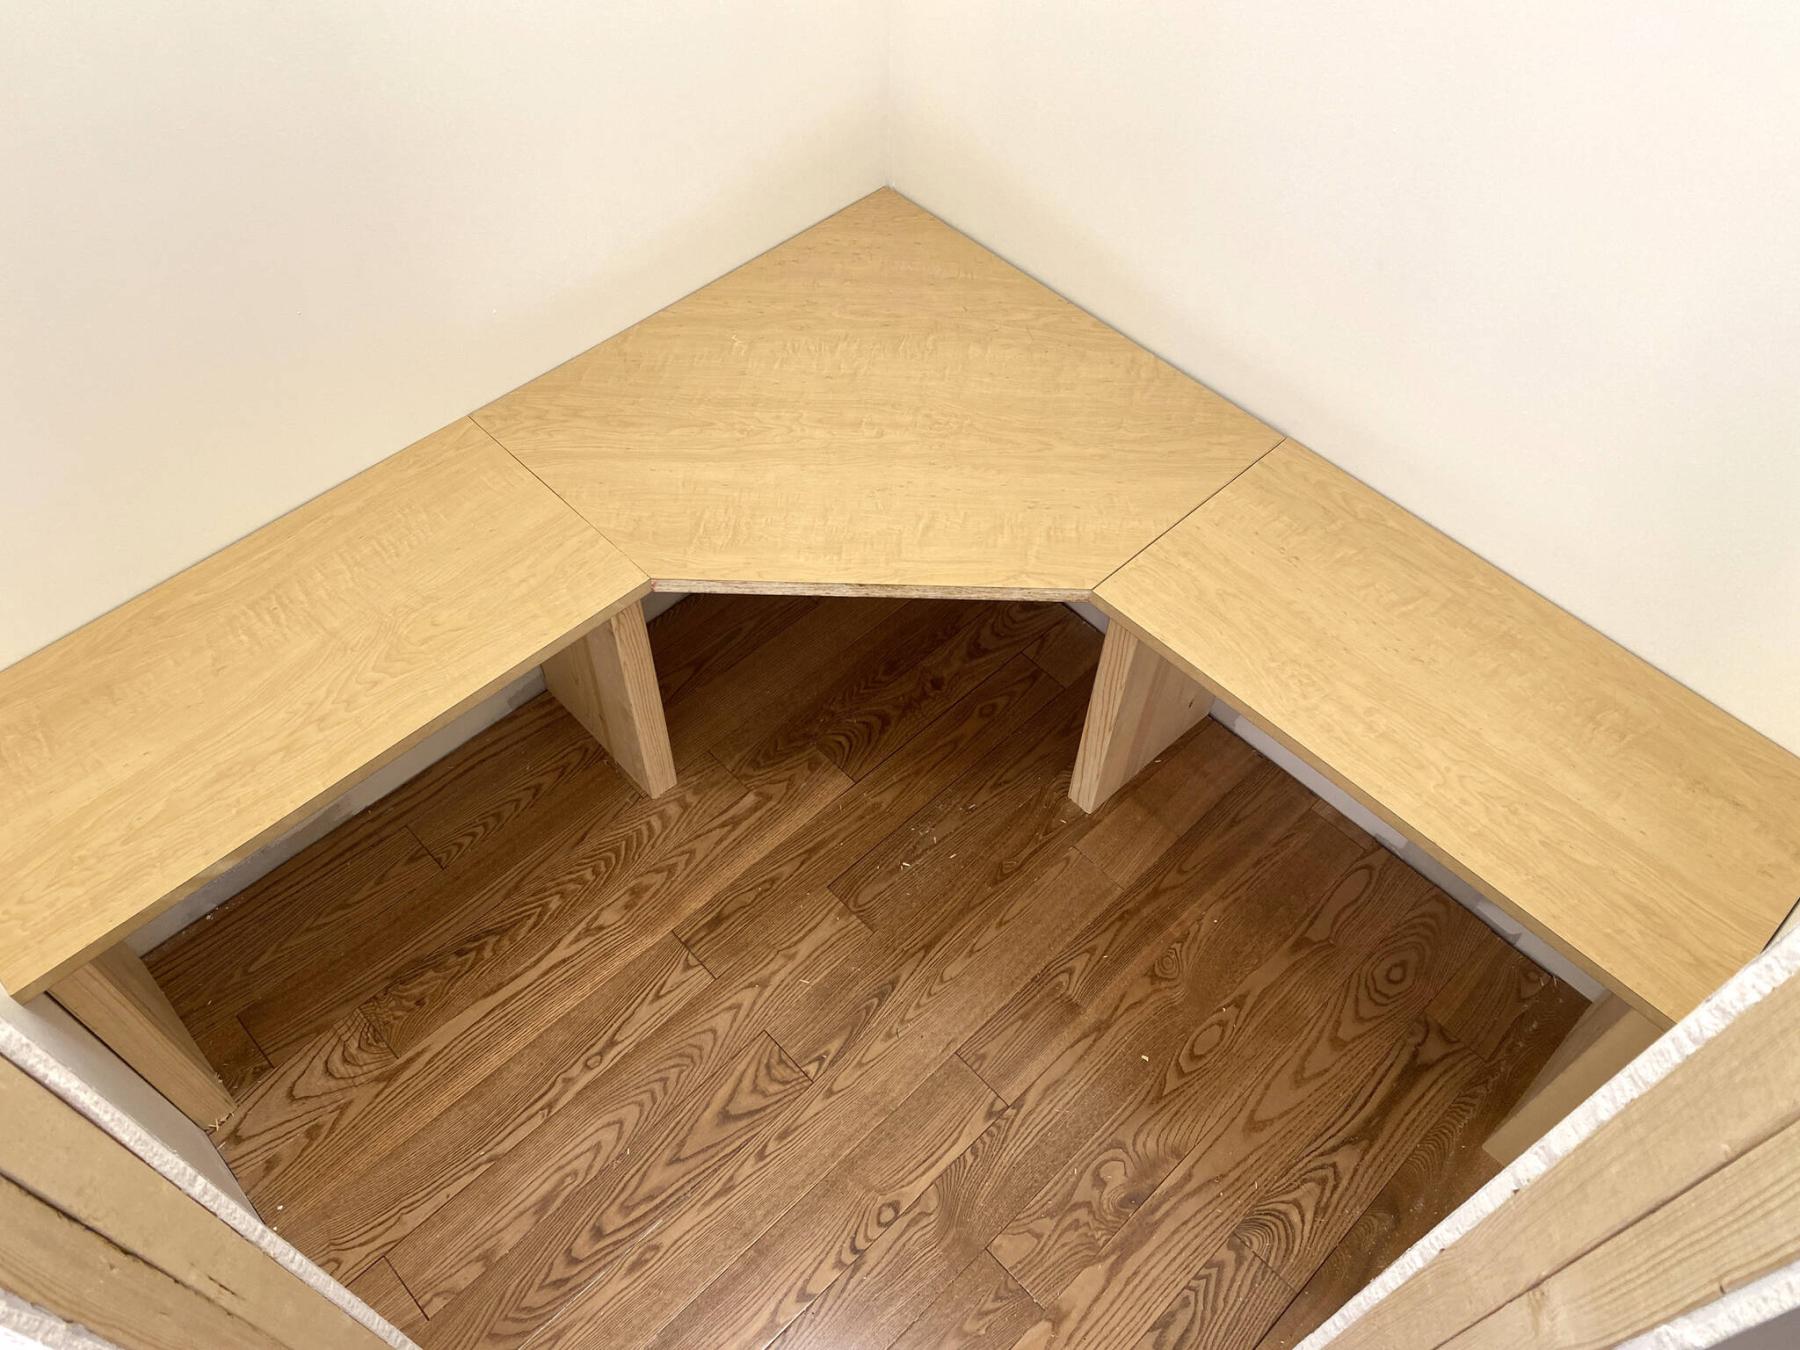
Within a storage unit on property, several sheets of maple veneer countertop material had been stored for a couple of years. This would serve nicely as the main shelving. And because the established design also required a “countertop” at counter height within the pantry, thicker two-inch veneer also within the storage unit would be repurposed as the main countertop. It was decided that one continuous shelf would be below the main countertop, and three above at pre-set heights requested by the homeowner. The lowest shelf would be 12-inches deep, the countertop at a 13-inch depth, whereas the upper shelves would diminish to 10-inches deep for easier access. And because the pantry is set at a 45-degree entry, the shelving would line each 48-inch inner wall, with a center-piece that meets the 45-degree angle of the door.
Once the five-eighths veneer shelving was prepped to the required depths, as were the two-inch slabs for the countertop, the center pieces were custom cut to fit the 24-inch legs of all the side shelves at the appropriate depths, with a 45-degree angle cut along the front side that meets the opposing shelving leg. This arrangement provides a deeper storage surface along the hypotenuse towards the corner of the middle shelves.
To construct the shelving array, 2×10 legs were positioned along the sides at 24-inch intervals, with a corner support protruding at a 45-degree angle from the corner. Once the first shelves were secured onto the initial supports, the next 2x10s were then placed atop the first shelves to support the countertop. From that point, 2×8 supports were installed along all shelving junctions, for every subsequent tier of shelves, fastening the supports to the back wall once leveled and in the correct placement. The shelving (and countertops) were secured using a nailer through to the support legs below. Once the structure was fully erect, thin strips of oak trim (prepped on site using a table saw) were used to finish the visible edges of every shelf and countertop, mitered at every seam.
The homeowner intends to finish the shelving and countertops by filing and fastener hole and slight seam gap with wood filler. And after a quick sanding, the entire structure will receive a few coats of stain sealer. There is no doubt this “while you’re here” project will have be a cost saving — the material they already had on hand would have cost a fortune to procure. And although is took a while to prep the pieces for this custom pantry shelving array, it was a very enjoyable experience. Nothing beats a custom solution to satisfy the soul.
RenoBoss.Inc@outlook.com