MARC LABOSSIERE
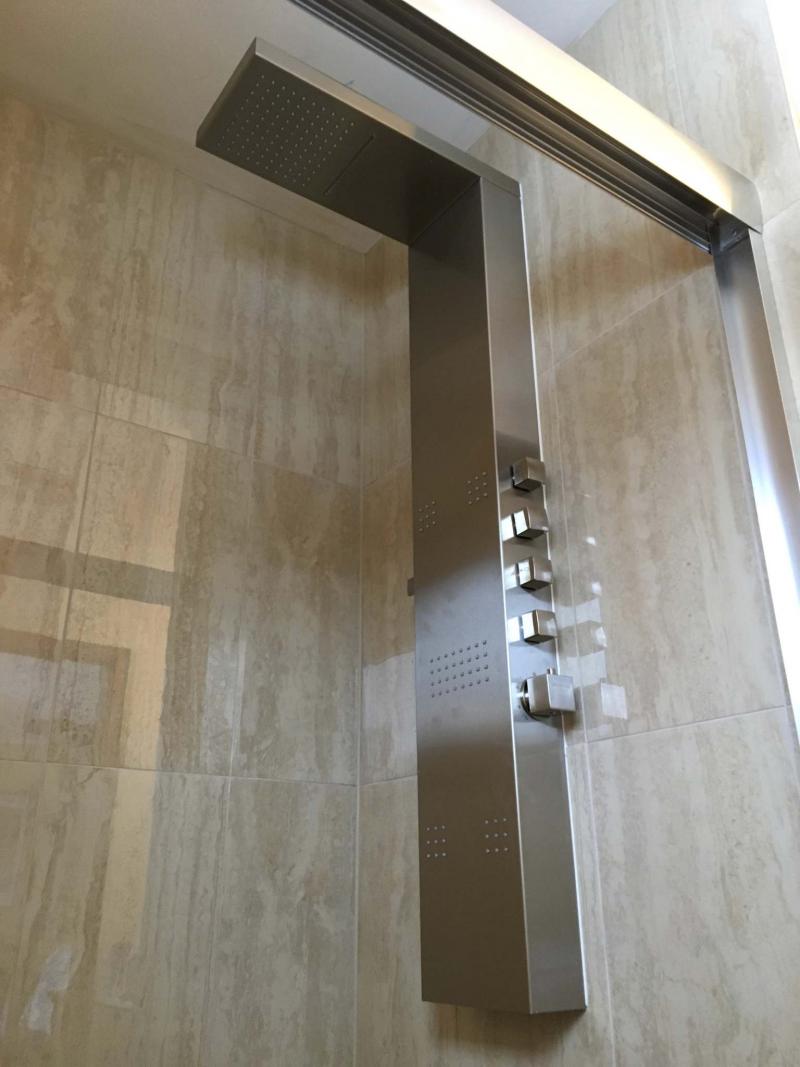
In lieu of a standard shower faucet pre-plumbed within the wall, water feeds were rough-plumbed and accessed via a small opening behind the intended wall-mount shower column location, easily connected to the column using brass fittings.
MARC LABOSSIERE
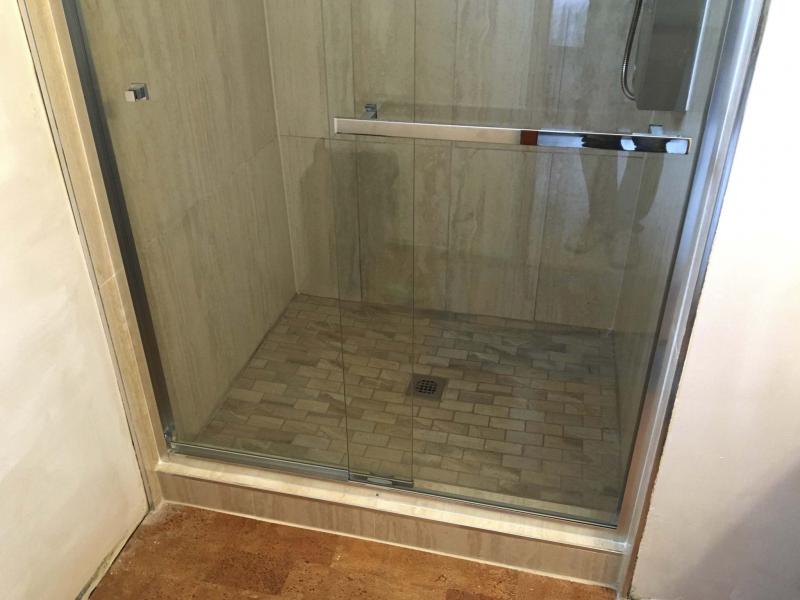
The shower base step serves two functions — to prevent water from escaping, and to create a rigid surface on which the sliding glass shower door’s lower track is affixed.
MARC LABOSSIERE
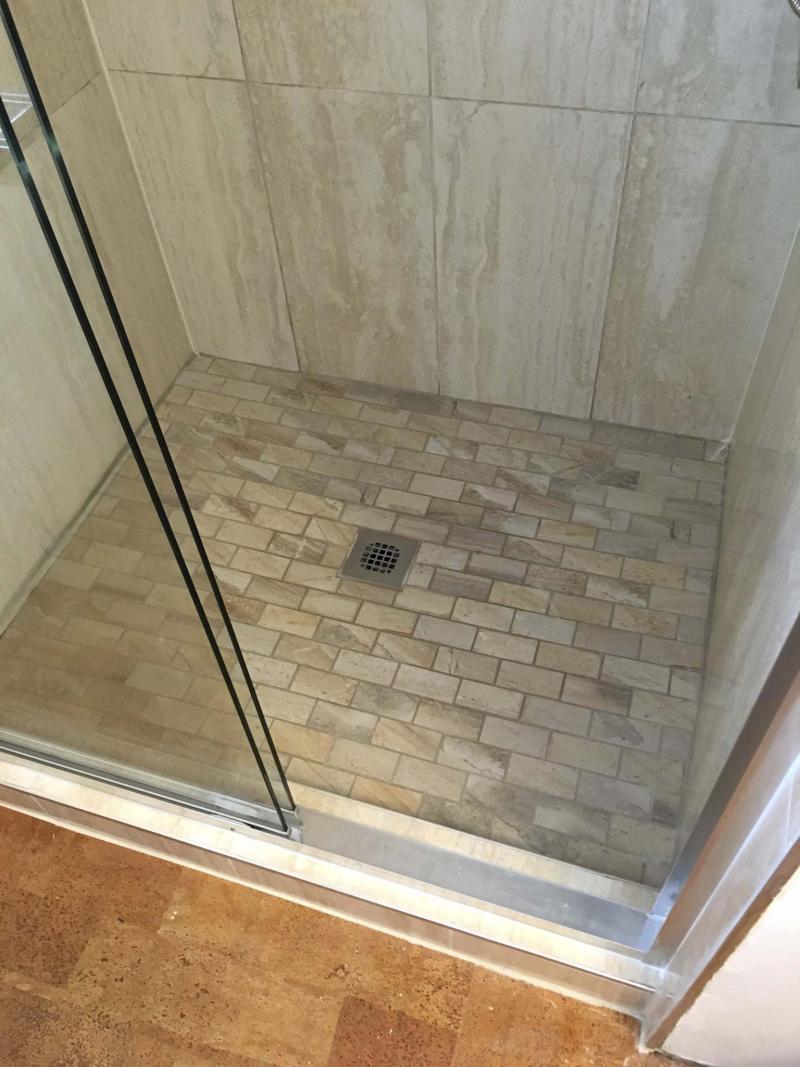
The shower base mosaic tile closely matches the larger wall tile but allows for the contour of the base, which grades gently towards the centre drain.
The job began much like most other shower stall upgrade projects: an initial meeting with the clients to discuss their ultimate reno objectives, how in-depth the demolition will be, and of course choosing the desired tile, shower faucet and sliding glass door for the custom stall. On the second-last day of the project, an unforeseen hurdle temporarily derailed the project. Although it wasn’t what I signed up for, the clients truly appreciated that I offered to help source the issue.
There is no subtle way to describe what happened, so I’ll just come right out with it. Despite our best efforts to avoid making a mess while hunting down an apparent blockage in the drainage pipes stemming from my clients’ ensuite bathroom, we were literally slapped in the face with fecal matter. Yup — gross!
Let’s back up a minute. Guy and Doris LeGras and their three daughters moved into this two-storey house, located near the University of Manitoba, roughly 18 months ago. Guy said proximity to the school was the main reason they bought the house, as all three daughters currently attend classes at the university. Although there are several bathrooms in the house, only two three-piece bathrooms (sink, toilet, shower and/or tub) exist, both located on the second floor. Because the main bathroom is usually overrun by the girls at varying hours throughout the day, Guy and Doris wished to update the ensuite bathroom adjacent the master bedroom, so they could finally have a nice bathroom all to themselves.
When I first met with Guy and Doris, they pointed out a few concerns. Water damage evident along the stipple ceiling at the base of the stairs on the main floor, directly below the ensuite shower stall, was likely caused by a leak in the shower pan (base). Guy asked if it was viable to simply address the base. After an in-depth chat, they opted to heed my advice and tackle the entire stall.
"After discussing our options with Marc, we agreed that it made a lot more sense to redo the entire shower instead of only repairing the base," Guy said. "The difference in cost was negligible. Marc’s willingness to answer our questions was very helpful." As such, the stall was demo’d to the studs to reveal the existing water feeds, and the floor boards were lifted to inspect the plumbing below the sub-floor to confirm the source of any and all leaks.
With renewed enthusiasm, Guy and Doris began the process of choosing shower stall tile as I began the demolition process. The old shower pan was removed and a new trap and drain would be installed to replace the old trap, which was indeed leaking. The old shower faucet was also extricated, and the water feeds were rough-plumbed in preparation for the introduction of a shower column.
The 24-by-12-inch wall tiles were set vertically along the three wall faces of the shower stall and cut to fit along the shower step. Because the sliding glass shower door installation would be the final task, the second-last day was reserved for the grouting, which normally only takes a few hours. I happened to flush the toilet after emptying water from a bucket and quickly realized something wasn’t right — toilet water backed up into my freshly grouted shower stall! While attempting to soak up the water which flooded the shower base as quickly as possible, I also lifted all affected mosaic tiles and removed the grout ruined by the surge of water. Guy then informed me water was once again leaking through the stipple ceiling at the base of the stairs. Dumbfounded for a few moments, I eventually surmised that there must have been water in the shower trap for several days, at a level surpassing where the adjustable top of the ABS drain was screwed into the main base — the silicone on the threads likely never set properly, being immersed in water, and simply dissolved away. Moreover, there was a serious blockage somewhere in the system and we needed to find it before we could proceed. "We were very concerned," Guy recalled. "This was a surprise and completely unexpected. Marc’s willingness to help us figure it out and eventually fix the problem was a huge relief to us."
Upon my suggestion, we removed a section of the stipple ceiling below the shower stall, to inspect the existing drainage pipes. Oh boy, was that a good idea! Not only had I been correct about how the water affected my newly installed shower drain (easily rectified by reinstalling it, this time preventing any water from entering the trap, thereby allowing the silicone to dry), there were five other visible leaks along the ABS drainage system. On the three-inch ABS pipe from the toilet, one coupling had never been properly glued, only dry-fitted. Another obvious problem was the proximity of the shower (and vanity sink) drain to the three-inch toilet drainpipe — merely inches from the toilet flange (which incidentally had never been secured to the floor, either). No wonder one flush fed directly into the shower stall — water chooses the path of least resistance. All the ABS would be rerouted and replaced. However, tracking down the blockage was our primary objective for the time being.
Systematically, the old ABS pipe was cut out, all the way to the stack where the enormity of the blockage was evident — it appeared as though the water level in the stack wasn’t moving. After half an hour or so, the water did manage to seep down, but it was moving at a snail’s pace. Using my iPhone, I snapped a pic within the stack to assess the water level. Because the coupling at the bottom of this section of stack was visible, we moved our focus to the basement.
Looking behind the suspended ceiling tiles revealed that the bottom of the main floor stack was attached to another 90-degree junction, with a clean-out. After a brief chat with Guy, we decided to open it. Tarps were laid, and all furniture was moved. We lined a huge bin with a large garbage bag, and Doris stood at the ready with several towels in hand. Perched atop a stepladder, I slowly began to loosen the clean-out cap. Although the vertical section of the stack was empty, the horizontal section leading from the 90-degree ceiling junction to the vertical stack of the basement wall was likely still full of… let’s call it "stuff."
That stuff began to ooze out the moment I started to unscrew the clean-out cap. With every loosening of the cap, more "stuff" came out under pressure. Carefully monitoring the flow, I’d open the cap a little more once the pressure dissipated. This went on for a little while, and despite the unpleasant nature of the activity, we all felt pretty good about our progress — all the "stuff" was being successfully collected in the large bin being held by Guy. Unbeknownst to any of us, the end of the ABS clean-out was cracked. With one last turn of the cap, the cracked end let go and snapped off, thrusting the cap as a powered projectile, followed by a flurry of "stuff." Luckily, it was a short-lived episode. Just long enough, however, to cover us. After a moment of disbelief strewn with a few profane outbursts, we realized the tarps had fortunately done their job — nothing was damaged. Only humans felt the brunt of this pipe’s wrath.
After getting cleaned up (as best we could), fecal euphemisms continued to flood the basement for the rest of the afternoon, in an attempt to make light of the situation. We eventually determined the blockage was deep within the line and into the cast-iron pipes, which ran below the foundation — this was beyond my capabilities and expertise. A few calls were made, and Dr. Drain was scheduled for the following week.
In the interim, the ensuite drainage ABS was re-plumbed properly, and the shower stall was fully completed. The young gent from Dr. Drain eventually did manage to unclog the line, overrun by roots and years of buildup. "It was very stressful not knowing exactly what the problem was until Dr. Drain unclogged the drain, and we were very relieved it wasn’t much worse," Guy said. Once the drainage lines were cleared and the system fully tested, the ensuite, including the new shower stall, was given the green light for use.
I’ve since returned to the LeGras home to strap the hallway ceiling, a task which serves a dual purpose — to conceal the sections of ceiling that had been removed to access the ABS plumbing and, just as importantly, to rid this hallway of the ugly stipple ceiling (Doris wanted had wanted it gone anyway). Six LED pot lights were also added to improve the hallway lighting. Could it be this "code brown" provided a silver lining after all? "It was all worth it in the end," Doris said.
The issue that doused us all in unpleasant "stuff" was the same issue that precluded the use of the new shower stall when a shower was the thing we all desperately needed — an example of irony I’ll do my best to avoid in the future.
bossenterprise@outlook.com