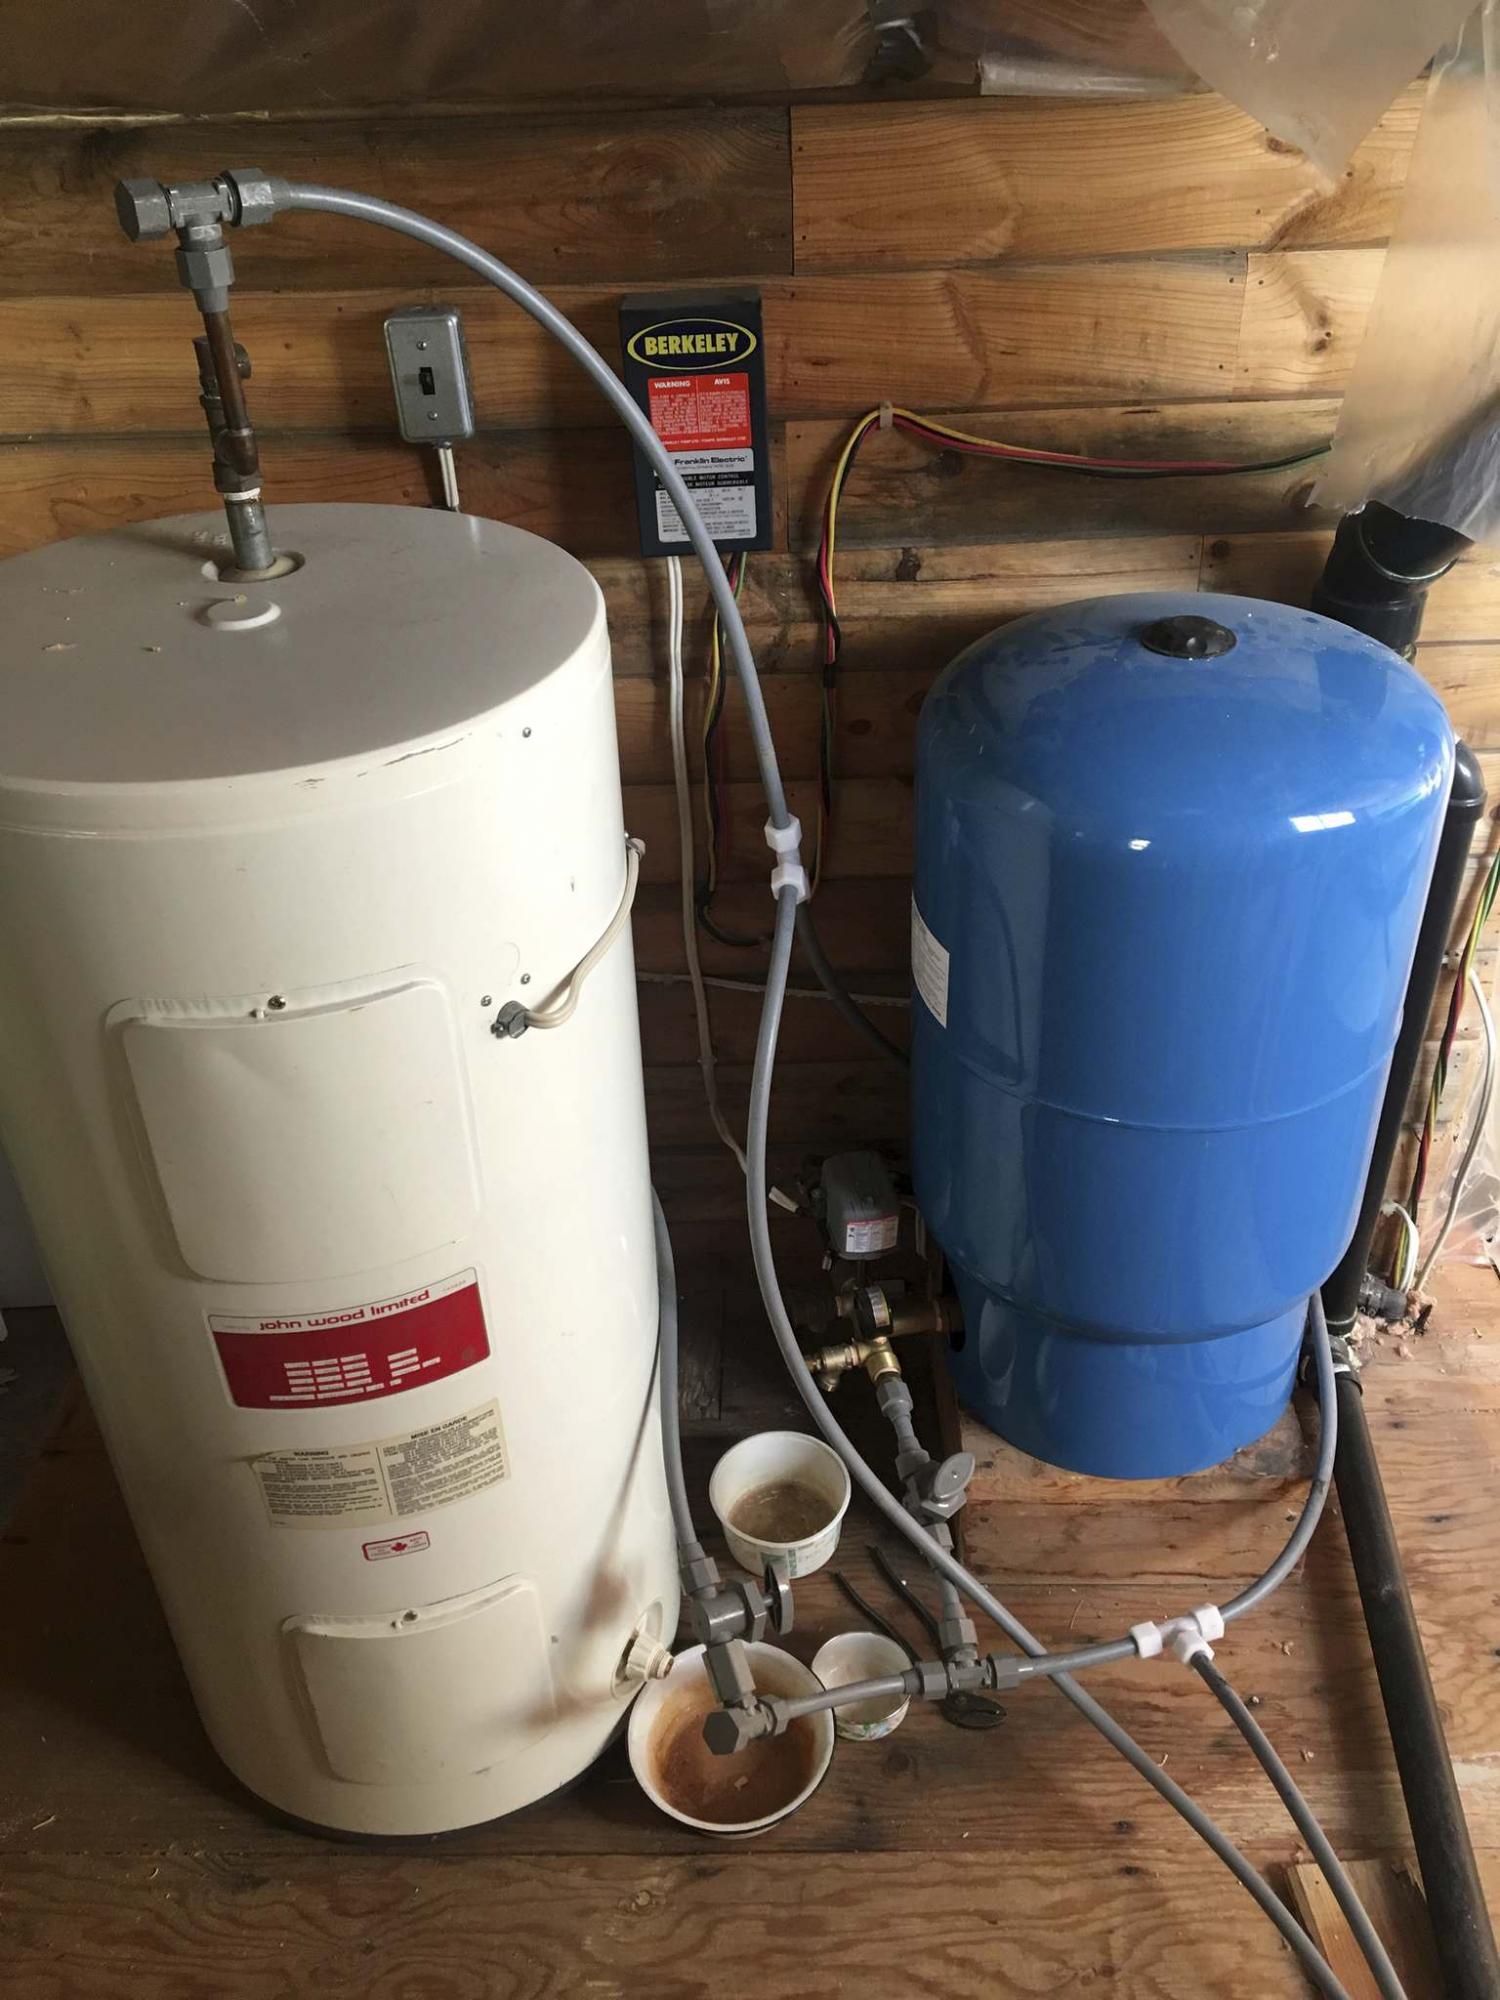
Prior to being relocated to the crawlspace the old water system was located on the second floor of the cottage.
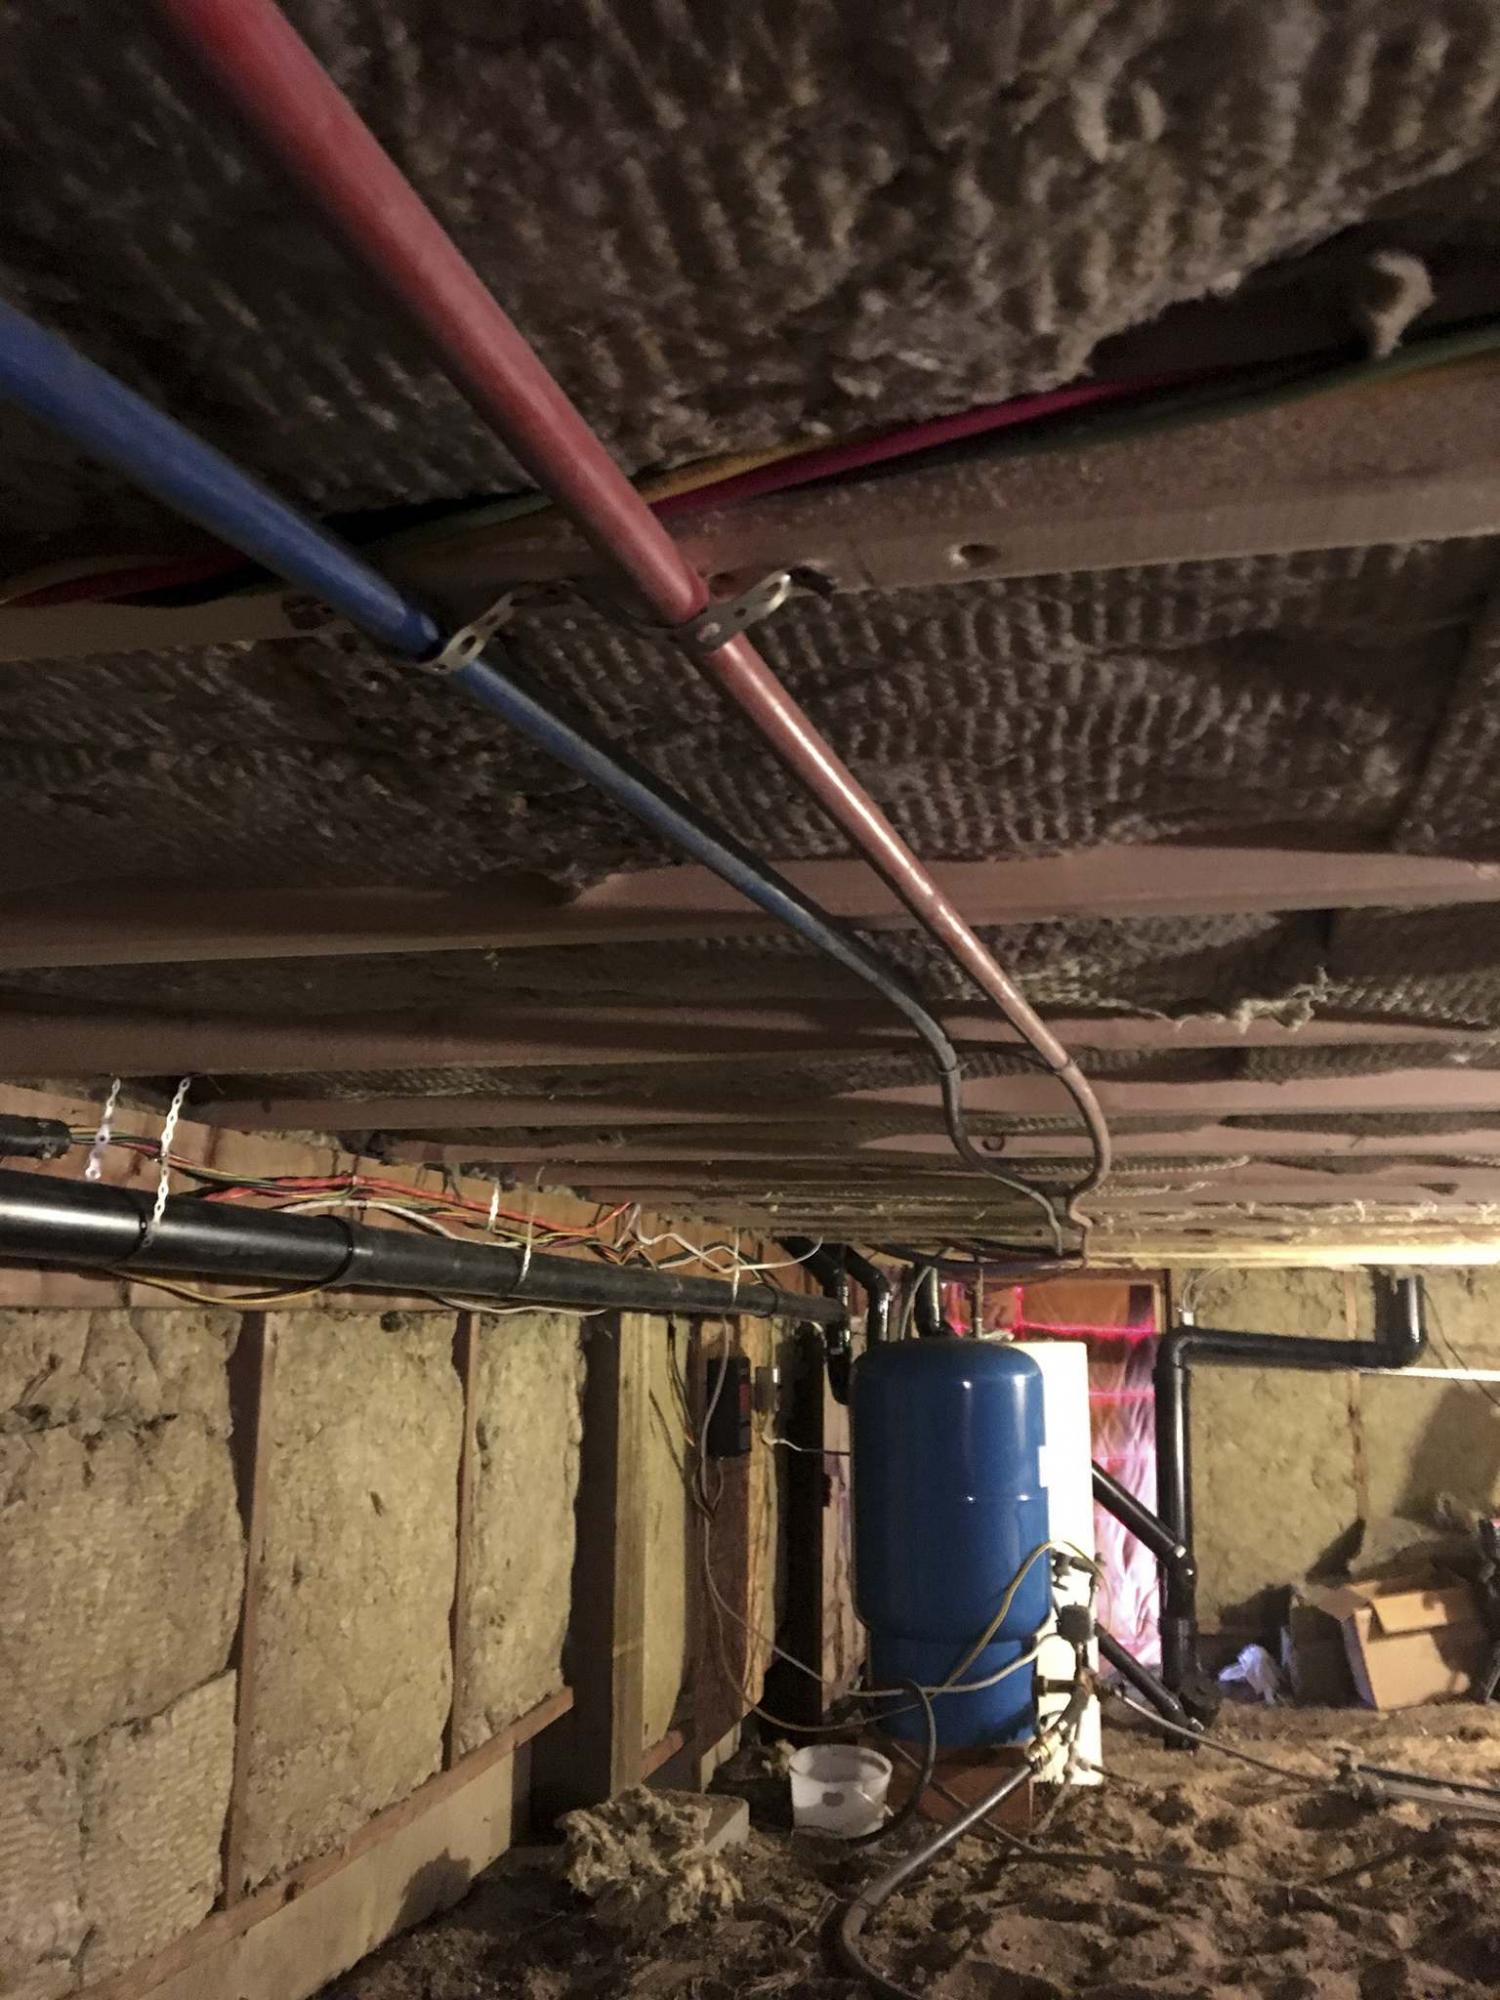
The new water feeds and drains are pre-run along the inside of the insulated crawlspace.
For a three month period starting in late August 2018 my daily routine consisted of driving to-and-from the Grand Marais area in an effort to complete a 300 square-foot addition to a four-season cottage before winter set in.
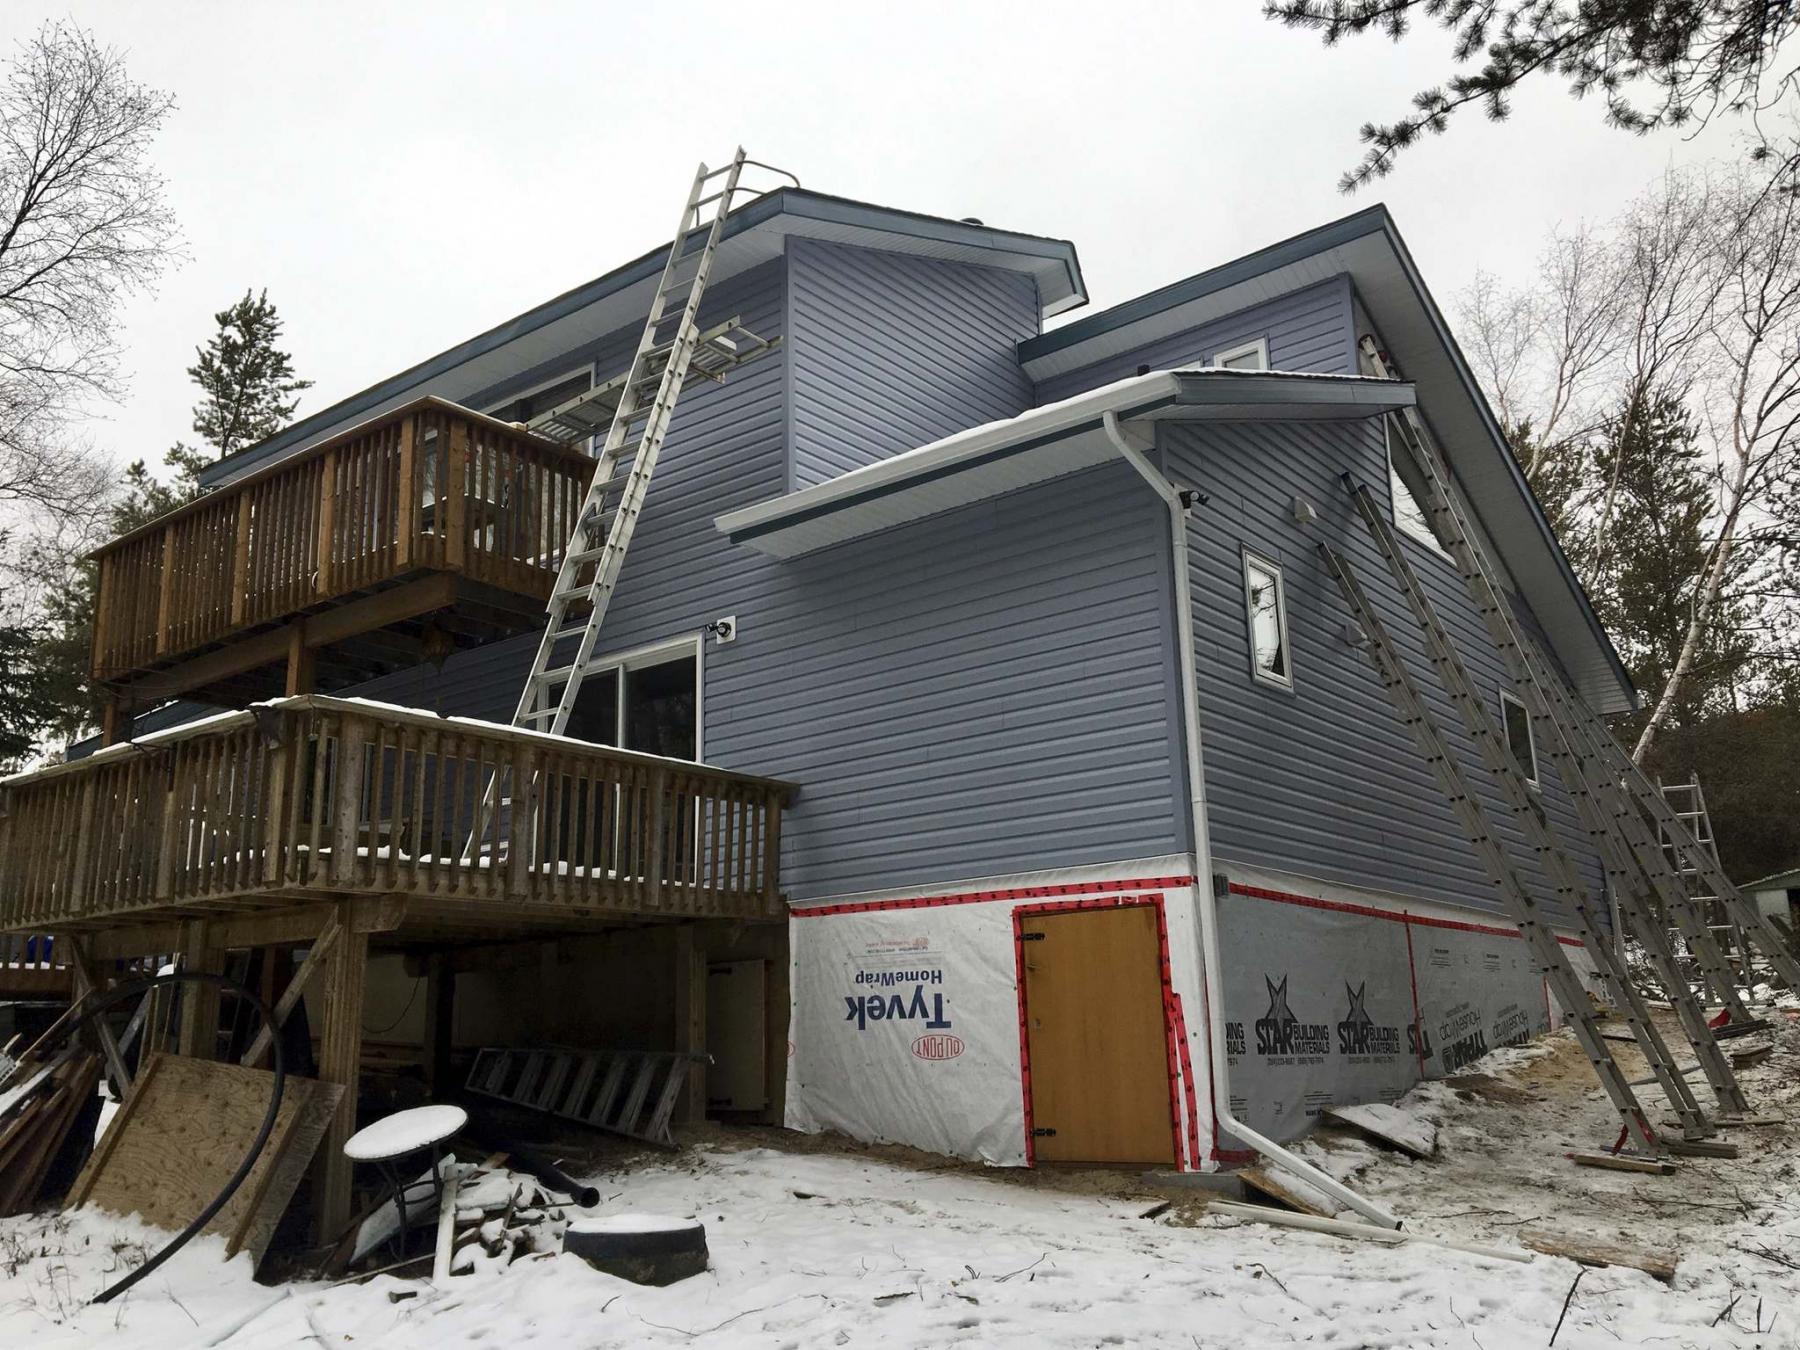
It only took a couple few weeks of framing before the structure was clearly defined and subsequent tasks could be tackled. Soon it was time to relocate the main plumbing services to accommodate the new floor plan.
Prior to the new addition, the existing plumbing services were located on the backside of a partial second floor. These services were to be relocated to the crawlspace below the new addition. In the interim, a chronological strategy was required to avoid any disruptions to the use of these services. The kitchen sink, water closet, and feeds to the upright shower were retained temporarily. The new water feeds and ABS drains were then pre-run to the proposed area of the hot water tank and pump after relocation. On transition day, both the tank and pump were disconnected at the second-floor location and carefully moved to the crawlspace. The old lines were then capped to close the loop, and the hot water tank and pump were then connected below.
With the old set of services reconnected for temporary use, the rough plumb for the new kitchen sink and dishwasher, washer, bathroom sink, toilet, and tub surround were tackled. Once the new lines were tied-in, the feeds to the old kitchen sink, toilet and upright shower were abandoned. All new water feeds and drains were tested for leaks, without any issues. With the new plumbing in place, one final step was required to ensure four-season capabilities — insulation and heating.
Contrary to the original location for the water system on the second floor, the new location below the main floor does not receive heating from the main interior space. As such, it was imperative that the area adjacent the new plumbing is both properly insulation, and a supplemental heat source is introduced. To achieve this, framing that follows the contour of the gradual slope between the posts along the main beam was introduced, to provide a surface on which five-eighths OSB could be fastened. The exterior sheathing would then be wrapped in TYVEK, as is the rest of the structure’s exterior before the decorative siding is installed.
To quarantine the immediate area nearest the hot water tank and pump, grey water and septic drains, a wall was created below the existing cottage frame adjacent the new addition. Along the inner sides of the exterior crawlspace framing as well as along the separating wall frame, Rockwool R14 insulation was inserted within every cavity of the two-by-four framing. Along the underside of the new addition, R22 Rockwool was placed within the joist cavities. A low wattage electric heater inside the crawlspace that is closely monitored with a topside temperature gauge, set to maintain the space at about 10C was installed by the owner. To maximize heat retention, the custom access door to the crawlspace was also fashioned with R14 Rockwool along the inner surface of the door. The entire space was fully insulated — only time would reveal its adequacy.
As the project was winding down that fall, the temperatures had begun to fall below freezing. Although the exterior finishing contractor was still wrapping up a few remaining siding, soffits and gutters tasks, my interior projects had since been completed. While driving away on the last day, my mind returned to that solitary crawlspace heater and wondered if that would be enough to ward off the coldest days of winter, but the following spring the owner reported it was not a concern. A great sense of relief warmed my heart— apparently it doesn’t take much to maintain a modest temperature in a well-insulated crawlspace.
BossEnterprise@outlook.com