photos by Marc LaBossiere / Winnipeg Free Press
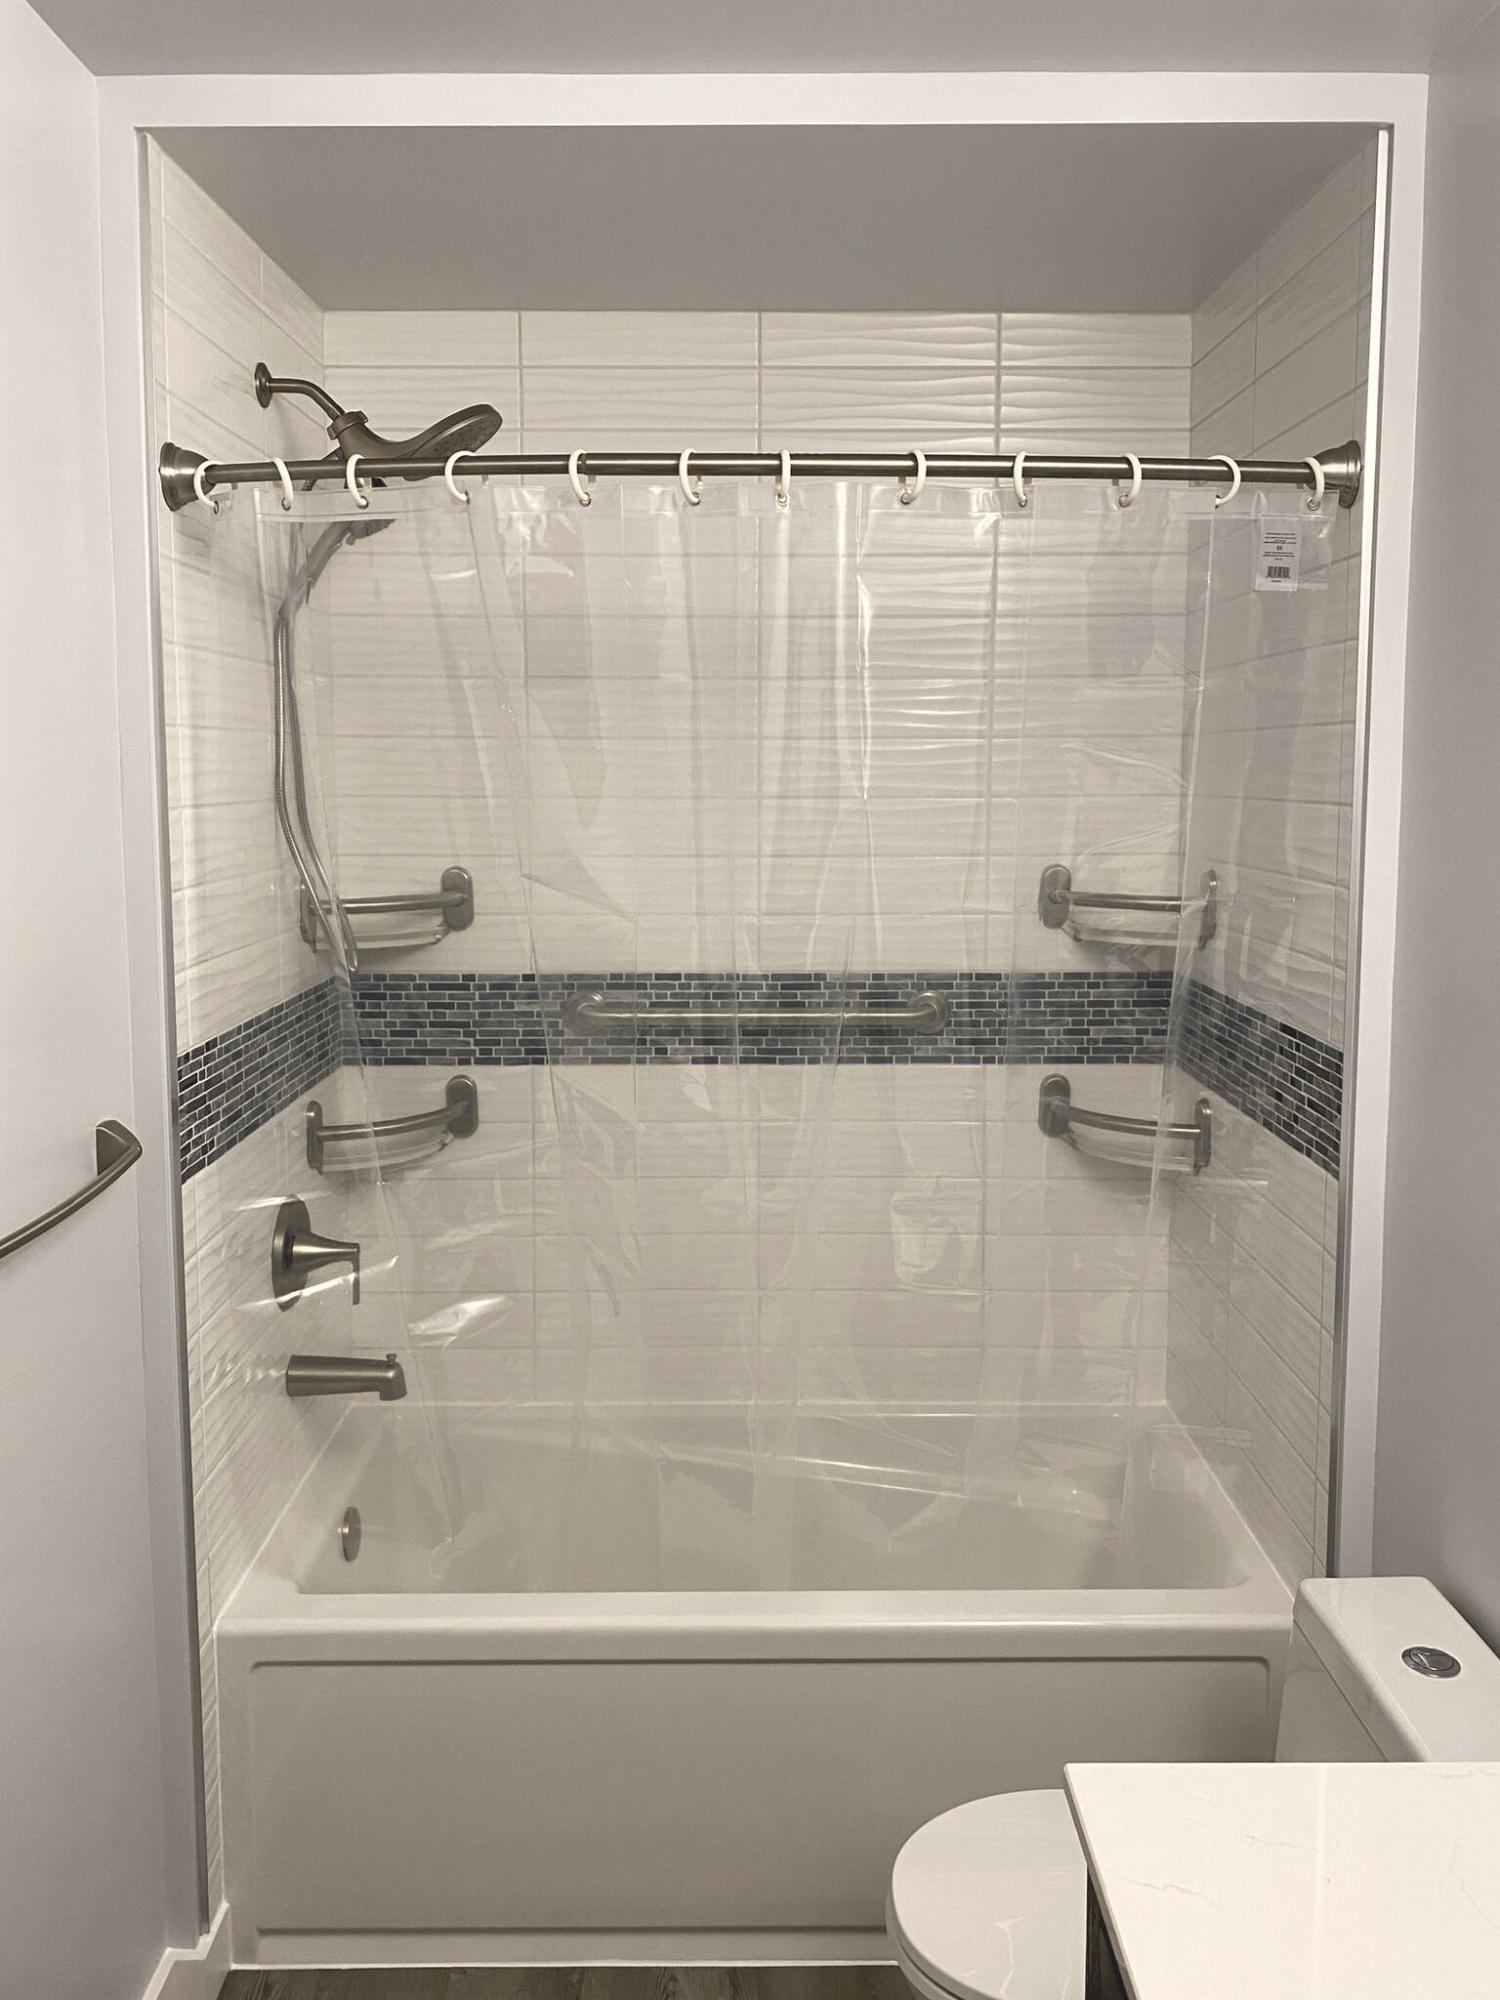
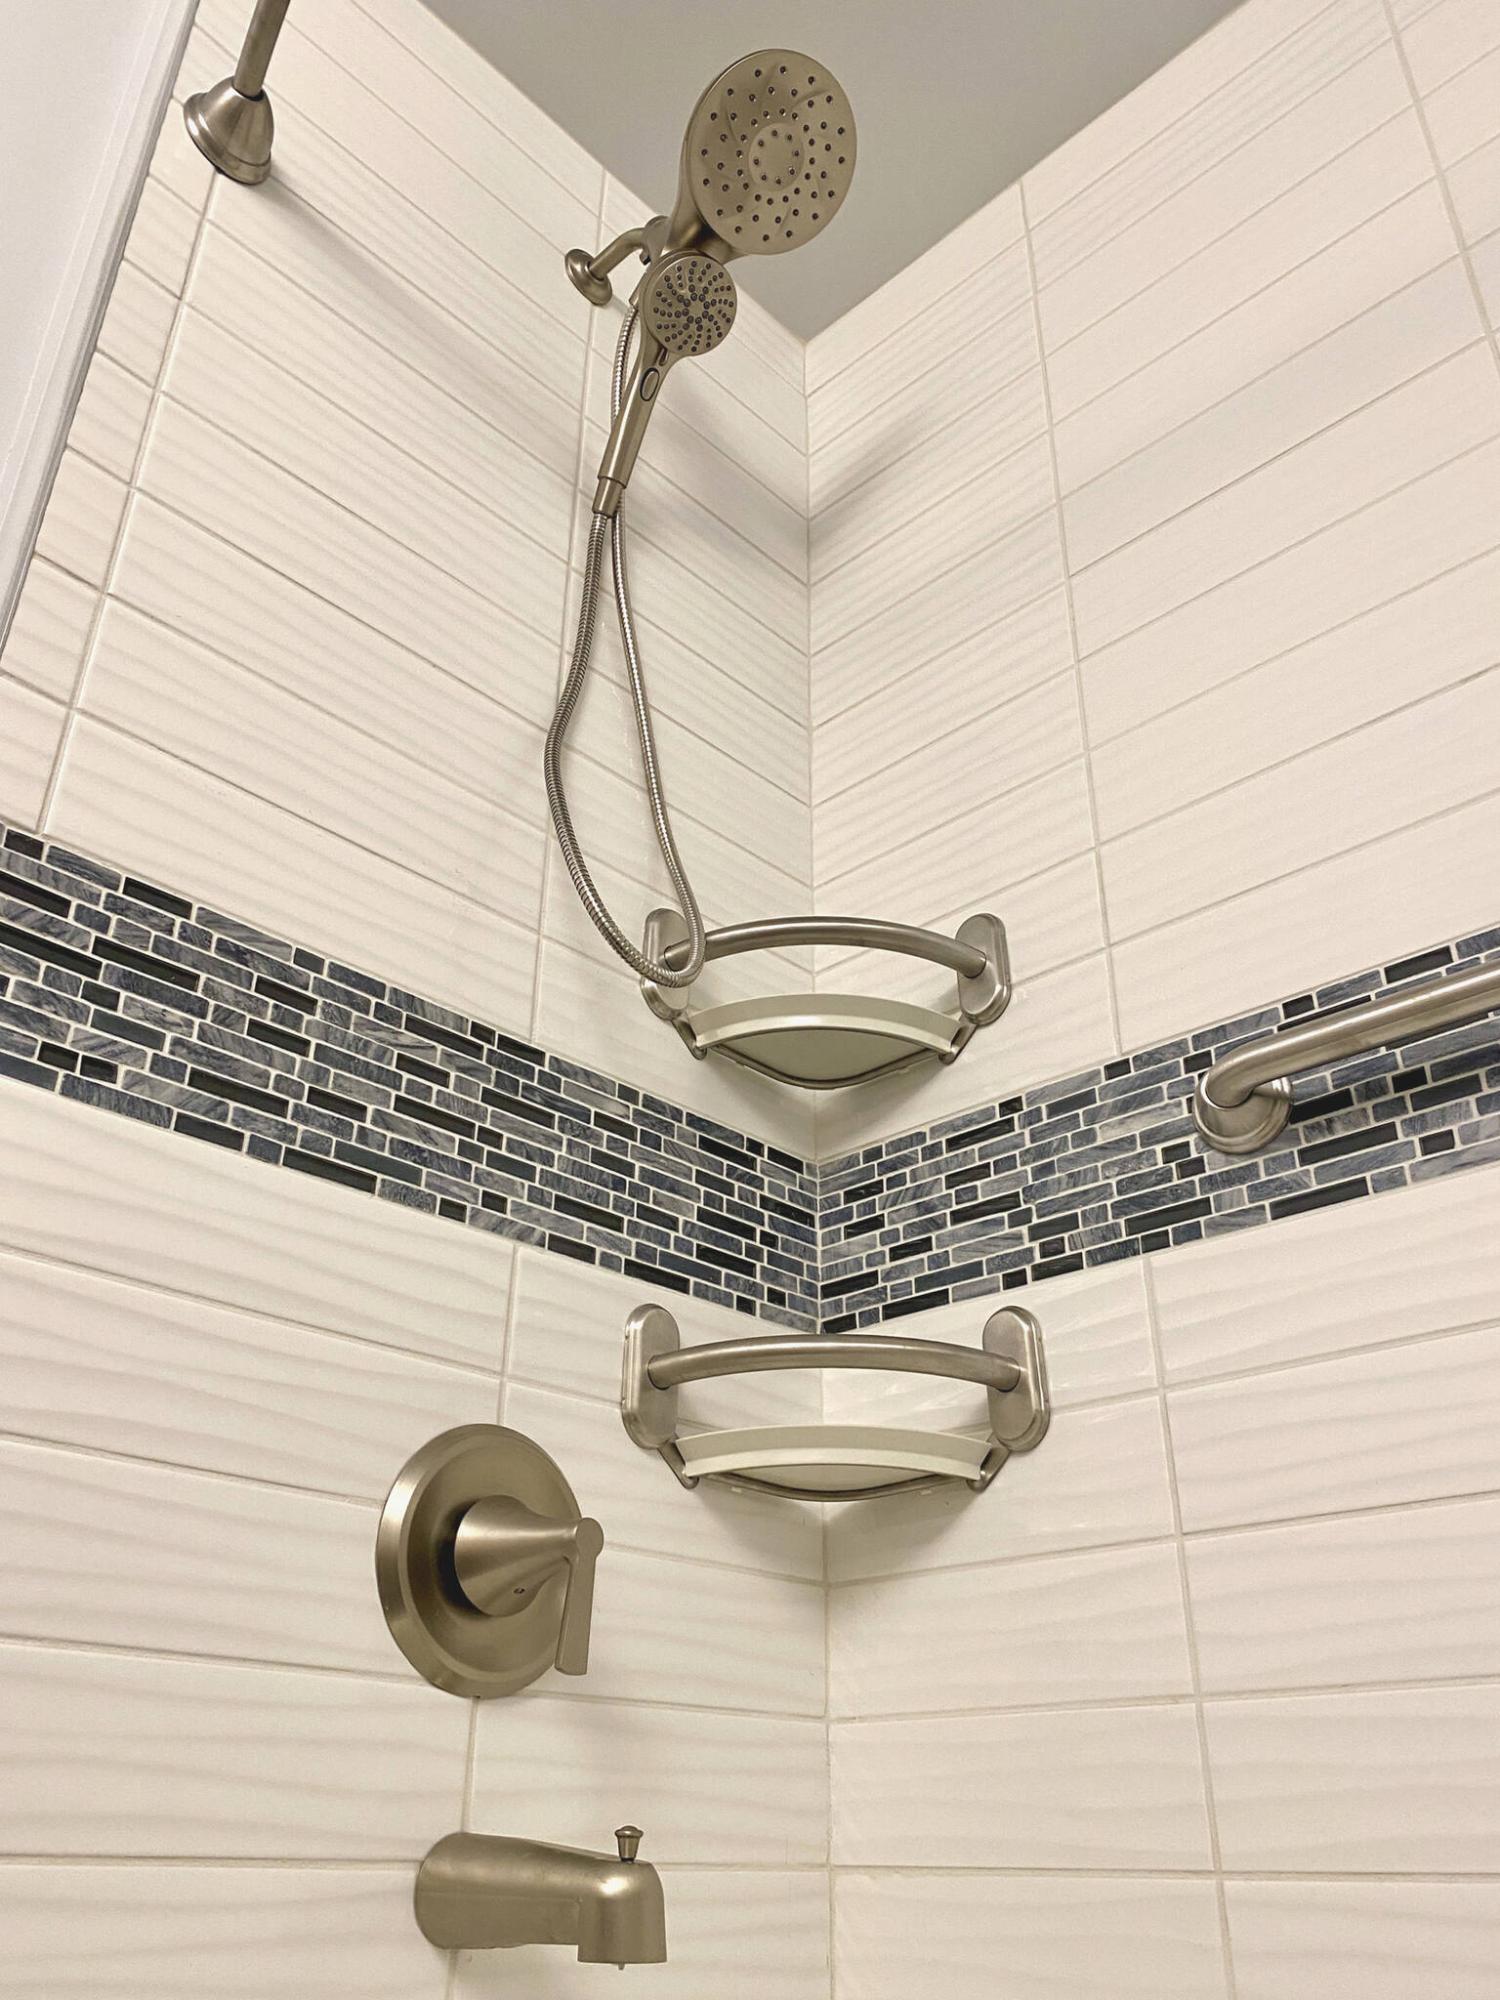
To meet the 60-inch gap requirement for a proper tub installation, the walls were built out and a slim bulkhead was created for an esthetically cohesive look creating a cove for the tub-shower area.
Marc LaBossiere / Winnipeg Free Press
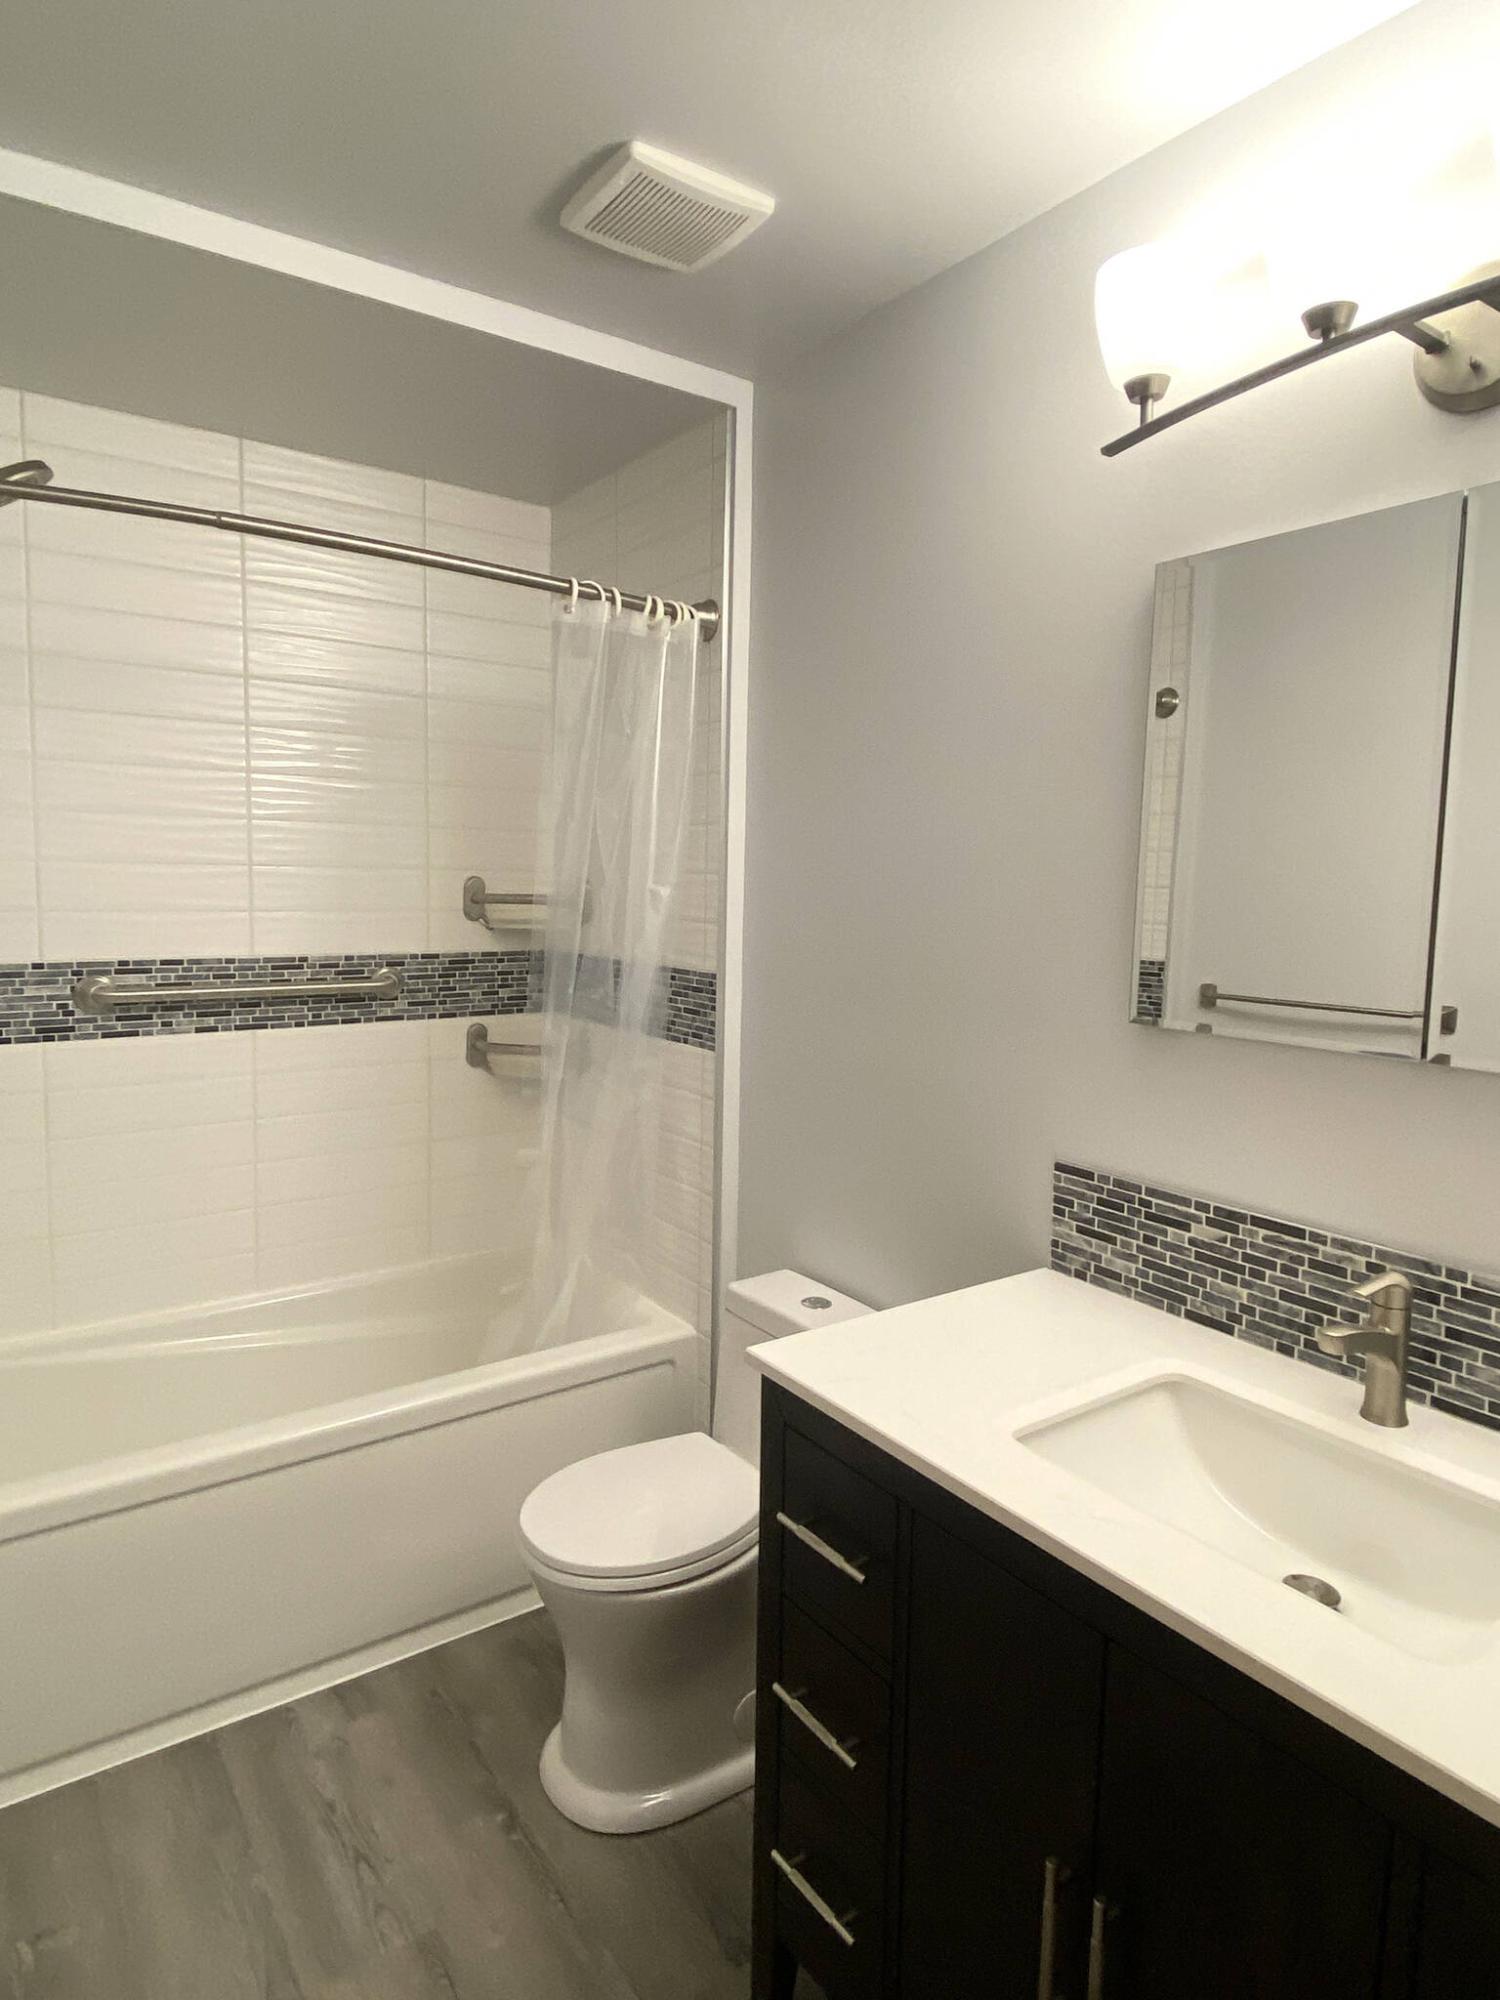
A dark vanity cabinet with white quartz countertop was chosen to contrast the light greys on the walls and floor.
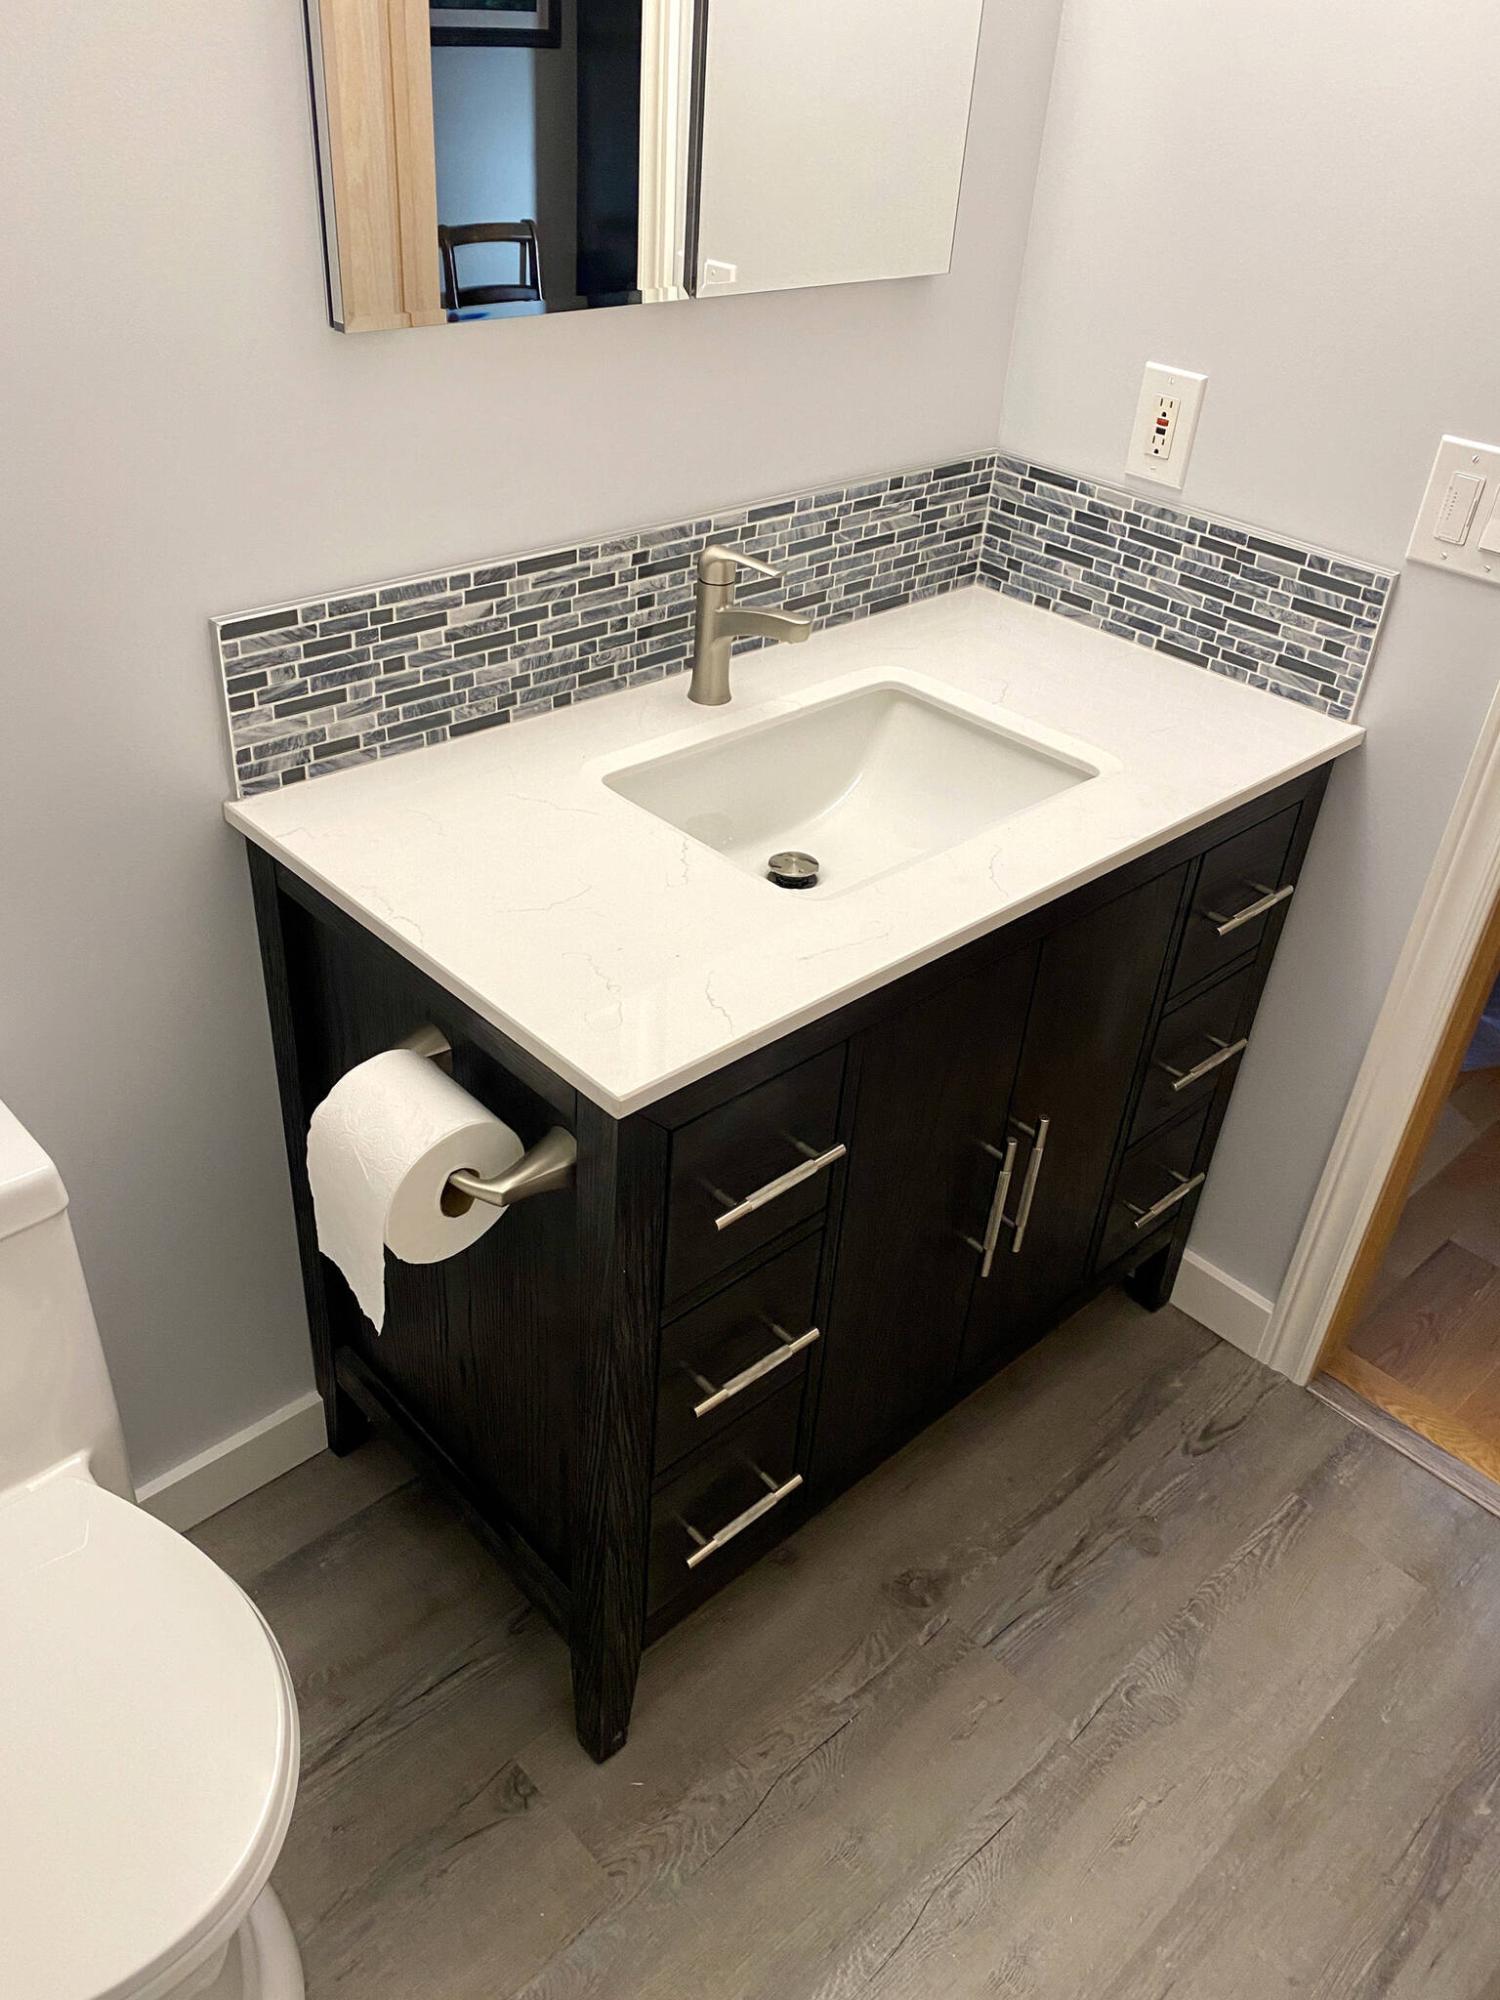
The mosaic tile used to ‘stripe’ the tub-shower walls was also installed as a backsplash along the two adjacent walls of the sink vanity.
Marc LaBossiere / Winnipeg Free Press
For consistency, brushed-nickel trim and functional amenities populate the entire remodelled bathroom space.
A recent bathroom remodel began as usual, and the typical precursors to the job were achieved; the subjective items chosen by the homeowners to eventually populate the space were delivered to the site, the start date was confirmed, and the demolition process initiated the work. Once the bathroom was gutted to the studs, however, an oddity that would require a slight change of plans had revealed itself.
Generally, a standard bathroom is framed at eight-by-five feet. Although the length fluctuates up or down on occasion, the 60-inch width accommodates a standard-sized tub. When a 60-inch tub is set into position within the studs, there is usually just enough gap to ensure the tub can be wiggled into position, resting snugly between the framed walls. With the tub in place, the aqua-board sheathing is then installed above the tub lip on the three sides against the wall studs, to ensure the tiling overlaps. This is a standard installation and what was expected at this job site.
Once the old one-piece fibreglass tub and shower stall was cut away and discarded, however, the actual bare-studs measurement from wall to wall was closer to 62-and-three-quarter inches — this was odd. The old one-piece stall was indeed a 60-inch unit. After contemplation, it made sense that the bathroom was framed larger than usual simply for installation purposes — those one-piece units must have been nearly impossible to position without extra wiggle room. No matter, this odd width presented a challenge — tubs aren’t fabricated to 62-and-three-quarter inches, and the one chosen by the homeowners accommodates a 60-inch gap. There was only one solution, and it required a few modifications to the initial design layout.
The area for tub and shower would require additional framing to meet the 60-inch gap requirement, which introduced esthetic ramifications. As such, a slim bulkhead was also framed above the tub and shower area to create somewhat of a cove. The rough plumbing for water feeds to the shower faucet and ABS tub trap were also shifted forward slightly to meet the tie-in locations, respectively. The tiling would occur as planned on the three inner walls to the underside of the newly introduced bulkhead, and continue to the floor along the front of the tub on both sides.
The near one-and-a-half-inch protrusions created by the extra framing on each side is complemented by a two-inch bulkhead height, which were later adorned with inset brushed-nickel tiling edge from floor to ceiling to cap the white-profile four-by-16-inch tile set in a horizontally stacked design, with a decorative contrasting mosaic stripe at the midway point. All amenities were also chosen in brushed-nickel for consistency throughout the bathroom.
The only other challenge was the baseboard configuration along the wall protrusion once the vinyl-plank flooring was installed. To ensure a cohesive look, the tiling (and wall edge) terminated slightly before the floor to allow the three-and-a-half-inch white, squared PVC baseboard to tuck in below the tiling, and meet the tub wall. The girth of the baseboard provides a surface upon which the thinner tile can rest, without creating any weirdness.
With the hurdles of the extra framing surmounted, the vanity was set into place with water and drain tied-in and backsplash installed, below the previously positioned inset medicine cabinet and new vanity light fixture. Once the one-piece toilet was mounted, the entire space received white and clear caulks and silicones where required.
Although the width dimensions of the space were not as expected, the “fix” allowed the project to continue without much delay. When implementing modifications such as this framing build-out, it is always vital to consider the esthetic ramifications. In this case, equidistant protrusions on each wall, along with the ceiling bulkhead made the most sense — this may not always be the case. Functional solutions may have several esthetic possibilities, and it’s simply a matter of choosing the one that best suits the desired look, despite the necessary alterations from the original design, no matter how slight.
RenoBoss.Inc@outlook.com