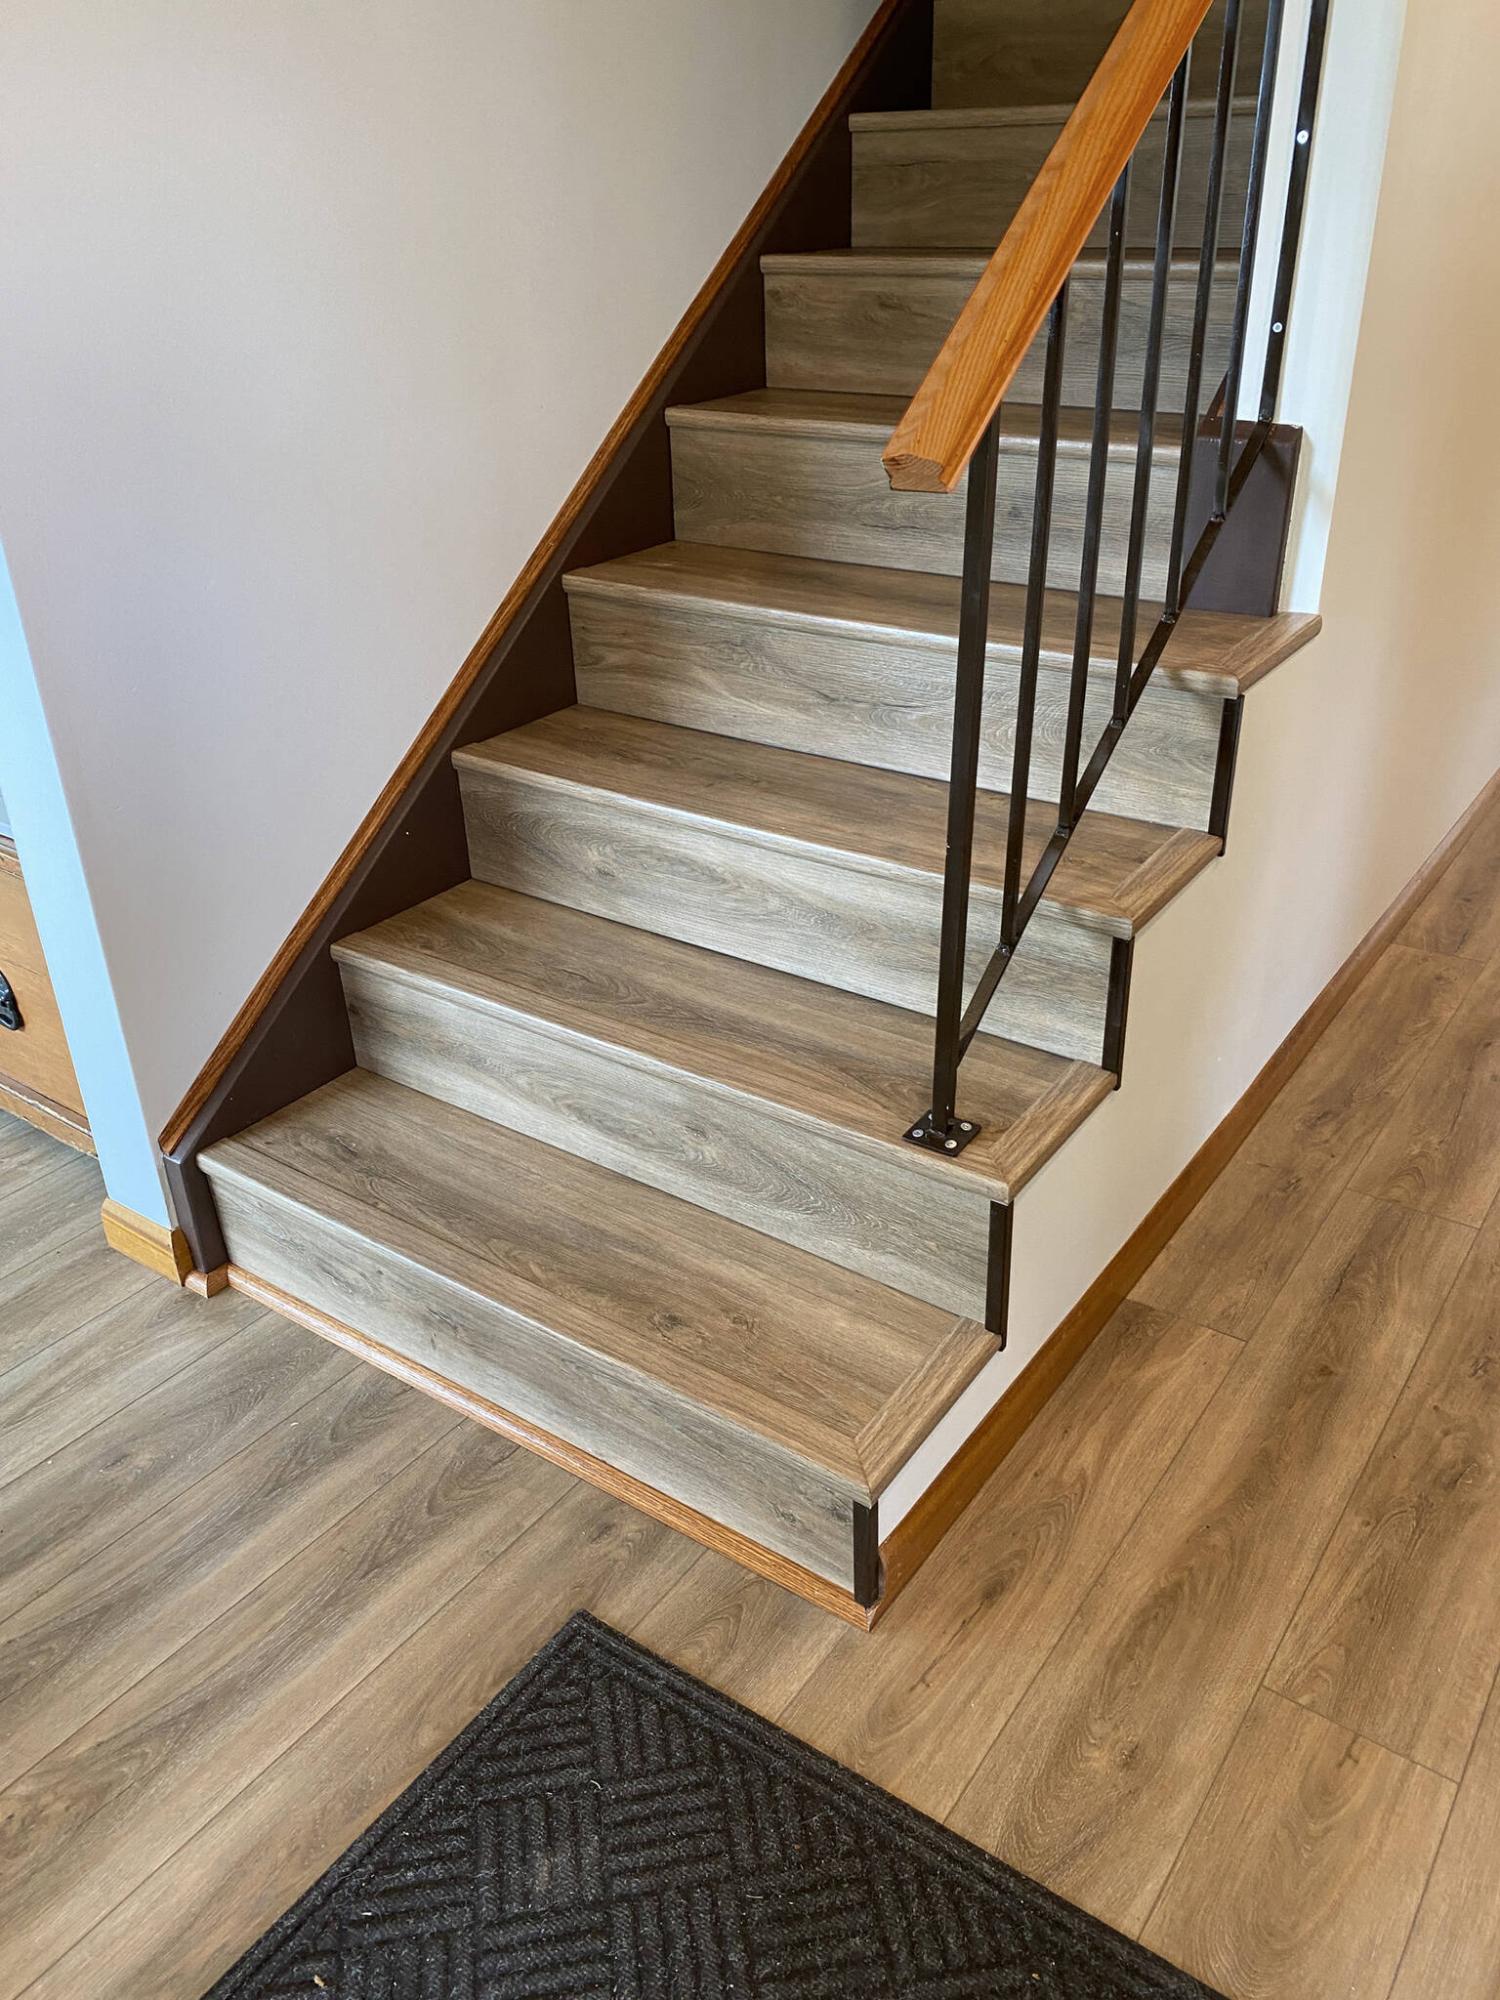
The stained oak handrail replaces old moulded hard plastic atop the metal railing, removed using a grinder blade.
Photos by Marc LaBossiere / Winnipeg Free Press
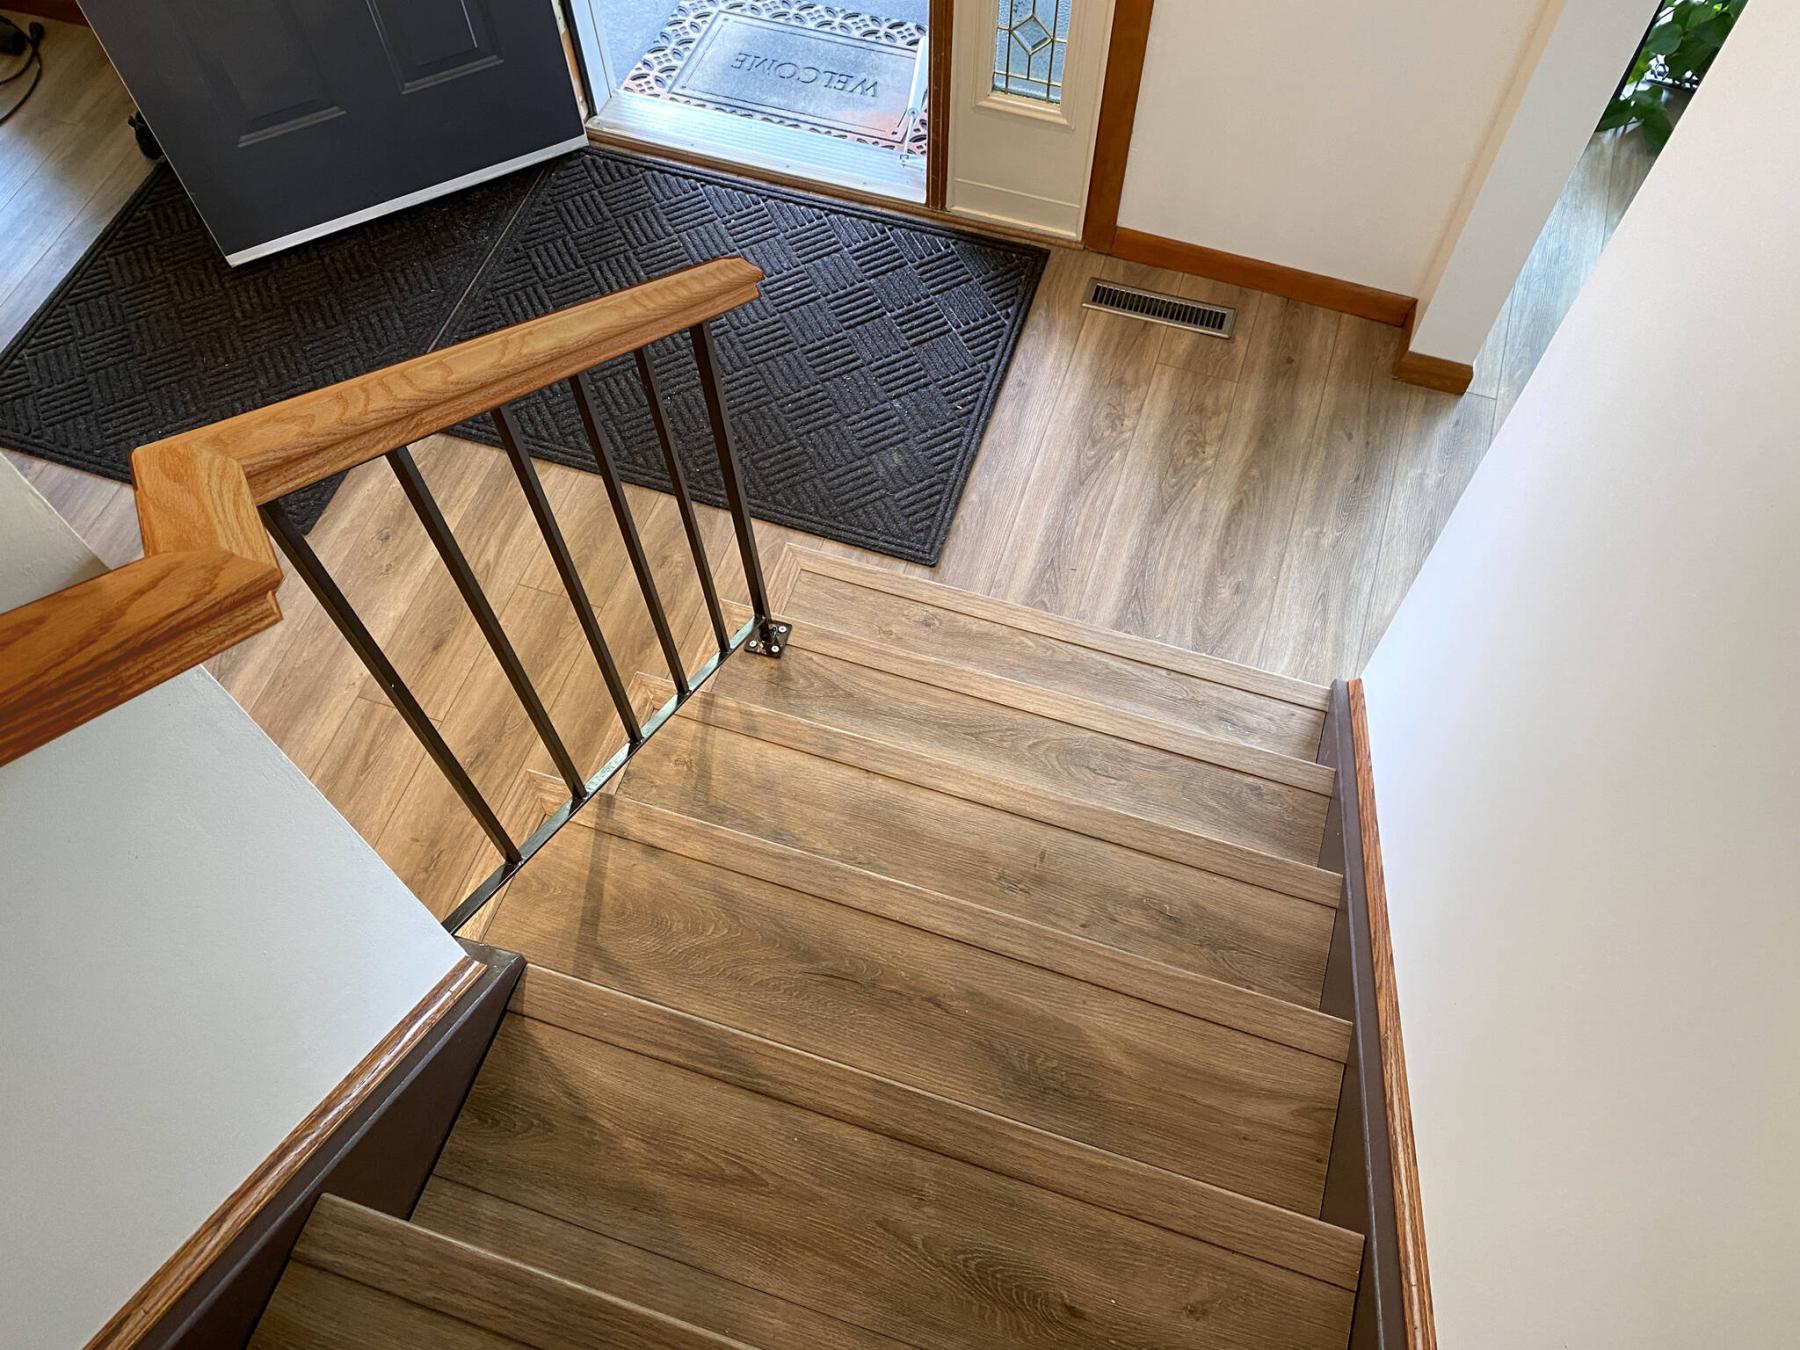
The vinyl plank was used to sheathe the rise and run of each stair, with a matching nosing mounted along every top-front edge.
Sometimes the installation of new flooring “throughout the main floor” involves a few caveats. In this instance, the introduction of a vinyl plank with underpad would continue up the stairs to the second floor, as well as the second-floor hallway that leads to three bedrooms and the upstairs bathroom. Although preparations had begun to accommodate the stairway, a few important details to maintain consistency had been overlooked.
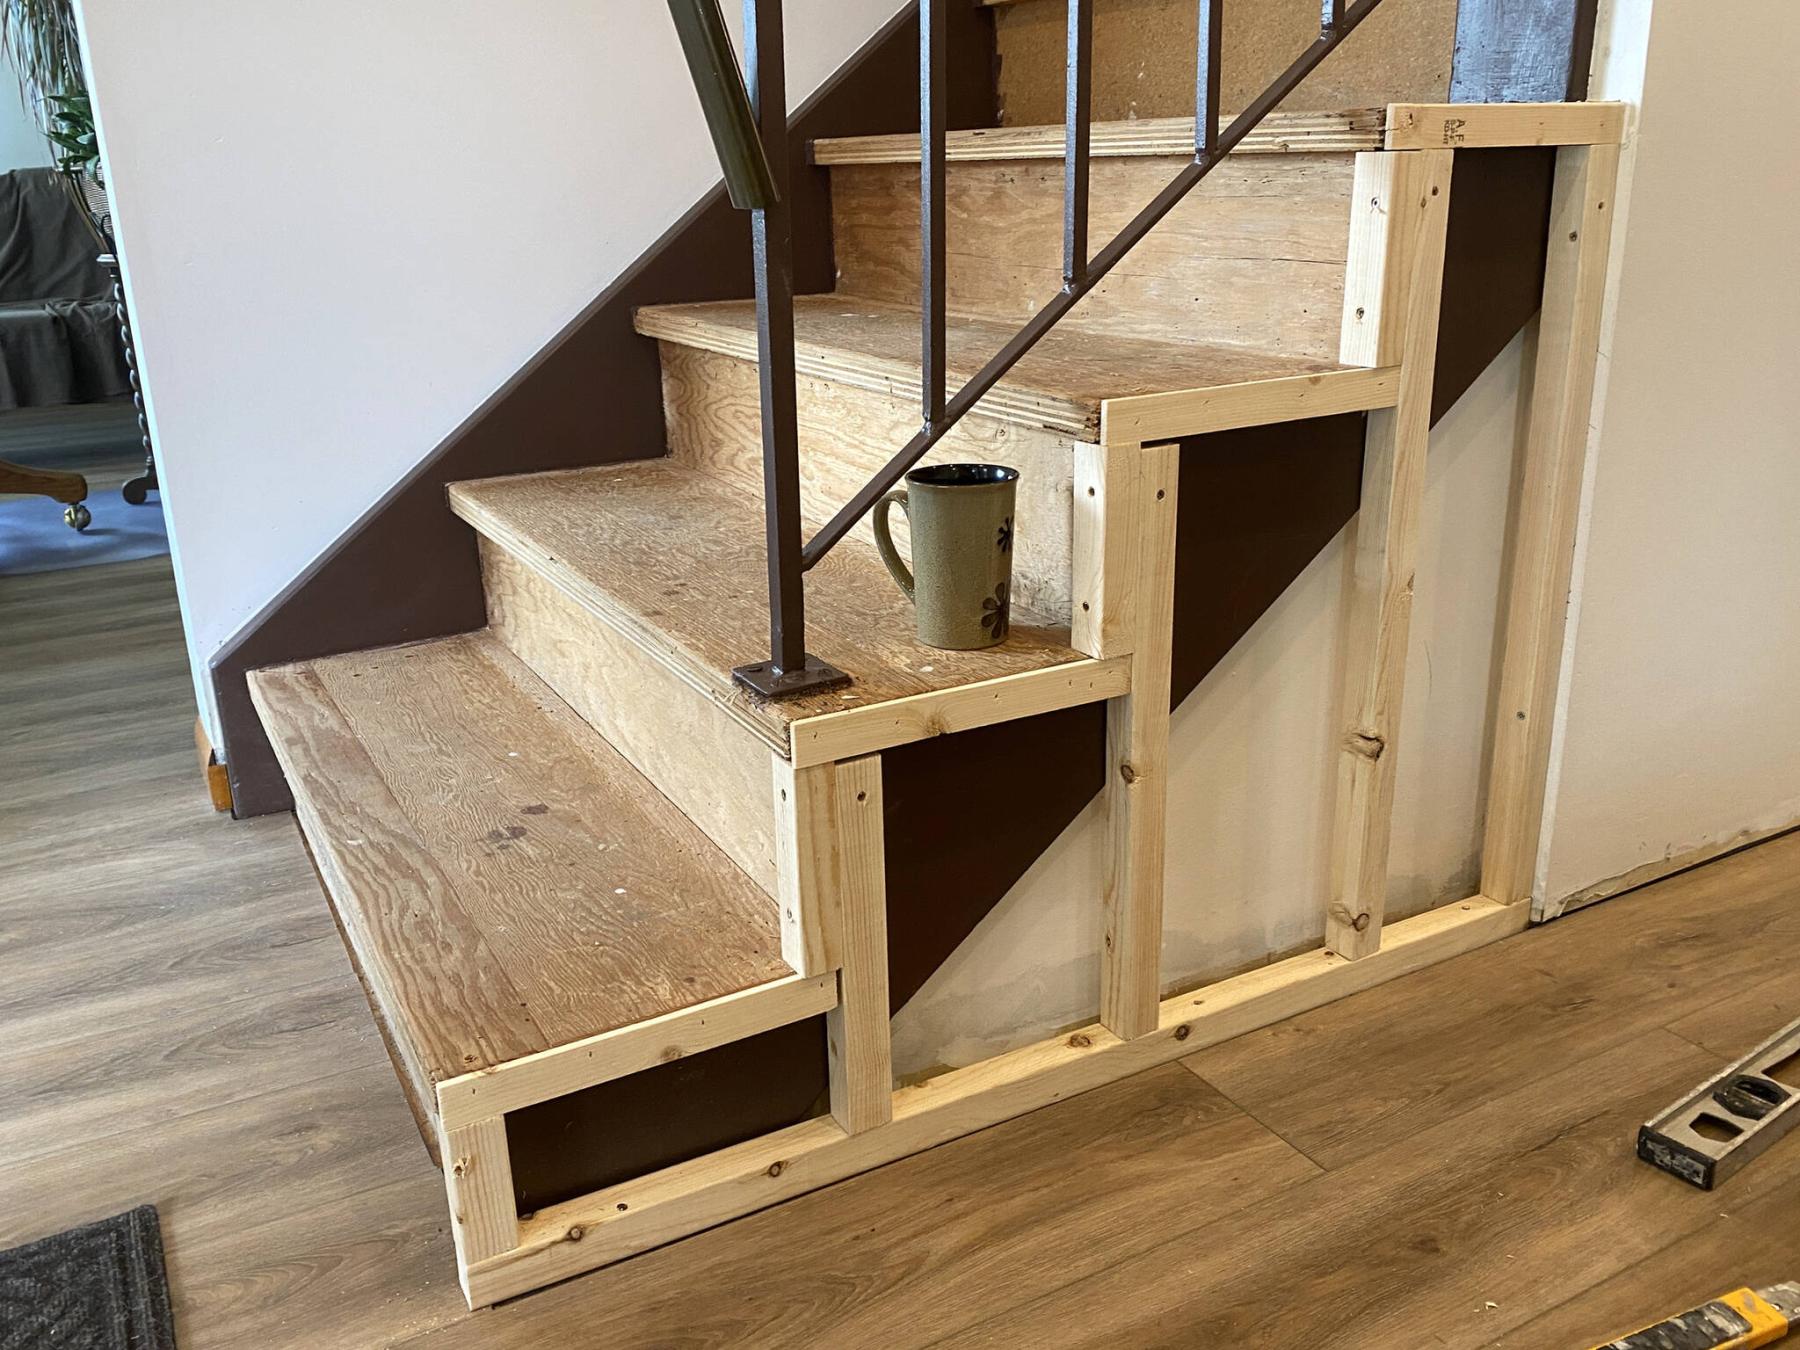
The stairs themselves had been framed using one-and-a-half inch plywood of some sort, which made it difficult to simply introduce laminate along the rise with the matching nosing atop the run – the nosing was not tall enough to conceal the height of the framed stair nose. As such, the rise would be adjusted by building out the bottom of every rise, so that the vinyl could be affixed along the entire rise. The PVC nosing could then freely create a new slightly less high protrusion atop every stair.
Before that was tackled, however, there was an odd feature at the base of the stairs that affected the bottom four stairs — these four were open along the railing side of the stairwell, and included a three inch inset that revealed a “decorative” stringer. This made the entire rise and run of vinyl, as well as the nosing very difficult to achieve cleanly. As such, the bottom four stairs were built out to meet the existing wall, using 2x2s set back half an inch to accommodate drywall. Once the drywall was in place, taped and mudded, the area was painted to match the adjacent existing wall. With this modification in place, the introduction of vinyl along the stairs could begin.
The rises were framed as described earlier, so that the entire front face of the exiting stairs framing could be covered with a vertically set vinyl plank. The tops (or run) of every stair were then also sheathed with vinyl plank, one and a half widths to cover each stair top. Once the rise and run was completed, the PVC nosing was mounted along the front edge using a high-bond construction adhesive, temporarily taped in position to prevent any unnecessary shifting until the adhesive properly set.
Before these steps (excuse the pun) were being completed, the homeowner had pre-painted the decorative stringers along the base of the stairwell a dark brown. While discussing the existing handrail (which need to be dismounted temporarily during the stairs upgrade), it was suggested that the railing in its current state may not cater well to the upgrade — it is a metal railing with a hard plastic molded cap. After a few discussions, we decided to attempt an railing revitalization that would better suit the stairwell upgrade. This enhancement would entail the removal of the hard plastic cap (using a grinder), and spray-painting the metal railing a dark brown to match the decorative stringers. The homeowner tackled this step while the stairs were being “vinyl”-ized.
Once the railing was remounted, the bare metal cap would then be upgraded with a solid oak handrail, affixed to the metal using screws from underneath. Every section of oak was carefully cut and mitered to meet the lengths and angles of the existing railing. Once in place, the oak was then carefully sanded. The oak was then stained by the homeowner to match the various trim elements that were used to finish the decorative aspects of the revamped stairs, including the baseboards along the bottom at main wall, corner-rounds long the front lower edge, and inside corner-round along the tops of the decorative stringers to hide any unsightly gaps. This stairway upgrade presented numerous challenges that culminated into several custom approaches, resulting in a finished product the homeowners truly love. In some ways it looks as though its always been this way, primarily because it blends so well with the flooring upgrade throughout the entire main floor.
The non-traditional approach is often overlooked, and can be easily dismissed — it can be extremely time-consuming to perpetually ponder the best approach beyond the obvious, let alone attempt to tackle it. Not having entertained an approach beyond the expected in this instance, would have undermined the effectiveness of the main floor upgrade. Fortunately, several unconventional steps were taken (there’s that pun again) and the results are undeniable — the stairs and railing enhance the cohesiveness portrayed by the other elements throughout the main floor. This is a stairway to a main floor haven, and the homeowners couldn’t be happier.
RenoBoss.Inc@outlook.com