Photos by Marc LaBossiere / Winnipeg Free Press
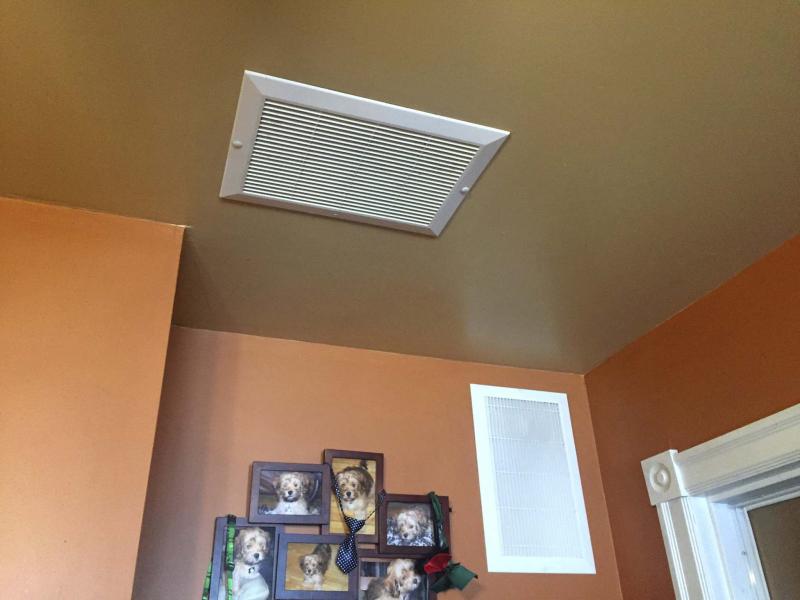
A foyer ceiling vent allows hot air to rise into cavity surrounding my tub's drain pipe while an additional vent on the "faux" wall was added later to protect the conduit of services within it.
Photos by Marc LaBossiere / Winnipeg Free Press
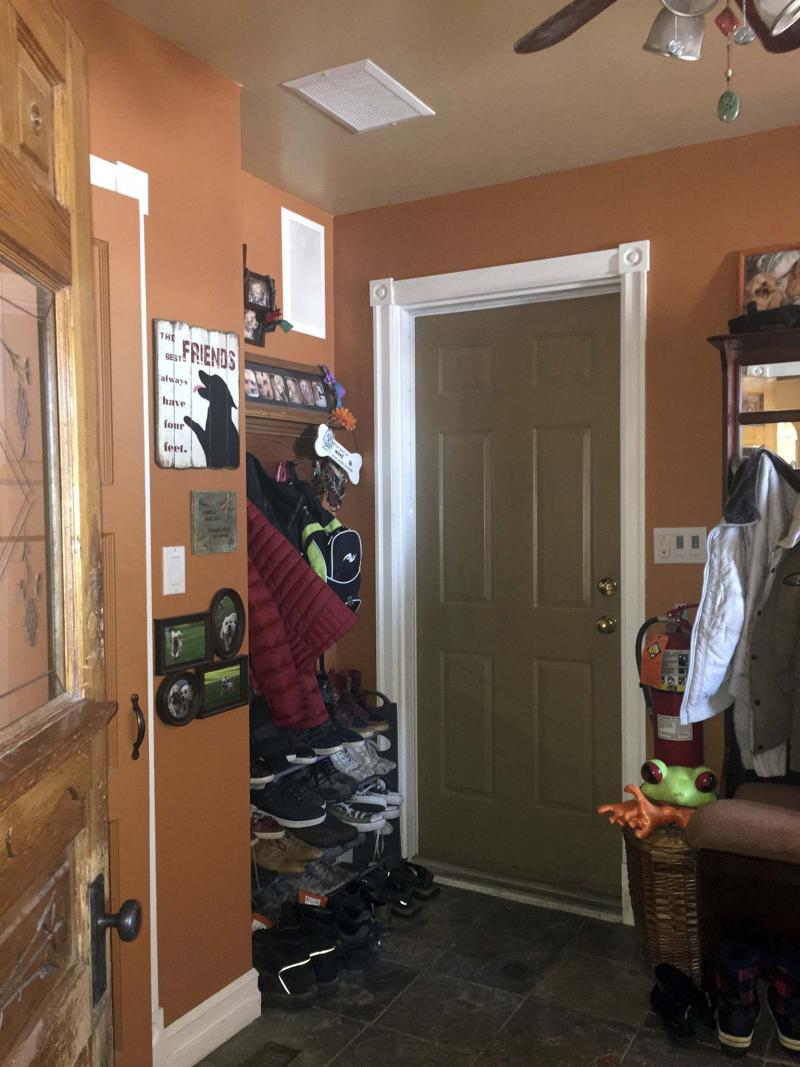
This foyer sits directly below the jacuzzi tub of the bathroom expansion. The ceiling vent allows hot air to rise into the cavity surrounding the tub's drain pipe.
When the temperatures dip below -25 C and the winds begin to howl, installation deficiencies within the exterior walls of your house can quickly reveal themselves in nasty and unpleasant ways: a soft yet frigid breeze blowing from a light switch or window casing, a room that never reaches a tolerable level of warmth and floors so cold it’s impossible to walk barefoot.
Although Manitobans have all learned to accept these hostilities of winter as commonplace, the most devastating and potentially costly may be when your pipes freeze because of the cold conditions. But fear not — there are often simple solutions.
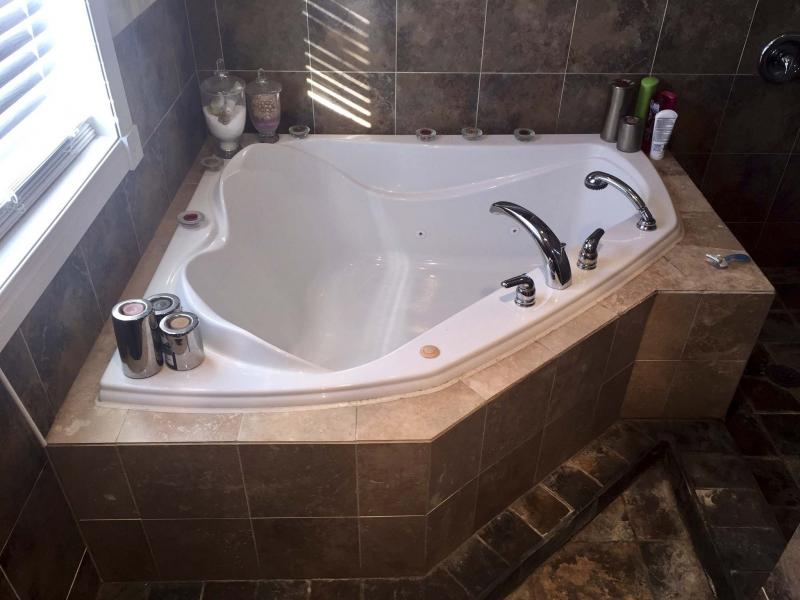
During the second-floor recording studio build above my triple-attached garage, much of my time was spent designing and preparing for the bathroom expansion, which was the most complex aspect of the project.
New plumbing was required and numerous additional electrical circuits would be introduced to the both the bathroom expansion and the recording studio space that collectively represent the largest expansion to my house to date.
To run the required services from the basement to the newly introduced portion of the second floor, the crawlspace below my foyer — which separates my main floor from my garages — serves as a gateway to all three.
Rather than breaching the adjacent external wall to run the services up into the second floor, I framed a "faux" wall, roughly 16 inches deep, between the foyer closet and the door to the garages, creating a cavity to serve as a conduit for the services to run up from the basement level into the second-floor addition.
The entire project took more than a year to complete. Although there are so many aspects of the second-floor addition to discuss, it is the winter months that remind me of one potentially disastrous obstacle that arose once the bathroom expansion was completed.
One cold and windy blizzard-like evening, during the first winter following the completion of the bathroom expansion, the new tub drain pipe froze solid.
Not only does a large jacuzzi tub provide for a relaxing soak after a long day, it also serves as the perfect dog-washing station for my favorite little buddies. On this particular evening, the outdoor temperature fell to -30 C, and the wind was howling.
As the dogs were being toweled down and dried off, something strange caught my eye — although the drain plug was open, the water level was not moving.
How could this be? The new shower stall drain seemed to be working fine. What could be the issue?
By cutting a small opening in the foyer ceiling below the jacuzzi tub drain, the source of the issue was exposed — it felt as though an arctic gale-force wind was blowing through the floor joists.
Clearly, something had been missed during the installation of an insulation and vapour barrier adjoining old and new construction.
The big question was, how could this issue be resolved quickly and easily, now that the project had already been completed?
Before taking drastic steps, it was prudent to exhaust any potential solutions.
With bucket in hand and thinking cap on tightly, the tub water was removed manually and dumped into the shower stall drain, until the water level was less than an inch deep. If it truly was a frozen drain pipe, maybe it would be possible to encourage flow by pouring into the drain a liquid that was immune to freezing at these sub-zero temperatures.
Luckily, just such a liquid exists: winter windshield wiper fluid, good to -35 degrees C. I emptied three jugs into the tub. By next morning, the drain had cleared and the tub was empty. This simple solution remedied the immediate problem without any intrusion to the finished bathroom.
However, avoiding this in future was the bigger issue that would prove to be slightly more challenging.
Remember the hole that was cut into the foyer ceiling? As it was directly below the tub drain, it also provided a very convenient access to introduce a permanent solution to the freezing drain pipe issue. Here’s how this was achieved.
A few batts of insulation remained upon completion of the second-level build. Pieces of insulation were cut to appropriate sizes and placed tightly into the joist cavity surrounding the tub drain pipe, leaving roughly a 12-inch space all around the drain pipe, between the pipe and all insulation segments.
The vapour barrier was then secured into place against the insulation, on either side of the drain. This noticeably lessened the cold air-flow, which without a doubt contributed to the freezing of the water within the drain pipe as it drained.
The hole in the foyer ceiling, which initially served as an access point to investigate the problem, would remain as a vent for the tub drain pipe.
As the hot air from the foyer rises into the cavity created, it gathers and remains around the pipe, thereby protecting it from any potential cold air and wind that finds a way into the joists.
A simple vent cover hides the hole, and voilà — problem solved!
Over a decade now and never again has the drain plugged up due to freezing, despite some extremely chilly winter nights over the years.
Problems that seem big, often have the simplest solutions if you take the time to work them out. So don’t panic — there’s always a way.
If you are experiencing pipe freeze-up, ensure your pipes are not sealed within the vapour barrier and insulation of an exterior wall.
And if you can, expose your pipes to room temperature. It may not be a permanent solution for you, but at least it’ll get you through the winter.
Stay warm, there’s only a few more months to go.
BossEnterprise@outlook.com