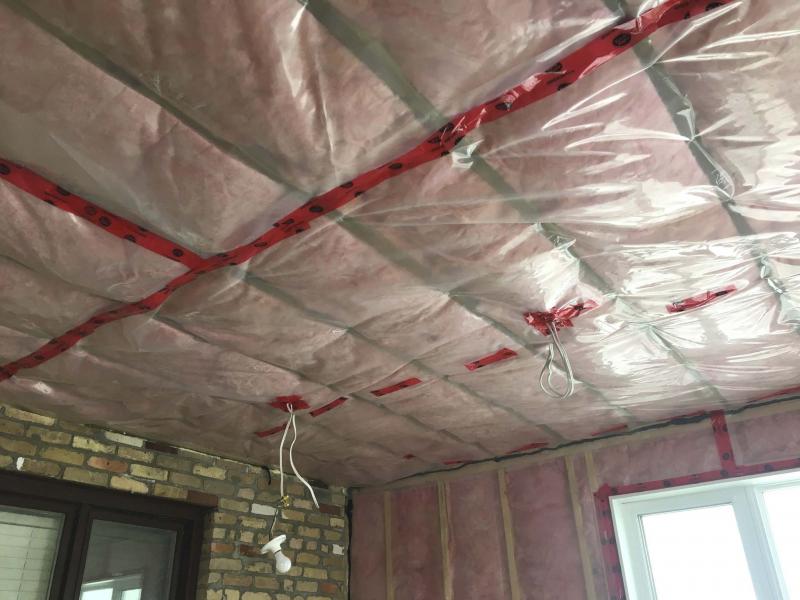
Marc LaBossiere / Winnipeg Free Press
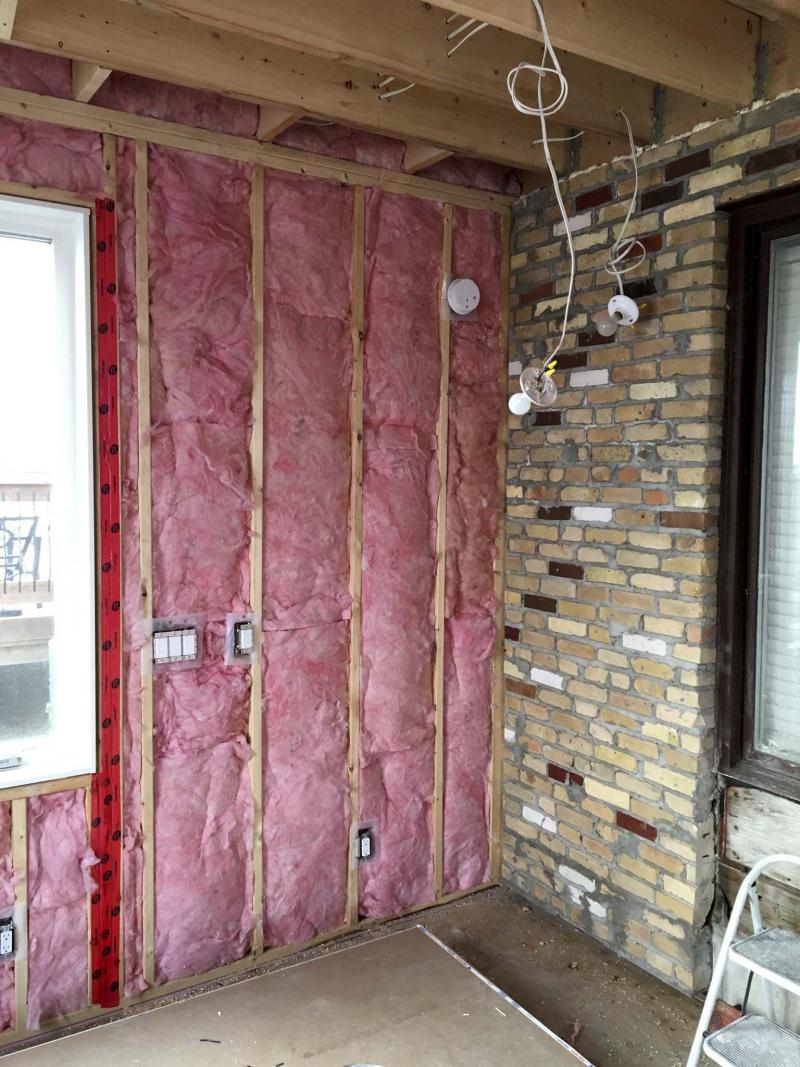
A vapour barrier holds insulation in place and is another line of defence against moisture.
Marc LaBossiere / Winnipeg Free Press
R-20 fibreglass batt insulation is installed within the exterior wall studs.
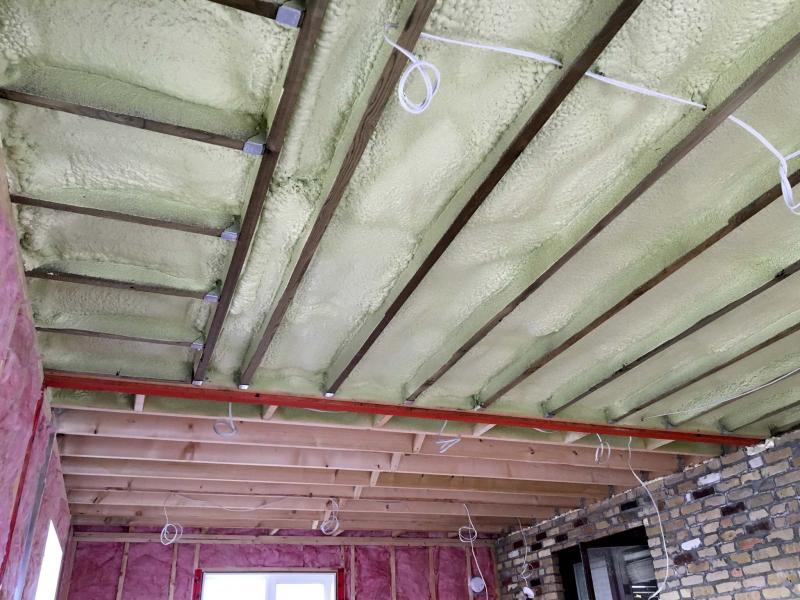
Marc LaBossiere / Winnipeg Free Press
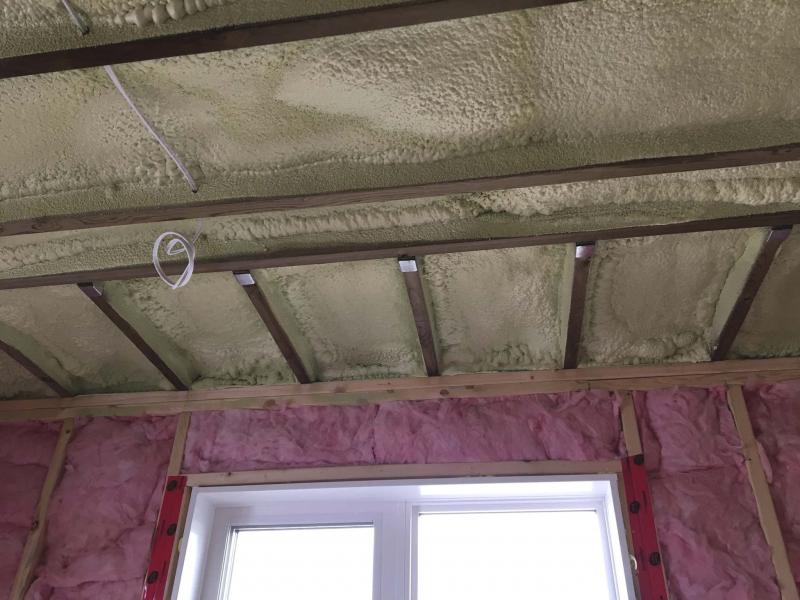
Spray foam (mint green colour) applied to a depth of six inches in the ceiling below balcony deck to R-36, and R-20 fiberglass batt insulation installed within the exterior wall studs.
Marc LaBossiere / Winnipeg Free Press
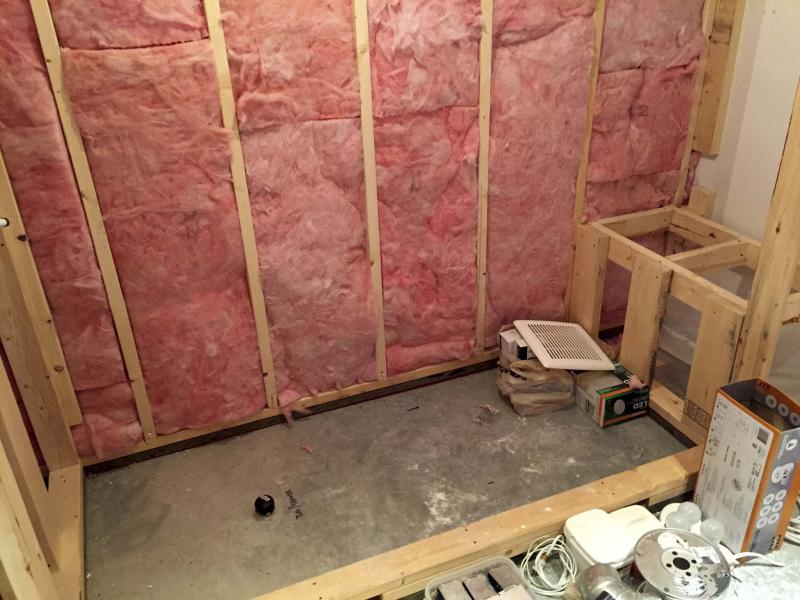
R-12 fiberglass batt insulation installed within the interior wall studs, between the furnace room and the shower stall at Don Kennedy’s lower level renovation to dampen noise from the furnace room.
Just like a Thermos mug, or a cooler, the insulation in your house regulates the temperature within by warding off the cold and heat on the outside. With proper insulation, your home’s ventilation system isn’t forced to work harder than it must to maintain a desired and comfortable temperature. That is precisely why it is ever so important to ensure not only the proper insulation is used, but that it is installed properly, with careful attention to the slightest potential for gaps and voids within your framework, allowing outside temperatures to invade the space within.
You’ve likely heard of the ‘R-value’ — a rating for how well insulation performs. Well, insulation requirements have evolved through the years, which means what may have been acceptable a few years ago, may no longer suffice. A short while ago, I had introduced a double patio-door on the rear side of a house that was built in 1949 — despite the plethora of wood chips used as insulation in the ceiling, this house had been built with NO exterior wall insulation, just empty cavities. It was no wonder my client complained of cold rooms in the winter!
Regarding my immediate reno scenarios, I was awakened to the energy efficiency evolution while preparing the drawings for my recent two-storey, south-side addition. I had expected that the two-by-six framing for the exterior walls, filled with R-20 two-by-six fiberglass insulation was more than enough to accommodate current insulation requirements, as this had been the protocol used during the studio addition built above my triple-attached garage, back in 2005. Despite having designed the recent addition in similar fashion to the studio build, the R-value no longer met current energy efficiency requirement, which had been increased to R-24. Therefore, to sufficiently raise the R-value for the exterior walls of the recent build, a one-inch rigid insulation, installed atop the OSB on the exterior of the addition was also required.
The R-value for an attic with a crawl space must be a minimum of 50. This is best achieved by using blown insulation, to a depth which meets the requirement. For cathedral ceilings, however, the mandatory minimum value drops to R-28. Because the second-storey ceiling of my latest addition is a rafter ceiling with no crawl space, and half of the ceiling on the main floor of the addition is below a balcony deck directly exposed to the rigors of the outdoor temperatures, the obvious goal was to meet or surpass R-28. Batts of standard fiberglass insulation was not optimal for this application. It was necessary to find an alternative — spray foam insulation.
Following an intensive search, it was Mike DeVlieger at Warm Home Insulation that explained the benefits of spray foam, and persuaded me to utilize this option. After discussing my specific requirements for both floors, we determined that six inches of spray foam would adequately insulate both the main floor partial ceiling below the balcony deck, as well as the rafter ceiling of the second-floor space. For every inch of spray foam applied, the R-value increases by six. With six inches of foam, both ceilings would surpass the R-28 requirement with a value of R-36. DeVlieger explained another benefit — spray foam applied to a depth of four inches or greater also acts as a vapour barrier (which I get to later in the column). The Warm Home crew was scheduled to come out shortly after I had finished sheeting the entire exterior of the addition with OSB, and the floors with three-quarter inch plywood. Before they began the spraying process, they carefully taped off all areas not receiving spray foam, to protect from over-spray. They then diligently filled every ceiling joist cavity on both floors with the product. Upon completion, areas where the foam exceeded the joist depth were trimmed, and the taping was removed. All in all, the process took less then three hours to complete, from start to finish. What a great product!
However, it should be noted that breaching this product once it has cured is not advisable — if any electrical or audio/visual wiring etc is necessary within the cavities to be spray foamed, this should be completed BEFORE the spray foam is applied. And keep in mind, any wires encased in foam will no longer be easily accessible, should modifications be required at a later date. I elected to run all my wiring BELOW the foam, for ease of installation and later access.
With the ceilings sprayed, the cavities of the exterior walls were insulated with R-20 batts, inserted within every 16-inch wall joist cavity, and carefully trimmed when needed to ensure a snug fit. The batts were also cut to accommodate electrical boxes and wiring. Because the six-inches of spray foam in the ceilings left two inches of void on the bottom side of the two-by-ten joists and rafters of each floor respectively, I decided to fill these gaps with batt insulation – and why not? A better R-value provides better protection from the outside variations in temperature. With the walls insulated, it was time to install vapour barrier – a durable plastic which prevents moisture from penetrating the interior space. During the installation of the electrical boxes, each box was mounted to a stud, within a box vapour barrier. The main vapour barrier wrap was stapled into place along the interior of the exterior walls, from the top to bottom of the stud wall. At each electrical box location, the plastic was sliced open and the edges of the box vapour barrier are pulled through. Vapour barrier was also installed to my ceilings, even though the spray foam had taken on the dual role of insulating and vapour barrier. It really was the only way to hold the batt insulation in place, until the drywall stage… and it also serves as a second layer of defense against moisture. The final steps were to seal all seams with Tuck Tape, and adhere the bottom and top edges of the wall vapour to the bottom and top of the framing using acoustical sealant.
It is amazing how much energy can be lost or wasted with improper or insufficient insulation. Insulation is only as viable as its weakest point — small gaps, compressed areas, holes in vapour barrier…can all lead to higher energy bills. The goal should be simple: maintain a comfortable environment, by using the least amount of energy. Your house should be a…Thermos. If your house was built before 1999, MB Hydro offers the Power Smart Home Insulation Program. If you do intend to upgrade the insulation in certain areas of your home, you may qualify for their rebate program — it never hurts to inquire. Any improvement to insulation deficiencies will save you money in the long run.
BossEnterprise@outlook.com