Marc Labossiere / Winnipeg Free Press
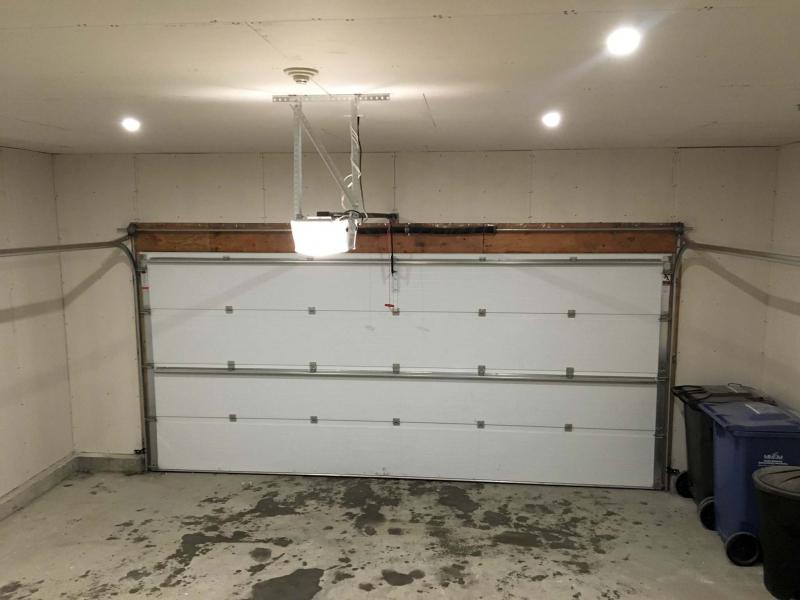
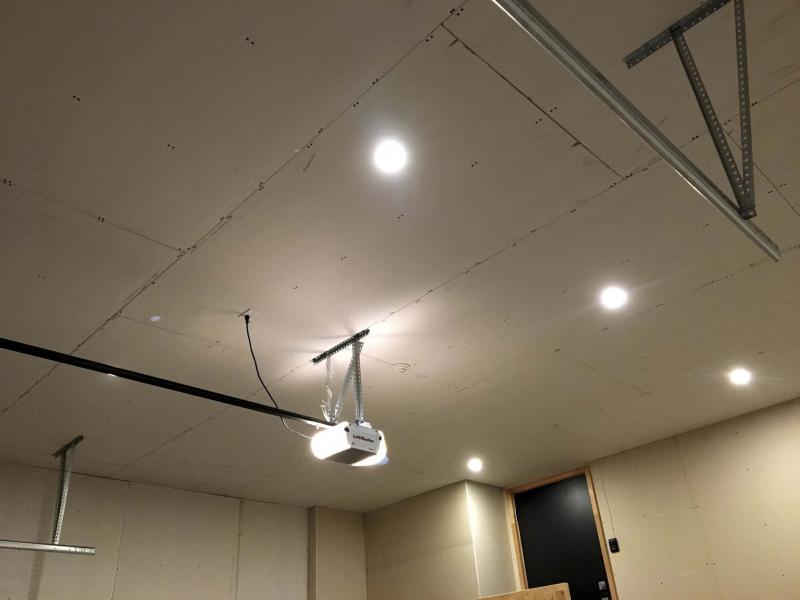
Six new LED pot lights illuminated what was once a dim space
Marc LaBossiere / Winnipeg Free Press
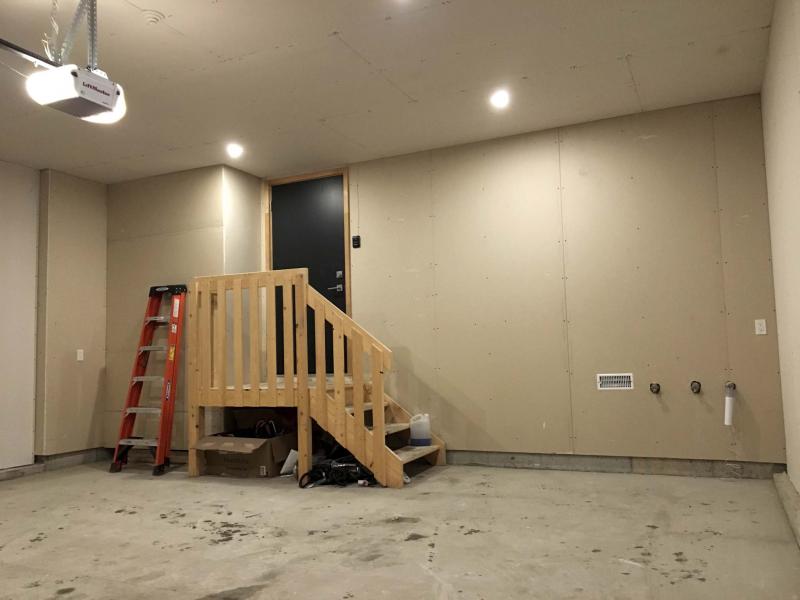
The back wall adjacent the interior living space was the first to be treated to the fireguard drywall, which was fitted on all walls and the ceiling in the garage.
The attached garage — an amenity not afforded to everyone. In fact, it wasn’t until my current home that I experienced such luxury. And I will attest, it makes quite a difference in the harsh of winter to be sheltered from the abrupt cold and howling winds while entering my vehicle.
So, it was not surprising when a longtime client of mine, Don Kennedy, requested the attached garage at his Sage Creek home be insulated.
Having completed his 1,500-square-foot lower level a few years prior, I was very familiar with his house. The attached garage, a 24-foot by 22-foot carport, was abandoned at the framing stage during the original construction. As such, the two-by-four walls and trusses, as well as the inner face of the OSB exterior sheathing, were all exposed — meaning these thin walls provided absolutely no protection against extreme temperatures.
Kennedy and I discussed a plan to complete any unfinished framing, properly insulate the ceiling and walls, apply and seal a thick vapour barrier throughout, prior to installing the 5/8 fireguard drywall. And due to the poor lighting offered by the existing two fixtures, I also suggested we replace these traditional fixtures with six strategically placed LED ceiling pot lights while I was at it.
Applying drywall to any surface requires the proper framework. In one corner of the garage, the ceiling trusses would not adequately support drywall — as such, the framing in that area was completed first. The electrical wiring for the six new pot lights was then run to each respective location. With the framing ready and the electrical prepped, the insulating could begin.
The ceiling trusses had been installed on 24 four-inch centres. The 24 four-inch insulation batts were carefully placed within the spaces between each truss. To ensure that the insulation did not fall, thin twine was run perpendicular to the trusses, roughly every 24 inches — this kept gravity from disrupting a long day’s work. Once the ceiling insulation was fully in place, 16-inch drywall batts were used to fill the wall stud cavities on 16-inch centres. This took the better part of another day. And I can attest — it was cold in that space. Even with my space heater on full, the frigid -30 C temperatures kept that garage as cold as an ice box. Soon, that would all change.
Most people don’t realize that insulating is only half the battle. Proper installation of vapour barrier is key to maintaining an appropriately climate-sustained space. The heavy gauge poly was first applied to the ceiling using a staplegun and half-inch staples. At every pot-light location, the prepped wiring was pulled through the vapour barrier for later tie-in. Where edges of poly met, at least a 12-inch overlap was supplied. And once the walls were completed in much the same manner, the entire vapour barrier surface was sealed with Tuck Tape, at every seam. It was only then that I began to feel the space begin to retain heat from my space heater — good thing too, because I had not felt my fingers and toes in more than five days!
The installation of drywall would prove more challenging. First off, 5/8 fireguard drywall is required in garage stalls, which is much heavier than regular drywall — my drywall hoist was about to get a big workout. Second, the ceiling in this garage was nearly 10 feet high, adding to the hoist’s trials and tribulations. And lastly, the existing overhead-door opener mechanism and tracks were already in place — the drywall would need to be installed in such a manner as to work around each of the opener’s components.
The ceiling drywall along the back wall, adjacent the interior living space, was hoisted into place and installed first. The holes for each of the LED pot lights were cut one by one, as each of the locations were covered with drywall. And to keep things lit, the LEDs were tied into the pre-prepped electrical wiring as I went along. Midway through the ceiling drywall installation process, it was time to tackle the areas that held the opener components. One at a time, the components were detached from the trusses, and temporarily suspended by other means, providing enough gapping between the component and ceiling trusses to allow the drywall to be lifted into place, and precisely positioned, before being secured with drywall screws. Once that sheet of drywall was securely in place, the component was then re-fastened to the ceiling in its original position. This process was repeated until all drywall in component-affected areas was in place, and the ceiling drywall could be installed along the overhead-door side of the garage.
The wall drywall was much easier to tackle. With only one outlet along the west wall, the remaining drywall was easily positioned and secured along every wall stud. The bottom edge of the wall drywall was lifted roughly one inch above existing concrete footings, allowing the top edge of the wall drywall to press snuggly against the underside of the ceiling drywall. This process continued right around the room. Above the overhead door, shorter lengths of drywall were installed snugly below the ceiling drywall, whereby the bottom edge sits just above the rough frame of the garage door. The garage was finished, and the battle to keep out the cold was won.
With all the drywall in place, it was evident that a small heat source would maintain the constant temperature that was conducive to being comfortable. At my place, I quickly learned that it wasn’t necessary to "heat" the space by much — keeping the space just above freezing was optimal — the snow on a vehicle in a garage heated to a high temperature will cause fast melting. The contrast of hot/cold at the overhead door will also create an ice buildup along the bottom edge of the door, which may also cause expansion damage to the concrete footings near the door openings.
My best advice: keep the garage space at a moderate temperature if the overhead door is used frequently — just above freezing is comfortable, in comparison to what we’ve all experienced outside, during the winter months.
bossenterprise@outlook.com