Photos by Marc LaBossiere / Winnipeg Free Press
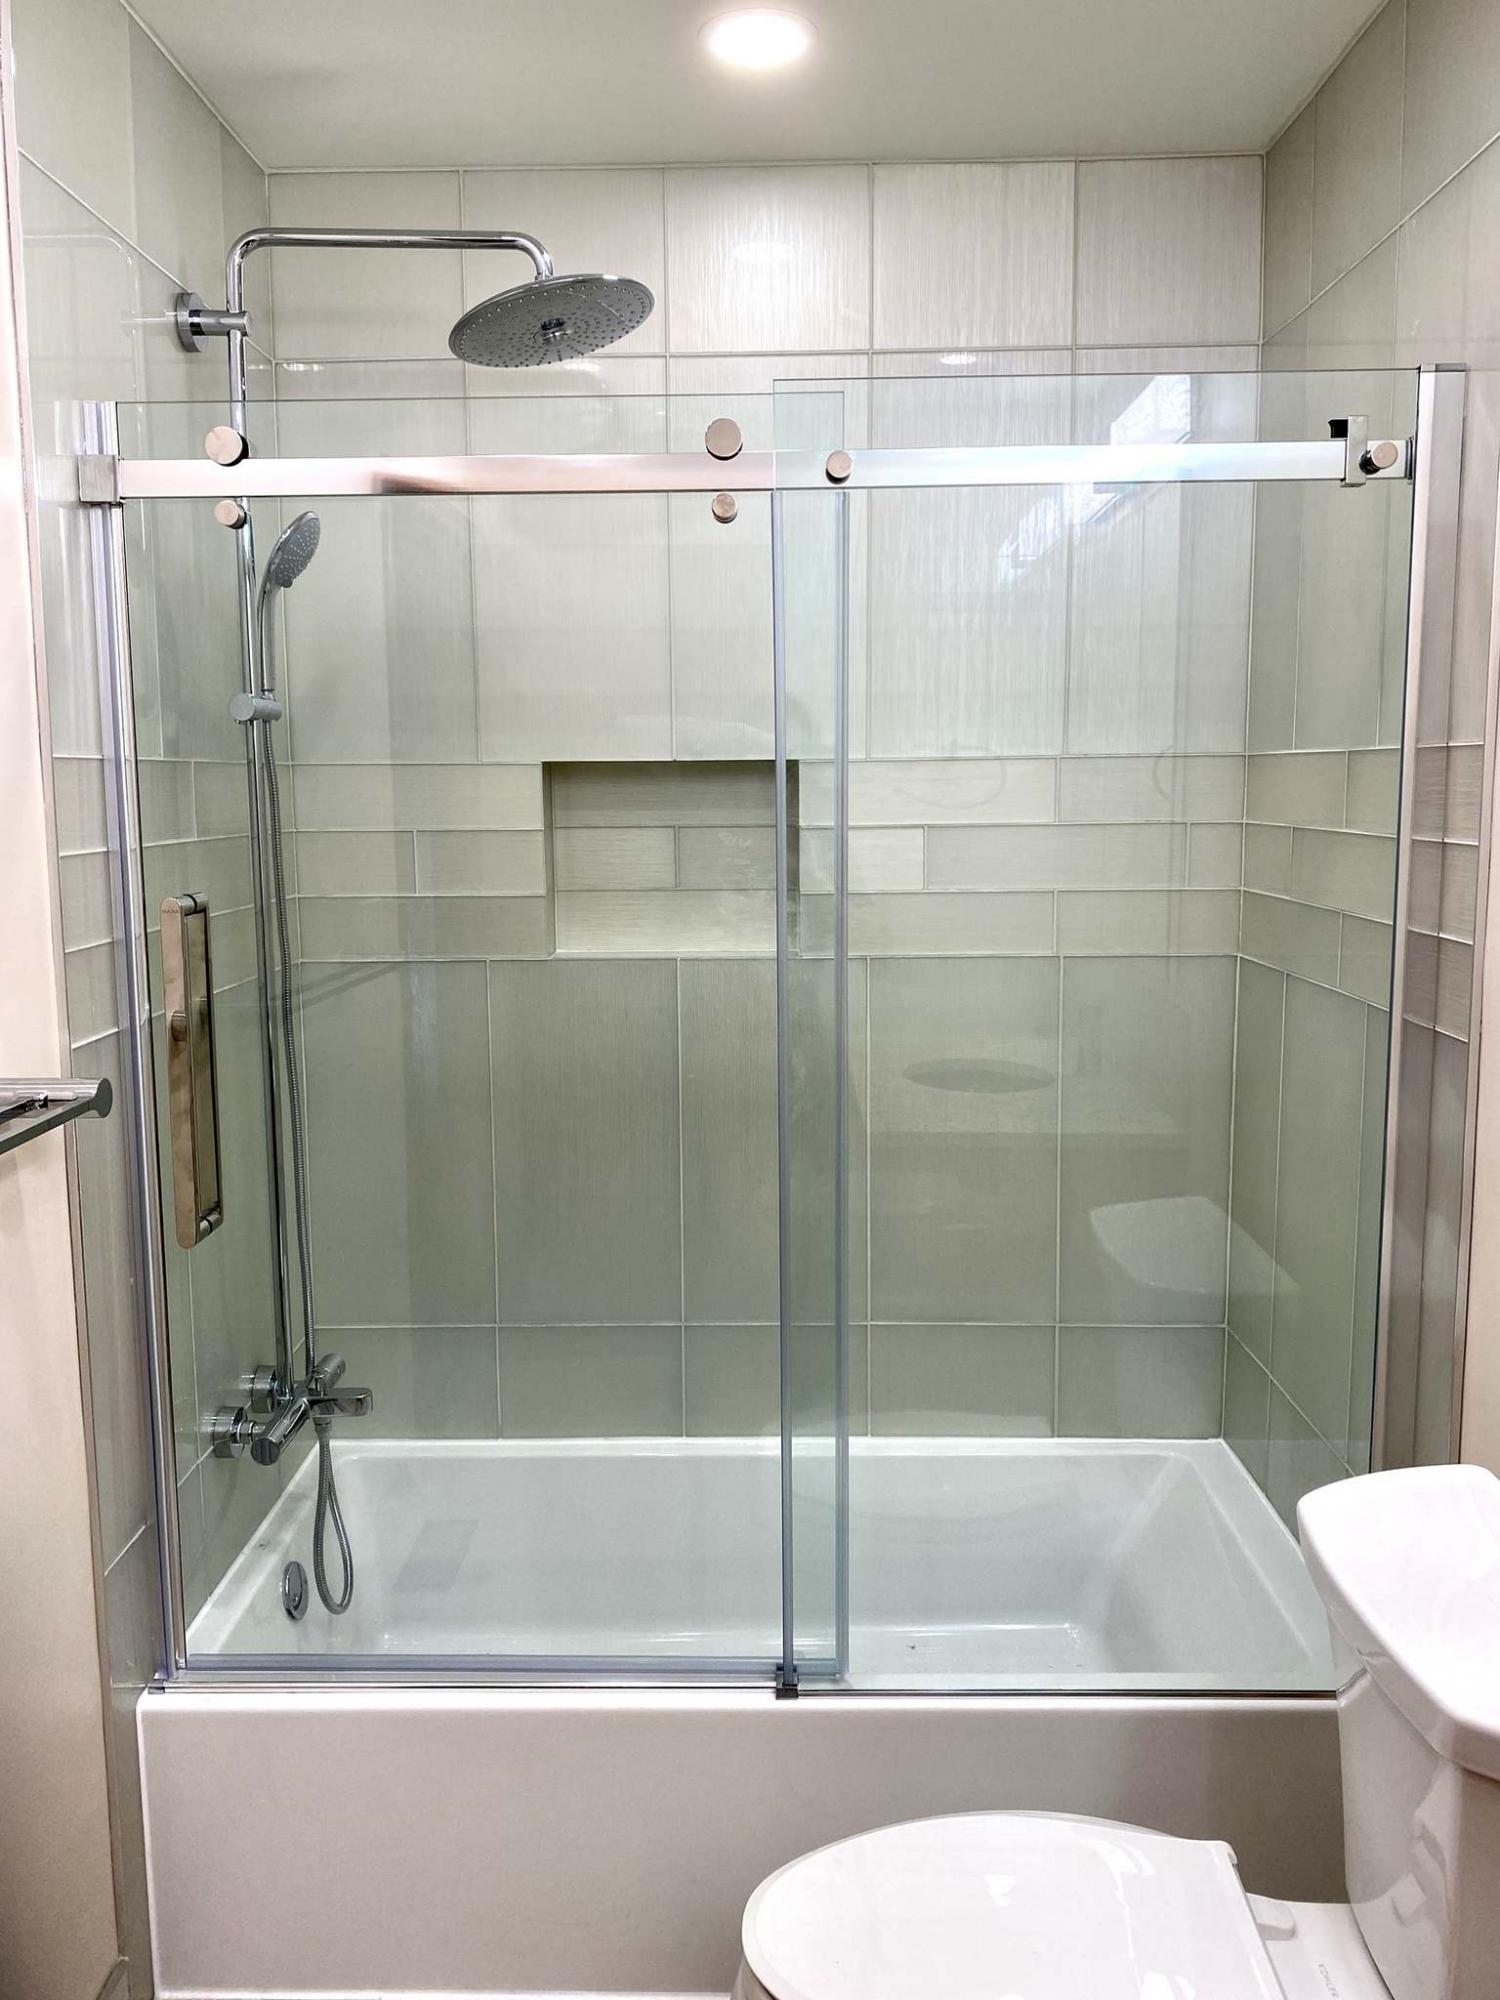
Vertical glass tiles are interlaced with three rows of smaller horizontal glass tiles set in a brick pattern.
The art of tiling is both methodical and strategic. It is a process by which mathematical conclusions determine aesthetic cohesiveness. Albeit challenging, the finished product often yields the focal point of a remodelled space.
At a recent bathroom remodel, the homeowner chose a tile made of glass — although the entire tiling process became more difficult, the result is spectacular.
Once the shower and tub stall was readied for the tiling stage, it was necessary to plot the tile layout before starting - a dry run to ensure the layout will optimize the size and shape of the tiles being used. In this instance, larger 12-inch by 24-inch glass tiles would be positioned vertically along the faucet wall, back wall and far wall of the stall, set above the tub. A decorative stripe using three rows of horizontally set four-inch by 16-inch similar glass tiles in a brick layout pattern would wrap along all three walls. To determine the height of the stripe, two main factors were utilized; the best partial tile height above the tub below a full tile to initiate the three rows that will constitute the stripe, and the convenient height for a shampoo shelf just to the faucet-side of center along the back wall.
After a few dry-run attempts, it was established that an eight-inch high partial vertical tile with a full tile above it, would allow for a conveniently positioned shampoo shelf, and the perfect height to begin the three-tile wide stripe. Using the dimensions of the smaller tiles, the shampoo shelf was created once the final dry-run and height determinations were completed. Taking careful measurements, and incorporating the thickness of a tile when creating the framed inset cavity within the drywall along the back wall, the height and width of the shampoo shelf matched the length of one full 16-inch smaller tile, and the height of the three rows, plus of course the thickness of a tile one every side so that once the shelf was fully tiled, the main surface of the back wall that meets the edges of the shelf would do so mathematically without having to notch any tiles. The shampoo shelf was also positioned exactly one full length of a smaller tile from the faucet wall.
The shampoo shelf was tiled first. Cutting the tiles proved to be challenging as expected — even when using a wet-saw with a new diamond blade, glass tile tends to chip much more easily than ceramic or even porcelain tile. As such, it was necessary to turn every tile midway through a cut, so that the blade never ended the cut along the back edge, thereby minimizing the potential for larger chips to break off when nearing the end of a full cut. It was also necessary to sometimes paint the backside of a cut edge where tiny chips occurred, to match the pre-painted backside of the entire tile — failing to do so allows the chipped cut to be forever visible through refraction of the clear glass from the front. This became a laboriously slow process. However, tile by tile, the layout slowly evolved until the tub and shower stall came to life.
Along the visible edges of the two walls that protrude past the tub, a three-eighths chrome tile edge was used from floor (baseboard) to ceiling to exhibit that polished look. To mute the visible one-eighth-inch grout lines, a pre-mixed resin-based Snow White coloured grout was used throughout. Applying grout on glass tiles presented its own set of challenges – it was nearly impossible to sponge the grout clean, without leaving a slight film that revealed a sponge stroke. To eliminate this, a spool of terry cloth wrapped around a small block of wood was used for the final wipe down — this allowed the thin resin film to be cleaned without disturbing the grout withing the gaps between the tiles, a multi-staged process of wipe downs.
Throughout the tiling process, my anxiety grew because I knew once the grouting was achieved, the next steps would entail mounting the shower head of the external shower column, as well as the barn-style glass shower door - both features involved drilling holes through glass tile, 16 holes to be exact! It was adaunting task, an eventuality that could not be circumvented. The drilling process is an etude in patience. To prepare for the drilling, multiple diamond tipped drill bits were acquired prior to ‘drill-day’ (nicknamed ‘dreaded drill day’ – ‘cuz alliteration is fun). In my experience drilling through any tile, bits tend to dull after the third or fourth hole. The glass tile is first marked, and the drill bit is used to nick the drill bit position. Once the hole is started, the drill is wobbled with slight pressure towards the tile surface. Every 15 seconds or so, the drill bit is dipped into a small canister of water to both cool and lubricate the drill bit. Ever so slowly, the hole’s depth increases until the breakthrough is felt. A properly sized wall-anchor is pushed within the hole until flush with the tile surface, ready to receive the stainless-steel screw. This process was repeated 16 times. The lingering thought that at any moment a tile could crack, could not be avoided — it was exhausting, all-the-while exhilarating after completing every hole succesfully.
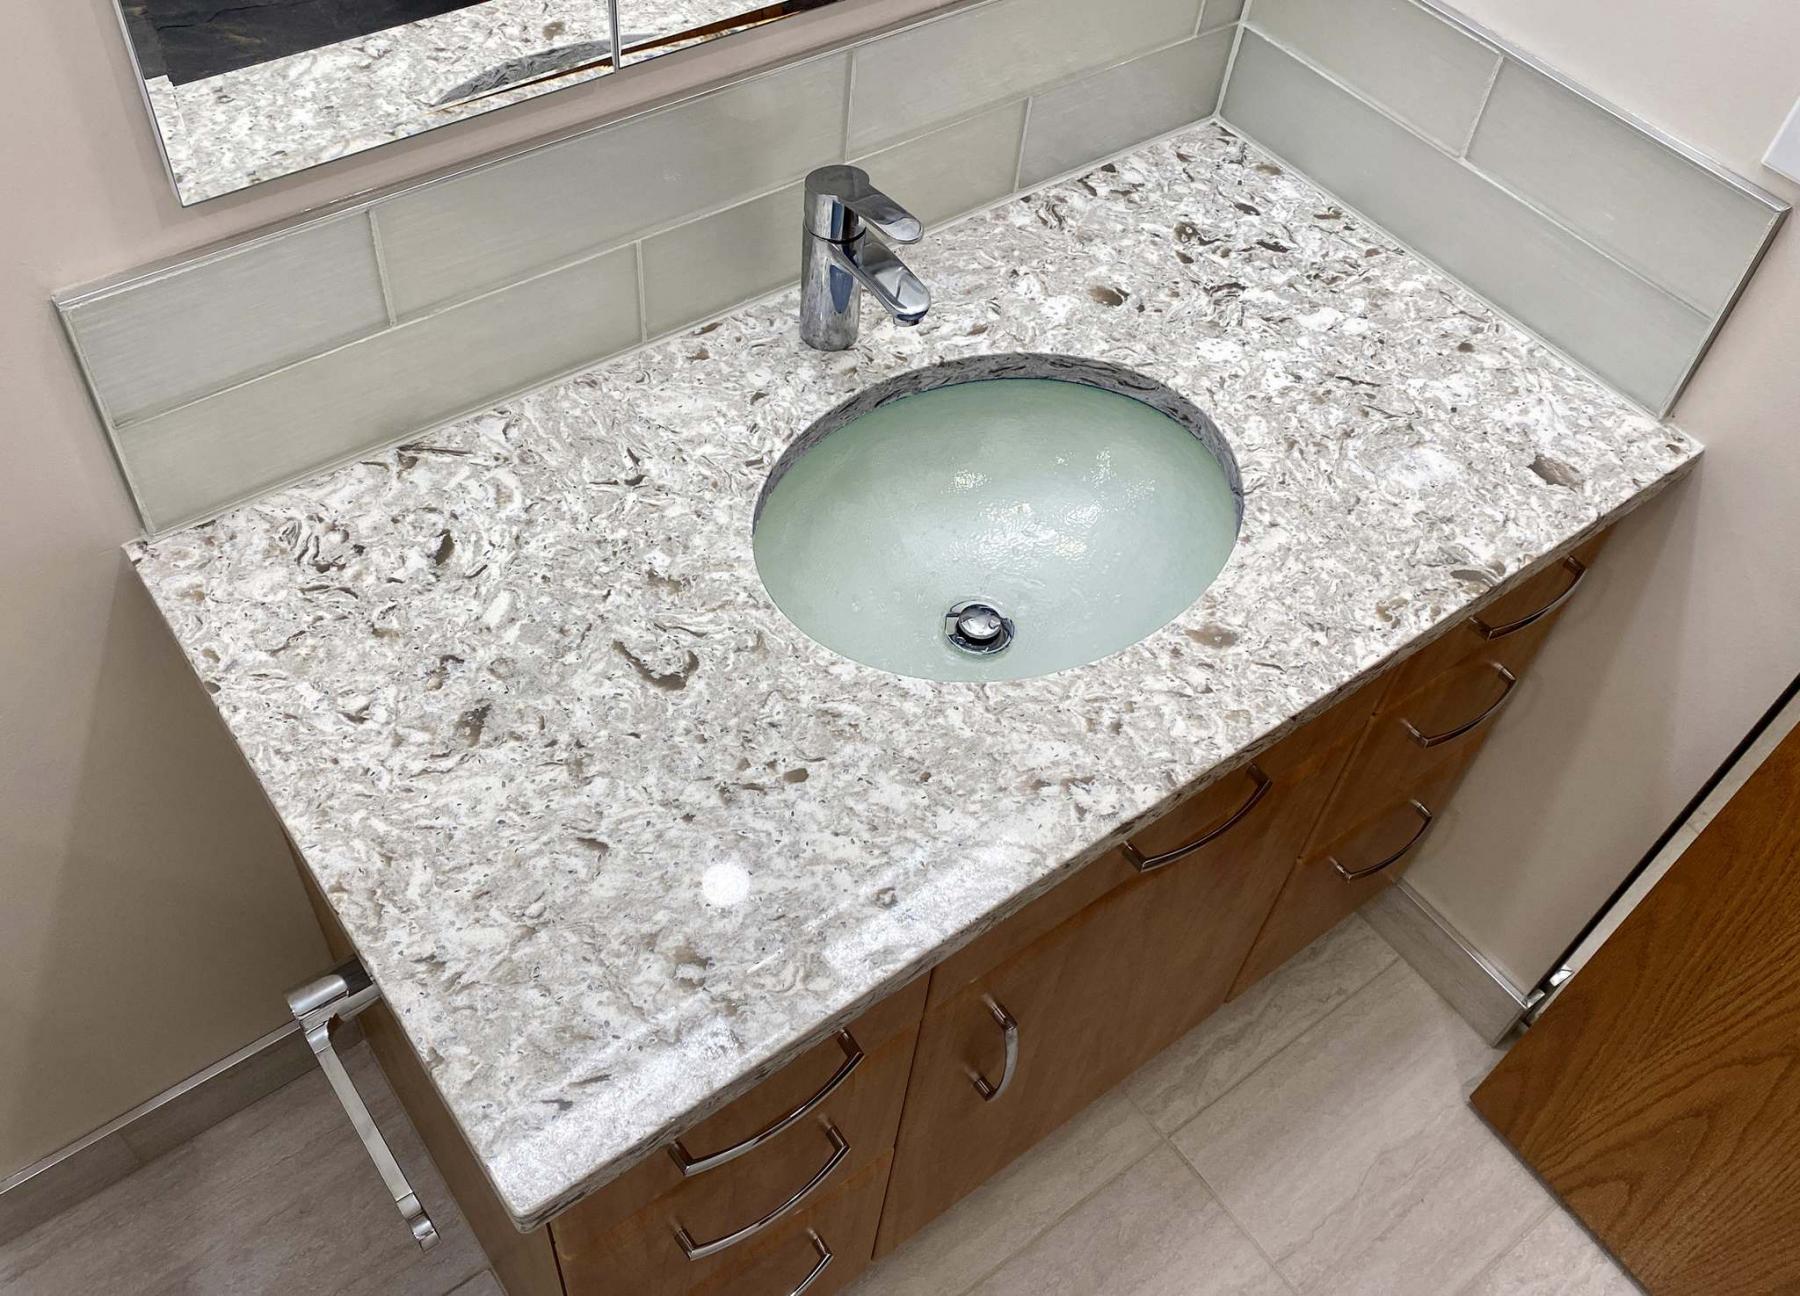
With all 16 holes completed without cracking a glass tile, the shower head was mounted. Once the faucet was tested, the barn-style glass shower door was also subsequently installed. The combination of chrome and glass is truly spectacular. To glorify this duo, the backsplash along the two walled sides of the custom vanity with quartz countertop mimics the glass tile stripe, by using two horizontal rows of the four-inch by 16-inch tiles creating a countertop stripe that ties-in nicely with the tub & shower stall. The ice-coloured glass sink also reinforces the sought-after look of opulence.
Even now, while typing the paragraph that describes the process of drilling holes through glass tile, I found myself holding my breath as though the process was occurring again— it was truly a task of patience and precision. Although five additional large tiles (always prudent to order 10-per cent more than required) were available should one or more have cracked at any point during the tiling process, it sure felt good to get through it without having to use them. And despite the worrisome nights leading up to this dreaded drill day, there is no doubt the glass tile steals the show in this beautifully conceived bathroom design — a spa at home.
BossEnterprise@outlook.com