Photos by Marc LaBossiere / Winnipeg Free Press
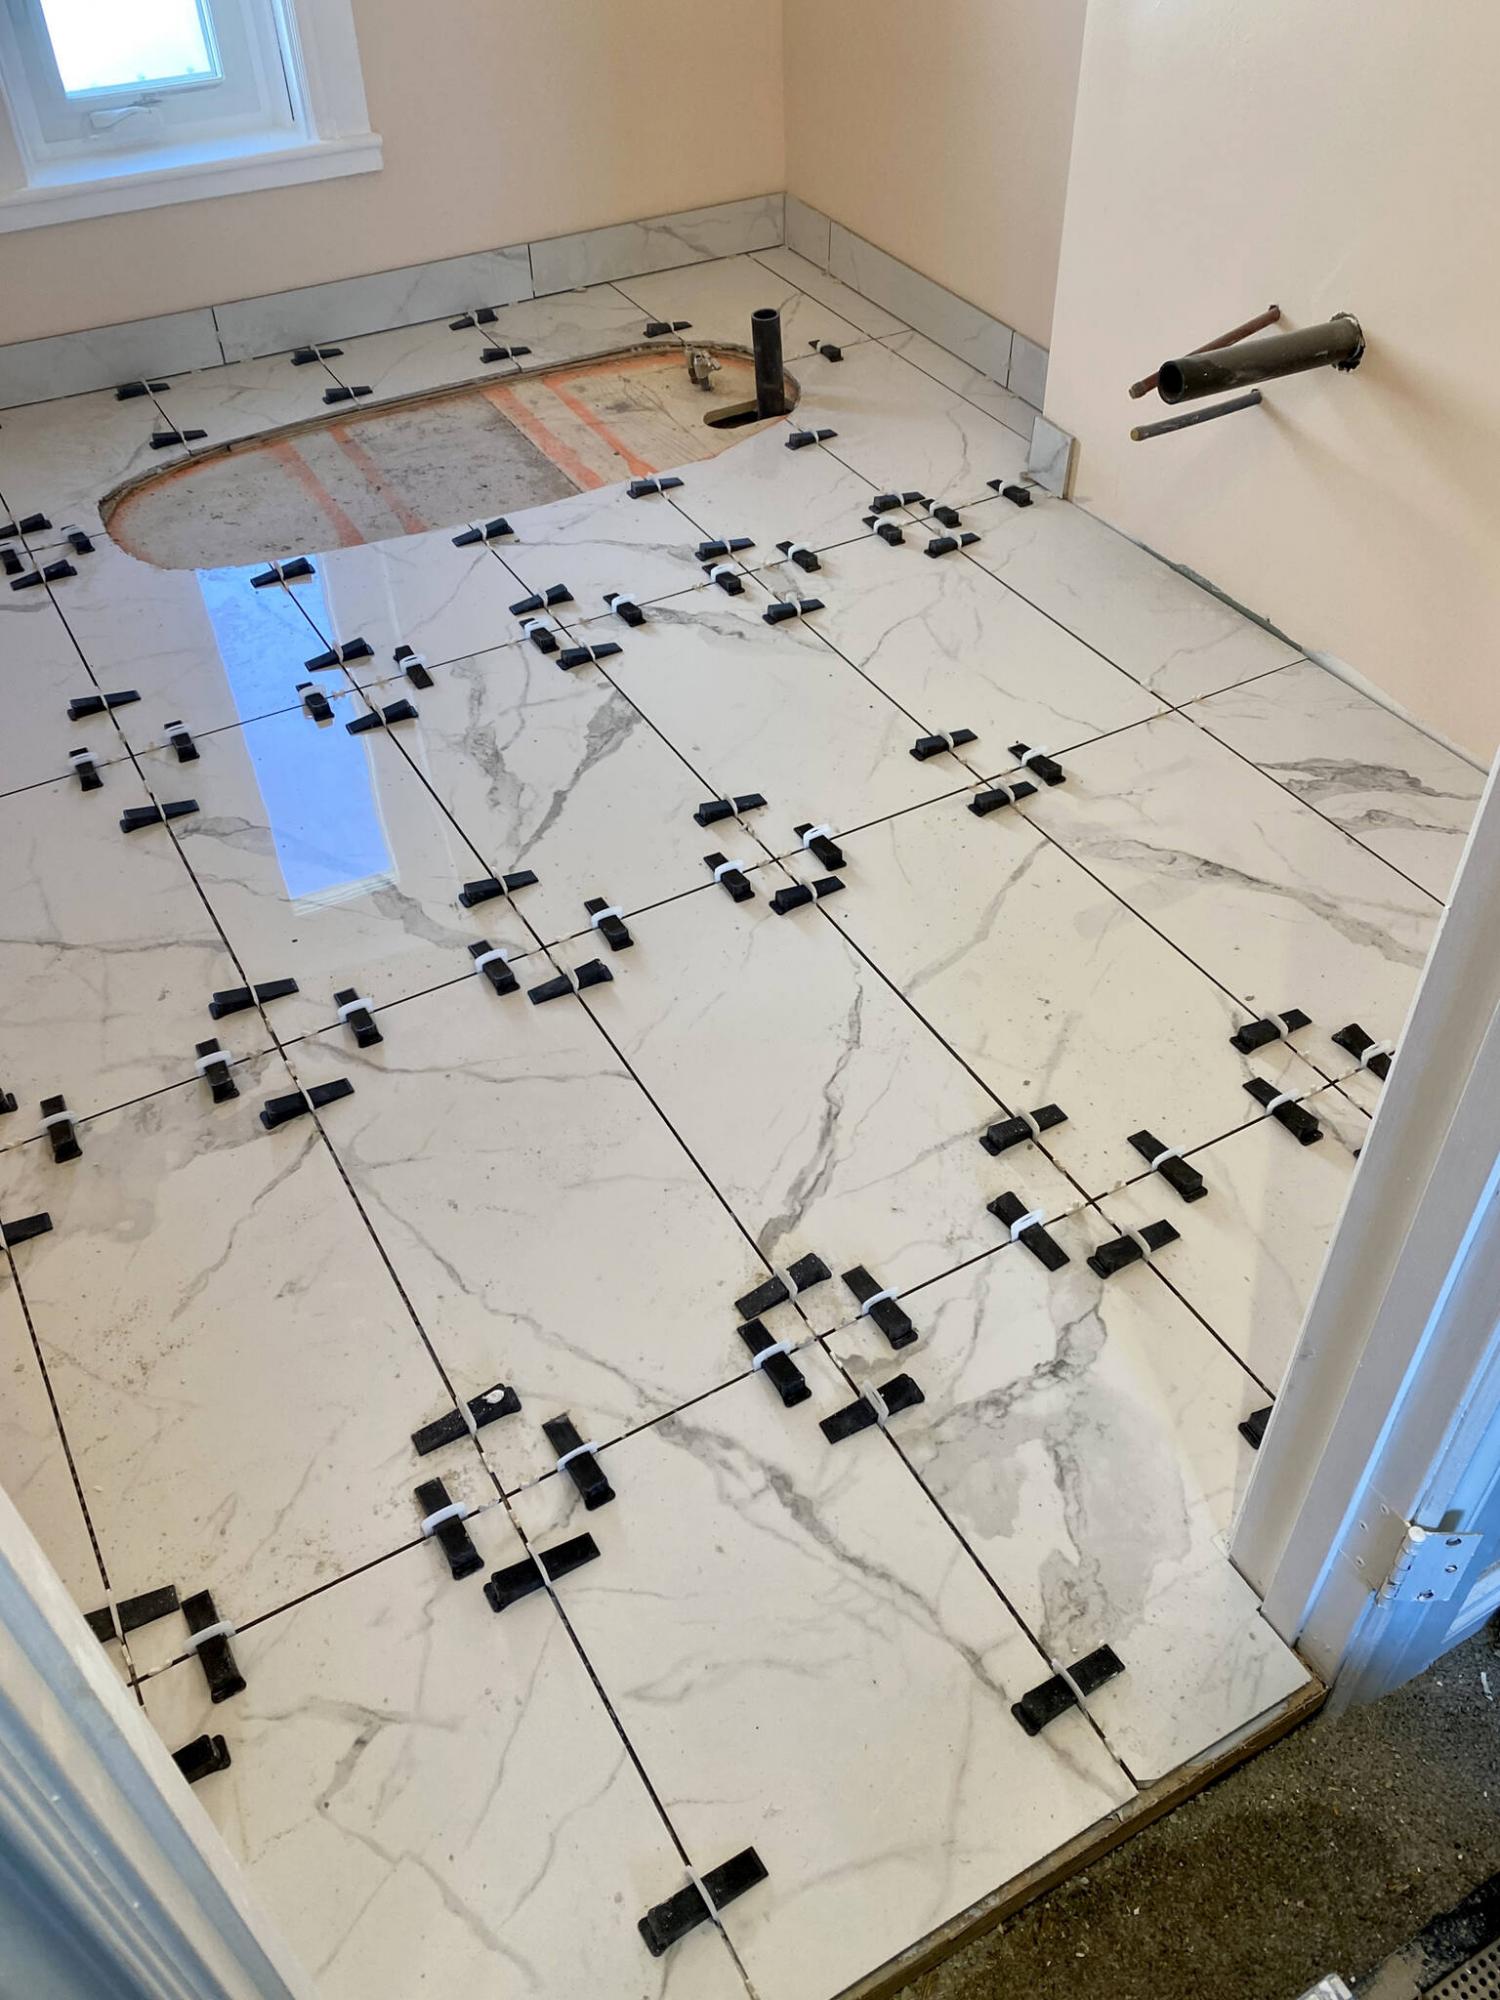
Once tile layout has been established, the tile are set and levelled using the RUBI Delta Tile Leveling System.

The RUBI Delta Tile Leveling System consists of thin plastic spacers, spacer wedges, and a plier tool.
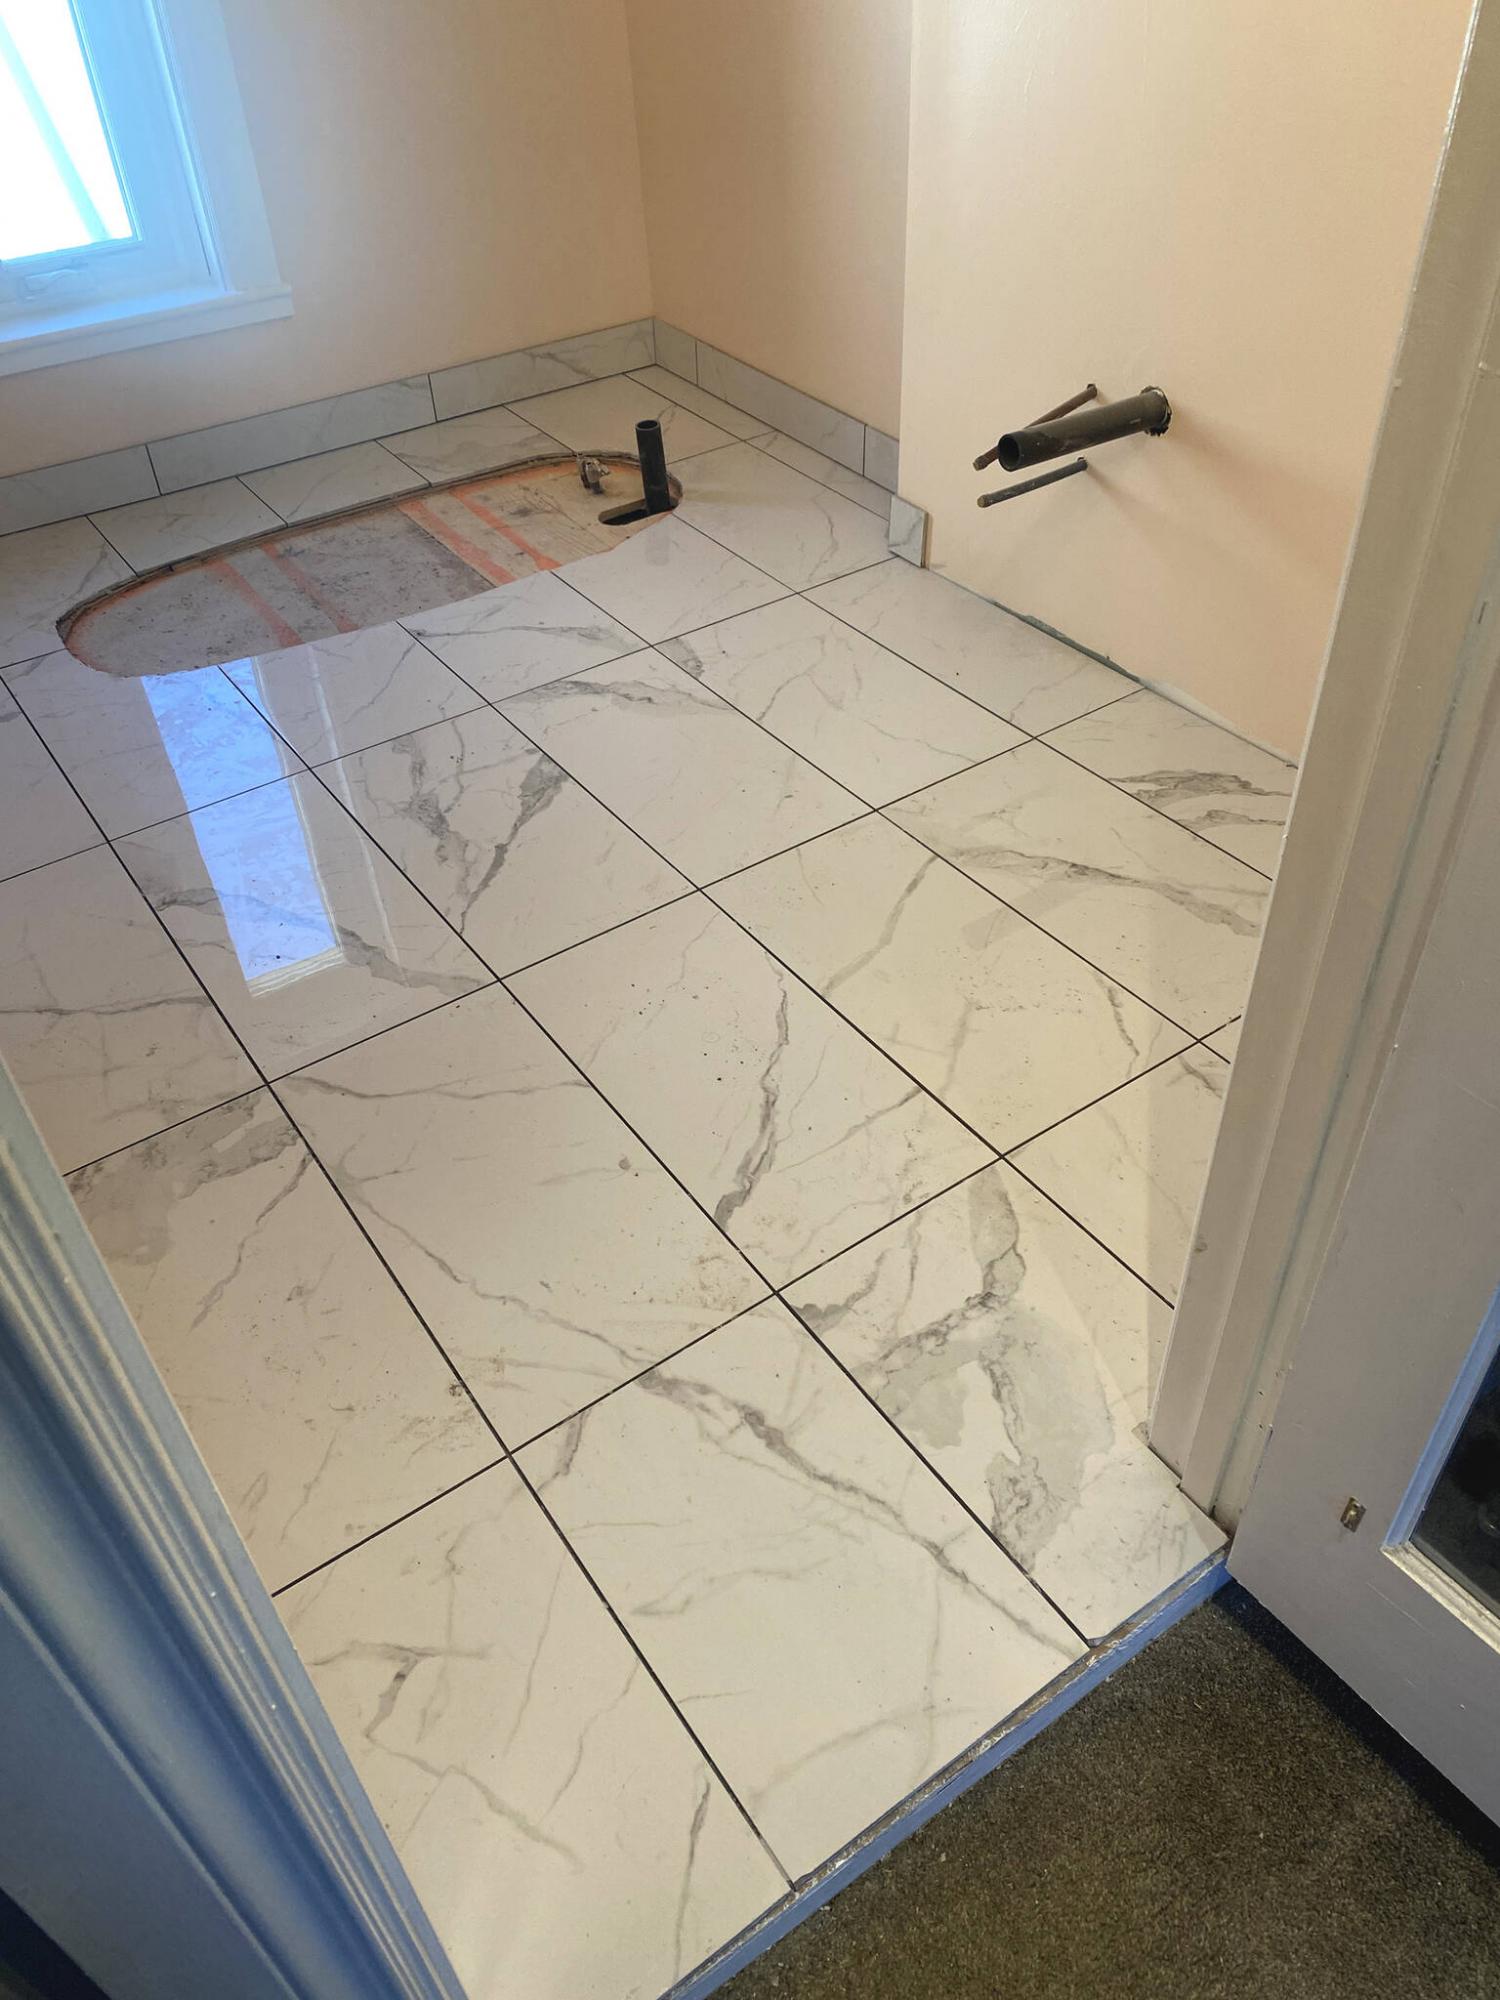
The following day after the tiles have set and the thinset adhesive has cured, the tops of the spacers and wedges are removed with a quick kick of the foot.
When tiling a floor, a few factors play into a successful outcome, including tile size, tile layout, and most importantly, the condition of the sub-floor surface the tile will be laid on. And even if the latter is flat and level, setting tiles level to each other as a whole can be a challenge in itself. Luckily, there are tiling aids that can ensure a consistently flat and smooth tiled surface.
Once the layout has been established, based on the size of the tile and the room’s floor plan, tiling should begin at the far end of the room, working backwards towards the entryway. At a recent bathroom renovation, two additional features were included in the process: an oval section would be left free of tile below the impending placement of a stand-alone tub, and strips of tile four inches wide would be cut and used as baseboards along the perimeter of the entire space.
A 12x24-inch marble-esk ceramic tile was chosen by the homeowner. The tile layout was configured to minimize the potential of sliver tiles (thin strips) at any given area, despite the width change at the back of the room to accommodate the tub, and the closet nook opposite the vanity. The orientation of the tile’s long side is set with the long of the room. Tiling began at the back of the room, where the tub would stand. As such, it was necessary to pre-cut the tile to meet the planned void below the tub. Once the tiles were cut accordingly, the thinset adhesive was introduced and the tiles were placed one by one. Tiny rubber spacers are used throughout to create the one-eighth inch gap between all tiles, as well as below the bottom edge of the four-inch tiled baseboard.
To ensure all tiles remain level adjacent to each other, the Delta Tile Leveling System by RUBI was used throughout. Essentially, the system consists of tile leveling spacers, spacer wedges, and a plier tool. Once the spacers are set between every tile at all corners, the wedge is inserted through the spacer opening above the tile. The plier tool is then used to recess the wedge further into the spacer opening until the adjacent tiles are flush along the top. The tiny ridges along the top of the wedge then hold the wedge in place below the spacer until the spacers are removed once the tiles have set and the thinset adhesive has fully cured.
The following day, the Tile Leveling System is easily removed by kicking each of the spacer and wedge combination. The spacer design allows the topside of the spacer through which the wedge is inserted to easily and quickly snap from the bottom edge that rest below the tile. Once the spacers and wedges have been completely removed from the area, the tile can be cleaned, and the grouting process can begin. Never again the need to worry whether a tile will shift during the drying stage, because the leveling system holds each tile tightly in place, perfectly level to all adjacent tiles — nothing but a smooth surface throughout.
Although there are several tile levelling systems on the market, the RUBI Delta System with the plier tool proved extremely easy to use, thereby expediting the entire process of setting tiles. Moreover, removing the spacers and wedges prior to grouting was even easier, as all they need is a quick kick of the foot to snap off the spacer tops. Although the spacers are a one-time use element of the system, the wedges can be recycled for the next project. Truly a great system, and I highly recommend it even for the novice DIY-tiler.
RenoBoss.Inc@outlook.com