Photos by Marc LaBossiere / Winnipeg Free Press
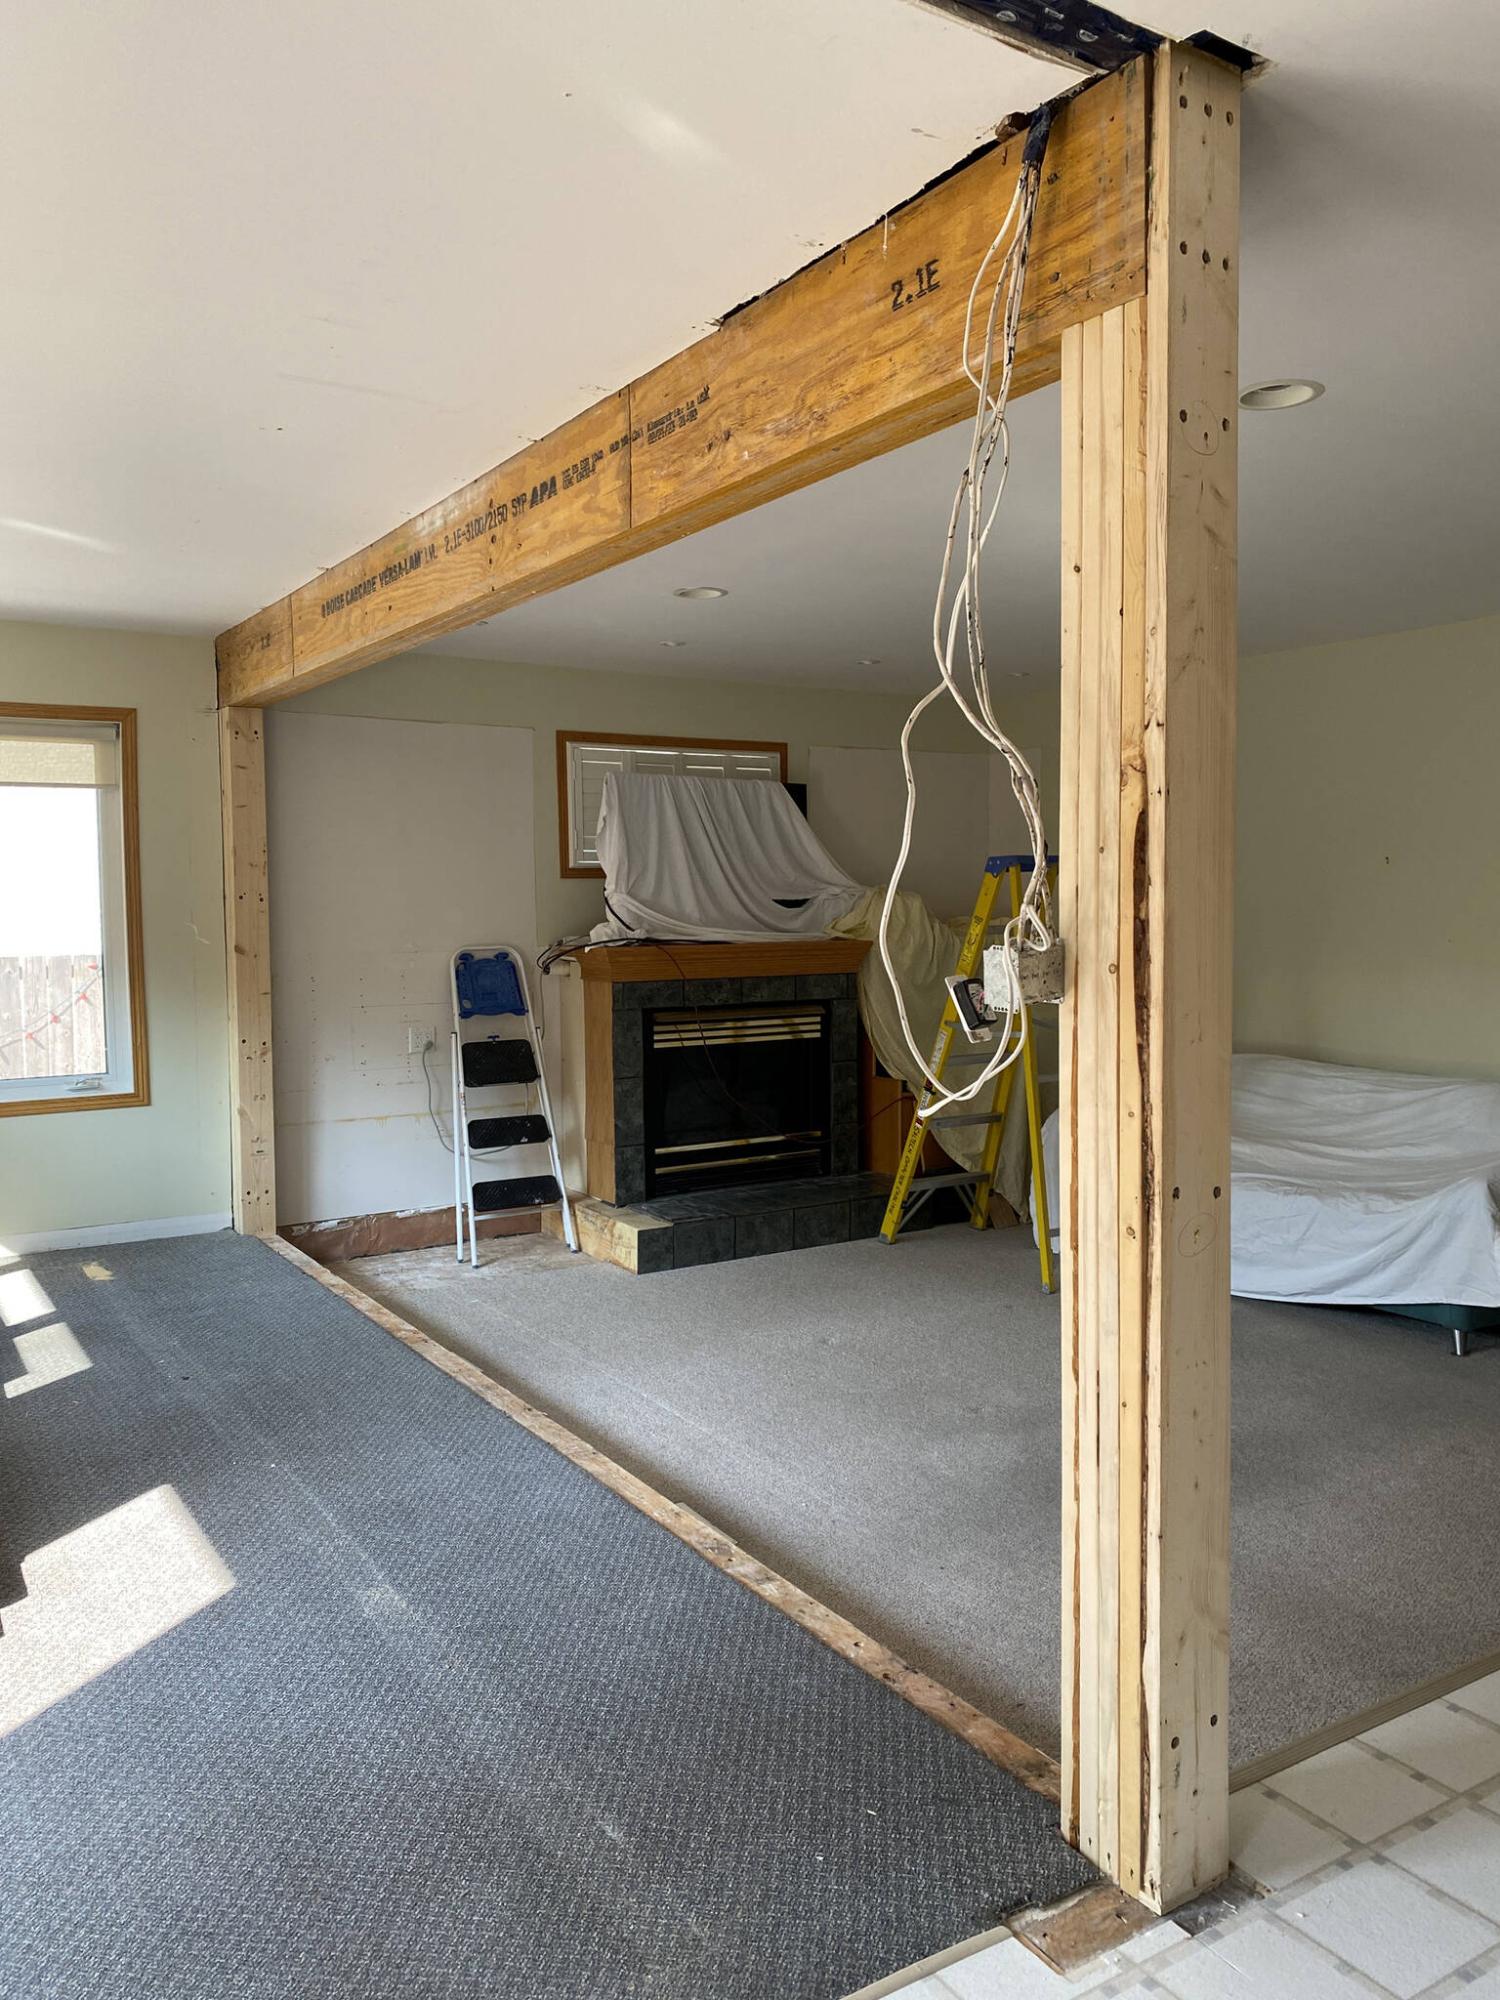
The beam rests on top of quadruple 2x6 posts at each end.
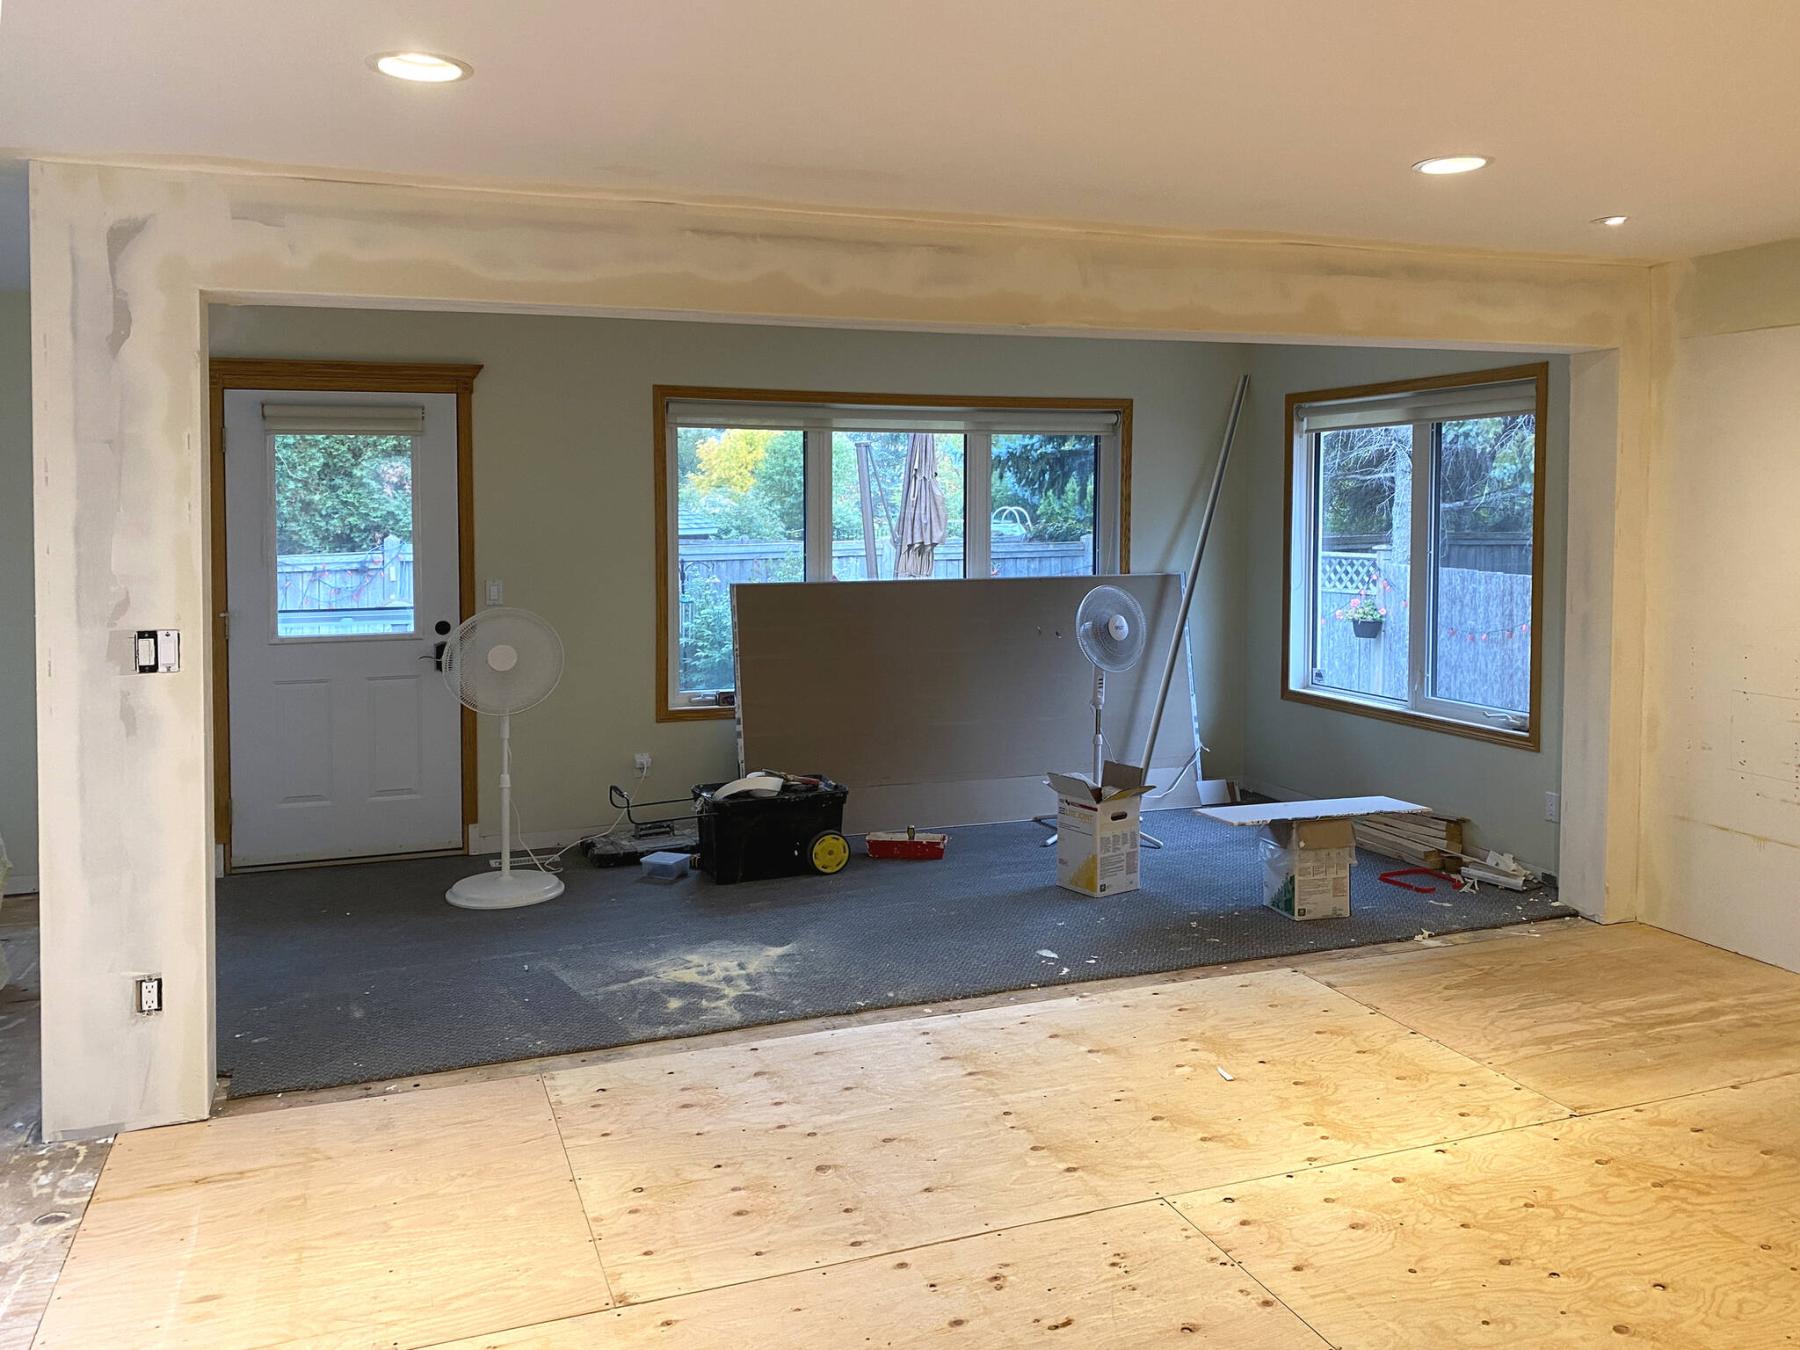
The sunken living room was raised to meet the elevation of the main floor.
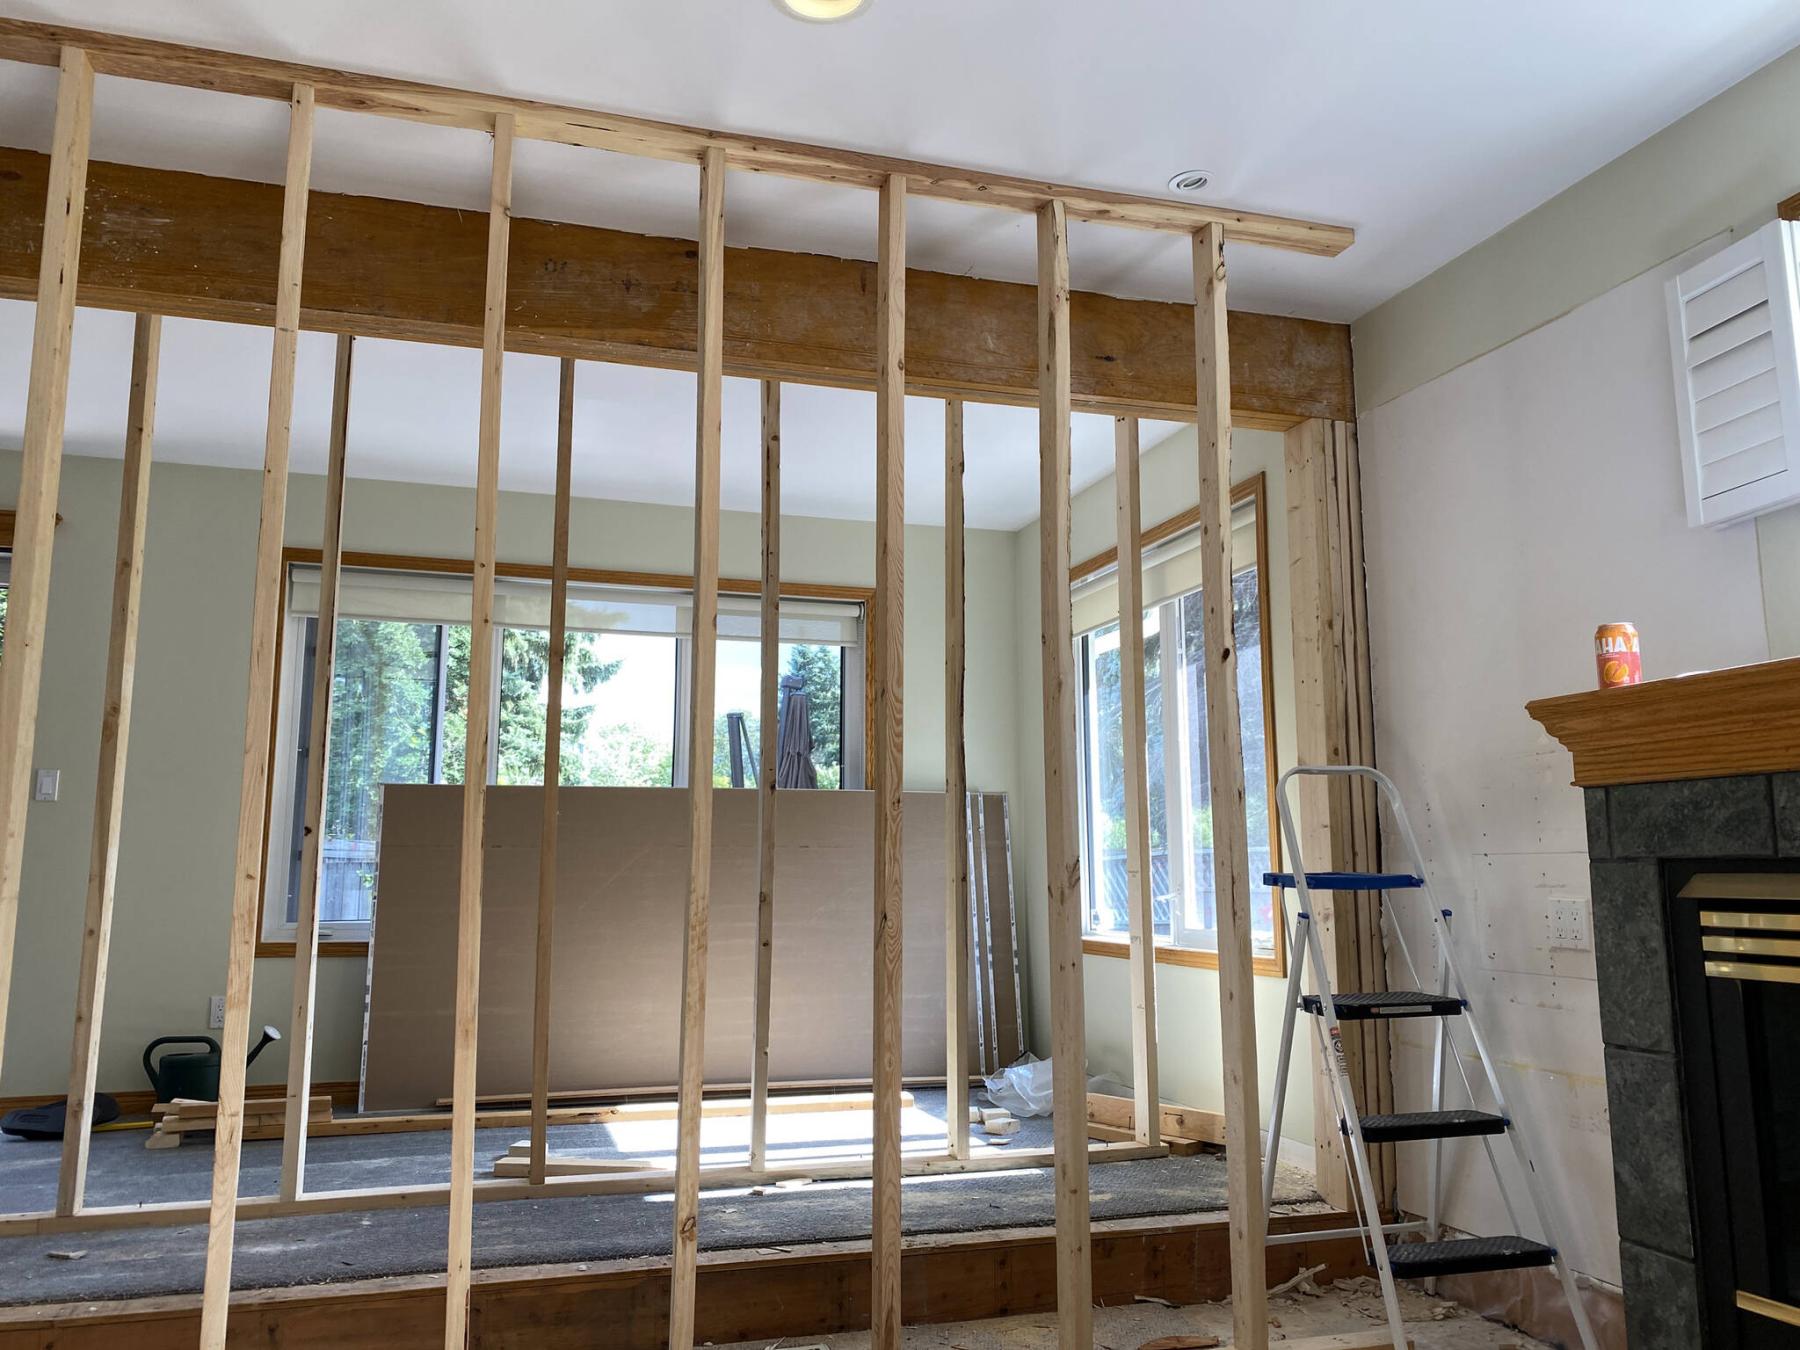
Temporary framing was erected to support the ceiling during wall removal.
Unlike a typical room renovation, the desire to remove walls to achieve an open-space concept can be a complicated endeavour. Certain walls of a house lend support to the structure. As such, it is imperative to ascertain which walls are load-bearing, before moving forward with plans to open things up. At a recent jobsite, the homeowners’ dream to eliminate a dividing wall between the sunken living room and back sitting area would be satisfied, with the introduction of a 17-foot beam.
Based on the truss orientation along the ceiling above, it was quite apparent that the main wall dividing the two rooms was indeed load bearing, confirmed by the original architectural drawings, and a subsequent visit from a structural engineer. In order to properly address the load once the wall is removed, the beam would be a triple-laminated 11-and-seven-eighths-inch at one-and-three-quarter inches thick LVL, resting atop quadruple 2×6 posts at each end. The weight of the ceiling structure above would then be dispersed along the beam, and down through the quadruple laminated posts. As such, it was also necessary to ensure the structural integrity below the newly implemented posts was sound.
Upon inspection of the existing basement framing, it was ascertained that a new post along the exterior wall side of the beam would indeed have adequate support, as the floor joists rest atop a main floor beam. At the other end of the intended beam location however, the existing tele-post would be upgraded to a Red Jack post, capable of supporting 32,000 pounds. Once the new Red Jack post was implemented, the tasks of load bearing wall removal and subsequent beam implementation could begin.
Firstly, it is imperative that the existing ceiling and second floor joisting be supported prior to dismantling the exiting load bearing wall. To achieve this, temporary wall framing on either side of the beam location is erected, roughly 18 to 24 inches from the intended beam placement. With the LVLs pre-cut to length and placed along the floor next to the existing wall, the temporary walls are constructed using 2×4 lumber, with studs at 16-inch intervals. Once both are secured in place, the existing load bearing wall is carefully dismantled and completely removed. To satisfy the width of the impending LVL beam, a narrow potion of the ceiling drywall is also removed.
The next steps are strategic. A single 2×6 is mounted at the exterior wall end of the beam, at a height that allows the height of the LVL between the top edge of the post, and the underside of the ceiling joists. At the other end, a similar 2×6 is cut, and is laminated to a floor to ceiling 2×6 that is temporarily supported with additional 2x4s to safeguard its position during the installation process, level and plumb. Each LVL is then installed one by one, by creeping each end along temporary steps mounted to the 2x6s, until the LVL is ready to be knocked into position above the end posts using a mallet. Once all three LVLs are in place, the remaining three 2x6s at each end are knocked into position, duly fastened together using five-inch structural lag screws. The LVLs are also fastened together using four-inch lags, completing the beam laminating process. The beam is then secured to the posts at each end, and the posts are fastened to the sub-floor to eliminate any shifting.
With the new beam in place, the temporary walls are then systematically removed one stud at a time, until all that remains is the new beam and posts, providing the first true hint of the sought-after open concept. Any existing electrical instances had been reconfigured to accommodate the beam introduction. With the new beam in place, additional framing was added to widen the beam, and allow for the required wall switches, and outlet. The new structure is then sheathed with drywall, and ensuing tape, corner bead and mud coats would ready the beam and posts for primer and paint within a few short days.
During the beam process, the homeowners had also voiced a desire to address the existing sunken living room floor. After several years of contemplation, a realization set in that although the space was only one step lower in elevation, the extra step had become inconvenient and somewhat hazardous to navigate. Furthermore, the removal of the load bearing wall emphasized the step along the area below the newly introduced beam. As such, interlaced within the beam tasks, the sunken floor was addressed by introducing joists atop the existing sunken sub-floor (which each had to be ripped to the required width using a table saw to ensure the result with new five-eighths plywood guaranteed a flush transition from new sub-floor to old). With the new joists in place, the new plywood was placed and secured to the new joists until the entire area was level with the adjacent sub-floor throughout the main floor.
Slowly but surely, the homeowners’ vision was coming to fruition.
With these major tasks completed, the homeowners are now able to address the cosmetic aspects of this main floor renovation, which includes new flooring throughout, and the eventual introduction of a high-efficient gas fireplace along the back wall where the old gas fireplace was centered within a wall-to-wall, built-in entertainment unit. These upgrades are sure to enhance the open-concept provided by the new beam — I suppose that’s the answer to the question “to beam or not to beam?”. Despite the inherent complexities of removing a load bearing wall, any challenges that arose during the process will soon be a distant memory. The homeowners wanted an open-concept — their dream now realized, will surely provide joy for years to come.
RenoBoss.Inc@outlook.com