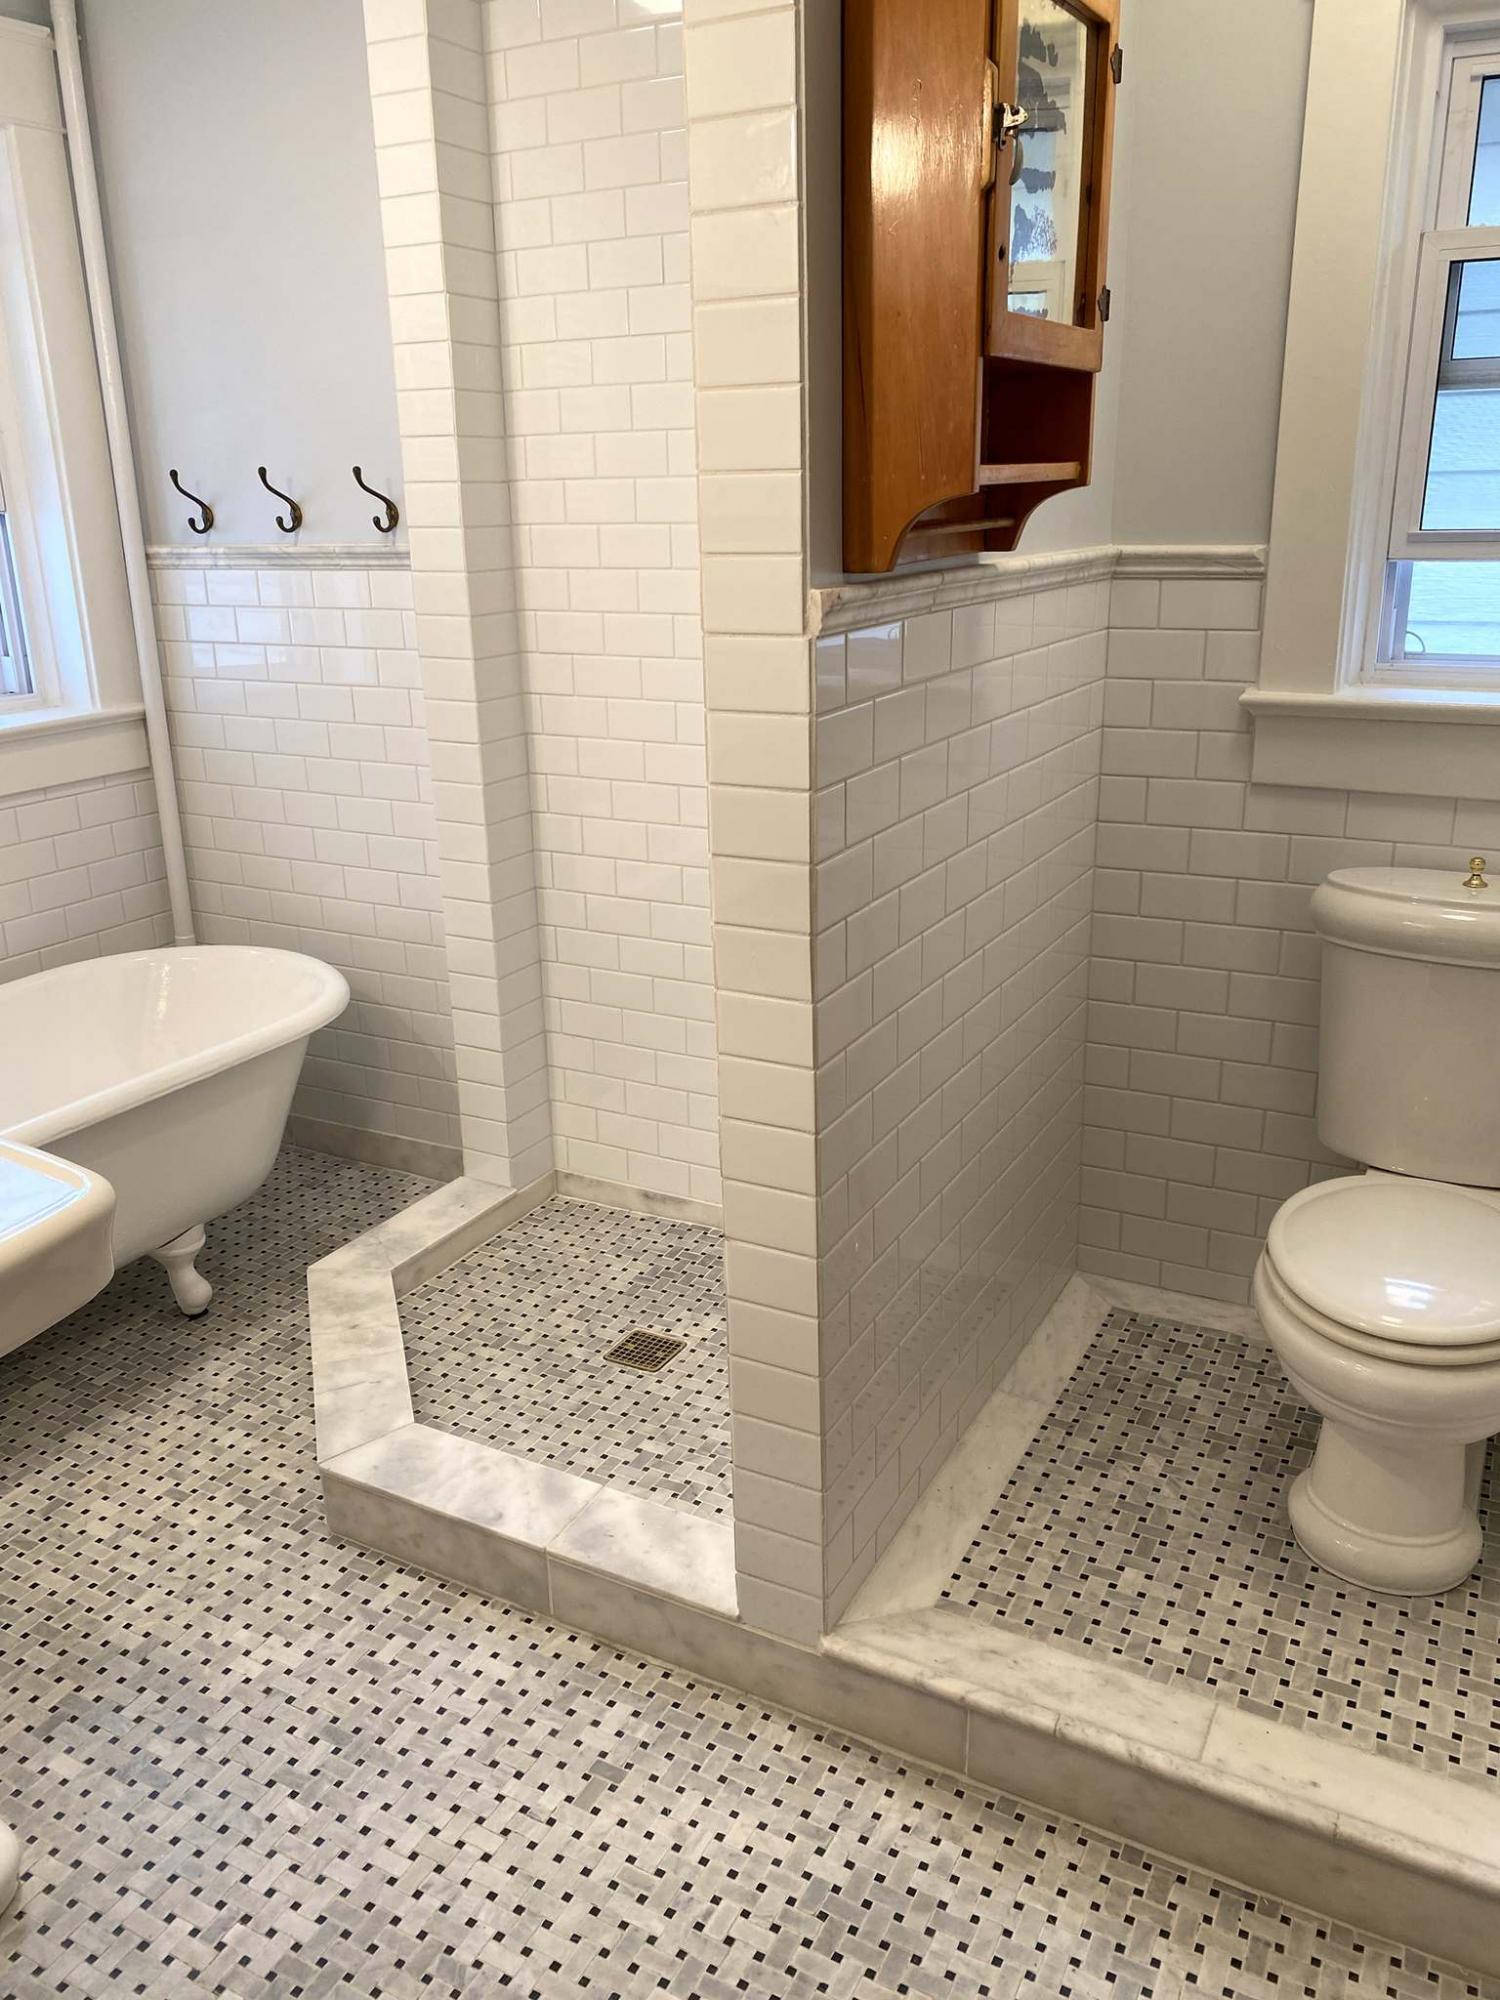
Photos by Marc LaBossiere / Winnipeg Free Press
Tiling the water closet, which is higher than the main bathroom floor, presented a challenge.
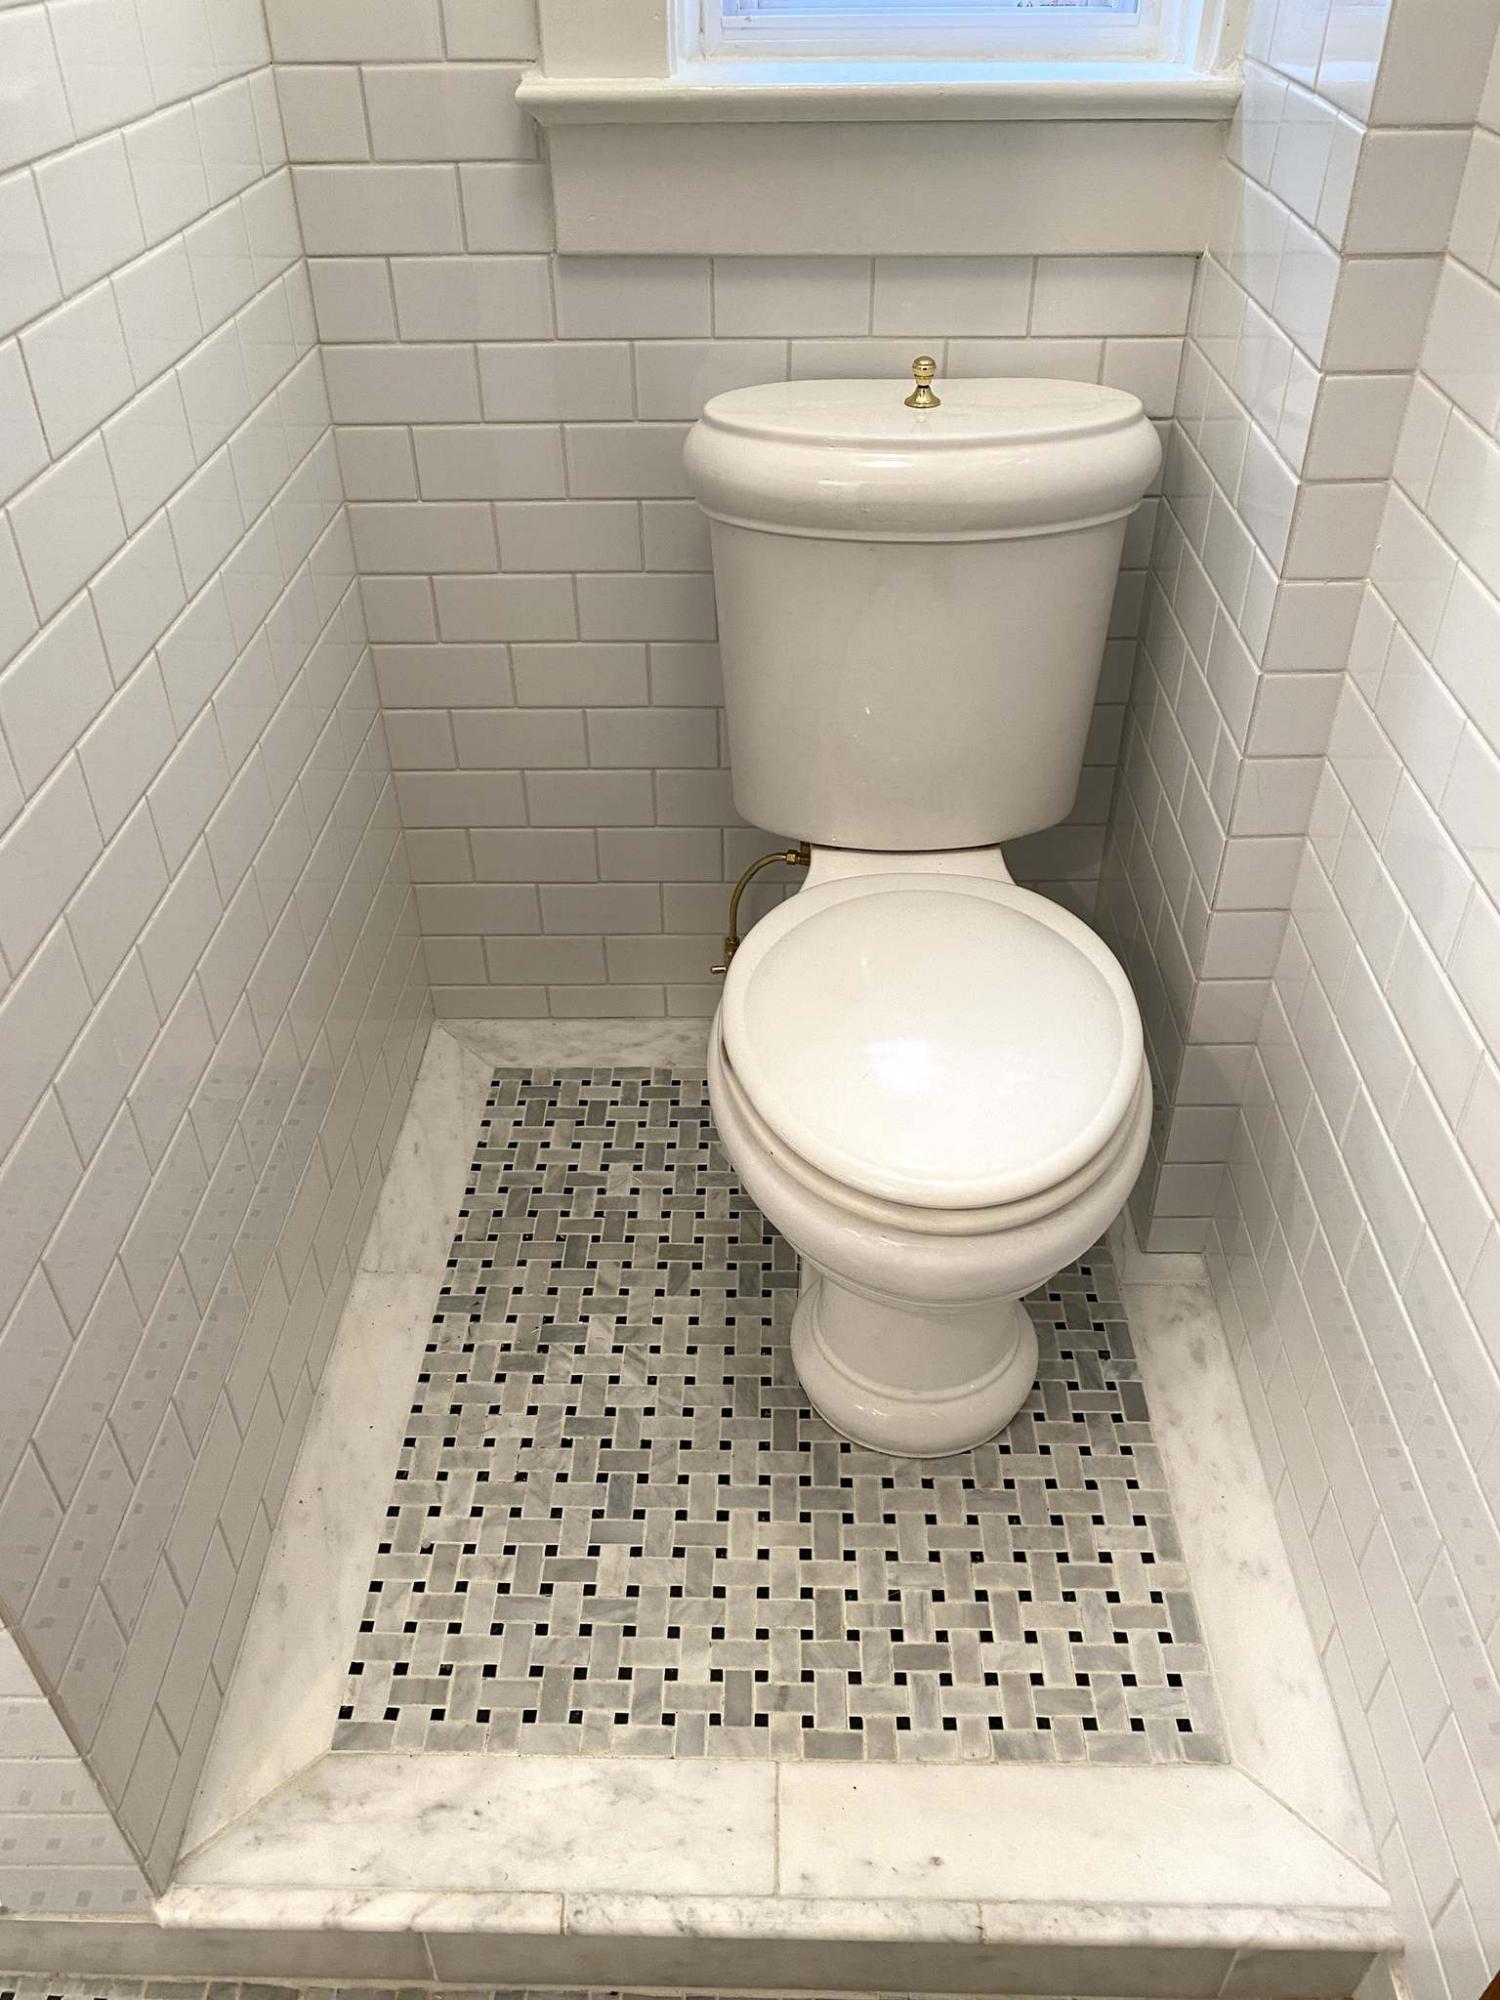
The water closet is a unique aspect of this bathroom.
Once the tiles were mapped, the marble baseboard was positioned along the perimeter.
Tiling can be tricky and before starting the job it’s always wise to have a concise plan of attack. The need for a solid plan is rivalled only by the importance of minimizing the idiosyncrasies of the room, which if left unchecked result in a beacon of tiling irregularity forever memorialized as an unwanted focal point.
During a recent bathroom remodel in a home built in the early 1900s, no truer words have ever been spoken.
In the 77 square-foot space that is the second floor bathroom of this old house, it was expected throughout the years of shifting and settling, most if not all surfaces of that room were likely no longer square, plumb and level. And as expected, this surely was the case. The ceiling tapered downward from the exterior wall towards the inner walls, as did the floor by as much as an inch-and-a-quarter over seven feet. The walls were slightly off level and overall, every surface had become somewhat of a parallelogram to some degree. This would not present much of a problem if all surfaces were to be painted. It was, however, a considerable challenge in that the floor, the entire walk-in shower stall, as well as all walls to shoulder height would be tiled with tiles that are of course, based on perfect 90-degree corners. Planning the tiling layout exactly, would be crucial to optimize the results.
Another bathroom anomaly presented an unusual hurdle — the water closet is situated on a second tier, roughly five inches higher than the main bathroom floor. As such, it becomes awkward to install a contiguous baseboard, short of following the rise of the floor using mitered tiles. Was there a better design layout that could be derived?
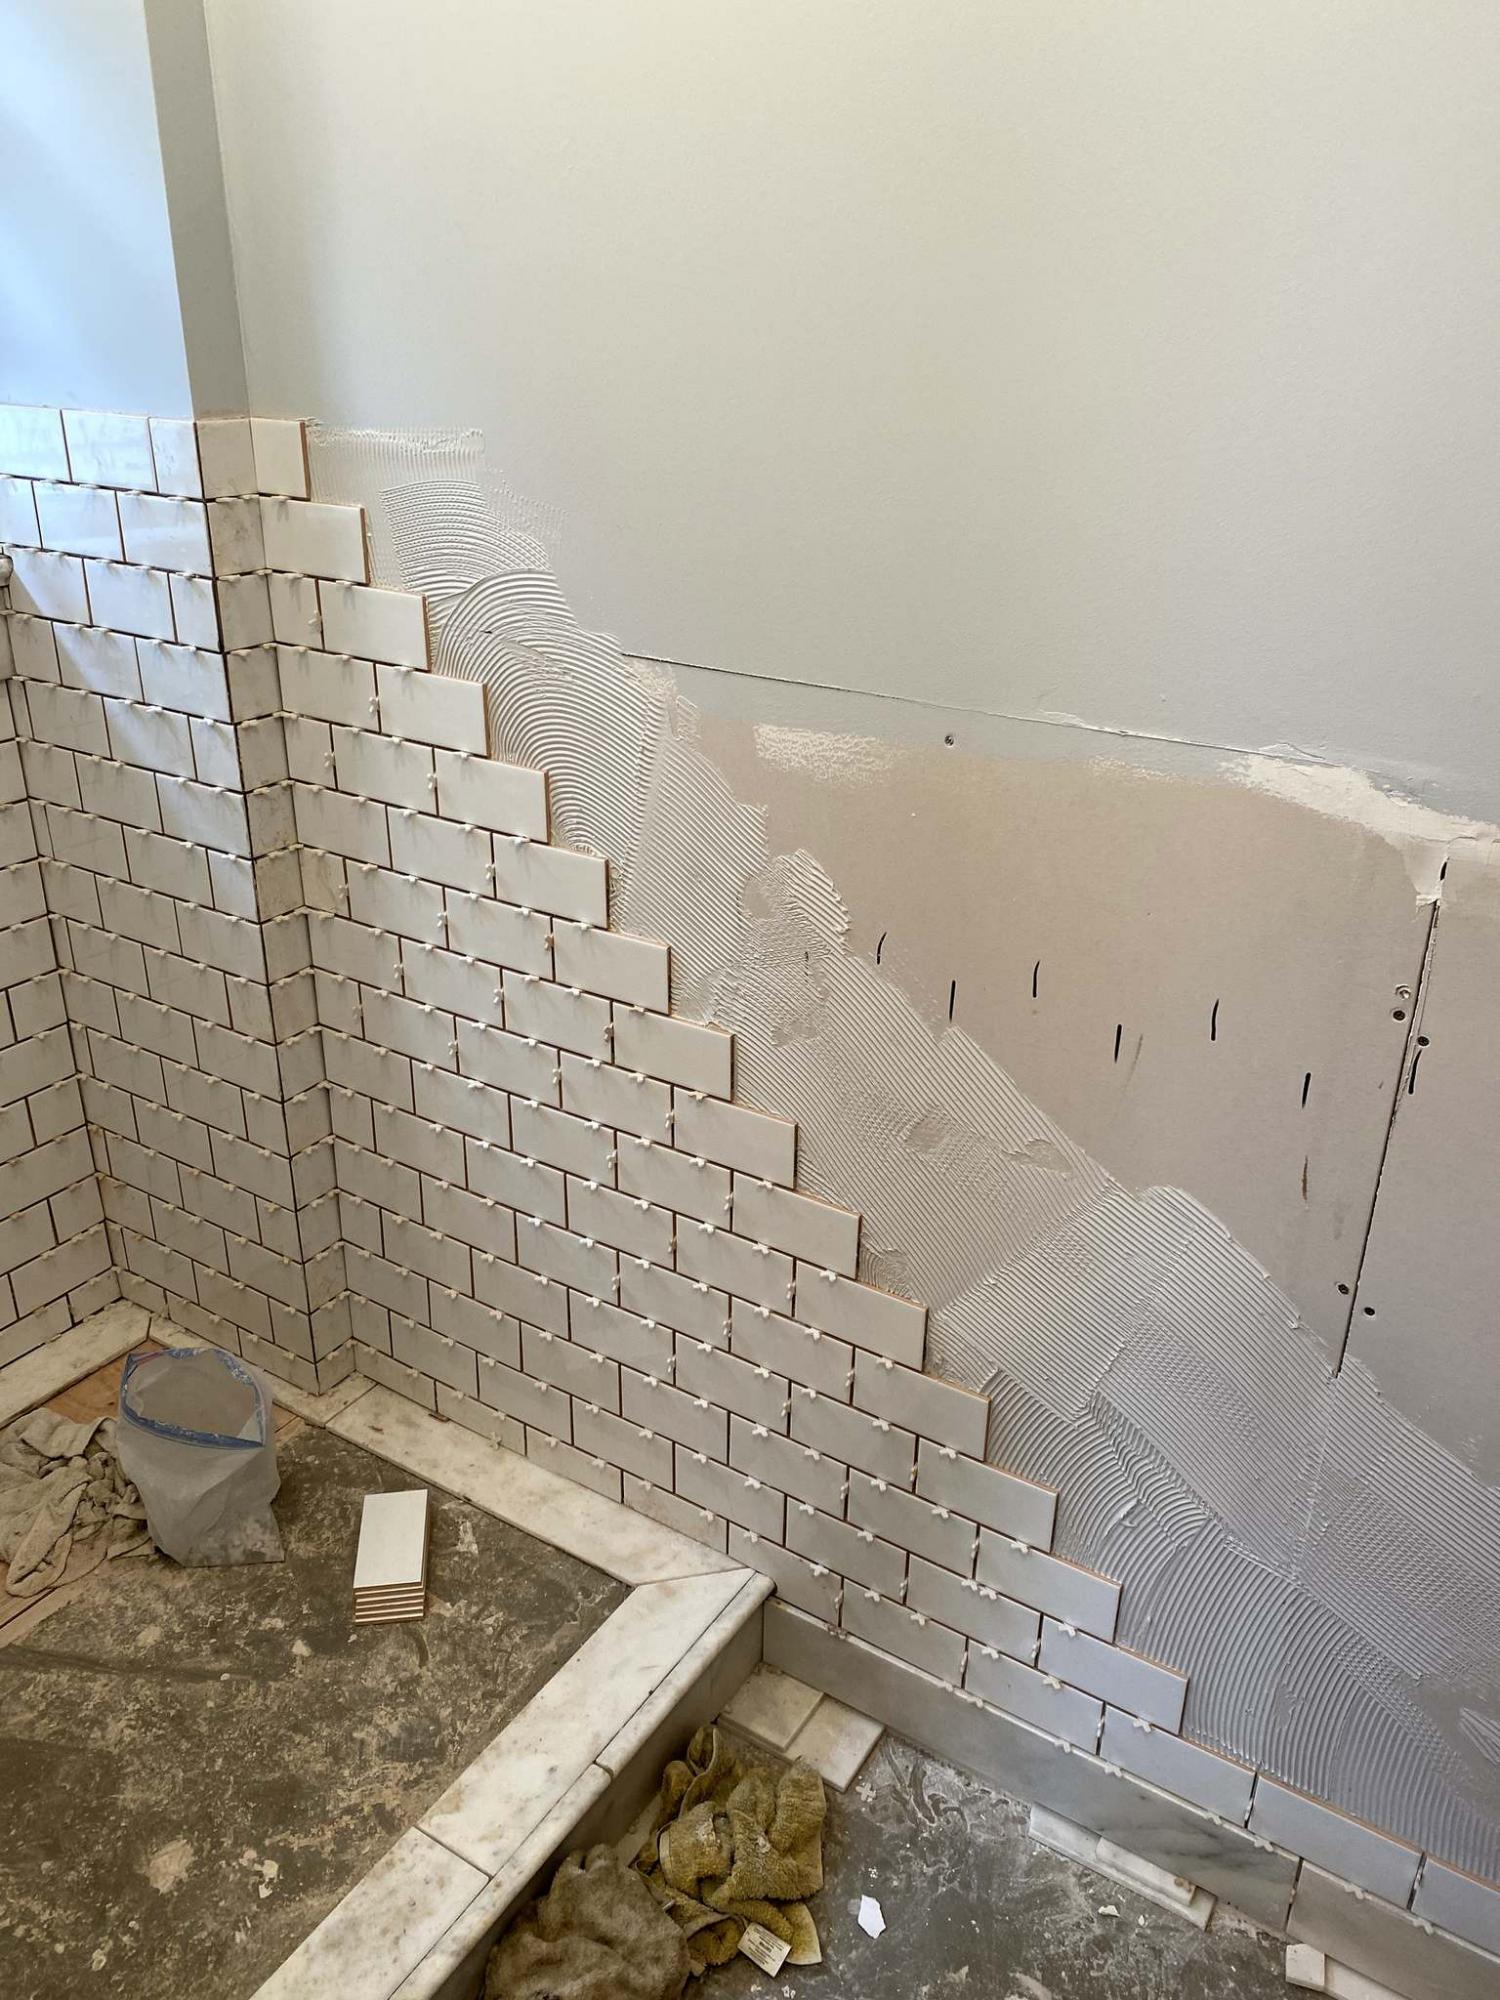
Before tiling begins, the essential amenities are first configured. The electrical and plumbing prep is established, the shower base and curb are constructed, and the heated floor coils are positioned, and subsequent floor leveler is poured. Once the drywall is installed, and the upper half of the walls and entire ceiling are mudded, sanded, primed and painted, tiling prep can begin. For every surface, tiles are painstakingly mapped along every axis to ensure both the starting points and end points of the tile layout is aesthetically pleasing. Slight shifts and adjustments are made when necessary. Once everything is marked, tiling can truly begin. I like to address the walls first, and tackle the floors last. This approach seems to work best with the effects of gravity.
Recall my dilemma regarding the water closet step? It became apparent that running a baseboard up the step would not produce the desired optics. Because the step-high water closet is adjacent the walk-in shower stall, I decided to mimic the look of the impending tiled curb of the shower by continuing a perimeter of tile along the top of the entire toilet area platform. This allows the baseboard to follow the entire space on the vertical on the main level, and switch to a flat ‘face-up’ perimeter that matches the look of the nearby curb of the shower.
With the final step of the tiling plan in place, the baseboard marble tile was installed first, to initiate a level-line on which the white subway tiles could be mounted on the walls. The curb of the shower stall, as well as the adjacent toilet platform were also completed and allowed to set overnight. The next day, the walls of the shower stall were lined with white subway tiles, and these tiles continued throughout the space to roughly a 54-inch height. Marble ogees were placed along the top of the 54-inch subway edge as a sort of decorative bullnose. Lastly, the tapered shower base, main area of the water closet tier, as well as the entire lower main floor area of the bathroom was adorned with a marble with black basket-weave style mosaic tile. To complete the look of the upper toilet tier, marble ogee was used to create a custom stair nosing along the front edge of the step. Allowed to firmly set over the span of the four days it took to finish all tiling tasks, the tiled surfaces were then grouted with self-sealing, resin-based formulated grout in a bright white, to dull the gaps between the subway tiles while highlighting the marble and basket-weave flooring mosaic.
Although I’d love to take the credit for hiding most of the imperfections of the room by having carefully planned the layout of the tiles, there were a few unexpected flukes during this game of ‘hide the corners askew’ that bolstered the results. For instance, it just so happened that an exact multiple of the mosaic sheet’s dimensions fit perfectly within the central section of the water closet tier. And we must not forget that a byproduct of using leveler to hide the heated floor coils did a tremendous job in reducing the slope of the floor nearing the interior wall at the doorway (well, I had anticipated that one). It is, however, my clients’ choice of tile combinations that ultimately provides an elegance to this finished space, rendering any remaining imperfections that may still exist, seemingly perfect for the time-period of the house.
And after standing the test of time, the house deserved no less.
BossEnterprise@outlook.com