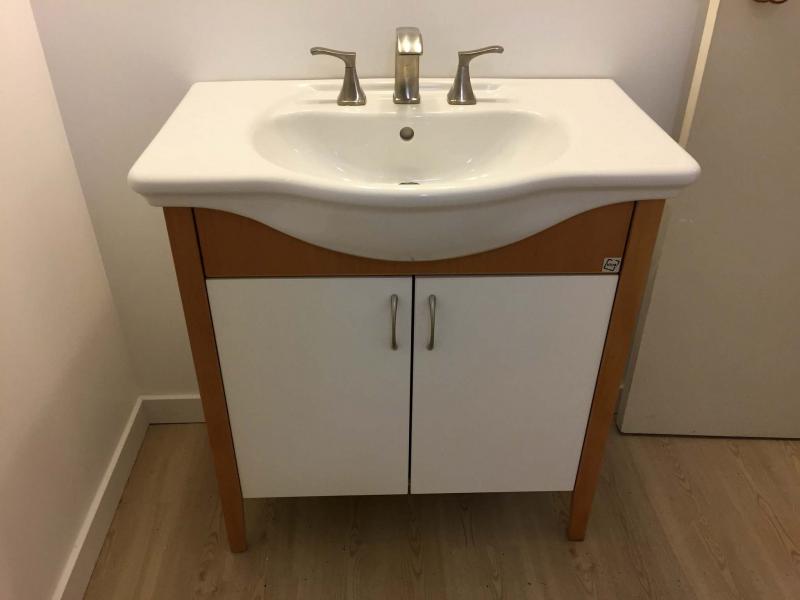
Barb Adams’s basement bathroom, sink and vanity with faucets.
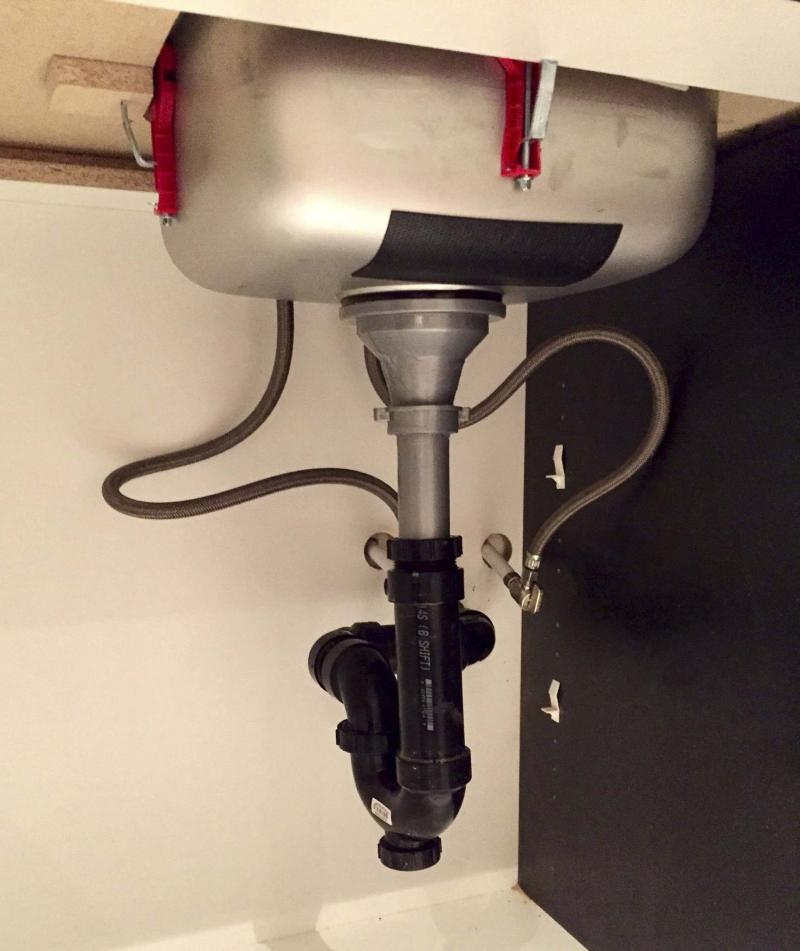
Don Kennedy’s lower level, below the counter the ABS trap, and mesh hoses attached to PEX shut-off valves for a bar sink installed atop an arbrite countertop.
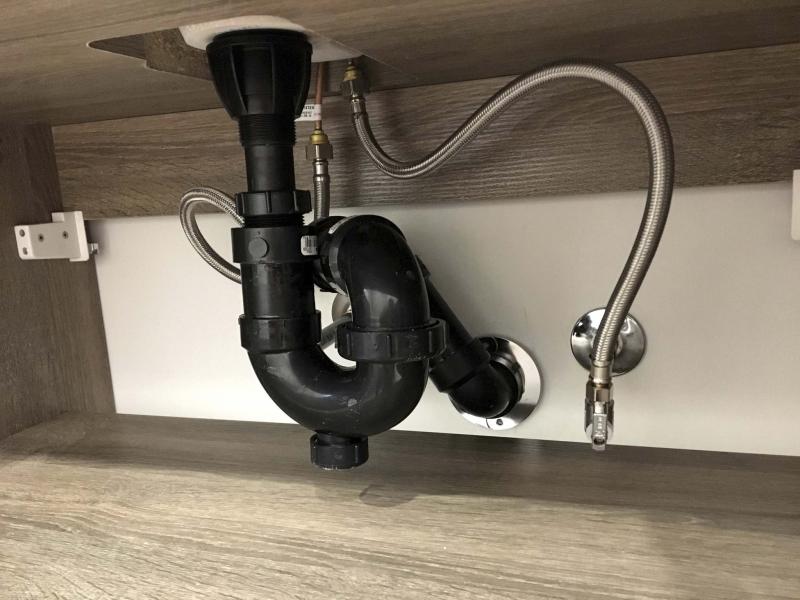
Wayne Nemy’s second floor bathroom, below the counter of left sink, the ABS trap, and mesh hoses attached to PEX shut-off valves for the double sink and vanity with decorative faucets and tiled backsplash.
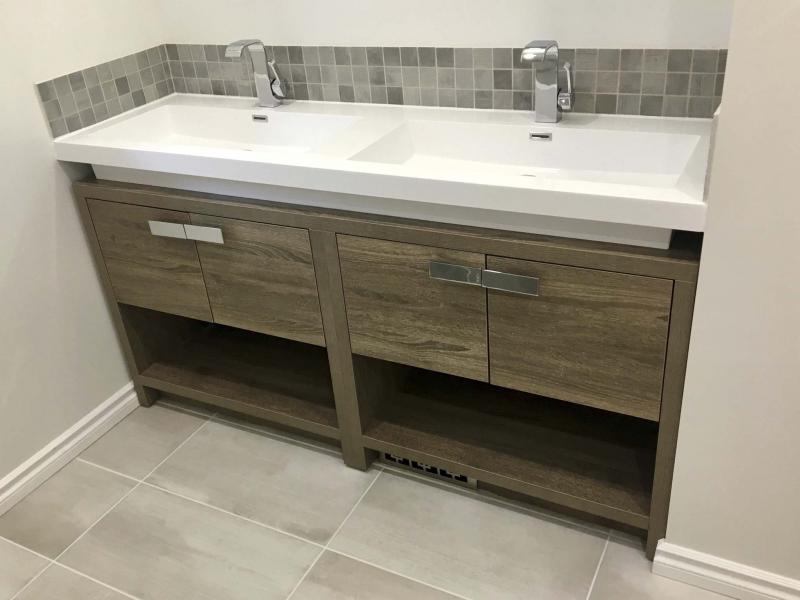
Wayne Nemy’s second floor bathroom, a double sink and vanity with decorative faucets and tiled backsplash.
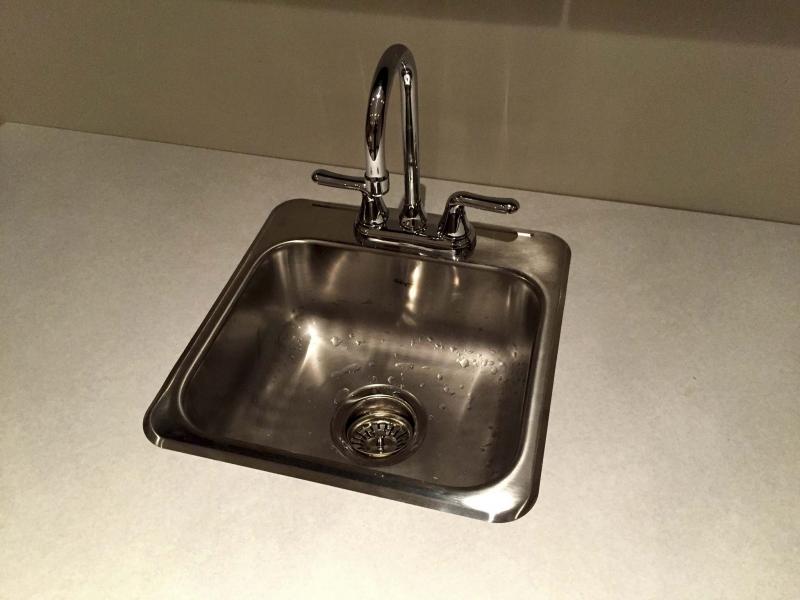
Don Kennedy’s lower level bar sink installed atop an arbrite countertop.
When doing a remodel or upgrade that involves replacing a sink and faucets, the placement of the drain and shut-off valves for the hot and cold water often isn’t given much thought because it is beneath the sink — tucked away and out of sight. I have always felt, however, it’s a good practice to keep the remodel as clean and tidy below the sink as it is up top.
Replacing a bathroom sink and vanity, as well as the faucets, may seem fairly straightforward — and often it is. As part of the planning process, it is important to note whether or not the water feeds have shut-off valves. If they don’t, make sure you shut off the main water shut-off valve (usually located just prior to the water meter) before making any changes below the sink.
Many times, I have been tasked with such a project. And more often than not, once the lower cabinet doors are opened to reveal the inner workings of an existing system, an unsightly mess is exposed. The drain and trap are crooked, the hot and cold water feeds are askew and off centre — it simply looks shoddy. During a full-out renovation of a bathroom, gutted down to the studs, it is easy to realign and centre the placement of drains and water feeds, based on the dimensions of the new vanity and sink. If, however, it is only the vanity that is being replaced, adapting to the existing drain and water feed locations is sometimes necessary. It is still very possible to clean things up down below.
Drains in most residential bathroom sink scenarios are composed of a drain kit mounted to the sink, with a chrome pop-up drain plug. Installing this onto the sink prior to placing the vanity and sink into position is easiest, because you will have clear access both above and below the sink. It is just as important to pre-install the hot and cold taps, along with the mesh faucet hoses, for the same reason — easy access to ensure proper installation and avoid leaks. Once the drain kit, taps and hoses are properly mounted onto the sink, it is imperative to do a dry run of the sink installation above the vanity. This will allow for exact measurements when tying in the drain kit to the ABS trap.
PEX vs Copper
The water feeds in later-century homes are often half-inch copper, with soldered shut-offs. Provided the protruding copper pipes for both hot and cold are long enough, cutting the pipes and using new Shark-Bite shut-off valves may be the easiest upgrade. Shark-Bite shut-offs are installed by simply pushing the valve onto the copper pipe and giving it a little twist. They do not require soldering.
Homes built more recently have adapted a new method of running hot and cold water throughout with PEX pipe. This product is a flexible, durable and cost-effective alternative to copper. PEX can be run with ease and connects using brass fittings, which are secured to ends of the PEX pipe with crimp rings. The PEX pipe is often white, but can also be purchased in red and blue — this really helps to keep hot and cold feeds separate when running long lengths of pipe.
Whether PEX or copper, the water feeds below the sink should be fitted with shut-off valves prior to reaching the faucets. With PEX pipe, PEX shut-off valves are installed with crimp rings. Be sure to include the decorative chrome pipe covers onto each water feed and press up against the wall before installing the shut-off valves. I often elect to also use a chrome plate that surrounds the ABS drain pipe at the wall — these chrome plates open and close and can be installed at any time.
With things prepped below sink level, the sink can now be placed permanently atop the vanity. The mesh hoses are then secured to each respective shut-off valve, ensuring the hoses are tucked in a way that keeps things tidy and unobtrusive. The final step is to measure the distances of ABS required to properly align the drain trap with the drain kit stem, which protrudes from the sink above. The trap is configured and attached to the existing ABS pipe coming from the wall (or floor) in such a way as to ensure the top of the trap will be centred with the drain stem from the sink. Once a final dry-run of the ABS has been performed, all sections of ABS are then glued together — it bonds very quickly, so be certain to ensure proper alignment of each ABS segment.
It is likely that the drain kit stem is 11/4". Therefore, a 11/2" to 11/4" drain adapter is required. The 11/4" end of the adapter is glued to the top of the trap and secured to the 11/4" stem by hand-tightening the top of the drain adapter to the stem.
With both faucet hoses attached to the shut-off valves and the sink trap fully installed, the shut-off valves are opened. Feel along the mesh hoses from the faucet to the valves — provided there are no leaks along the water lines, the drain and trap can now be tested. Run the water and check along the entire ABS pipe for leaks. If the drain pipe remains dry, test the overflow by filling the sink until the water level reaches the overflow drain. If no leaks have occurred throughout this process, it is a successful install.
In my opinion, ensuring a sink and vanity upgrade looks as good below as it does above is essential. Meticulousness shouldn’t only be reserved for aspects of a bathroom that are always visible — the hidden details can reveal just as much about the workmanship of a project, if not more. An unsightly mess below your sink can suggest other hideous scenarios may be lurking behind the walls, under the floor or in the ceiling above. When a project is at hand, opt to complete it in its entirety — even when a small portion of it may never be seen, the knowledge that it was done properly from start to finish is what matters most.
BossEnterprise@outlook.com